

You don’t need expensive supplies or artistic talent to make something beautiful with paper. A few sheets of cardstock, a pair of scissors, and some glue can take you further than you’d think. Paper crafting is one of the most accessible hobbies out there, cheap to start, satisfying to do, and endlessly rewarding. Whether you want to decorate your home, make handmade gifts, or simply keep your hands busy, these 22 projects are designed for real beginners. No experience required. No fancy tools. Just paper, patience, and a little creativity.
1. Paper Flowers
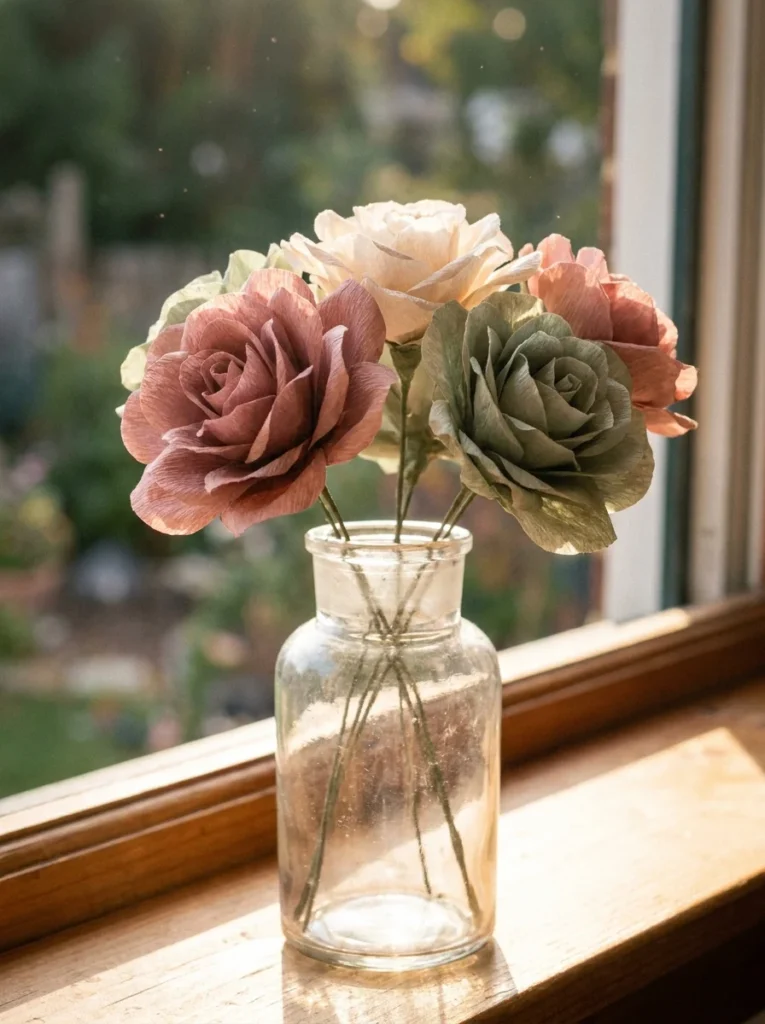
Paper flowers are one of the best starter crafts you can try.
They look impressive, but they’re genuinely simple to make. All you need is colored tissue paper or cardstock, scissors, and a green pipe cleaner or wooden skewer for the stem.
Here’s a quick way to start. Stack four to six sheets of tissue paper on top of each other. Fold the stack back and forth like an accordion. Pinch the middle together and wrap a pipe cleaner around it. Gently pull each layer upward and outward to form petals.
That’s it. You have a flower.
Budget tip: A pack of tissue paper costs under $2 at most dollar stores. One pack makes 10 to 15 flowers easily.
You can mix colors for a rainbow effect or keep things monochrome for a more elegant look. These work beautifully as gift toppers, centerpieces, or wall decorations. Try grouping five or six together in a mason jar for an instant home decoration that costs almost nothing. They also make great party decorations when you hang them from the ceiling in clusters. Kids love making these too, which makes them perfect for family craft days. For even more inspiration, check out this guide on how to make stunning paper flowers in just 5 easy steps.
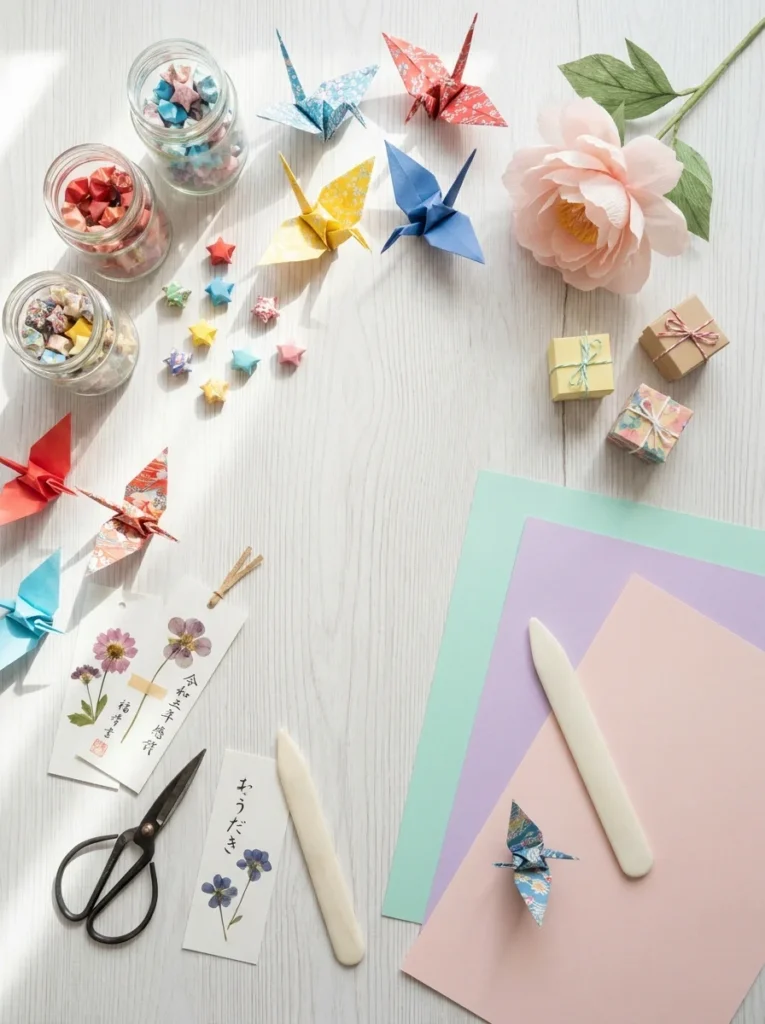
2. Origami Crane
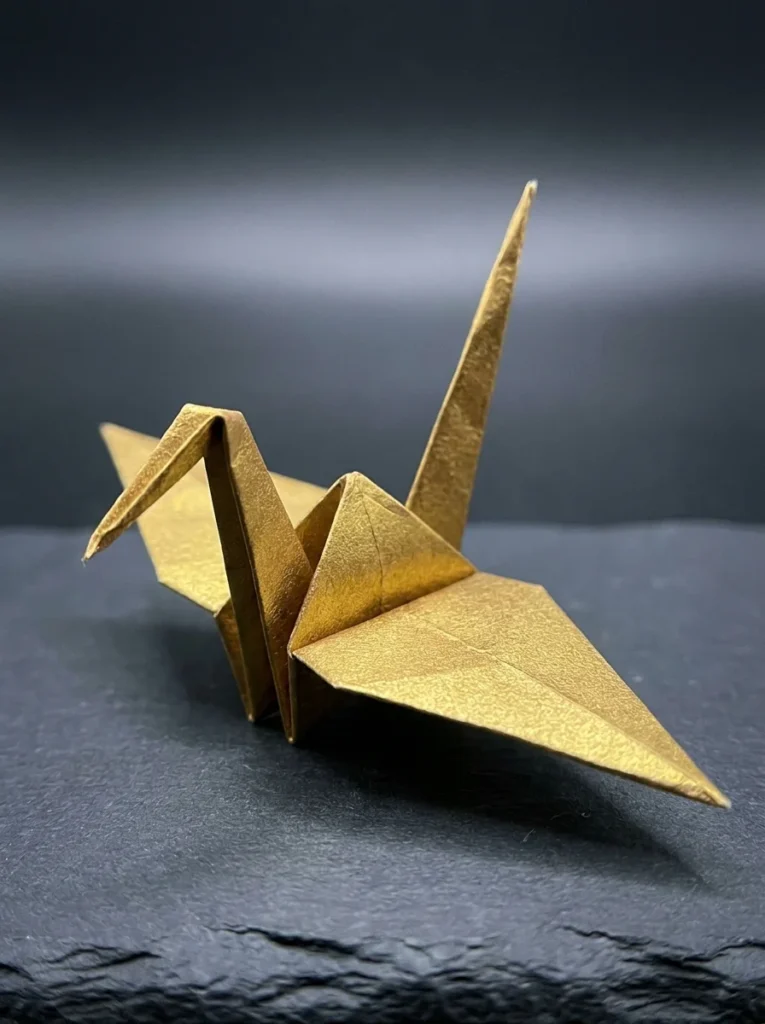
The origami crane is probably the most recognized paper craft in the world and yes, beginners can absolutely make one.
You only need one square sheet of paper. Standard origami paper works perfectly, but you can also cut a square from any printer paper or gift wrap you have at home.
The crane involves about 20 steps, but don’t let that intimidate you. Each step is small and straightforward. Dozens of free video tutorials on YouTube walk you through it in under 10 minutes.
Budget tip: A 100-sheet pack of origami paper costs around $5 to $7 online. That’s a lot of practice cranes.
Once you get the hang of it, cranes become addictive to fold. You’ll find yourself making them while watching TV or waiting for something. Japanese tradition says that folding 1,000 cranes brings a wish. String 10 cranes together with thin thread and hang them in a window for a beautiful, light-catching garland. They also make thoughtful handmade gifts. A single crane tucked inside a birthday card says far more than a store-bought card ever could. Start with a 15cm x 15cm sheet, it’s the easiest size to work with when you’re learning.
3. Paper Bookmarks
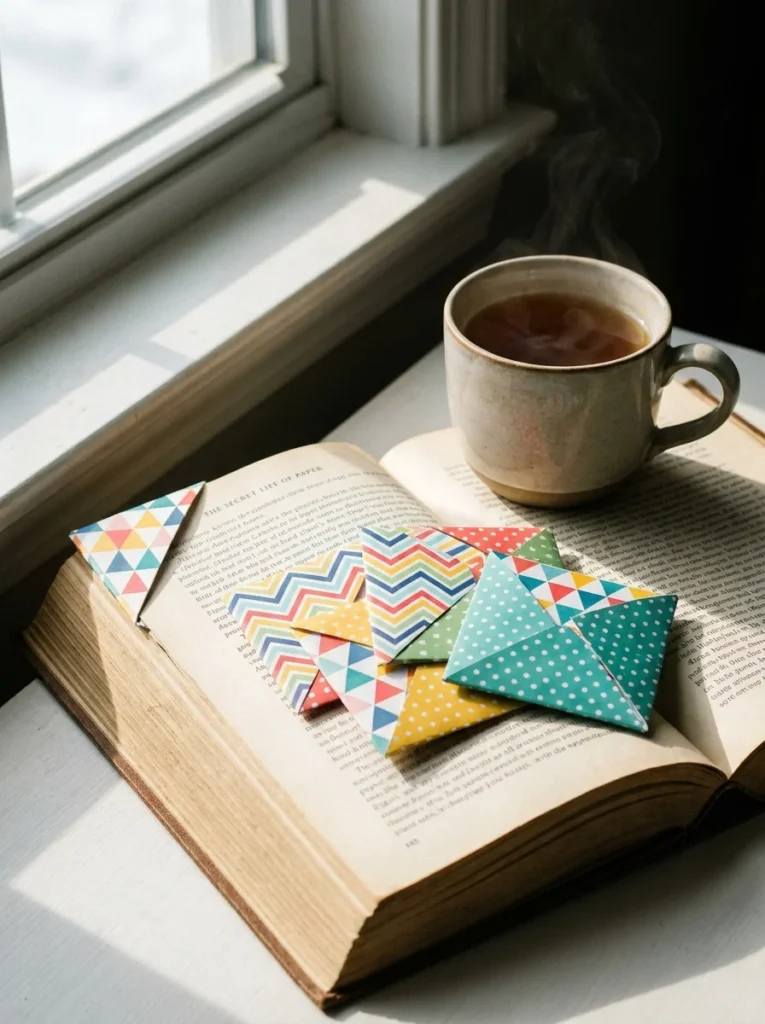
Paper bookmarks are fast, fun, and completely free if you use scrap paper.
The corner bookmark style is the most popular for beginners. Cut a square of paper (about 7cm x 7cm works well). Fold it diagonally to make a triangle. Fold the two side corners up to meet the top point. Open the top flap and tuck the two corners in. You now have a little pocket that slips over the corner of any page.
Budget tip: Use old magazine pages, wrapping paper scraps, or leftover cardstock. Cost: literally zero.
Decorate the front with markers, stickers, or washi tape. You can draw a face on it to make it look like a character, fox, cat, bear, whatever you like. These are one of the most popular items at craft fairs and school fundraisers. A set of five bookmarks in a small bag makes a lovely gift for any book lover. They take about 5 minutes each once you’ve done one or two. Kids can make them independently after a quick demonstration. You can also make flat strip bookmarks by cutting paper into long rectangles and decorating them with stamped patterns or hand-drawn designs. Simple and satisfying.
4. Paper Lanterns
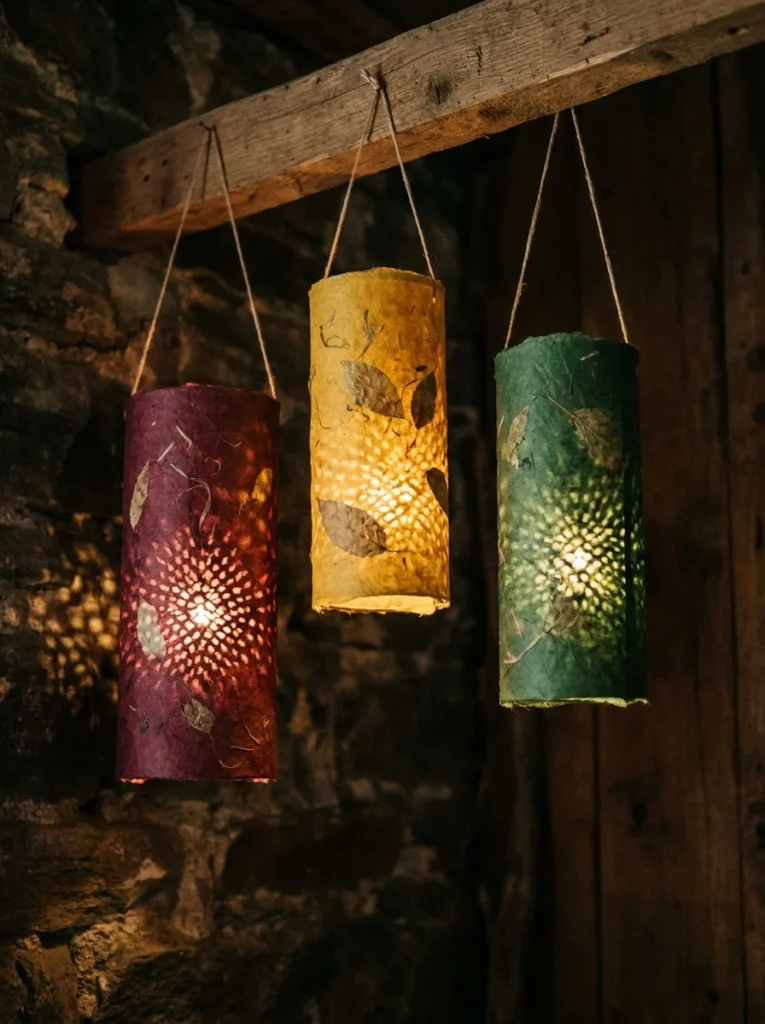
Paper lanterns add a festive atmosphere to any space and take about 15 minutes to make.
You need one sheet of cardstock or construction paper, scissors, a ruler, and tape or glue. The basic method: fold the paper in half lengthwise. Cut slits across the fold, stopping about 2cm from the open edges. Unfold the paper. Roll it into a cylinder and tape the ends together. Add a paper handle strip across the top.
That’s your lantern.
Budget tip: Use colored printer paper if cardstock isn’t available. It works just as well for lightweight decoration.
Place a battery-operated tea light inside for a safe, glowing effect. Never use real candles with paper. Hang several together at different heights for a party decoration that looks professionally done. You can also cut decorative patterns into the slits, stars, diamonds, or abstract shapes, so the light shines through in interesting ways. Try using metallic or patterned scrapbook paper for a more festive look. These are popular for Diwali, Eid, Christmas, and birthday parties. Make them in one afternoon and transform any room completely. They store flat too, so you can reuse them for multiple events.
5. Folded Paper Lucky Stars
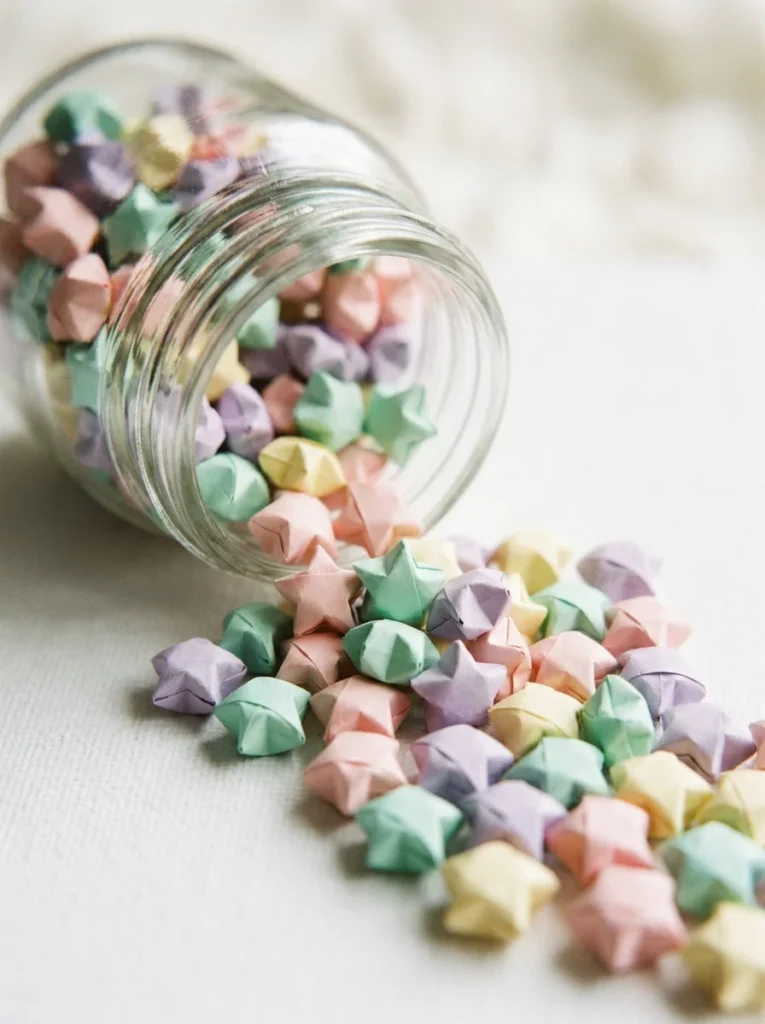
Lucky stars are tiny, puffy, five-pointed stars folded from narrow strips of paper.
They’re endlessly satisfying to make and nearly impossible to stop once you start. You only need strips of paper about 1cm wide and 25cm to 30cm long. Cut them from old magazines, colored paper, or even gum wrappers.
Tie one end into a loose knot. Flatten it into a pentagon shape. Wrap the long tail around the pentagon until it runs out. Tuck the end in. Gently press the five sides inward with your fingernails and the star puffs up.
Budget tip: Cut strips from magazine pages or junk mail envelopes. Completely free, and the printed patterns look gorgeous.
Fill a glass jar with lucky stars for a charming home decoration. They’re a popular handmade gift, a jar of 100 lucky stars is a meaningful, personal present that takes effort but costs almost nothing. Use strips in your favorite color combinations for a cohesive look. These are great for long car rides or slow afternoons because you can make them almost anywhere. Once you fold 10 or 20, your hands memorize the steps and you can do it while watching television. A genuinely meditative craft. If you enjoy making paper stars, there are even more stunning variations worth exploring.
6. Paper Butterflies

Paper butterflies are simple to make and look wonderful as wall decorations or gift toppers.
Start with a rectangle of paper. Fold it back and forth like an accordion along the short side. Pinch the middle and wrap a small piece of wire or a twist tie around the center. Fan out both sides to form the wings. That’s your butterfly.
For a slightly more realistic look, cut a simple wing shape from cardstock before folding. The accordion fold still works, it just follows the wing outline you’ve cut.
Budget tip: Use pages from old books, music sheets, or magazine pages for wings with a vintage, textured look. Free and beautiful.
Curl the wing tips slightly upward for a more three-dimensional effect. Attach butterflies to thin wire stems and arrange them in a vase for a year-round centerpiece. Pin a cluster to a wall in a staircase or above a bed for a whimsical art installation. Sizes matter here, make a mix of large, medium, and small butterflies for the most natural effect. You can also paint or stamp the wings before folding them. These work beautifully for spring decorations, baby showers, and bedroom walls.
7. Paper Gift Boxes
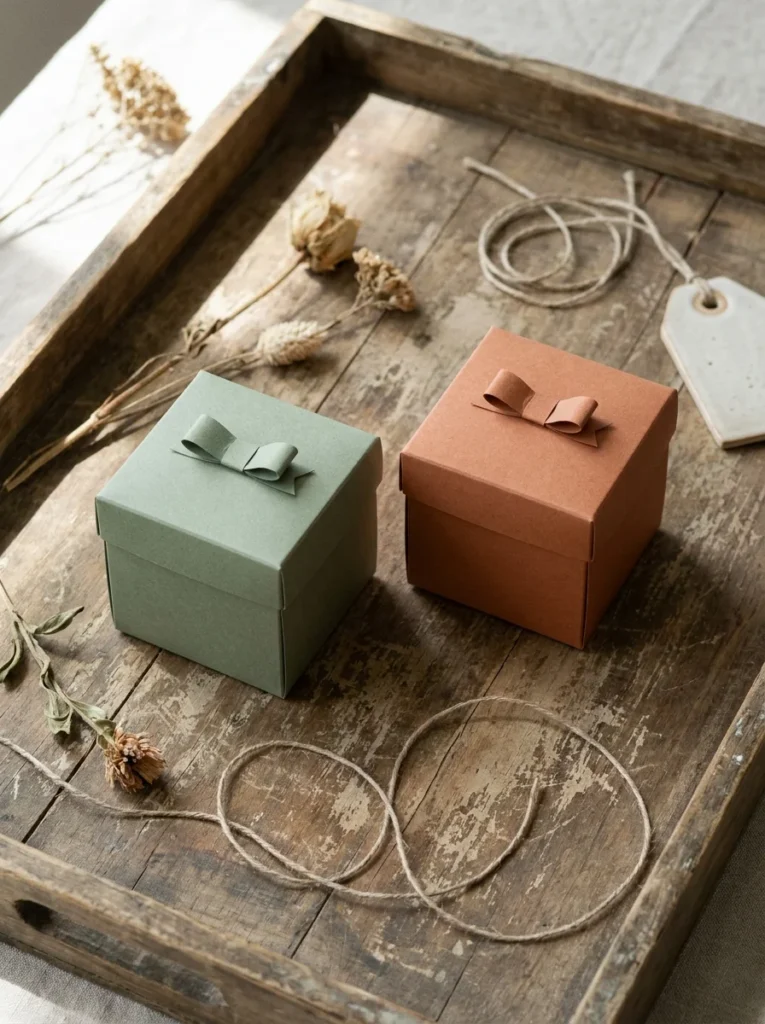
Making your own gift box means you never have to run to the store for one again.
All you need is a square sheet of cardstock and the ability to fold in a straight line. The origami masu box method is the most reliable for beginners. Fold the paper in half both ways to mark the center. Fold each corner to the center point. Fold the sides up to form the box walls. Lock the corners in. Done.
Make a second, slightly larger box using a slightly bigger sheet for the lid.
Budget tip: Cardstock from a dollar store pad is perfect. Or repurpose thick magazine covers, which are often beautiful and completely free.
These boxes are strong enough to hold small jewelry, chocolates, folded notes, or earrings. Line the inside with a scrap of tissue paper for an even more polished look. You can stamp a pattern on the outside before folding, or leave the paper plain for a clean, modern aesthetic. These are also a great way to wrap oddly shaped small gifts. Once you’ve made a few, you’ll start sizing them for specific items a ring box, a bracelet box, a candy box. Practical and genuinely impressive. For a deeper dive, see this full tutorial on how to make beautiful paper gift boxes for any occasion.
8. Paper Pinwheels
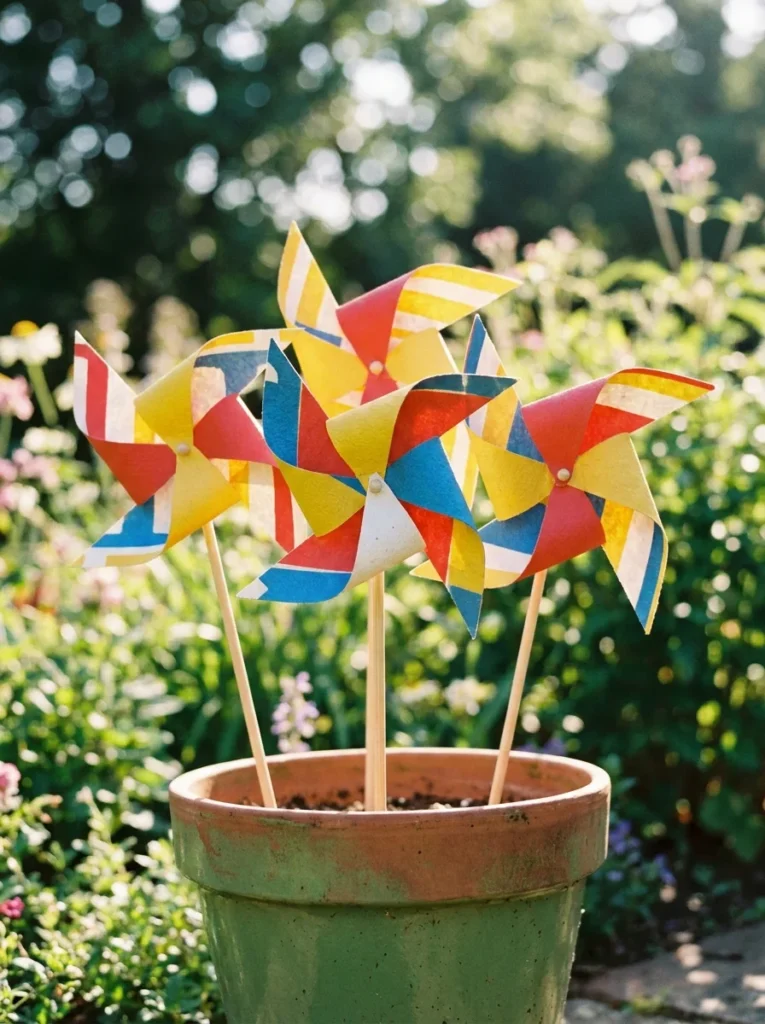
Paper pinwheels are quick, cheerful, and almost impossible to make wrong.
Cut a square of paper. Make diagonal cuts from each corner toward the center, stopping about 2cm from the middle. Fold every other point into the center and secure with a brad fastener (also called a paper fastener or split pin). Push the brad through the center and attach it to a wooden skewer or straw.
Budget tip: Brad fasteners come in packs of 100 for under $3. One pack gives you 100 pinwheels.
The pinwheel spins beautifully in even a light breeze. Use double-sided paper or glue two contrasting pieces together before cutting for a two-toned effect. Make them in various sizes, from 15cm squares down to tiny 5cm squares, and group them together on sticks in a plant pot for a party centerpiece. These are popular for outdoor weddings, birthday parties, and children’s bedroom decorations. You can also use them as cake toppers by attaching them to cocktail sticks. Patterned scrapbook paper gives the best visual effect. They take about 5 minutes each and cost almost nothing. A cheerful project you can knock out in an afternoon.
9. Paper Garland
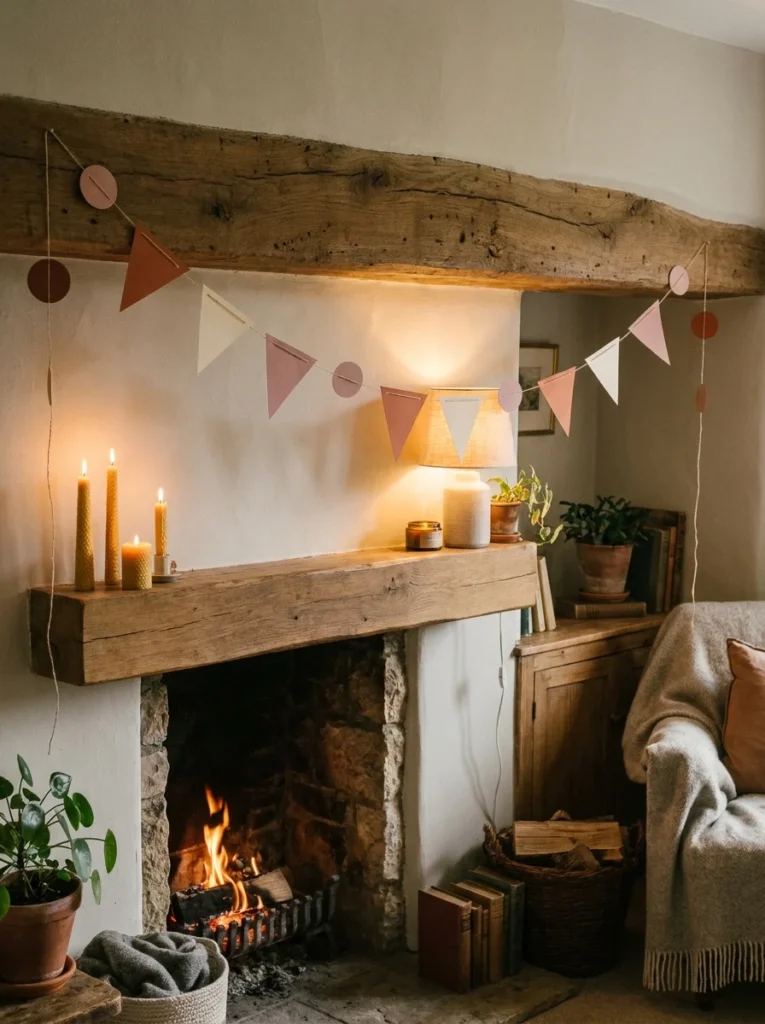
A paper garland is one of the easiest ways to decorate any room for a celebration or just because.
The simplest version: cut identical shapes from colored paper, circles, triangles, stars, rectangles, and glue or tape them to a long piece of twine or string. Fold each shape over the string and secure it with a dab of glue. Space them evenly and you’re done.
Budget tip: Use a single pad of scrapbook paper for $3 to $4. You’ll have more shapes than you need for a 2-meter garland.
For a classic triangle banner, cut isosceles triangles and fold the flat edge over the string. You can punch a hole through each side instead and thread the string through for extra security. Mix solid colors with patterned papers for a more interesting texture. Write letters on the shapes to spell out a name or message, “HAPPY BIRTHDAY” or “WELCOME HOME.” Garlands also look stunning made from folded squares of tissue paper threaded together. Hang them above a dining table, across a bookshelf, or along a staircase railing. They go up in minutes and completely change the energy of a room. Take a look at this step-by-step guide on how to make simple paper garlands in 3 easy steps for more detail.
10. Paper Fan
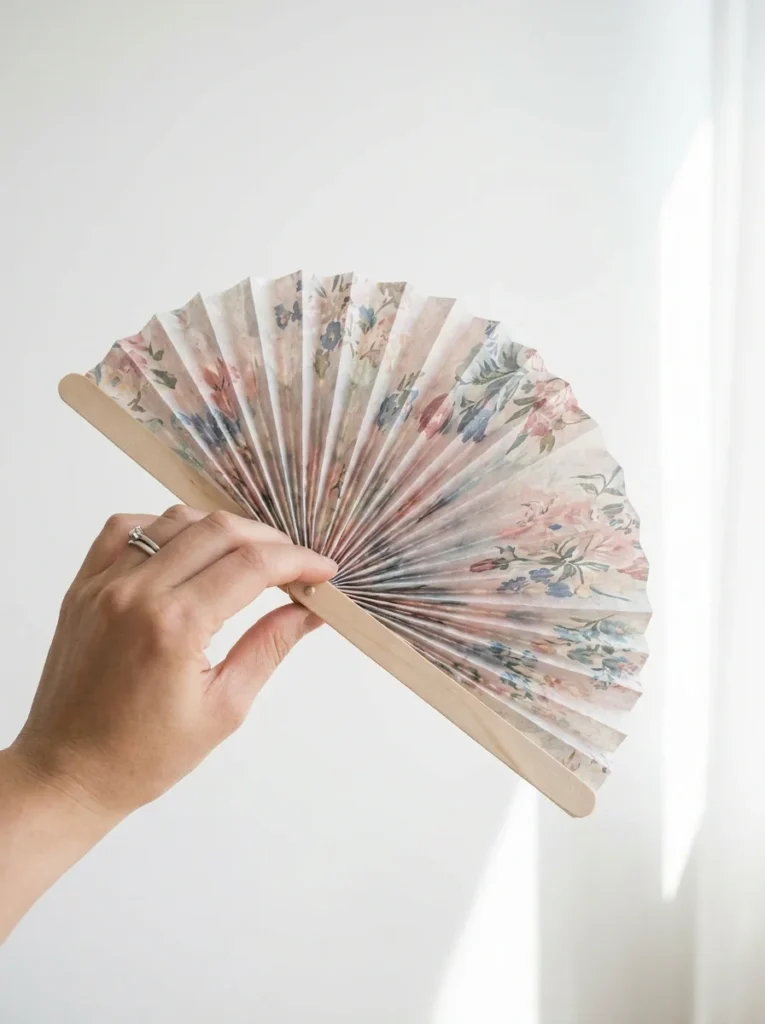
A hand-held paper fan is practical, pretty, and takes under 10 minutes to make.
Take a long rectangle of decorative paper, at least A4 size works well. Fold it back and forth like an accordion from one short end to the other. Keep your folds even and consistent, about 1.5cm to 2cm wide. Once fully folded, pinch one end together and wrap a rubber band around it tightly. That’s the handle. Fan out the other end.
For a sturdier handle, tape a wooden craft stick or wide popsicle stick to the pinched end.
Budget tip: Use pages from magazines or old calendars for free fans with ready-made visual interest.
Decorate plain paper first before folding it, watercolor washes, stamps, or simple stripes all look effective. You can also glue two complementary sheets back to back before folding so both sides of the fan look beautiful. These make great party favors at summer events, weddings, or outdoor gatherings. Guests genuinely appreciate a handmade fan they can actually use. Make a set of 10 for a dinner party in under an hour. These also work as decorative wall fans pinned open in a cluster formation, a popular boho home decor trend.
11. Paper Envelopes
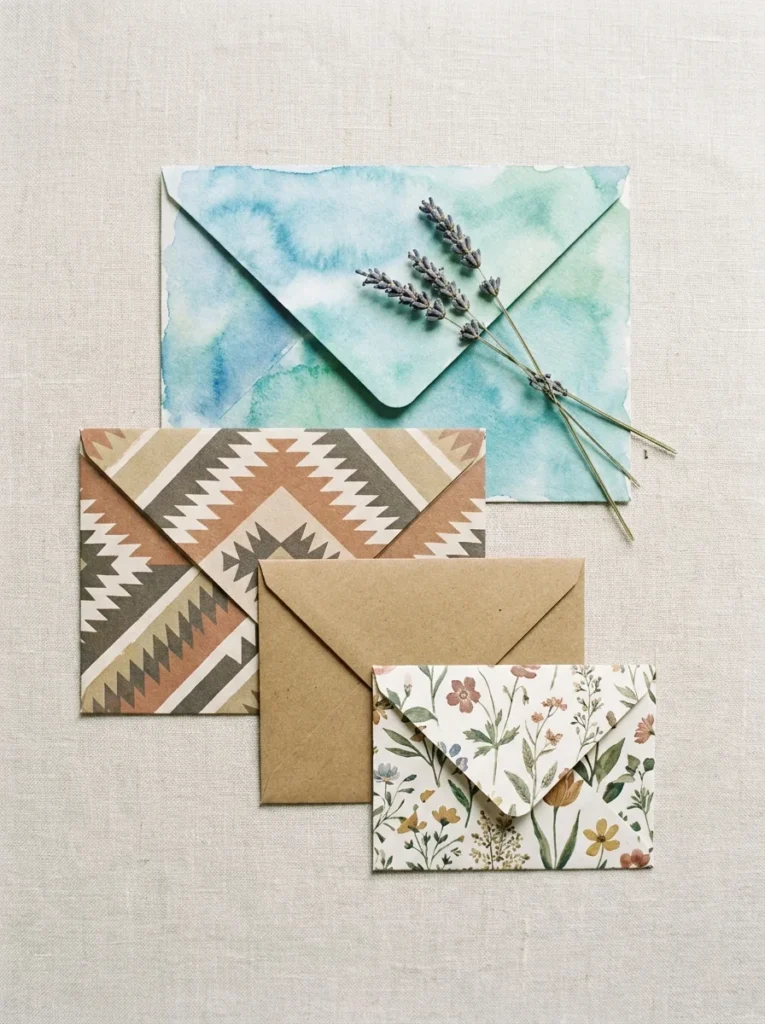
Once you know how to fold a paper envelope, you’ll never buy plain white ones again.
The simplest method: lay your paper horizontally. Fold the bottom third up. Fold the top third down over it. Fold both side edges inward to create the side flaps. Seal with a sticker or wax seal. That’s a basic envelope in under two minutes.
Budget tip: Use any paper you have, old calendar pages, patterned craft paper, or even newspaper for a quirky look. Free to make.
For a more polished result, use a ruler to score the fold lines before folding. A bone folder (a cheap bookbinding tool) makes clean creases but a butter knife works almost as well. Size your envelope around the card or note you’re putting inside, fold the paper around the card to check the fit before committing. Envelopes made from patterned paper turn a simple note into a gift. Use a glue stick to close the flaps if you want a permanent seal. Decorative washi tape along the seam looks especially nice. These pair perfectly with handmade cards and make your correspondence feel genuinely personal and thoughtful.
12. Paper Crown

Paper crowns are a timeless craft that works for birthday parties, dress-up play, or just Tuesday.
Cut a long strip of cardstock wide enough to fit around a head. Cut zigzag points along the top edge simple triangles or more elaborate curves both work. Tape or staple the ends together to close the circle. Done.
Budget tip: One sheet of A3 or 12×18 inch cardstock is enough for one adult crown. For kids, regular A4 sheets taped end to end work fine. Cost: pennies.
Decorate before assembling for the easiest experience, lay the strip flat and add markers, stickers, gems, glitter glue, or washi tape. Metallic gold or silver cardstock looks especially regal. You can also punch small holes along the band and thread ribbon or yarn through for extra decoration. Make a custom crown for a birthday child with their name and age on it. These are one of the most popular party activities, set up a crown-making station with pre-cut strips and art supplies and let guests decorate their own. It takes less than 5 minutes per crown, costs almost nothing, and every single person ends up with a unique keepsake.
13. Paper Beads
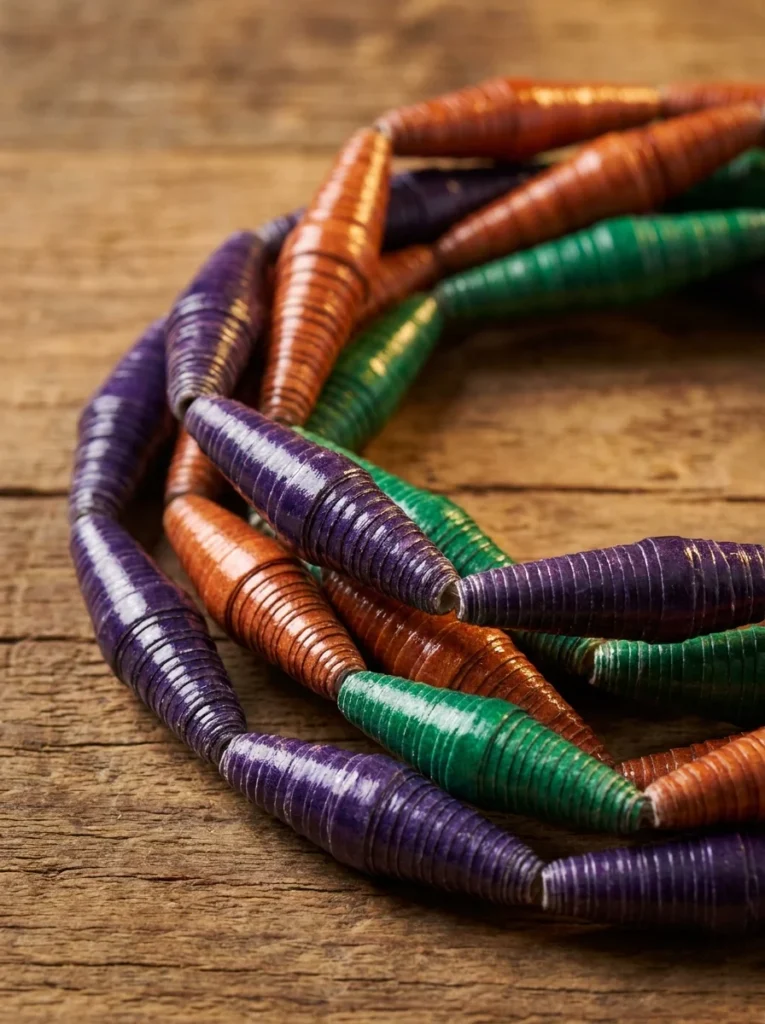
Paper beads are one of those crafts that look far more complex than they are.
Cut long, thin triangles from magazines, colored paper, or wrapping paper. The triangle should be narrow at one end and wider at the other. Start rolling the wide end tightly around a toothpick or thin skewer. Keep rolling toward the narrow point, keeping tension consistent. When you reach the tip, dab a drop of glue to secure it. Slide the bead off the skewer. Let it dry.
Seal the finished bead with a coat of clear nail varnish or Mod Podge for a glossy, durable finish.
Budget tip: Old magazines provide hundreds of pre-printed triangle strips for free. No need to buy paper at all.
String the beads on thin elastic or tiger tail wire to make bracelets, necklaces, or earrings. Mix bead sizes some fat and round, some long and tapered, for a more interesting piece. The printed patterns from magazine pages create a beautiful stained-glass effect when rolled. Pair bold colors with neutrals for a balanced look. Paper bead jewelry also makes a popular craft fair item and a thoughtful handmade gift. A single bracelet takes about 20 minutes once you’re comfortable with the rolling technique.
14. Paper Bowl
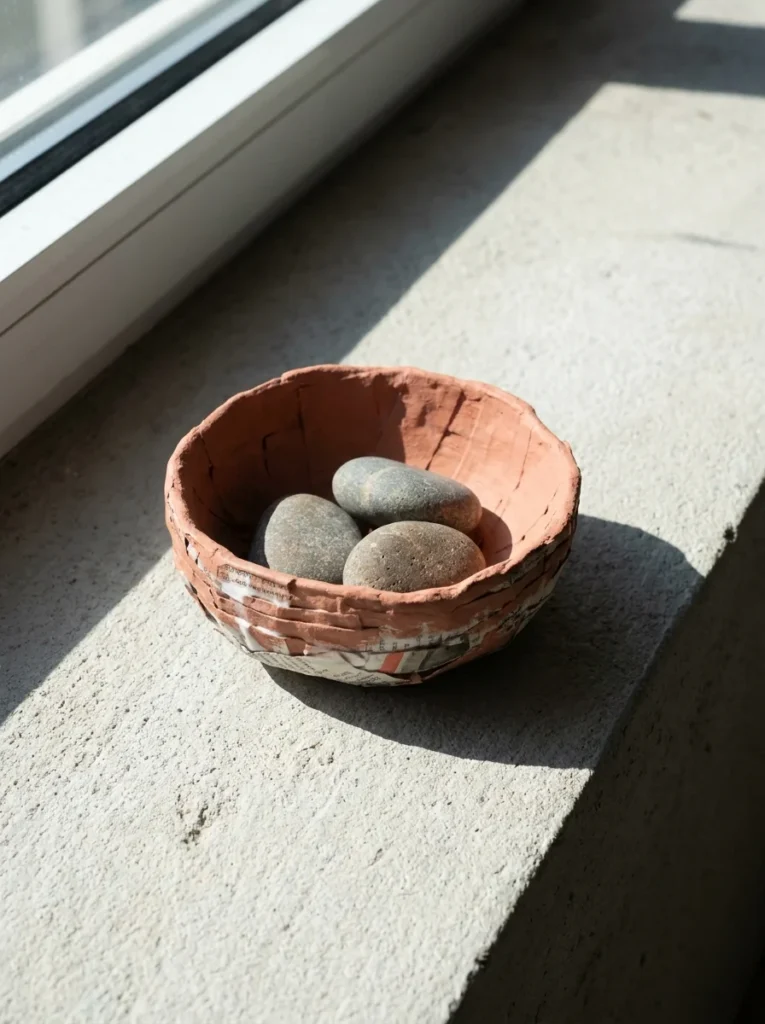
A paper bowl made with papier-mâché is a beginner-friendly project that results in a genuinely useful object.
Tear newspaper into small strips, about 2cm wide. Mix white PVA glue with a little water in a bowl roughly 3 parts glue to 1 part water. Flip a real bowl upside down and cover it with plastic wrap. Dip paper strips in the glue mixture and layer them over the bowl. Apply three to four layers. Let each layer dry before adding the next.
Once fully dry (24 hours at minimum), carefully lift the paper bowl off the mold. Trim the edges with scissors.
Budget tip: Old newspaper is free. PVA glue costs $2 to $3 for a large bottle. One bottle makes many bowls.
Paint the finished bowl with acrylic paint in any color. Seal with a coat of varnish to make it wipe-clean. These bowls are decorative rather than food-safe, but they’re excellent for holding keys, jewelry, small trinkets, or dried flowers. Give them a marbled look by mixing two paint colors loosely on the surface. A cluster of differently sized paper bowls makes a striking shelf display. This project takes a couple of days with drying time, but hands-on time is minimal. A genuinely satisfying result for beginners.
15. Paper Snowflakes
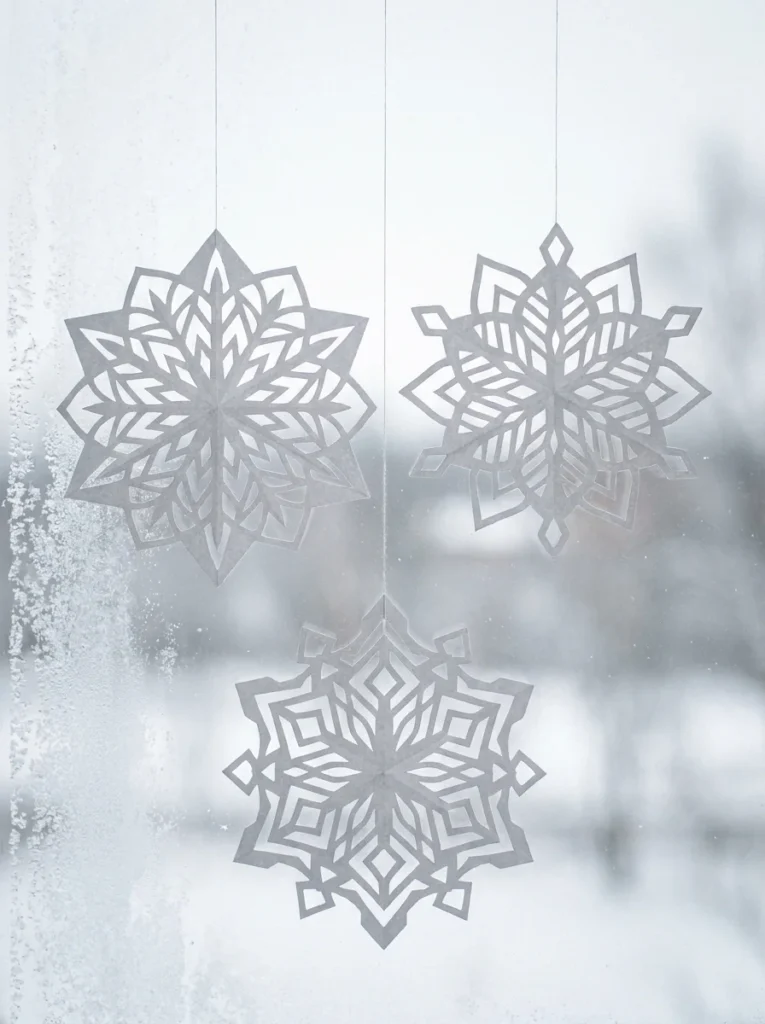
Paper snowflakes are a childhood classic that adults love just as much.
Fold a square sheet of white paper in half, then in half again, then fold it diagonally to make a triangle. Cut small shapes, triangles, curves, notches, along all the folded edges. Open it up carefully. Every snowflake will be unique.
Budget tip: Regular printer paper is perfect. One ream of paper gives you 500 snowflakes for around $5.
The more you cut away, the more delicate and lacy the result. Start with small, simple cuts along the edges until you’re comfortable, then try more complex interior cuts. Use sharp scissors for the cleanest lines, nail scissors or small craft scissors work well for the finer details. Hang finished snowflakes in a window with a piece of clear thread. Layer them at different depths for a 3D winter installation. Spray lightly with silver glitter spray for a festive sparkle (optional, but beautiful). Make snowflakes in various sizes and tape them to a wall in a scattered pattern for winter-themed wall art. These also look wonderful as gift tags or layered onto wrapped packages.
16. Paper Boats
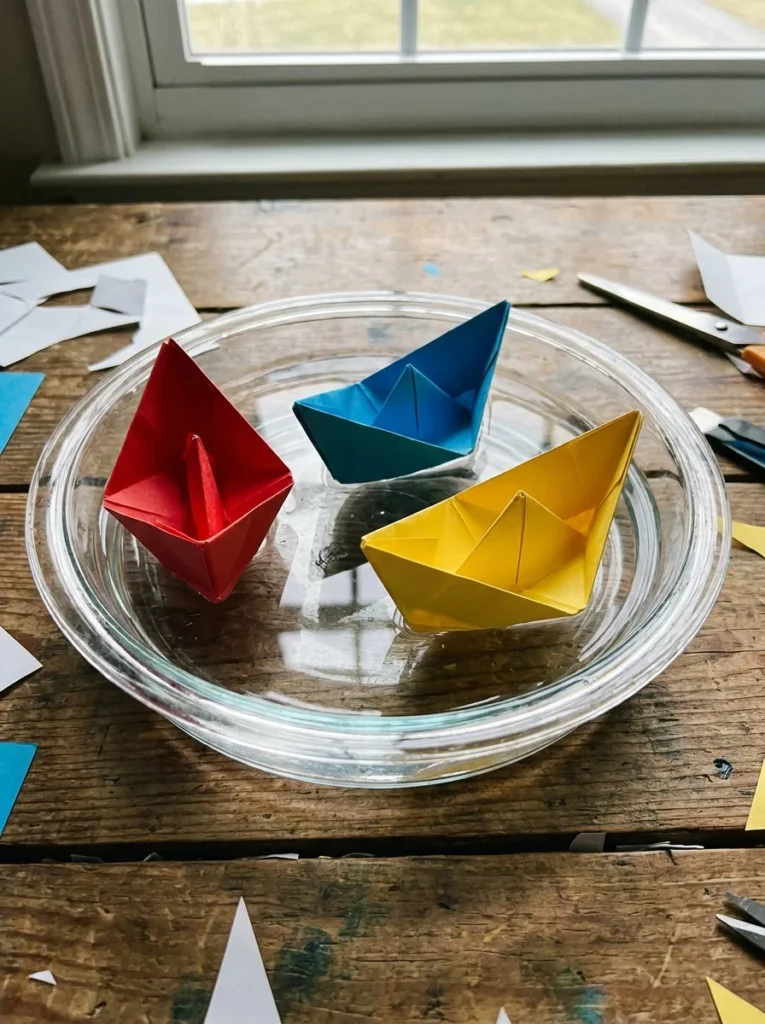
The classic paper boat is one of the first things many people ever fold, and it’s genuinely easy to do.
Start with a rectangular sheet of paper. Fold it in half horizontally. Fold the top corners down to meet the center line, forming a triangle at the top. Fold the bottom flaps up on each side. Hold the two open ends and pull them apart gently. Press the bottom flat into a square shape. Fold the bottom corners up again to form a triangle. Pull the sides apart again and press flat. Lift the inner points upward and you have a boat.
Budget tip: Newspaper makes the best boats because it’s stiff enough to hold its shape. Cost: zero.
Float paper boats in a bowl of water for a fun activity with children. Use wax paper or apply a light coat of beeswax to the outside of the boat before floating it for a longer-lasting, water-resistant version. Make a fleet of boats in different sizes and arrange them as a table centerpiece for a nautical-themed event. You can draw patterns on the sail section before folding. Paper boats also photograph beautifully for social media or as wall art prints.
17. Paper Wall Art
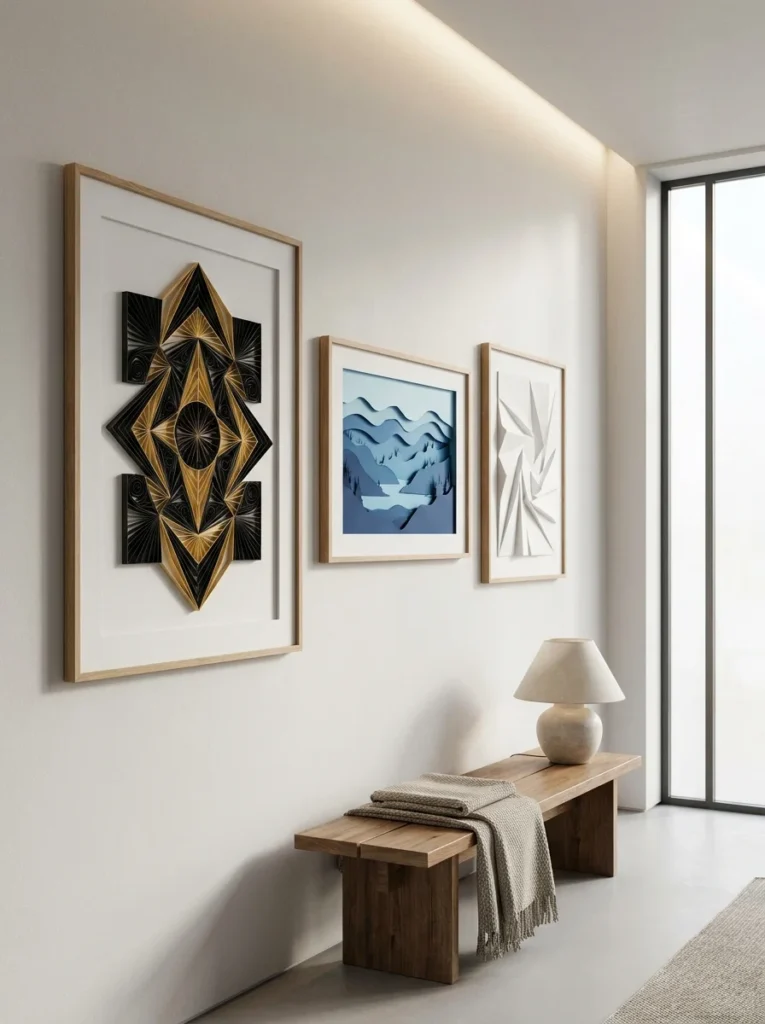
Paper wall art can look as polished and gallery-worthy as anything you’d buy in a shop.
There are many approaches. The simplest: cut shapes from colored cardstock, circles, triangles, organic forms, and arrange them on a contrasting background sheet, then frame the result. A 4-layer paper cut landscape is only slightly more complex. Draw a horizon line on four progressively darker sheets of paper, cut along it, and stack them with a small gap between each layer. Frame it deep enough to show the shadow depth.
Budget tip: Dollar stores often sell simple frames for $1 to $2 each. The paper inside costs almost nothing.
Quilling rolling thin strips of paper into coils and shaping them is another stunning paper art form. It looks intricate but the technique is simple once you practice for 20 minutes. Roll strips around a toothpick, pinch them into shapes (teardrops, squares, petals), and glue them onto cardstock. A finished quilling piece framed in black looks like expensive modern art. Fill a gallery wall with three or four small framed paper art pieces in a cohesive color palette. Original, handmade, and completely personalized to your space. For even more ideas, browse this collection of gorgeous paper wall art you can create for your home.
18. Paper Greeting Cards
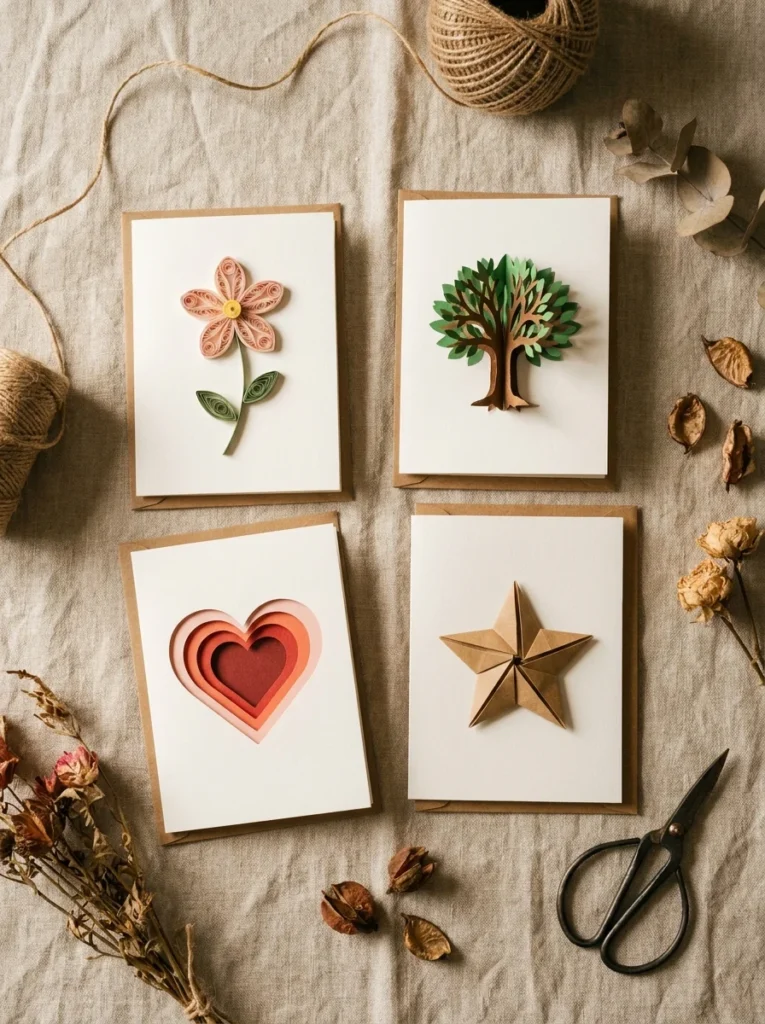
A handmade card means infinitely more than a store-bought one and it costs a fraction of the price.
Start with a folded piece of cardstock as your base. That’s your card. Everything else is decoration. Glue a paper flower to the front. Stamp a pattern. Write a message in nice handwriting. Add a washi tape border. You’re done.
For something more impressive, try a simple pop-up. Cut a tab from the center fold of your card two parallel cuts, then fold the tab forward. Glue a small paper shape (a heart, a star, a cake) to the tab. When the card opens, the shape springs up.
Budget tip: Buy a pack of blank A6 cards and envelopes for $3 to $4. The decorations can come entirely from paper scraps you already have.
Layer different papers for a collage-style card. Use watercolor paint, alcohol markers, or even coffee staining for interesting background textures. Include a small handwritten note inside the combination of a handmade exterior and a personal message makes for one of the most meaningful gifts possible. Make batches of cards in one sitting and keep them ready for birthdays, thank-yous, and celebrations throughout the year.
19. Paper Mobile
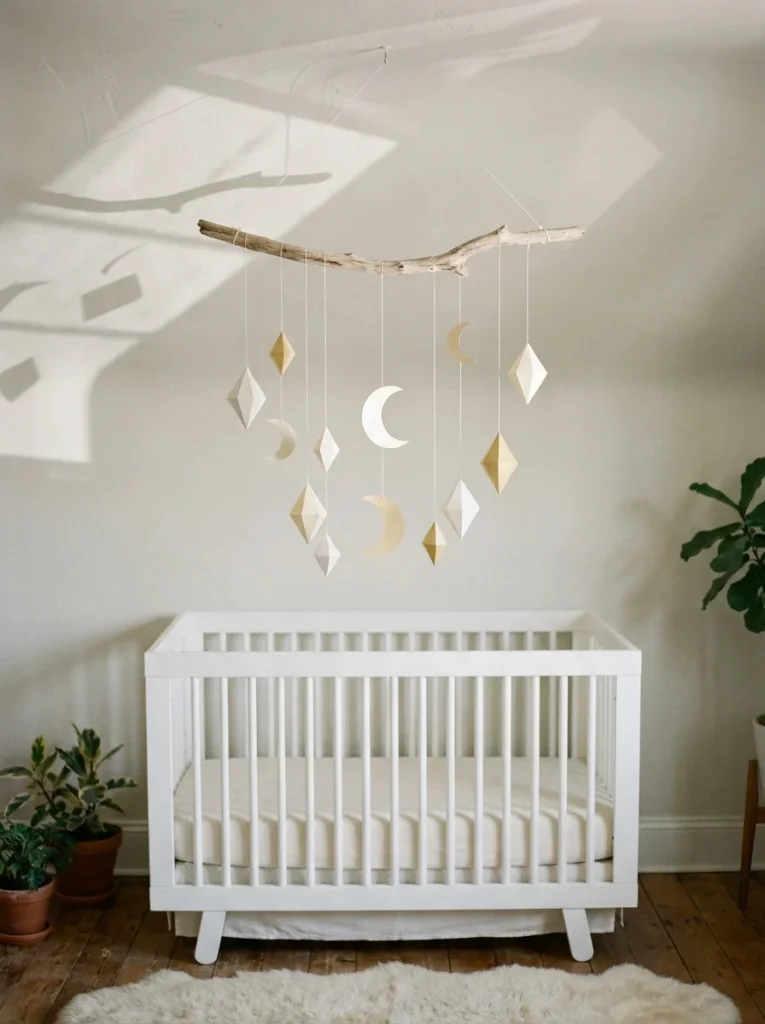
A hanging paper mobile adds movement and visual interest to any room and takes about an hour to make.
Gather a branch, wooden dowel, or sturdy twig for the top bar. Cut paper into your chosen shapes stars, moons, diamonds, animals, or geometric forms. Punch a small hole in each shape. Thread thin fishing line or white thread through each hole and tie it to the dowel bar at different lengths.
Balance the bar by adjusting where the thread anchors to it until it hangs level.
Budget tip: Use white cardstock for a minimal, clean look. Cost for the whole mobile: around $3 to $5 including the thread.
Double-sided paper shapes look best either use paper that’s colored on both sides or glue two pieces back to back before cutting. Add sparkle by cutting shapes from metallic or iridescent paper. For a nursery mobile, keep shapes simple and lightweight so they move easily in gentle air currents. For a boho bedroom, use raw-edged paper shapes in earthy tones. String fairy lights around the dowel before hanging the shapes for a glowing version. These make beautiful, personalized nursery gifts that are genuinely made with care and cost almost nothing.
20. Paper Treat Cones
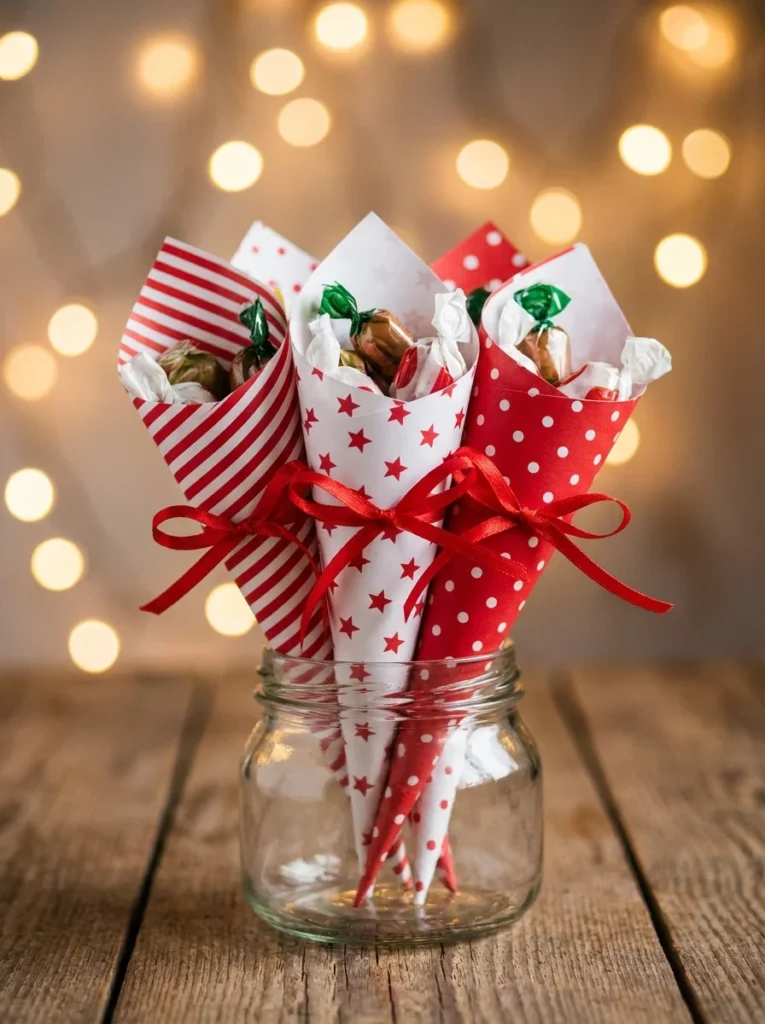
Paper treat cones are one of the fastest and most charming ways to package small gifts or party favors.
Roll a circle of paper into a cone shape. Overlap the edges and tape or glue along the seam. Fold the bottom point inward to close the base. Fill with small sweets, dried flowers, nuts, or tiny trinkets. Tie the top with ribbon or thread.
That’s it. Whole process: under 5 minutes per cone.
Budget tip: Use pages from old books, magazines, or wrapping paper. These look beautiful and cost nothing.
Vary the paper size for different cone sizes a 20cm circle makes a generous treat cone, while a 10cm circle makes a tiny, delicate one. Stamp or paint the paper before rolling for extra decoration. Arrange a dozen cones in a row on a table as a party display. Hang them from a string with a hole punched near the top for a garland of treats. These are popular at craft fairs as wedding favors, baby shower gifts, and holiday treats. Guests always comment on them. Five minutes of work, but the presentation looks like you spent hours.
21. Paper Photo Frame
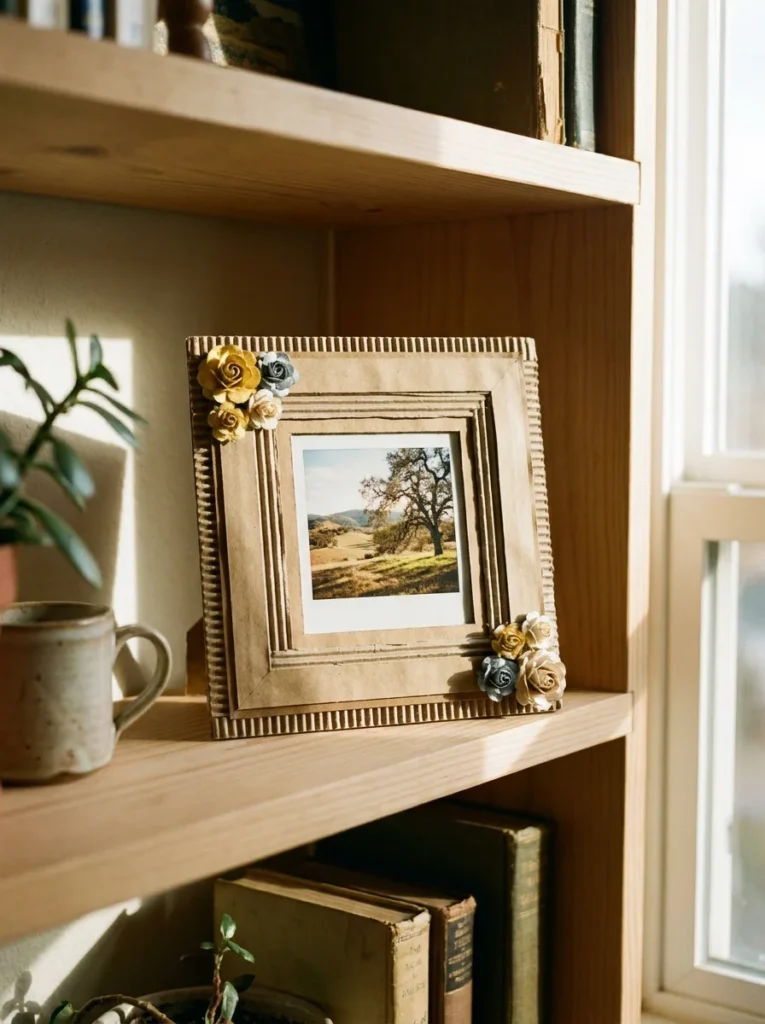
A handmade paper photo frame is a thoughtful gift and a beautiful way to display a favorite memory.
Cut two identical rectangles from thick cardstock or layered cardboard. On one piece, cut out a window in the center, the size of your photo, minus a border. This is your frame front. Glue the front piece to the back piece on three sides only, leaving the top open so you can slide the photo in.
Budget tip: Use cereal box cardboard as your base layer for sturdiness. Cover it with decorative paper. Total cost: almost nothing.
Decorate the front frame border with strips of patterned paper, washi tape, paper flowers, or geometric shapes cut from cardstock. Mitre the corners of your decorative paper strips (cut at 45° angles) for a clean, professional look. Paint the frame with acrylic paint before decorating for a cohesive base color. These frames work beautifully in portrait or landscape orientation. Make one as a gift with a printed photo already inside, the combination of a personal photo and a handmade frame is one of the most meaningful presents you can give. Add a paper easel stand on the back using a folded triangle of cardstock. You can also follow this detailed guide on how to make charming paper photo frames in 4 simple steps.
22. Paper Animal Masks
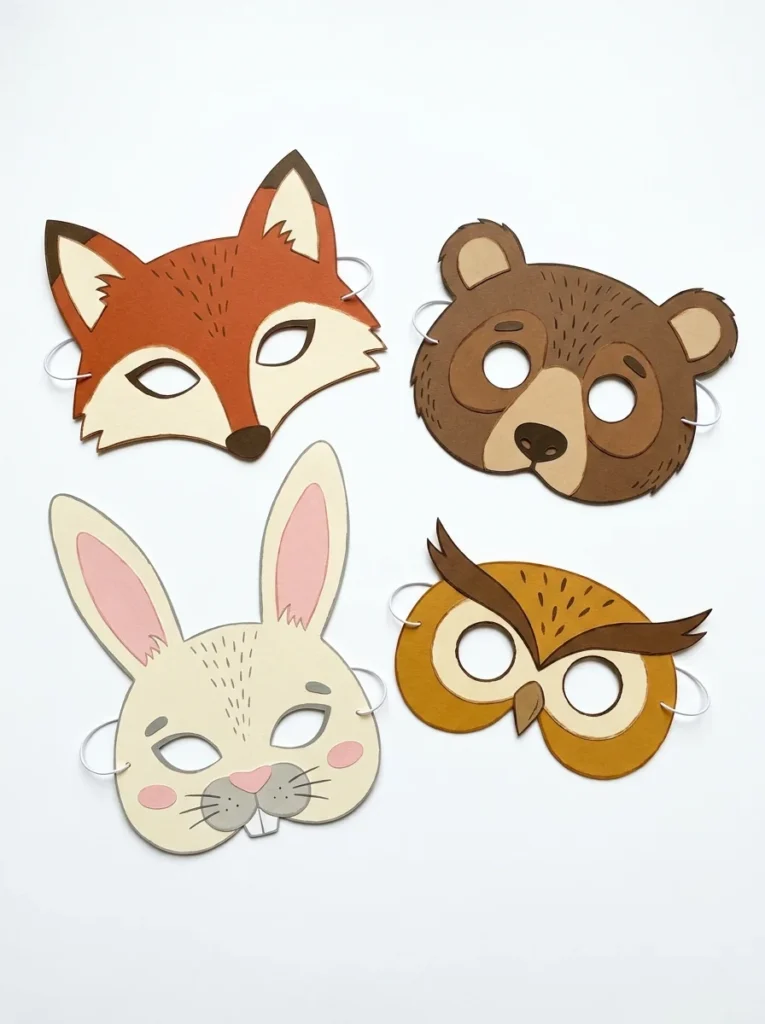
Paper animal masks are a brilliant craft for all ages, not just kids.
Draw the outline of an animal face on cardstock, oval or round works for most animals. Cut it out. Cut or punch eye holes. Add ears by cutting separate pieces and gluing or folding them to attach to the back of the mask. Punch a hole on each side and thread elastic or ribbon through for the ties.
Budget tip: A single sheet of A3 cardstock is enough for one mask. A $3 pack of mixed cardstock sheets gives you 10 to 20 masks.
Choose a simple animal first. A bear needs only a circle base, two round ears, a small snout circle, and a simple nose shape. A cat needs pointed ears and a narrow muzzle. An owl can be made with large circular eyes cut from contrasting colored paper and angular brow feathers. Paint or color the mask before cutting the eye holes for the cleanest result. Add texture with crinkled paper, paper fringe for fur, or layered paper feathers. These are wonderful for birthday parties, photo booths, Halloween, and dramatic play. A set of six different animal masks as a gift is a creative, affordable, and memorable present.
Conclusion
Paper crafting is one of the most rewarding hobbies you can pick up, and one of the most affordable. The 22 projects here range from a 5-minute bookmark to a full afternoon of papier-mâché, but all of them share one thing: you don’t need experience to begin. You just need paper, a little time, and the willingness to try. Start with whichever project caught your attention first. Make it once. Make it again. Give one away. You’ll quickly find that paper crafting becomes a habit,a satisfying, creative one that fills your home with handmade beauty and your gift bag with thoughtful, personal presents. The materials are cheap. The skills build fast. And the results are genuinely impressive. Pick up some cardstock, find your scissors, and start folding.