

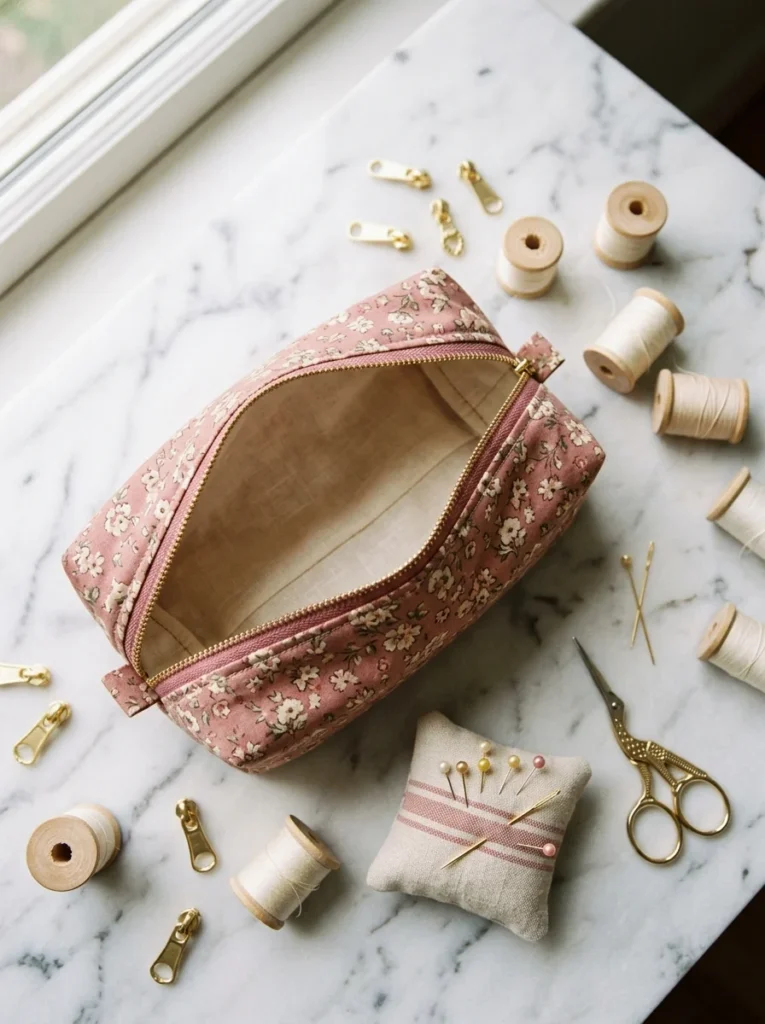
You’ve seen them everywhere, on Pinterest, in Etsy shops, tucked into flat lays on Instagram. That perfectly neat little fabric pouch with clean corners, a satisfying zipper, and fabric that looks like it was chosen on purpose. Here’s the thing: you can make one this afternoon. No fancy equipment. No advanced skills. Just a few supplies, a bit of patience, and this guide walking you through every step.
What You’ll Need Before You Start
Getting your supplies ready before you cut a single piece of fabric saves time and frustration. Here’s your full list:
- Outer fabric, cotton or canvas, about ¼ yard
- Lining fabric, a contrasting or coordinating print, same amount
- One zipper, 9 inches works for most pouch sizes
- Sewing machine with a zipper foot (or a hand-sewing needle if you prefer)
- Iron and ironing board, this is non-negotiable for a clean finish
- Fabric scissors or a rotary cutter
- Pins or wonder clips
- Seam ripper, because everyone needs one eventually
Budget tip: Fat quarters cost $2–4 each and give you more than enough fabric for one pouch with scraps left over. Grab a coordinating pair from the clearance bin and you’re set.
Step 1: Cut Your Fabric Pieces
Precision here makes everything easier later.
Cut the following pieces:
- 2 outer fabric rectangles, 10 × 7 inches
- 2 lining fabric rectangles, 10 × 7 inches
That’s it. Four pieces of fabric, all the same size. Keep edges straight and corners square. Use a ruler and rotary cutter if you have one, clean cuts lead to clean seams.
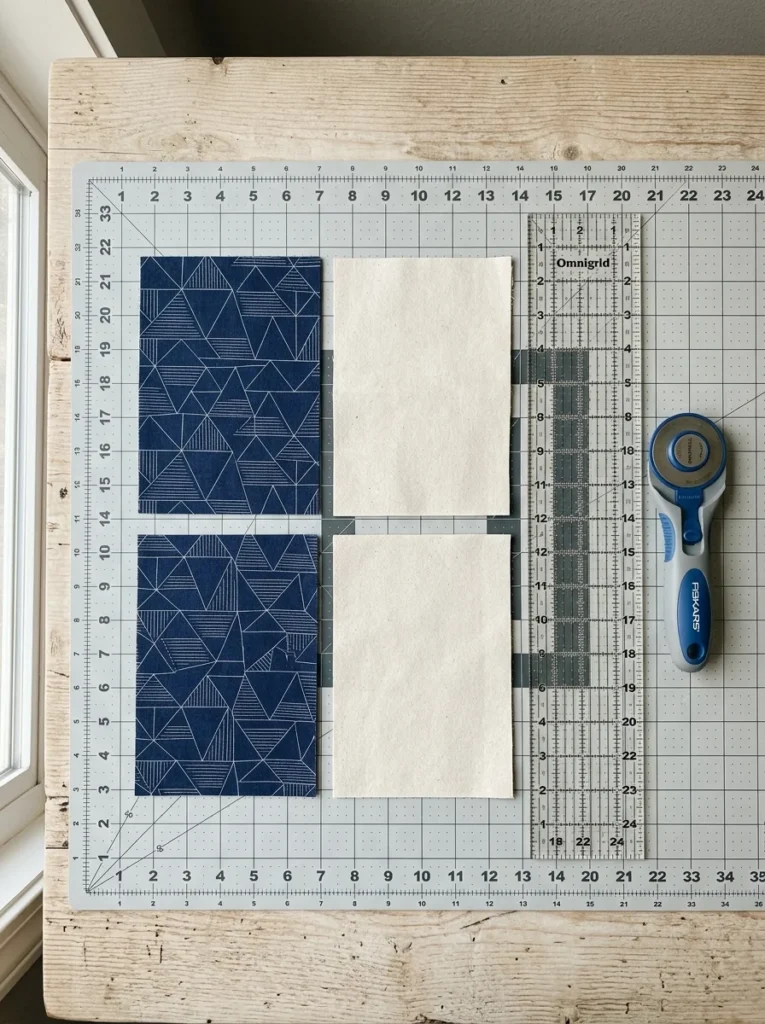
Press your fabric pieces lightly with an iron before cutting. Wrinkled fabric shifts while you cut and throws off your measurements. Two minutes of pressing saves a crooked seam later.
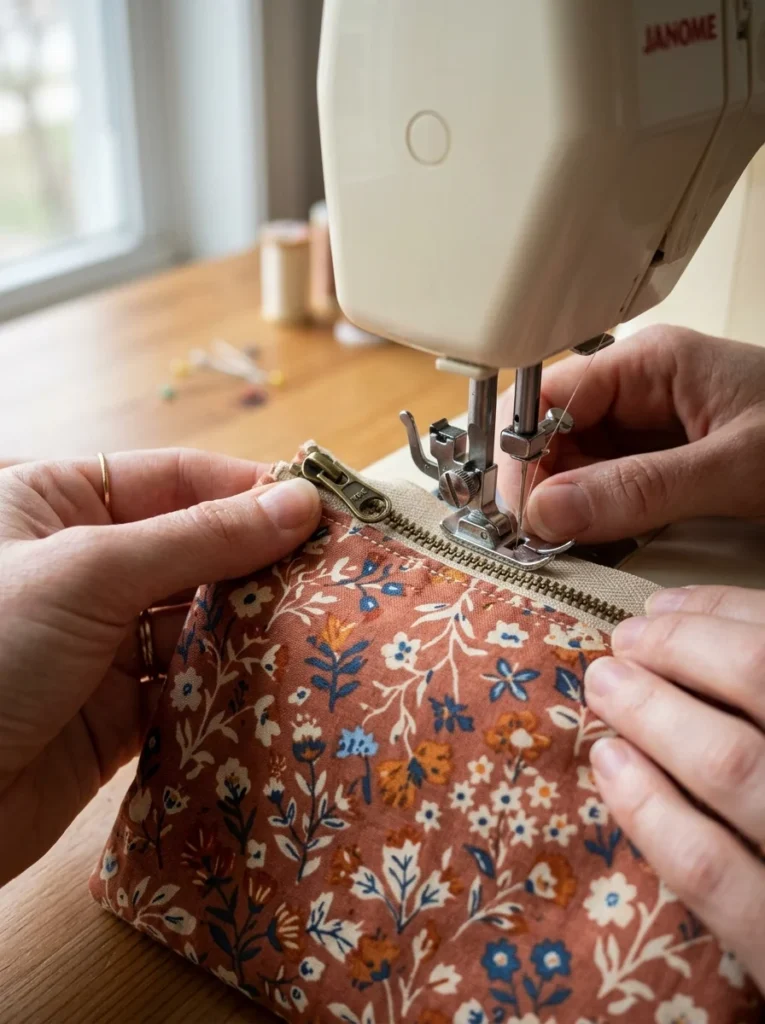
Step 2: Sew the Zipper
This is where most beginners slow down. But once you’ve done it once, it clicks.
Here’s the sequence:
- Place one outer fabric rectangle face-up on your table.
- Lay the zipper face-down along the top edge, with the zipper pull on the left side.
- Place one lining rectangle face-down on top of both, sandwiching the zipper.
- Pin everything in place along the top edge.
- Sew along the top edge using your zipper foot. Use a ¼-inch seam allowance.
- Fold both fabric pieces away from the zipper so they face outward. Press with your iron.
- Topstitch close to the zipper edge. This keeps the fabric from catching in the zipper when you open and close it, and it looks sharp.
Repeat steps 1–7 for the second set of outer and lining rectangles on the other side of the zipper.
When you’re done, you’ll have a strip of fabric with a zipper running along the center and fabric panels hanging off each side.
Step 3: Sew the Pouch Together
Now it starts to look like something.
- Open the zipper halfway. This is how you’ll turn the pouch right-side out at the end. Don’t skip this or you’ll be stuck.
- Fold the whole piece in half so the outer fabrics are touching each other (right sides facing in), and the lining fabrics are touching each other.
- Line up all the edges and pin around the sides and bottom, but keep the outer and lining sections separate. You’ll sew them as two U-shapes, not one.
- Sew around the outer fabric section on three sides. Sew around the lining section on three sides, leaving a 3-inch gap at the bottom of the lining for turning.
- Clip the four corners diagonally, this removes bulk so your corners sit flat once flipped.
Step 4: Turn It Right-Side Out and Finish
Almost there. This is the satisfying part.
- Reach through the open zipper and pull the outer fabric through. Push the corners out gently using a blunt pencil or chopstick.
- Push the lining down inside the pouch.
- Fold in the raw edges of the gap you left in the lining and sew it closed, either by machine or with a few hand stitches.
- Tuck the lining inside the pouch and press the whole thing flat with your iron.
- Topstitch around the top edge of the pouch opening for a finished, professional look.
That final topstitch is the small detail that separates a handmade pouch that looks homemade from one that looks like you bought it.
Tips for a Professional Finish Every Time
These small habits make a big difference in the final result:
- Press every seam as you sew it. An iron turns an average seam into a crisp one.
- Use a matching thread color for topstitching on the outside. Contrast thread looks intentional only when it’s very deliberate.
- Slow down at the zipper ends. This is where puckers happen. Take it stitch by stitch if needed.
- Sew a small fabric tab at each end of the zipper before assembling, it gives the zipper pull room to move and makes the ends look tidy.
- Try two coordinating prints for the outer and lining. A bold outer print with a simple stripe lining feels considered without being complicated.
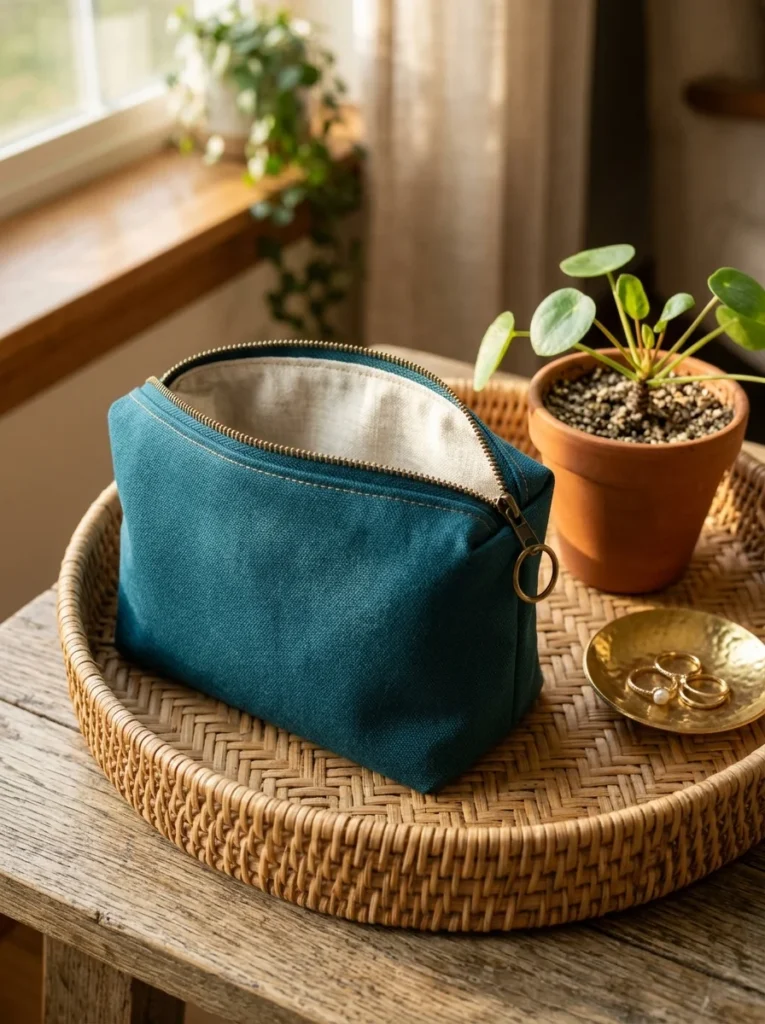
A well-made fabric pouch is proof that you don’t need complicated techniques to get a result that looks polished and intentional. Four pieces of fabric, a zipper, and an afternoon is genuinely all it takes.
Start with this basic rectangle pouch, get comfortable with the zipper step, and then experiment, try a boxed bottom for more depth, add an interior pocket, or use a bold quilted fabric on the outside for texture. Every pouch you make gets faster and neater than the last.
Pin this guide for your next free afternoon, grab some fabric scraps, and make your first one today. Your future self, the one with a beautiful handmade pouch holding their lip balm and cards, will be glad you did.