

Kids don’t need expensive supplies or complicated instructions to make something they’re proud of. Paper crafts are one of the best ways to keep little hands busy, build fine motor skills, and give kids a real sense of accomplishment. Whether you’re dealing with a rainy afternoon, school holidays, or just the classic “I’m bored,” these projects deliver results fast. Most of them use nothing more than paper, scissors, glue, and a few basic supplies you already have at home. From animals to games to holiday decorations, there’s something here for every age, skill level, and occasion. Let’s get into it.
1. Paper Plate Animals
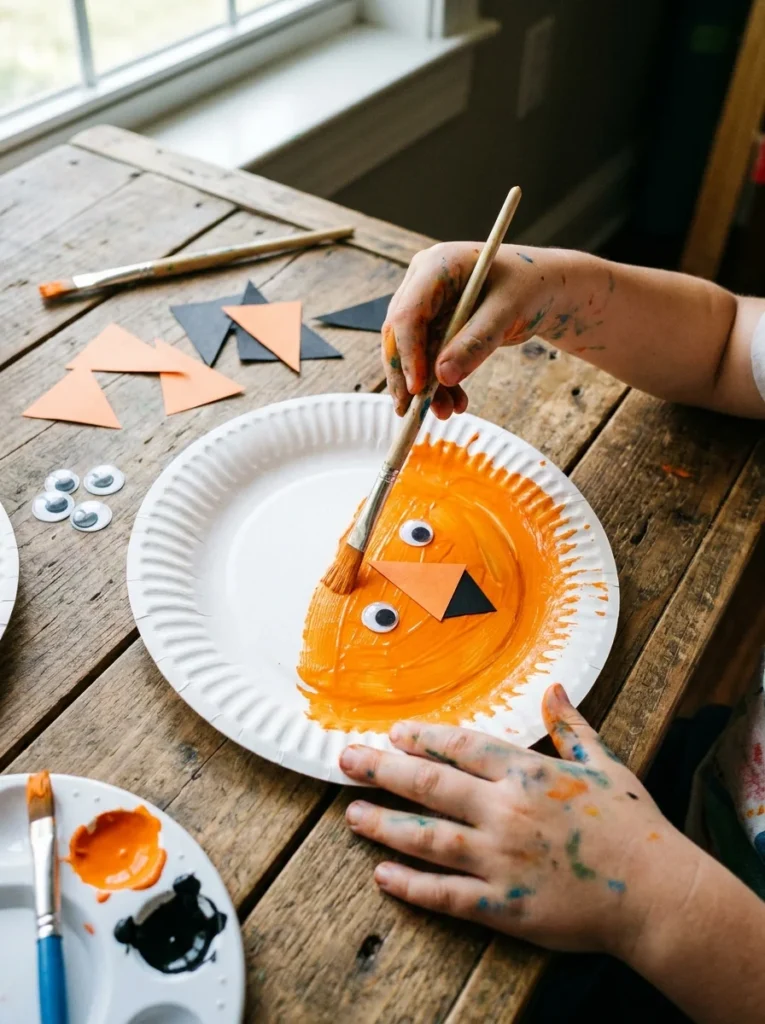
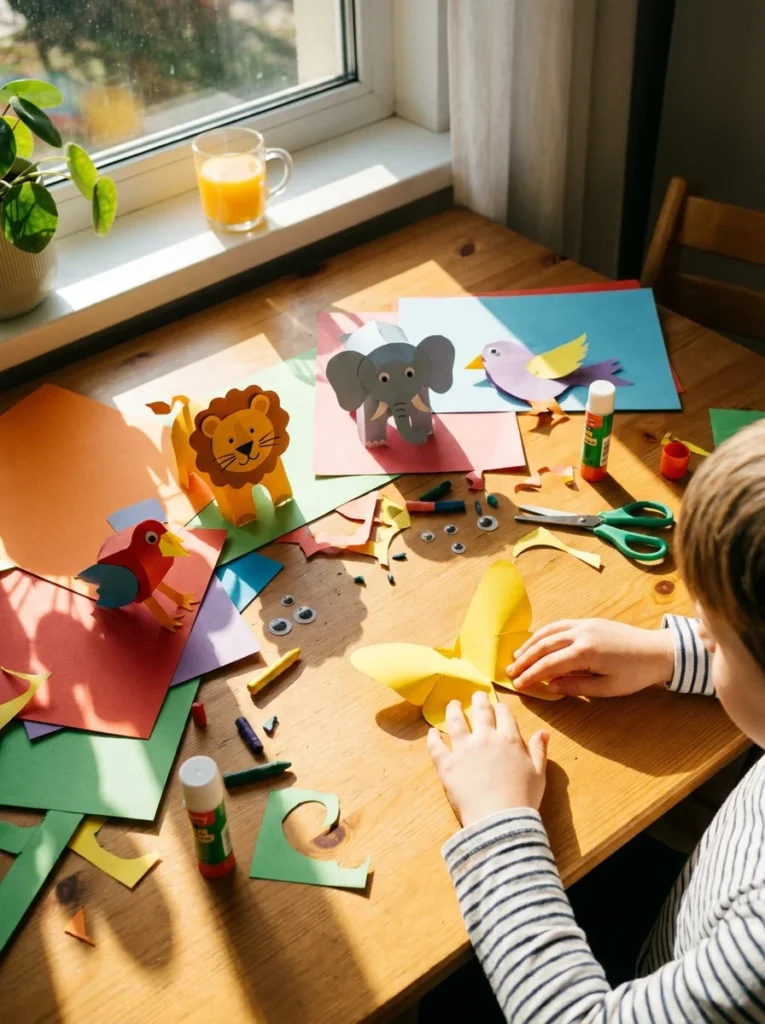
Paper plate animals are a classic for a reason, they’re quick, easy, and wildly customizable.
Start with any standard paper plate. Let your child pick an animal. Lions, frogs, owls, and cats are popular choices.
What you need: Paper plates, paint or markers, construction paper, googly eyes, glue.
Here’s how to keep it simple:
- Paint the plate the base color of your animal.
- Cut ears, beaks, or snouts from construction paper.
- Glue on googly eyes, kids love this part.
- Add details with a marker.
The whole project takes about 20 minutes, plus drying time.
Budget tip: Dollar store paper plates and googly eyes keep costs under $3 total.
This works great for toddlers and early elementary kids. Younger ones can paint while older kids cut the details themselves.
You can turn it into a learning game, too. Make a whole farm of animals and let kids act out stories with them.
Paper plate animals are also perfect for birthday parties. Set up a craft station and let each guest make one to take home.
2. Origami Paper Cranes
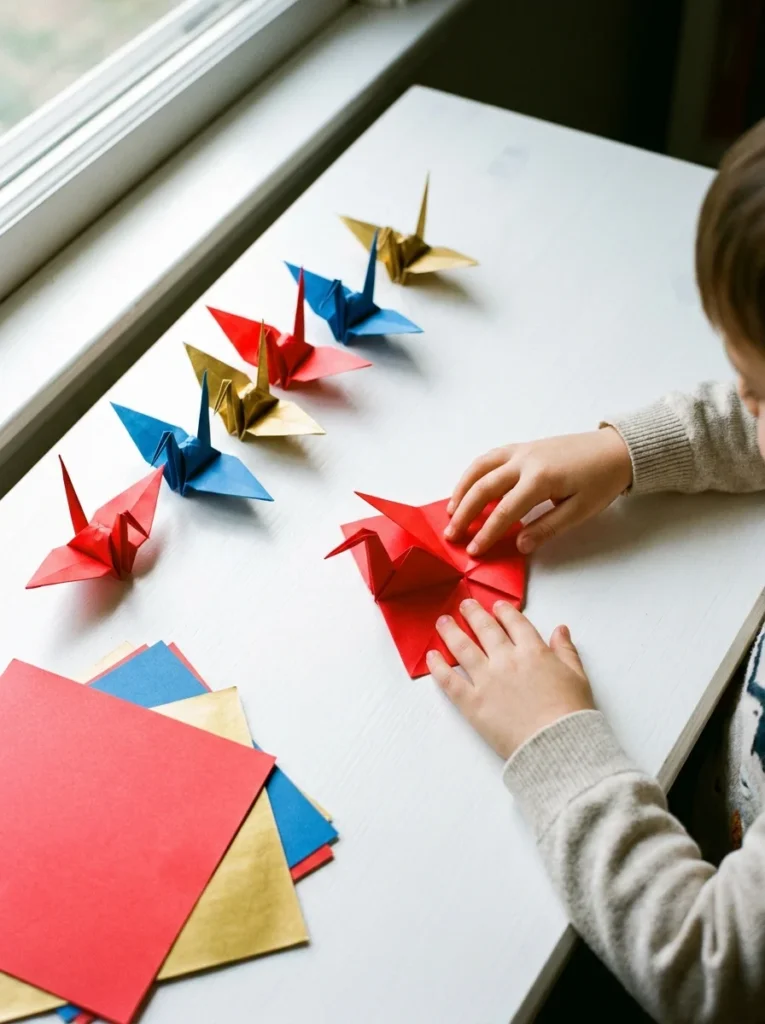
Origami cranes look impressive, but kids can absolutely make them.
The traditional crane uses one square sheet of paper and no scissors or glue. That’s it.
Best age: 7 and up with some guidance. Younger kids can do simpler folds with help.
What you need: Square paper, origami paper works best, but any square cut from printer paper does the job.
Walk through the steps slowly:
- Fold in half both ways, then diagonally.
- Collapse into a smaller square.
- Fold the edges to the center line.
- Shape the neck and tail.
- Gently pull the wings apart.
Budget tip: A pack of colorful origami paper costs around $2–$4 and includes hundreds of sheets.
Print a step-by-step diagram or watch a video together the first time. Once kids learn it, they’ll make dozens.
String several cranes together to make a hanging mobile. Use thread and a wooden dowel from the craft store.
In Japanese tradition, folding 1,000 cranes is said to grant a wish. Some kids find this a fun long-term goal.
3. DIY Paper Bookmarks
Every kid who reads needs a bookmark, and making one is just as fun as using it.
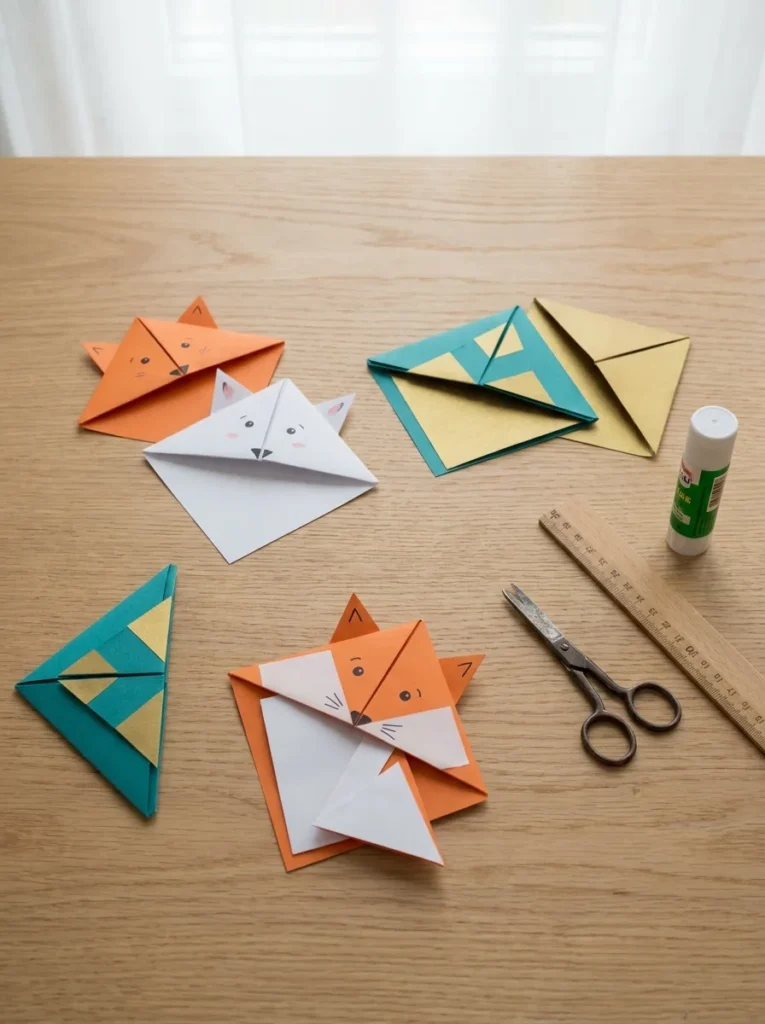
Corner bookmarks are especially satisfying. They slip right onto the corner of a page and don’t fall out.
What you need: Construction paper or cardstock, scissors, markers, glue.
To make a corner bookmark:
- Cut a square of paper (about 3×3 inches).
- Fold it in half diagonally to make a triangle.
- Fold the two outer corners up to the top point.
- Unfold them, tuck the corners into the pocket you’ve made.
- Decorate the front.
Popular designs: Fox, cat, dog, monster, superhero.
Kids can make these as gifts for family members, too. A homemade bookmark inside a book is a thoughtful present that costs almost nothing.
Budget tip: Use leftover construction paper scraps. No need to buy anything new.
These are great for school-age kids who are learning to read. Making their own bookmark can actually get reluctant readers more excited about picking up a book.
4. Paper Chain Garlands
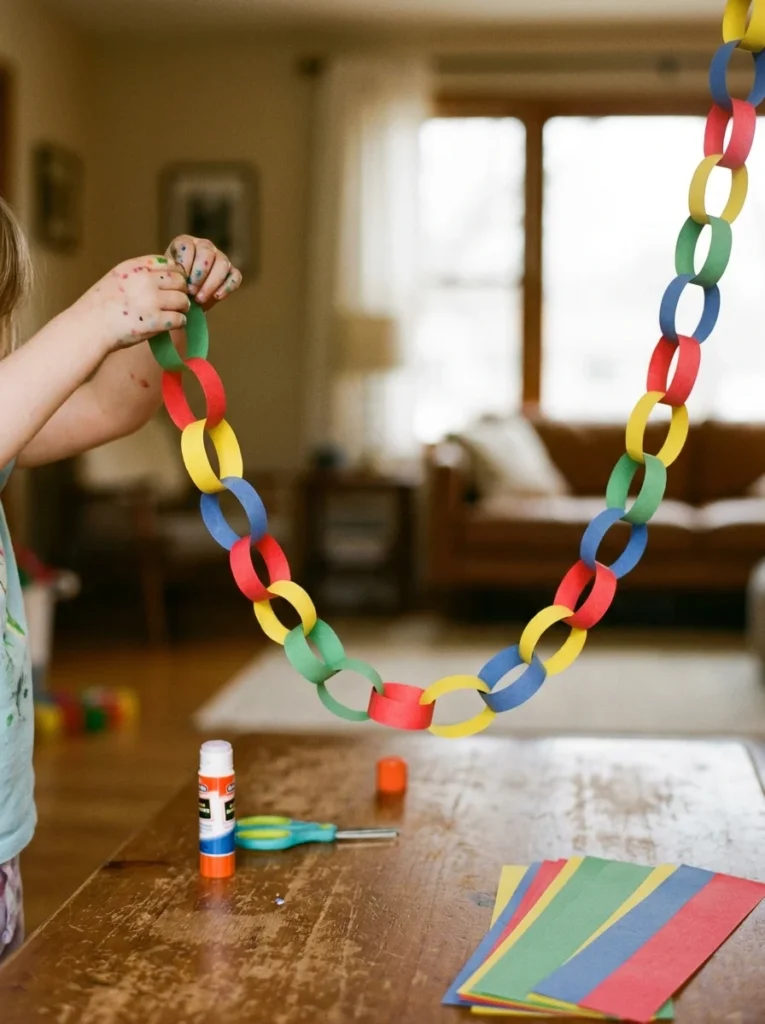
Paper chains might be the simplest decoration project out there, and kids get genuinely excited watching them grow longer.
What you need: Construction paper, scissors, glue or tape.
Cut strips of paper about 1 inch wide and 8 inches long. Loop the first strip into a circle and glue it. Thread the next strip through the circle before gluing it closed. Repeat.
That’s it. The longer you go, the more satisfying it gets.
Uses for paper chains:
- Classroom decorations
- Birthday party streamers
- Holiday garlands
- Counting down days to an event
Budget tip: A single pack of construction paper makes hundreds of links.
This project is perfect for very young kids, even 3 and 4-year-olds can do it with minimal help. It builds hand-eye coordination and teaches colors at the same time.
Make it educational by using a pattern. Red, blue, yellow. Repeat. Ask kids to predict what color comes next.
For Christmas countdowns, make one link per day in December and remove one each morning. Kids love the visual progress.
5. Newspaper Hats
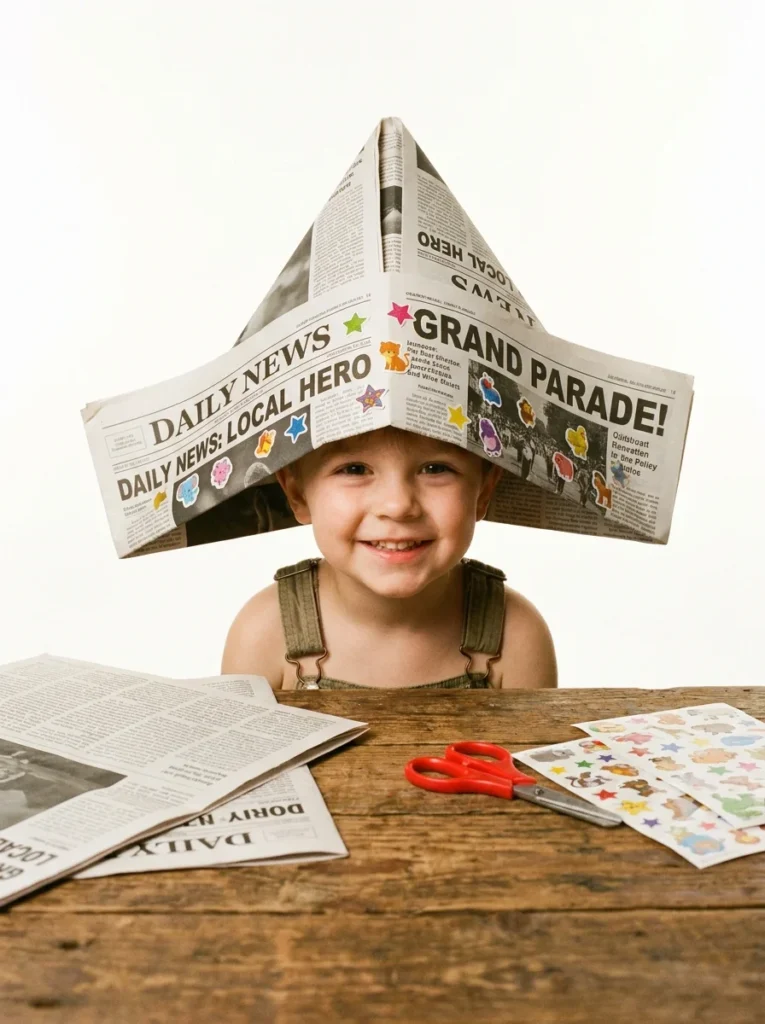
Newspaper hats are a staple of childhood crafts, fast, free, and dramatic.
All you need is a full sheet of newspaper. No scissors, no glue.
The classic sailor hat fold:
- Fold the newspaper in half widthwise.
- Fold the top two corners down to the center, leaving a border at the bottom.
- Fold the front border up, flip, fold the back border up.
- Open the bottom and press flat into a hat shape.
Takes about two minutes once you know how.
Make it more fun: Let kids decorate with stickers, markers, or paint before folding.
Newspaper hats work great for imaginative play. Pirates, chefs, sailors, soldiers, a hat changes everything.
Budget tip: Free. Completely free. Use yesterday’s paper or grab a free community newspaper.
Older kids can try variations, tall chef hats, wide brim hats, or folded crowns. Look up “newspaper hat variations” for more templates.
This is also a great project for classrooms with zero budget. All you need is a stack of old newspapers.
6. Paper Bag Puppets
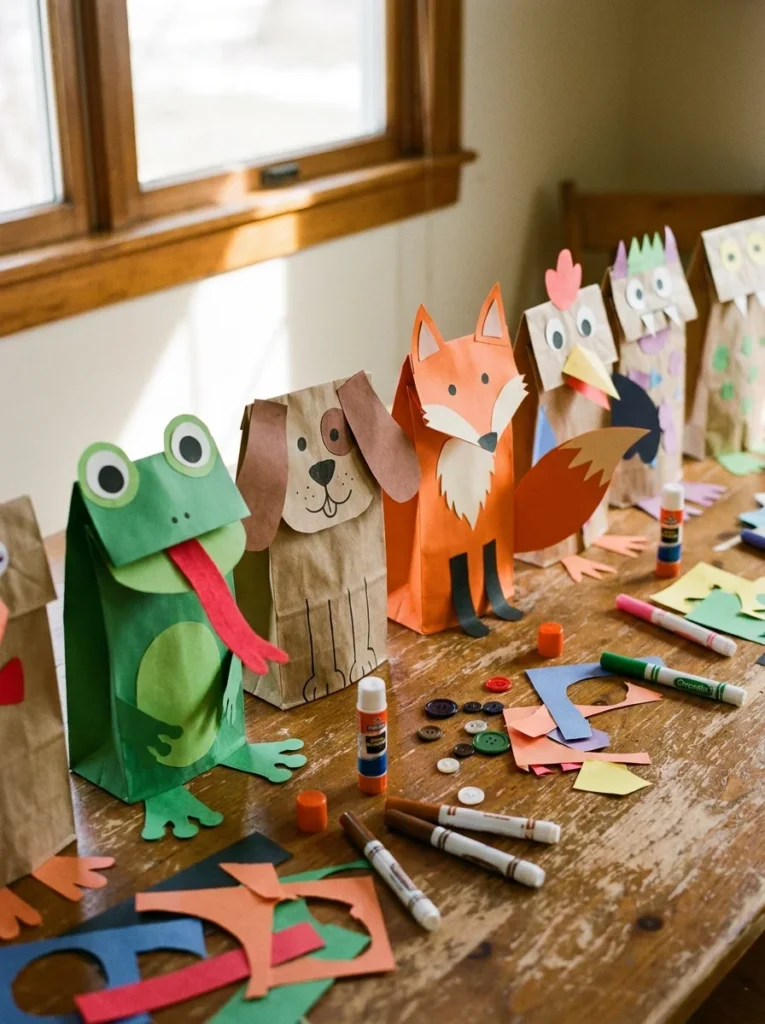
Paper bag puppets turn a simple lunch bag into a full character, and then the real fun starts with puppet shows.
What you need: Brown paper lunch bags, construction paper, markers, googly eyes, glue.
The flap at the bottom of the bag becomes the puppet’s mouth. Slip your hand in, and the flap opens and closes when you move your fingers.
Build your puppet:
- Cut ears, hair, or horns from construction paper.
- Draw or glue on a face.
- Add googly eyes.
- Glue on yarn for hair.
Kids can make an entire cast of characters, a whole puppet show in an afternoon.
Budget tip: A pack of 50 lunch bags costs about $3. Googly eyes and construction paper add maybe $2 more.
This works for ages 4 and up. Younger kids may need help cutting, but they can absolutely do the gluing and decorating.
The best part? After crafting, kids use their puppets for pretend play. That extends the value of the project way beyond the crafting time.
Set up a simple “stage” using a cardboard box or the back of a couch.
7. Paper Snowflakes
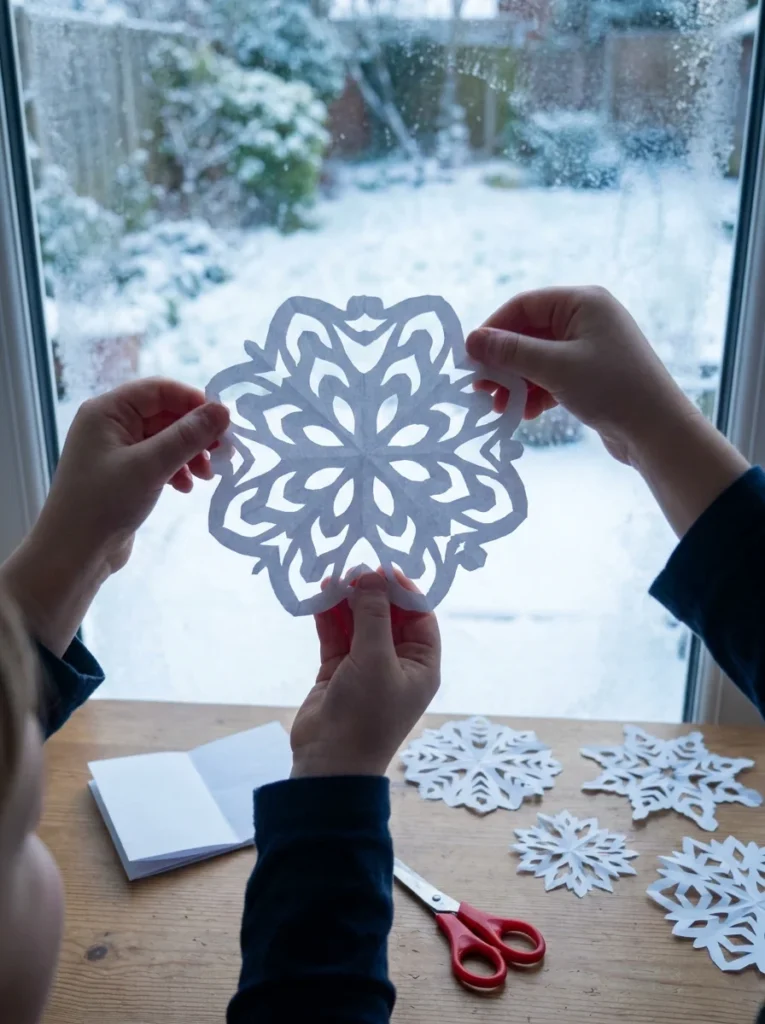
Paper snowflakes are magical, especially when you unfold them and see what you made.
What you need: White paper (printer paper works perfectly), scissors.
The basic method:
- Start with a square of paper.
- Fold it in half diagonally to make a triangle.
- Fold it in half again.
- Fold one more time.
- Cut small shapes, triangles, curves, notches, along all edges.
- Unfold carefully.
No two snowflakes are ever the same. That’s the magic of them.
Budget tip: Use regular printer paper. Zero extra cost.
Kids aged 5 and up can do this with guidance. Younger kids may need help with the folding, but they can do the cutting.
Hang snowflakes in windows, from the ceiling, or tape them on walls for winter decorations. They look amazing backlit.
Make it a challenge: Who can cut the most detailed snowflake? The most symmetrical? The biggest?
This project also teaches basic geometry concepts, symmetry, patterns, folding, in a hands-on way.
8. Toilet Paper Roll Binoculars
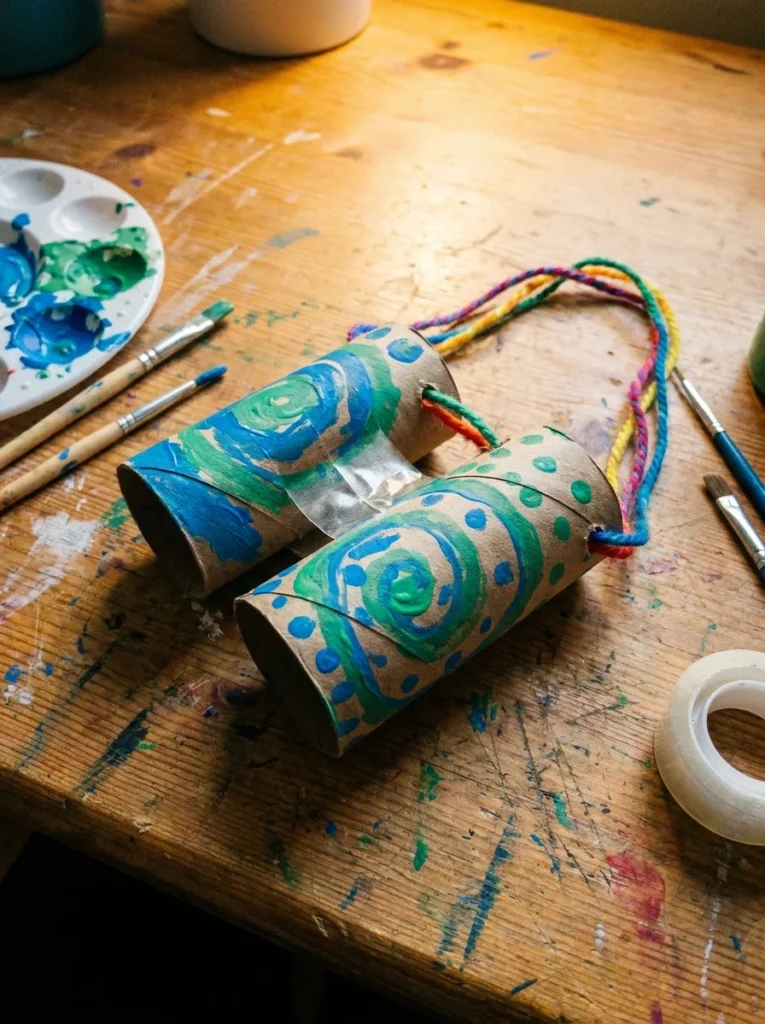
These binoculars don’t actually magnify anything, but that doesn’t matter to a 5-year-old on a nature walk.
What you need: 2 toilet paper rolls, tape or glue, paint or stickers, a length of yarn or string.
Assembly:
- Tape or glue the two rolls side by side.
- Poke a small hole on the outer side of each roll.
- Thread yarn through each hole and knot it to make a neck strap.
- Decorate with paint, markers, or stickers.
Done in about 15 minutes.
Budget tip: Toilet paper rolls are free. Everything else is optional decorating.
These are perfect for outdoor play. Kids “spy” on birds, look for bugs, pretend they’re explorers.
Pair this with a nature walk. Give kids a simple list of things to “spot” with their new binoculars, a red bird, a rock, a flower.
For extra fun, cut circles of colored cellophane and tape them over the ends. Everything looks tinted in a different color through each eye.
9. Paper Flowers
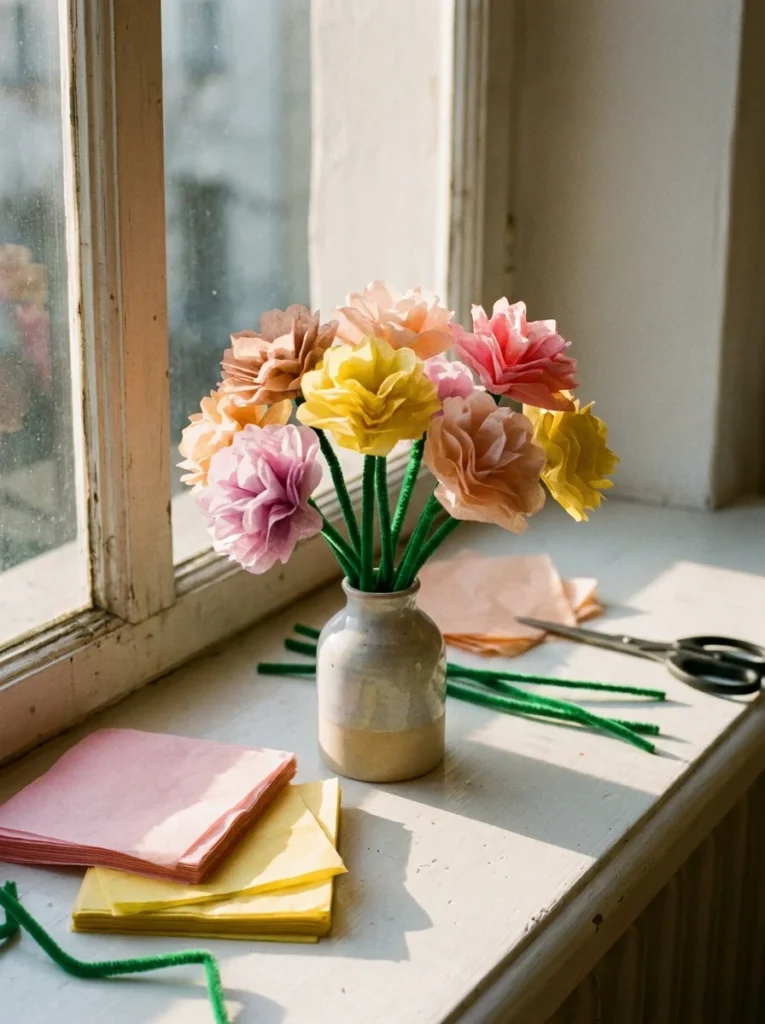
Paper flowers never wilt, never need water, and look genuinely pretty on a shelf or table.
Tissue paper flowers are the easiest version for young kids.
What you need: Tissue paper, pipe cleaners (or green paper strips for stems), scissors.
How to make them:
- Stack 5–6 sheets of tissue paper.
- Fold the entire stack accordion-style (like a fan).
- Pinch the center and twist a pipe cleaner around it.
- Gently pull each layer of tissue paper up and toward the center.
- Fluff out into a full flower shape.
Takes under 5 minutes per flower.
Budget tip: A pack of tissue paper costs about $2 and makes 20+ flowers.
Older kids can try more detailed versions, rolled paper roses, spiral flowers, or tulip shapes cut from cardstock. If you want to go further with paper flowers, this guide on how to make stunning paper flowers walks through five easy steps in detail.
These make wonderful gifts. A small bouquet in a painted jar is a sweet Mother’s Day or teacher gift.
Try using coffee filters instead of tissue paper. Kids can color them with washable markers first, then lightly mist with water to blend the colors.
10. Paper Weaving
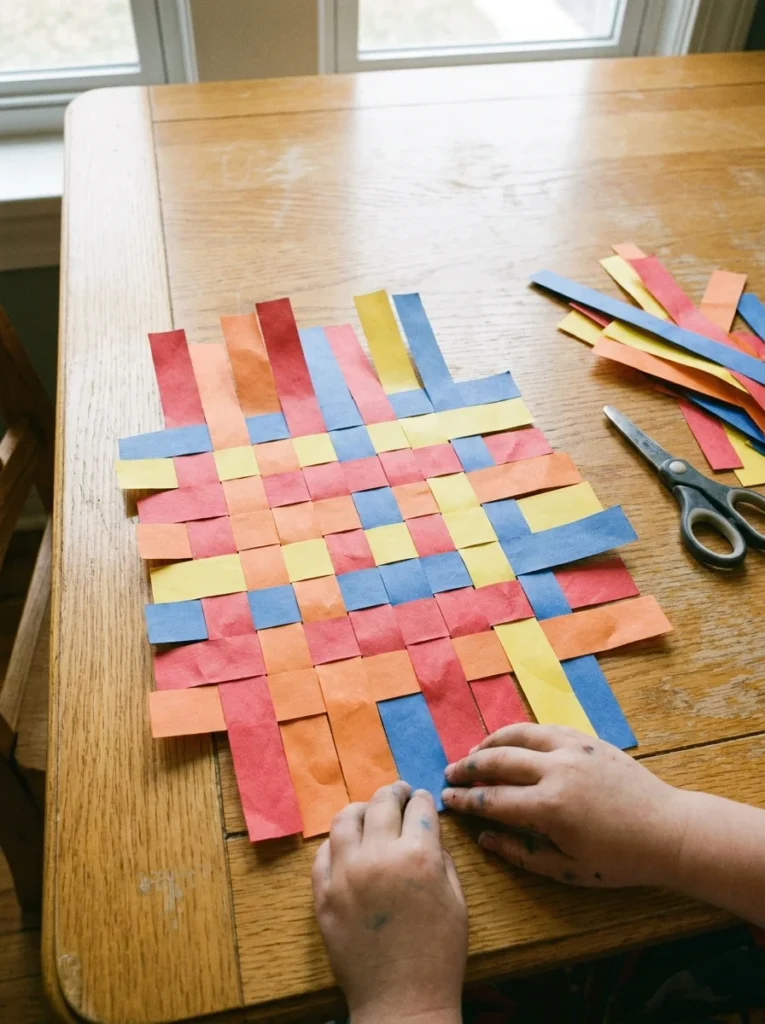
Paper weaving looks complicated but is actually very manageable for kids aged 6 and up.
What you need: Construction paper in two or more colors, scissors, tape or glue.
Basic method:
- Start with a sheet of paper folded in half.
- Cut slits from the fold toward the open edge, leaving about 1 inch uncut at the top.
- Unfold. This is your loom.
- Cut strips from a different color of paper.
- Weave strips over and under through the loom, alternating each row.
- Tape or glue the ends down.
The result is a colorful woven mat.
Budget tip: Use leftover construction paper scraps of different colors.
This project builds fine motor control, patience, and pattern recognition, great for kids preparing for reading.
Once kids get the hang of it, challenge them to make patterns. Stripe patterns, checkerboard patterns, or even diagonal weaves.
Finished weavings can become placemats, wall art, or wrapping paper for a small gift.
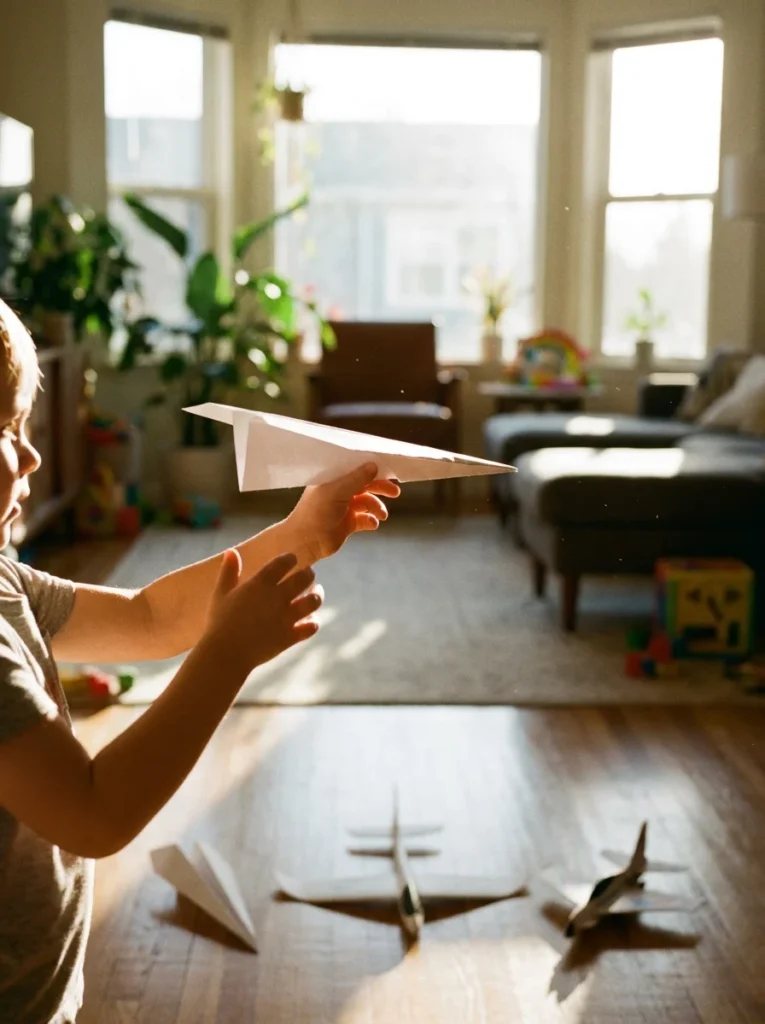
11. Paper Airplanes
Paper airplanes are one of those childhood crafts that never gets old. And there are dozens of designs, not just the one everyone knows.
What you need: Printer paper. Just printer paper.
Start with the classic dart:
- Fold the paper in half lengthwise.
- Fold the top two corners to the center crease.
- Fold the top point down to where the last fold ended.
- Fold the outer corners to the center again.
- Fold up the small triangle at the bottom.
- Fold the whole plane in half and bend the wings out flat.
Budget tip: A ream of printer paper costs $5 and makes 500 planes. That’s basically free.
Once kids master the dart, introduce other designs:
- The Glider: Wide wings for slow, floating flight
- The Stunt Plane: Short wings for loops and tricks
- The Bulldog: Blunt nose for distance
Turn it into a competition. Who can fly the farthest? The highest? The most accurate landing?
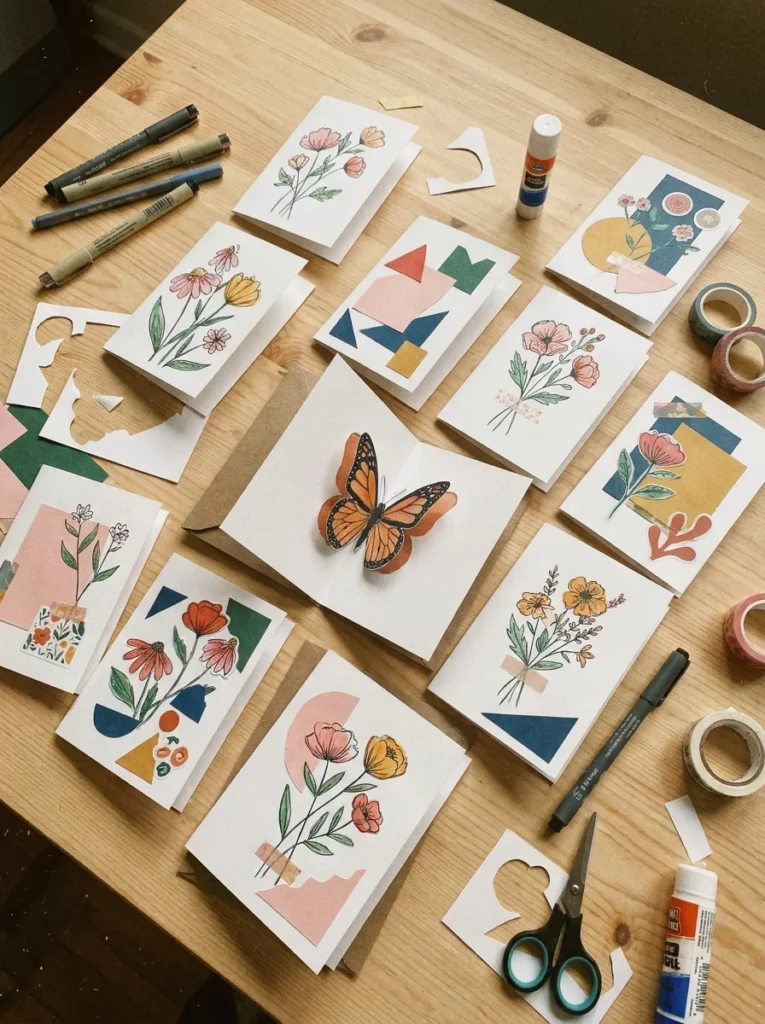
12. Greeting Cards
Handmade cards mean more than anything from a store. Kids know this. The people receiving them definitely know it.
What you need: Cardstock or thick paper, markers, scissors, stickers, scraps of decorative paper.
Simple card ideas:
- Folded card with a drawing: Even a stick figure drawing from a 5-year-old is treasured
- Pop-up cards: Cut two slits in the fold and push the tab forward; attach a small shape to it
- Collage cards: Cut up old magazines or colored paper scraps and layer them
- Fingerprint cards: Press fingers in paint and turn the prints into animals
Budget tip: Cut old cereal boxes into card blanks. They’re thick, sturdy, and free.
Cards work for every occasion, birthdays, holidays, get-well notes, thank-you cards, “just because.”
Encourage kids to write a few lines inside. Even if it’s just “I hope you have a good day.” Those words get kept forever.
For younger kids, they can dictate what they want to say and a parent can write it for them.
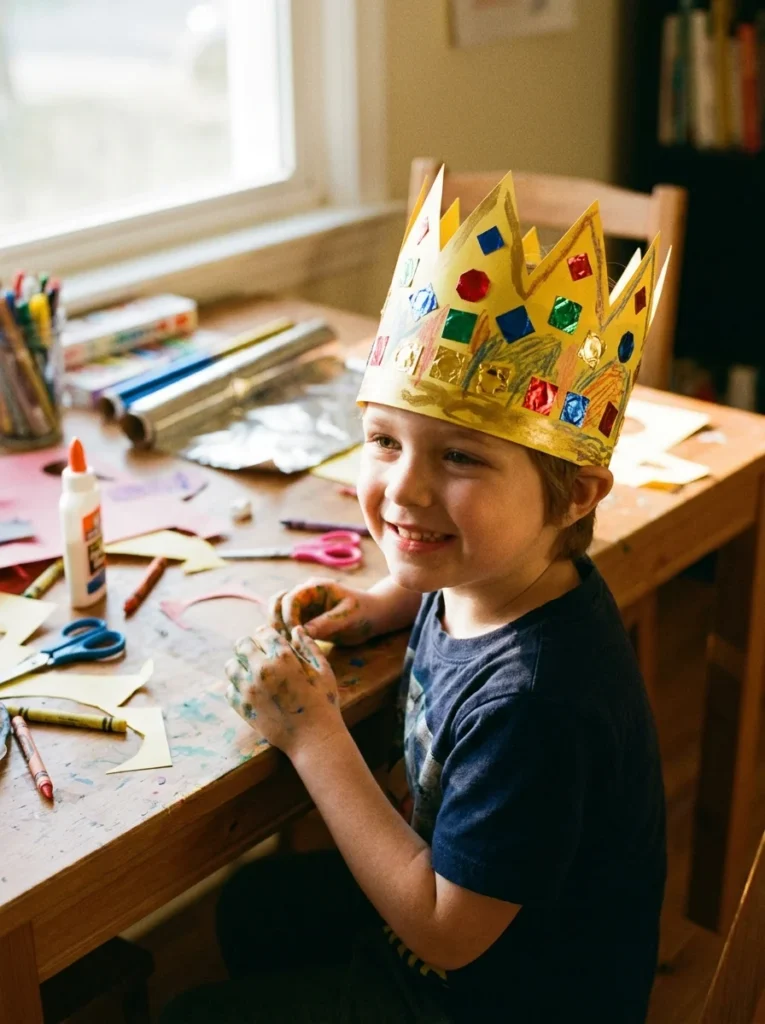
13. Paper Crown
Every kid should own a crown they made themselves. It’s a simple afternoon project with maximum drama.
What you need: Yellow or gold construction paper, scissors, stapler or tape, markers, stickers, foil paper (optional).
How to make it:
- Cut a strip of construction paper long enough to fit around your child’s head, plus a couple of inches for overlap.
- Cut a zigzag pattern along the top edge to make the crown points.
- Decorate with markers, stickers, or glued-on foil “gems.”
- Measure around the head, then staple or tape the ends together.
Done in 10–15 minutes.
Budget tip: Gold and silver cardstock costs about $1–2 per sheet and makes 2–3 crowns.
Add foil paper “jewels” by cutting small circles or diamonds and gluing them on. Crumpling and smoothing the foil first gives it a gem-like texture.
This is a great birthday craft. Make one for the birthday child, or set up a crown-making station where every guest decorates their own.
14. Paper Mosaic Art

Paper mosaics are slow, meditative, and produce genuinely beautiful art. They’re perfect for kids who like detail work.
What you need: Colored paper or tissue paper, glue (diluted slightly with water works well), black cardstock or heavy paper for the background, scissors.
How it works:
- Draw a simple outline on the black background, a fish, a sun, a flower.
- Tear or cut colored paper into small pieces.
- Glue the pieces inside the outline, fitting them together like a puzzle.
- Leave small gaps between pieces for a stained-glass effect.
Budget tip: Use old magazines. The glossy pages provide a huge range of colors for free.
This works beautifully with tissue paper, which lets light through slightly when glued on white paper, creating a luminous stained-glass window effect.
Hang finished pieces in a window for the best effect.
This project works for ages 5 and up. Younger kids may need pre-drawn outlines and pre-torn paper pieces. Older kids can draw and cut everything themselves.
15. 3D Paper Animals
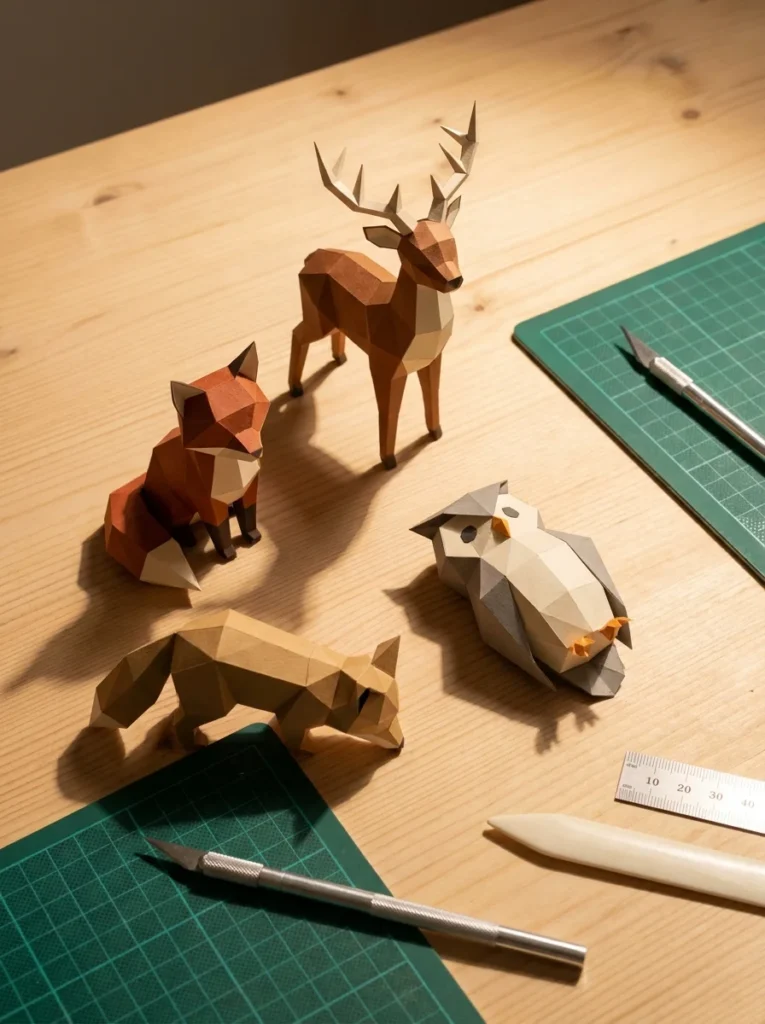
These are a step up from flat crafts, and the results look genuinely impressive.
3D geometric animals are made by folding and gluing flat paper into faceted shapes.
What you need: Cardstock (heavier paper works better here), scissors, craft glue, a bone folder or dull knife for scoring, templates (free printables are widely available online).
The process:
- Print a template onto cardstock.
- Cut out the flat shape.
- Score along all fold lines with a dull edge.
- Fold all the tabs.
- Glue tabs together in order, holding each one until set.
Popular animals include foxes, deer, owls, and geometric cats.
Budget tip: Download free templates online and print on regular cardstock. Total cost is under $1.
This project suits older kids, 9 and up, or younger kids with adult help during the gluing phase.
Finished animals look great on a bookshelf, desk, or windowsill. They make excellent room decorations that actually look intentional.
16. Paper Lanterns
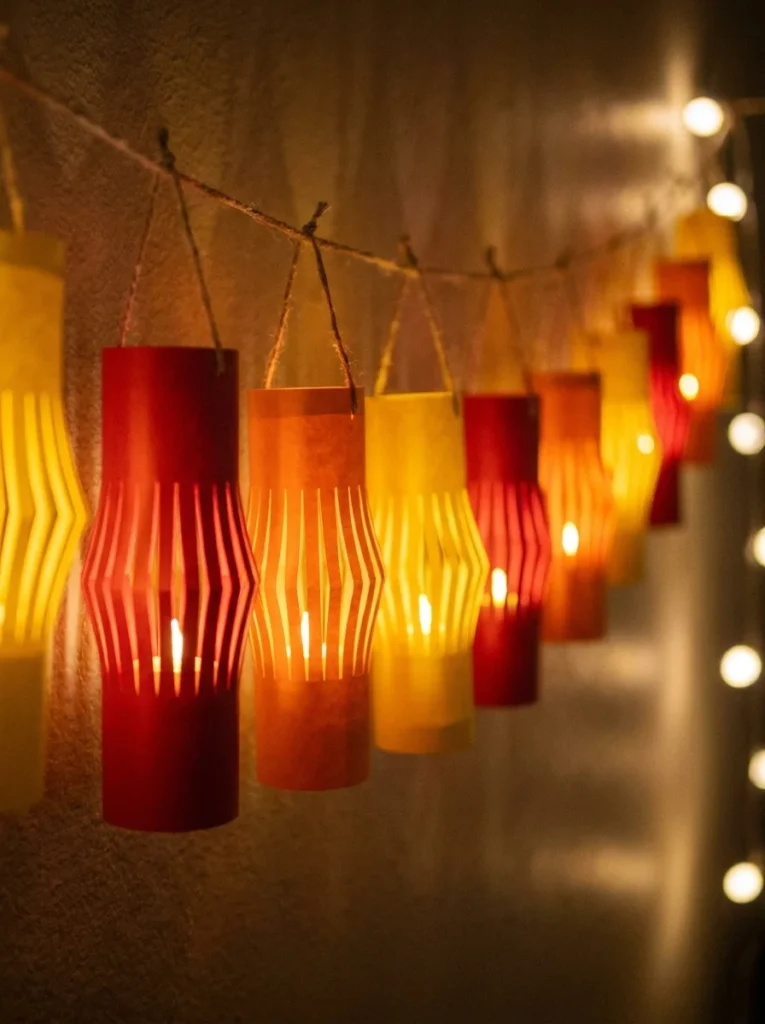
Paper lanterns look festive hanging from a ceiling, a bedroom wall, or across a porch.
What you need: Construction paper or cardstock, scissors, tape or stapler, battery-operated tea lights (if you want them to glow).
Classic cylinder lantern:
- Fold a sheet of paper in half lengthwise.
- Cut slits along the folded edge, stopping about 1 inch from the open edge.
- Unfold the paper.
- Roll it into a cylinder, slit-side out, and tape or staple the ends together.
- Add a paper handle across the top.
Drop a battery-operated tea light inside for a glowing effect.
Budget tip: Paper lanterns cost nothing to make. A pack of battery tea lights from the dollar store adds gentle glow.
These are great for Chinese New Year, birthday parties, outdoor summer evenings, or bedroom decorating.
Make them in a range of sizes, small ones from index cards look sweet alongside large ones made from full sheets.
17. Paper Pinwheel
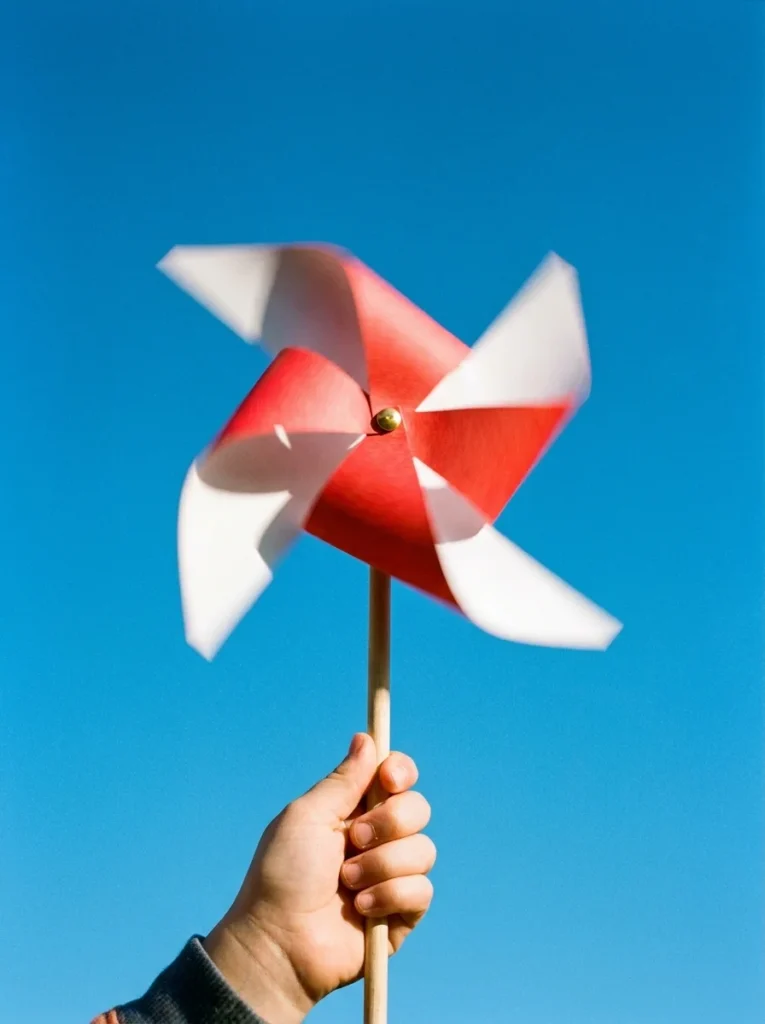
There’s something deeply satisfying about watching a pinwheel spin in the wind.
What you need: Cardstock or heavy paper, scissors, a brad (paper fastener), a straw or wooden dowel, and a ruler.
How to make one:
- Cut a square of paper (about 5–6 inches).
- Draw lines from each corner toward the center, stopping about 1.5 inches from the middle.
- Cut along these lines.
- Bring every other point to the center.
- Push a brad through all the points and the center.
- Attach to a straw or dowel through the brad.
The brad should be loose enough that the pinwheel spins freely.
Budget tip: Brads cost about $2 for a pack of 100. One pack makes 100 pinwheels.
Decorate the paper before cutting, bold patterns look especially dramatic when spinning.
These are wonderful outdoor toys that kids make and immediately play with. Take them outside and watch them go.
18. Paper Bag Kite
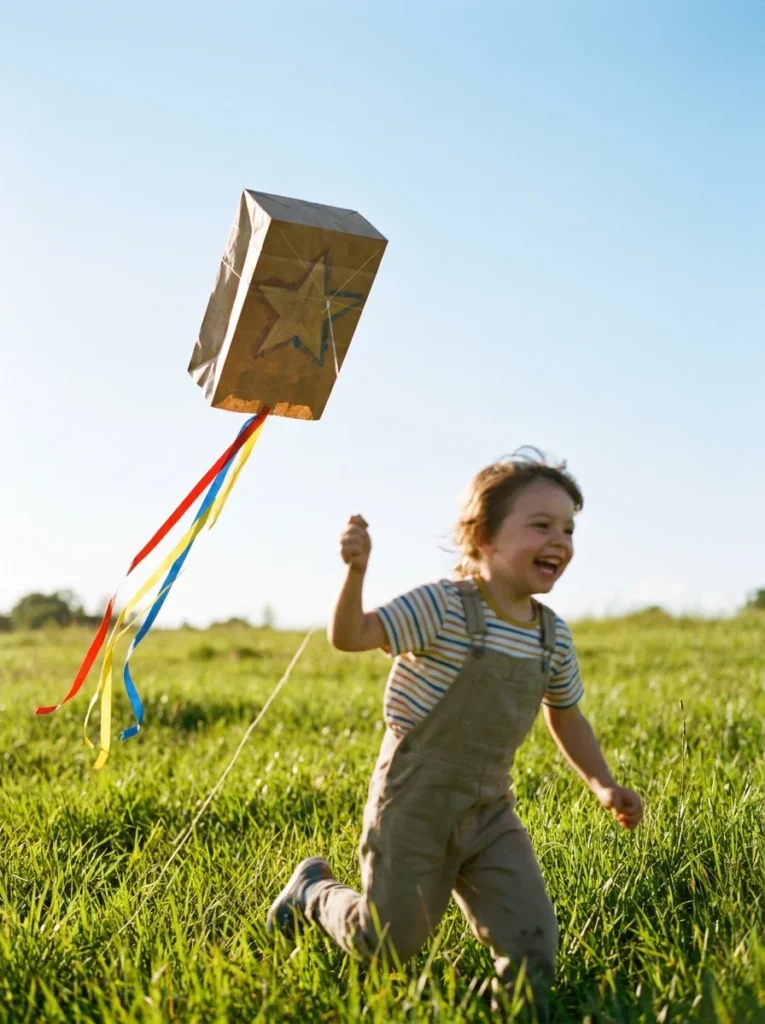
This kite doesn’t need a frame or fancy materials, and it actually flies.
What you need: A paper grocery bag, string or yarn, ribbons or strips of paper for tails, tape, markers or paint.
How to build it:
- Decorate the outside of the bag with markers or paint.
- Fold down the top edge of the bag and tape it to reinforce it.
- Punch two small holes on opposite sides of the opening.
- Thread string through both holes and knot it, creating a bridle.
- Attach a long piece of string to the middle of the bridle.
- Tape ribbon strips to the bottom corners as tails.
Open end faces back when flying. The bag catches air.
Budget tip: Paper bags, string, and ribbon from gift wrap, most of this you already have.
This works best on a breezy day with a wide-open outdoor space. Kids run with them first, then find the right angle to let them float.
19. Paper Bowl
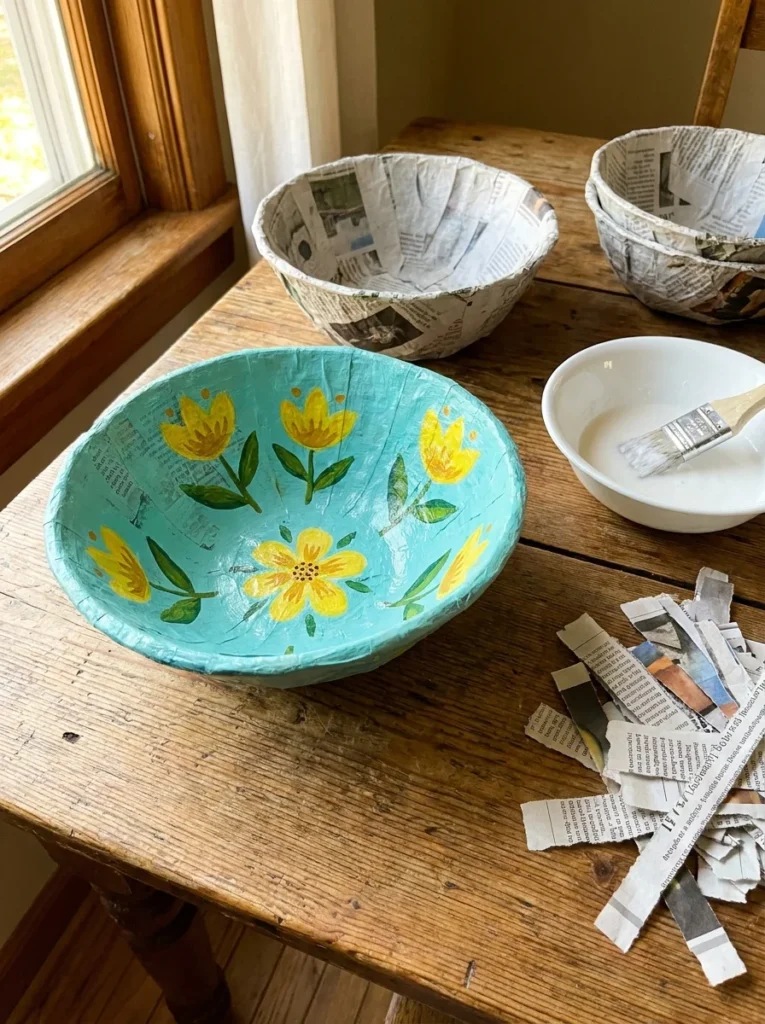
Papier-mâché bowls are one of those crafts that feels almost like magic. You start with soggy newspaper and end up with something you can actually use.
What you need: Newspaper, white glue mixed with water (1:1 ratio), a bowl to use as a mold, petroleum jelly, paint.
How to make it:
- Coat the outside of a bowl with petroleum jelly so the paper won’t stick.
- Tear newspaper into strips.
- Dip each strip in the glue-water mix and smooth it over the bowl’s outside.
- Apply 3–4 layers, letting each dry before adding the next.
- Let dry completely (usually overnight).
- Gently pop the paper bowl off the mold.
- Paint and decorate.
Budget tip: Newspaper is free or nearly free. White school glue costs about $2.
These bowls make excellent gifts. A hand-painted papier-mâché bowl for a grandparent is a keepsake.
Kids aged 7 and up manage this well independently. Younger kids need help with the gluey strips.
20. Paper Fortune Teller
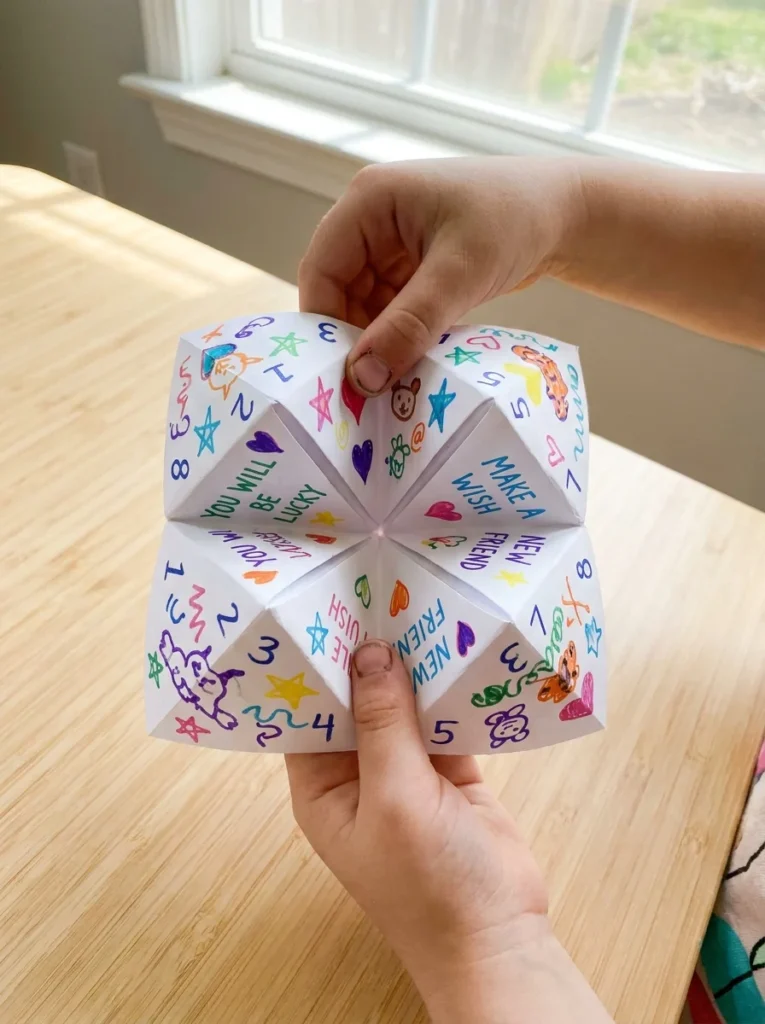
Paper fortune tellers, also called cootie catchers, have been entertaining kids for generations. They’re simple to make and immediately become a toy.
What you need: One sheet of square paper, markers.
How to fold it:
- Fold the square diagonally both ways, then open.
- Fold all four corners to the center.
- Flip over, fold all corners to the center again.
- Fold in half, then in half again.
- Slip thumbs and forefingers into the four pockets.
Decorate it:
- Write numbers 1–8 on the outside flaps.
- Write colors inside.
- Write fortunes under each inner flap.
Budget tip: One piece of paper. Free if you have any printer paper at home.
This project works for ages 6 and up. Once kids learn to make one, they’ll make a dozen to share with friends.
Great for sleepovers, classroom parties, or just an afternoon activity. The fortunes are always funny when kids write them.
21. Paper Butterfly Mobile
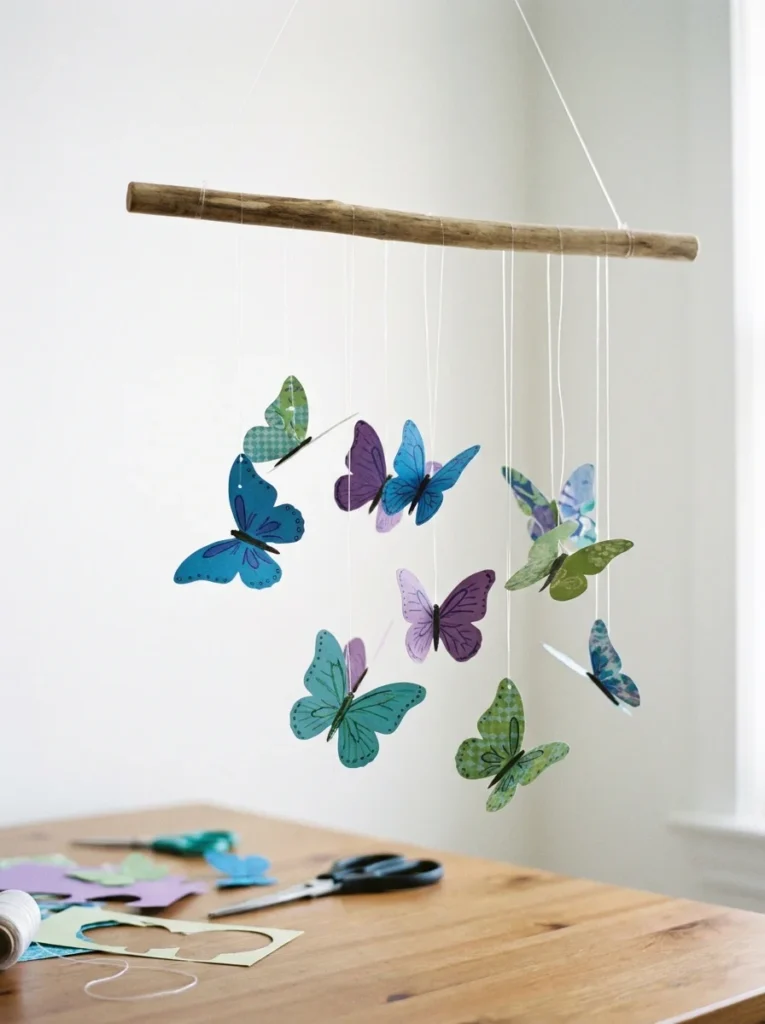
A paper butterfly mobile adds color and movement to any bedroom or classroom, and it’s made entirely from paper.
What you need: Colored paper or cardstock, scissors, markers, thread or string, a wooden dowel or stick, tape.
Make the butterflies:
- Cut a simple butterfly shape from paper (trace a stencil or freehand it).
- Fold in half lengthwise along the body.
- Open slightly and pinch at the center to give the wings a realistic lift.
- Decorate with markers.
- Attach a length of thread to the body center.
Assemble the mobile:
- Hang multiple butterflies from a dowel or branch at varying heights.
- Balance the dowel from a single central string.
Budget tip: Use leftover wrapping paper or magazine pages for extra color and pattern.
Make different sizes for visual interest, large butterflies at the top, smaller ones lower down.
This project works best for kids aged 6 and up who can manage scissors and thread.
22. Paper Spinner Tops
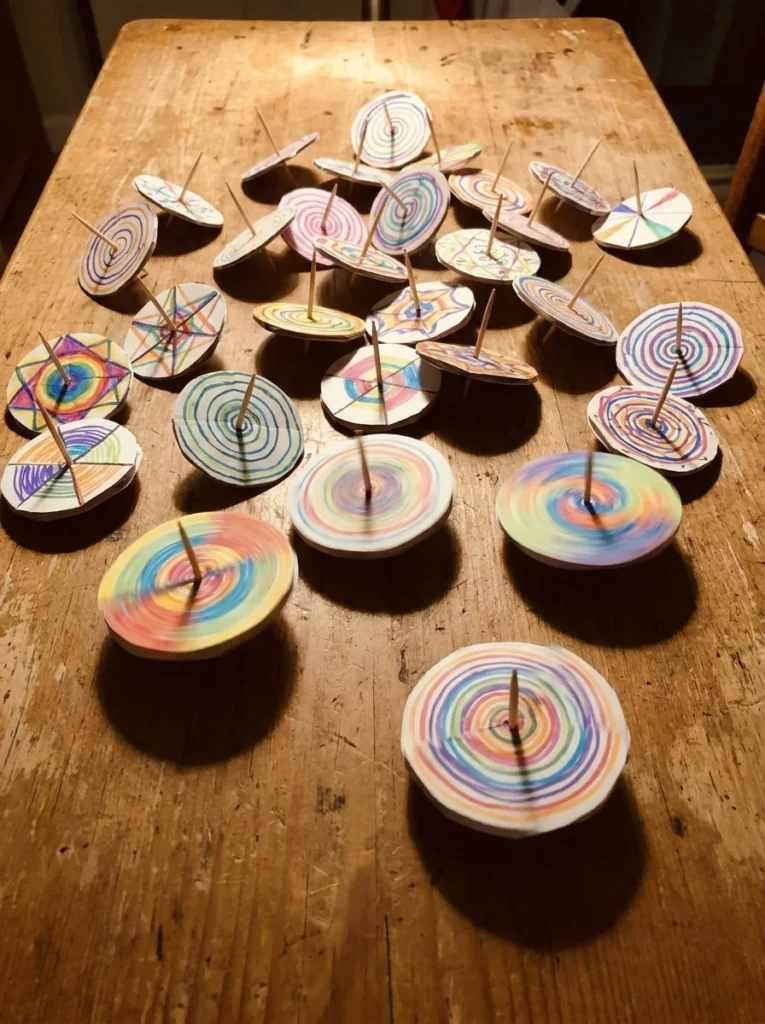
Paper tops are a satisfying combination of craft and toy. Kids make them and immediately play with them.
What you need: Cardstock or thick paper, a toothpick or short pencil stub, scissors, markers.
How to make one:
- Cut two identical circles from cardstock (about 2–3 inches diameter).
- Decorate each circle with bold, colorful patterns, spirals look especially great when spinning.
- Glue the two circles together back-to-back.
- Carefully push a toothpick through the center.
- Adjust the toothpick so the disk sits near the bottom, not in the middle.
Spin by pinching the toothpick between two fingers and twisting quickly.
Budget tip: Toothpicks cost about $1 for a box of 200. A single pack of cardstock handles many tops.
The patterns kids draw look completely different once the top is spinning, a fun surprise every time.
Hold a spinning competition. Whose top spins longest? On whose top does the pattern look best while spinning?
23. Paper Journal or Mini Booklet
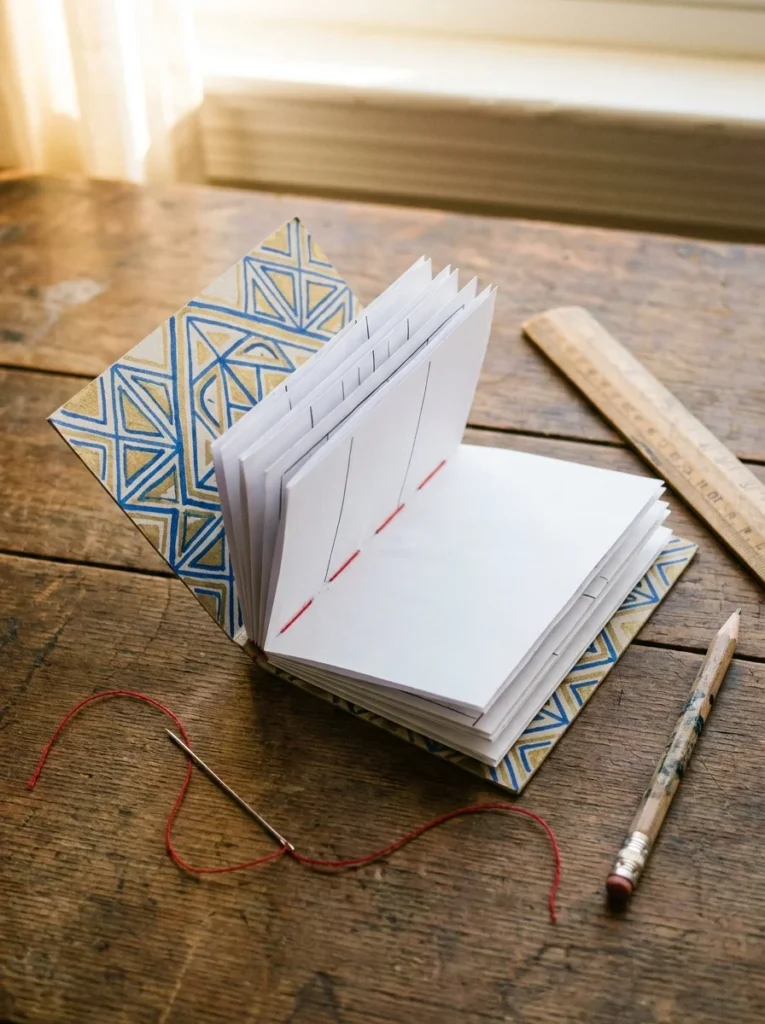
Making a little book is one of the most rewarding paper crafts, kids instantly want to fill it with drawings, stories, or lists.
Simple 8-page booklet from one sheet:
- Fold one sheet of paper in half lengthwise.
- Fold in half widthwise.
- Fold in half again the same direction.
- Unfold everything once to the lengthwise fold.
- Cut a short slit along the center fold between the middle two sections.
- Refold lengthwise and push the ends together so the cut opens into a diamond shape.
- Fold into a book.
What you need: One sheet of paper. Scissors.
Budget tip: Entirely free if you have printer paper.
Make a cover from cardstock and slip it over the pages. Decorate the cover with markers or collage.
Kids can use their booklet as a sketchbook, a story journal, a nature diary, or a travel log.
This is a wonderful project for reluctant writers. When kids make the book themselves, they’re far more motivated to fill it.
24. Paper Pop-Up Cards
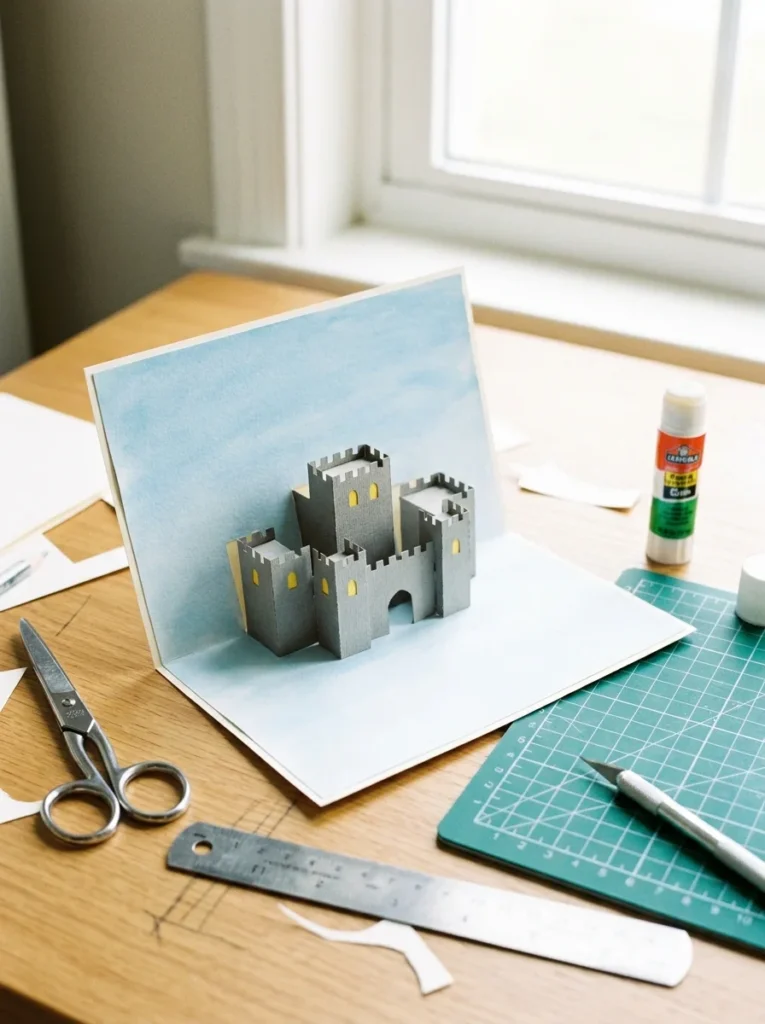
Pop-up cards feel like little paper engineering projects, and kids are always amazed by how they work.
The basic mechanism is simple:
- Fold a piece of cardstock in half for the card base.
- Cut two short parallel slits on the fold, about 1 inch long, 1 inch apart.
- Push the tab through to the inside of the card.
- Open and close the card, the tab pops up.
- Glue a small shape onto the tab: a heart, a star, a birthday cake.
What you need: Cardstock, scissors, glue, markers.
Budget tip: Cut cardstock from old cereal boxes for the pop-up pieces.
Once kids understand the basic tab mechanism, they can combine multiple tabs for more complex scenes, a whole jungle scene, a castle, a birthday party.
These make incredible gifts. A handmade pop-up birthday card is genuinely special. For more handmade gift ideas that kids can help with, this collection of creative easy DIY gifts has plenty of thoughtful options.
Ages 8 and up manage pop-ups well. Younger kids can do the decorating while an adult handles the cutting.
25. Paper Straw Rocket
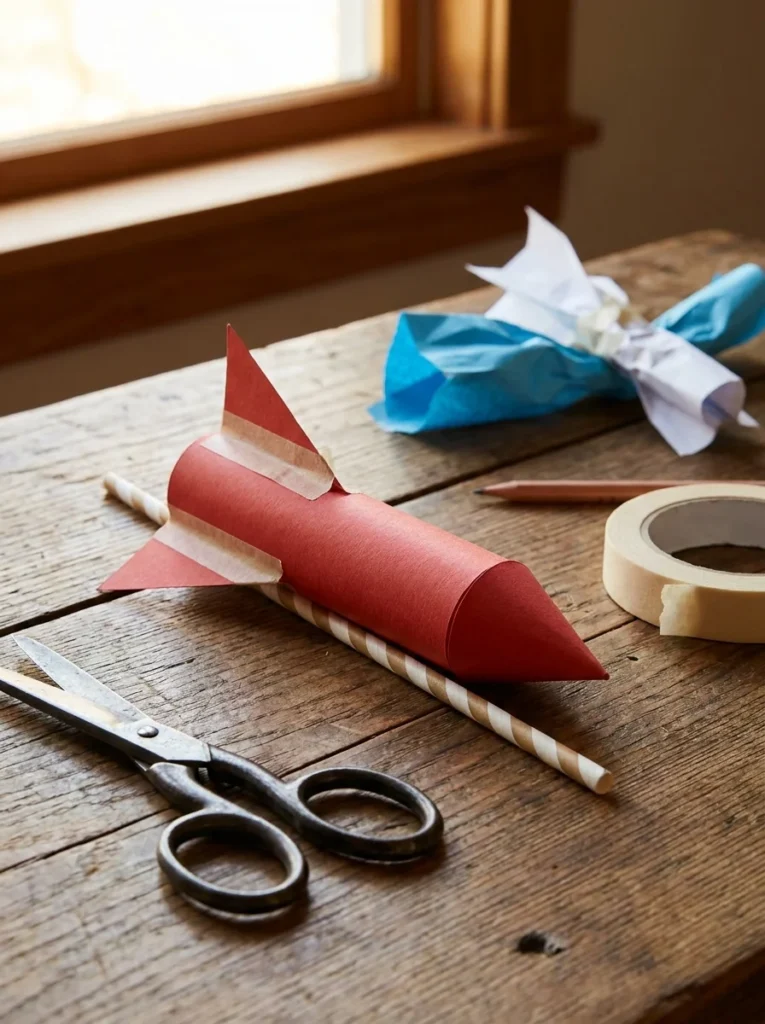
Paper straw rockets are simple, cheap, and ridiculously fun. Kids can make several and launch them across the room.
What you need: Paper, tape, scissors, a paper straw.
How to build the rocket:
- Cut a small rectangle of paper and roll it tightly around a pencil.
- Tape the seam to hold the tube shape.
- Slide off the pencil, this is your rocket body.
- Pinch and tape one end to close it (this is the nose).
- Cut three small triangles for fins and tape them to the open end.
- Slide the rocket onto a paper straw.
To launch: Put the straw to your lips and blow hard.
The rocket shoots several feet across the room.
Budget tip: Paper straws cost around $3 for a pack of 100. The rocket itself uses a single sheet of paper.
Make a launch target, a circle on the floor, and try to land the rocket inside it from across the room.
Older kids can experiment with fin size and nose shape to see how it affects distance and accuracy.
Conclusion
Paper crafts are genuinely one of the best investments of a slow afternoon. They cost almost nothing, require no special equipment, and leave kids with something real, a toy they made, a card they gave, a decoration hanging in their room. These projects grow with children, too. A 4-year-old tearing tissue paper for a mosaic and a 10-year-old engineering a pop-up card are both fully engaged, both building real skills, both feeling proud of the result.
You don’t need to tackle all 25 at once. Pick two or three that match your child’s age and interest, gather what you have at home, and just start. The supplies are already there. The only thing missing is the time set aside to make it happen. Block off an afternoon this week, and watch what your kids can create with a few sheets of paper and a pair of scissors. If you’re looking for even more inspiration, these easy paper crafts for beginners and fun paper crafts for your next party are great places to keep the creativity going.