

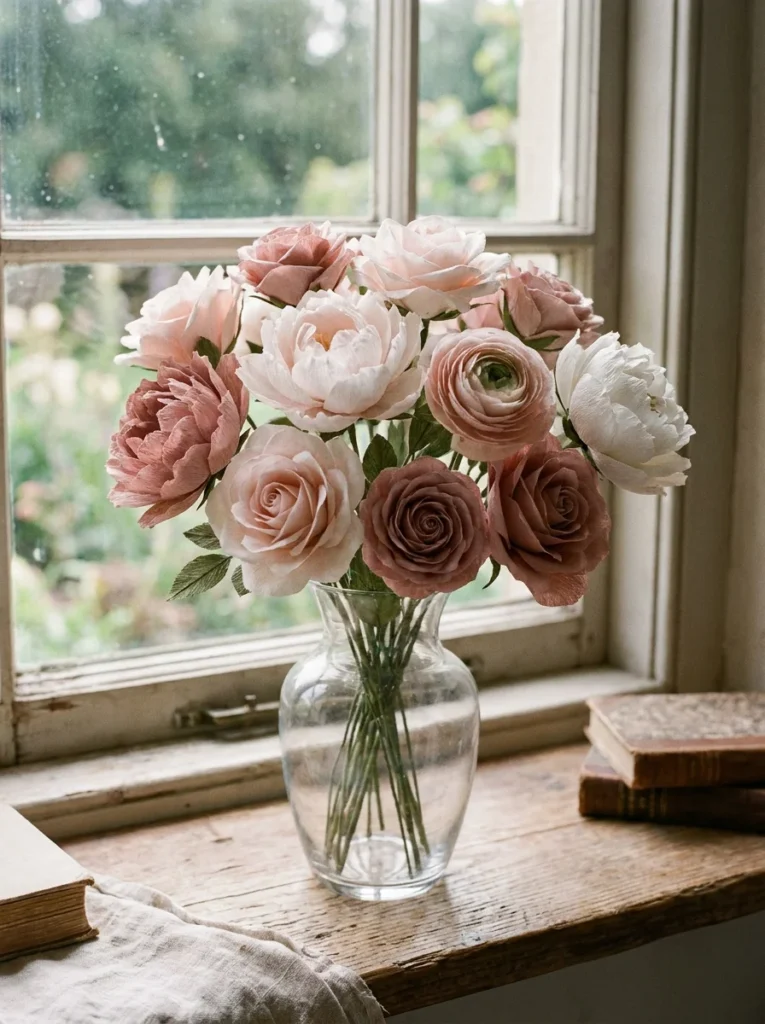
Imagine walking into a room filled with gorgeous blooms that never wilt, never need watering, and cost almost nothing to create. That’s the magic of paper flowers and once you make your first one, you won’t be able to stop. Whether you’re decorating for a wedding, sprucing up your home, or looking for a relaxing weekend hobby, paper flowers are the ultimate creative project for all skill levels.
The best part? You don’t need to be an artist. With just a few basic supplies and about 20 minutes, you can craft something truly show-stopping. Let’s get into it.
What You’ll Need Before You Start
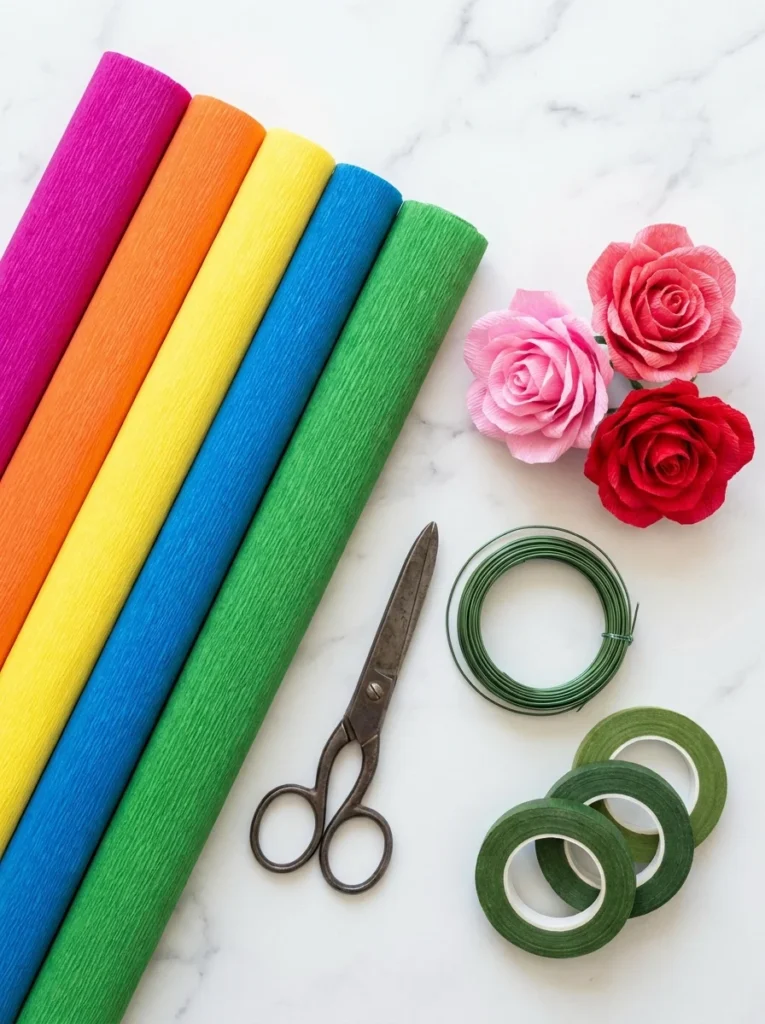
Gather your supplies first so you’re not hunting for scissors mid-fold. Here’s your quick checklist:
- Tissue paper or crepe paper (soft, flexible, and perfect for realistic-looking petals)
- Floral wire (18–20 gauge works great)
- Green floral tape
- Scissors
- A hot glue gun (optional but helpful for extra hold)
- Wire cutters
Crepe paper gives the most lifelike texture, but tissue paper is easier to find and works beautifully too. For your first try, pick two or three colors you love, think soft blush, coral, and ivory for a romantic vibe, or bold red and yellow for a fiesta feel.
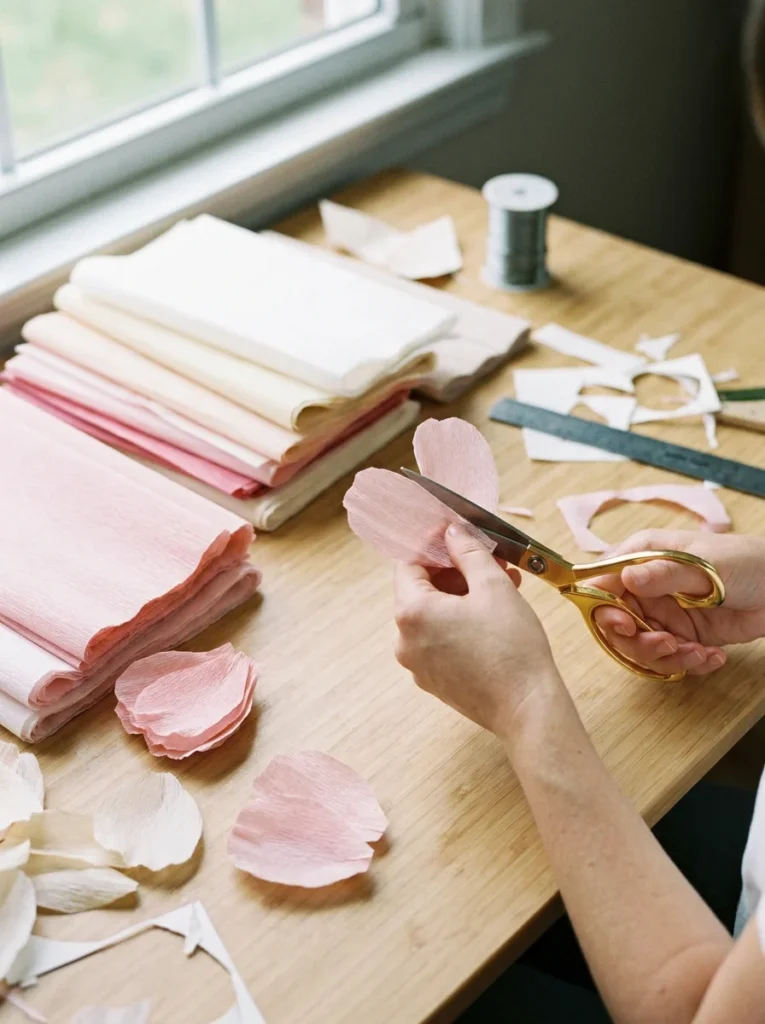
Step 1: Cut Your Petals
Stack 4–6 sheets of your paper on top of each other and cut out petal shapes freehand. Don’t stress about perfection, slightly uneven edges actually look more natural and realistic.
- For roses: Cut rounded, wide petals, roughly the size of your palm
- For dahlias: Go with smaller, narrower petals
- For peonies: Mix large and small petal sizes for layered fullness
Cut at least 15–20 petals per flower. The more layers, the more lush and full your bloom will look.
Step 2: Shape and Curl the Petals
This is the step that transforms flat paper into something magical. Take each petal and gently cup it in your fingers, pressing your thumbs into the center to create a natural curve. For extra realism:
- Curl the tips outward by wrapping them around a pencil
- Pinch the base of each petal slightly to create a slight gather
- Ruffle the edges of crepe paper by gently stretching the paper sideways
Take your time here. Shaping is what gives each flower its character.
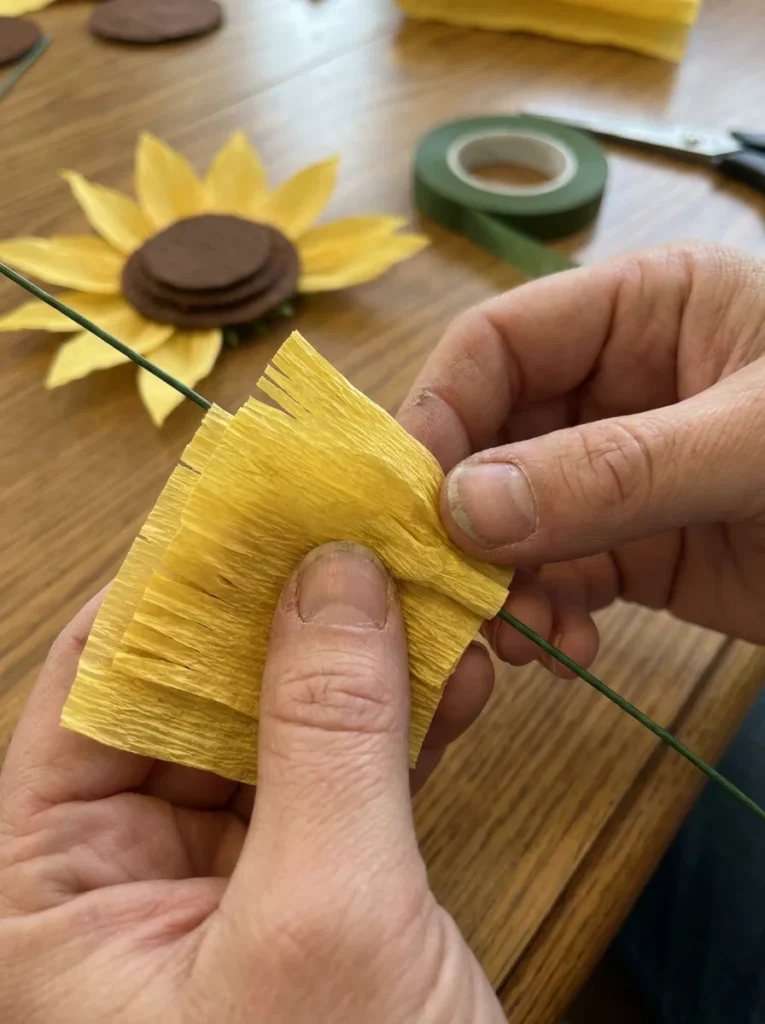
Step 3: Build the Center
Cut a small rectangle of paper (about 3 inches wide), fringe the top half with your scissors, and roll it tightly around the top of your floral wire. Secure it with floral tape or a tiny dot of hot glue.
This frilly center is what gives your flower that full, realistic look from any angle. For a rose, skip the fringe and simply roll one small petal tightly at the center instead.
Step 4: Layer the Petals Around the Center
Now the fun begins! Starting with your smallest petals, wrap them one by one around the center, slightly overlapping each one and securing with floral tape as you go. Work your way outward, using larger petals as you build toward the outer layers.
A few tips to keep in mind:
- Alternate the placement of each petal so they don’t line up in rows
- Angle outer petals slightly downward for a fully open bloom look
- Don’t wrap too tightly, a little looseness adds realism
Keep adding petals until you’re happy with the fullness. There’s no wrong answer here!
Step 5: Finish the Stem
Once all your petals are on, wrap the entire stem from the base of the flower all the way down the wire with green floral tape. Pull the tape slightly as you wrap, it activates the adhesive and creates a smooth, professional finish.
Want to add leaves? Cut leaf shapes from green paper, pinch the base, and tape them onto the stem at a natural angle. Now step back and admire your work.
A Few Pro Tips to Elevate Your Flowers
- Blend colors by layering two shades of paper together before cutting petals
- Use a bone folder to get sharper creases if you prefer a more geometric, origami-style look
- Mist crepe paper lightly with water and scrunch it for an even more textured, organic feel
- Go oversized, giant paper flowers (12–18 inches wide) make incredible wall decorations and photo backdrops
You’ve Got This, Now Go Make Something Beautiful
Paper flowers are one of those crafts that look impressive but are genuinely beginner-friendly. Once you nail the basics, you can experiment endlessly, different papers, sizes, colors, and styles mean no two flowers are ever exactly alike.
Save this guide for your next craft night, pin it for your next event, or share it with a friend who loves DIY. There’s nothing quite like handing someone a bouquet that you made entirely by hand. 🌸