

You don’t need a craft store run or a big budget to display your favorite memories beautifully. A handful of cardstock, some glue, and about an hour of your time are all it takes to make a photo frame that looks genuinely handmade in the best possible way. These paper frames are sturdy, customizable, and far more personal than anything mass-produced. Whether you’re making one for your own wall or wrapping it up as a gift, the result is always something worth keeping.
What You’ll Need Before You Start
Gathering your materials first makes the whole process faster and more enjoyable. Nothing here is hard to find, and most of it you probably already own.
Materials:
- Thick cardstock or cereal box cardboard (for the frame base)
- Decorative paper, patterned scrapbook paper, or washi tape
- A craft knife or sharp scissors
- A metal ruler
- A cutting mat or thick magazine to protect your surface
- PVA glue or a glue stick
- A pencil and eraser
- A small bead of glue or a folded triangle of cardstock (for the easel stand on the back)
- Optional: acrylic paint, stamps, dried flowers, or twine for decoration
Photo size tip: Decide on your photo size before you cut anything. A standard 4×6 inch photo is the most common, but 3×3 square prints (popular from phone printing apps) also work beautifully with this method.
Step 1: Cut Your Frame Base
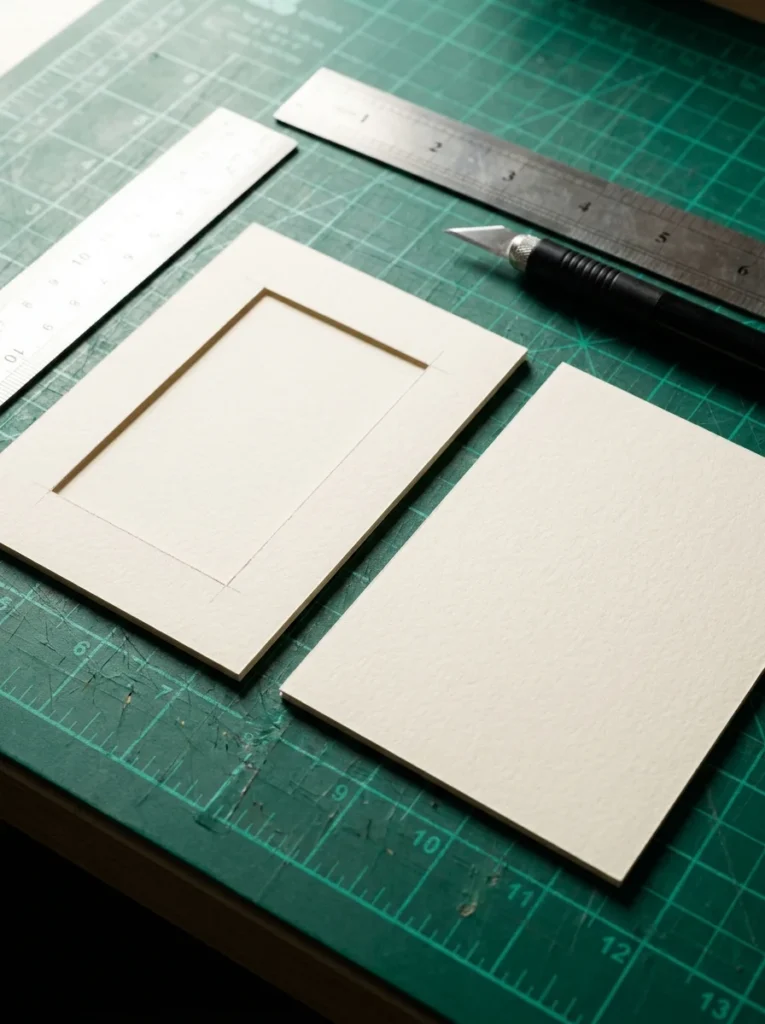
Start by cutting two identical rectangles from your cardstock. If your photo is 4×6 inches, cut your rectangles to 5×7 inches, this gives you a half-inch border all the way around.
On one rectangle only, mark the window opening:
- Measure half an inch in from each edge
- Draw the inner rectangle lightly in pencil
- Use your craft knife and metal ruler to cut it out cleanly
This piece becomes your frame front. The uncut rectangle is your frame back.
Pro tip: Cut the window slightly smaller than your photo so the photo edges are hidden behind the frame border. Nothing looks less polished than a photo peeking out unevenly.
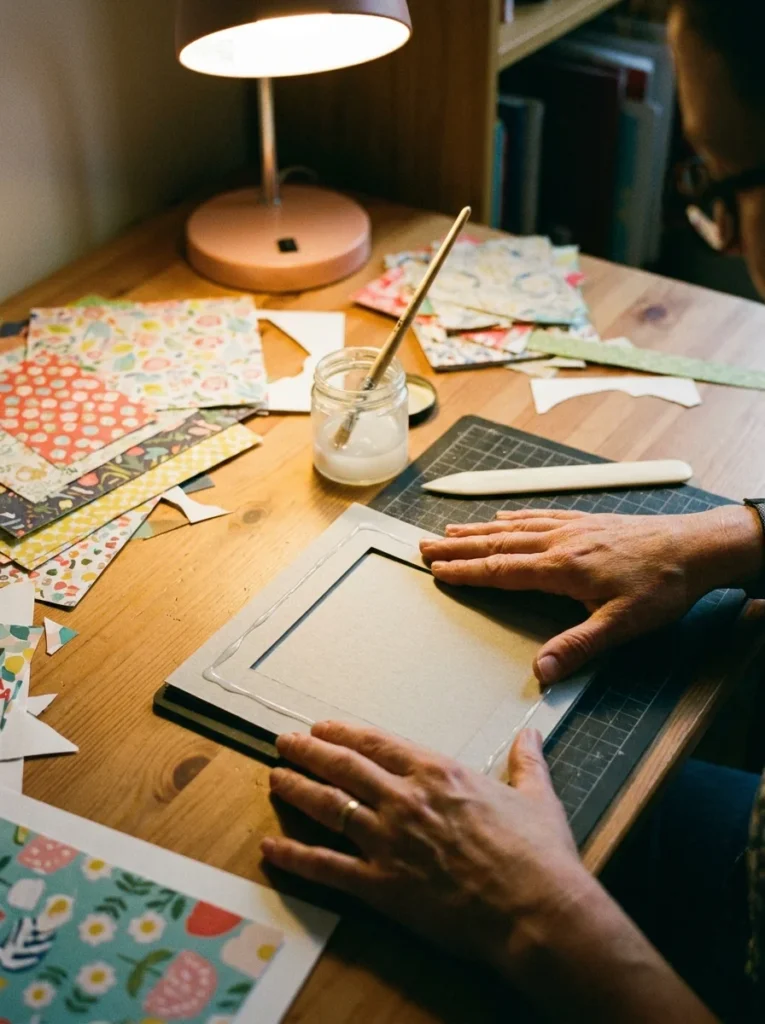
Step 2: Decorate the Frame Front
This is the step where your frame becomes yours. Lay the frame front flat and decide on your look before gluing anything down.
Ideas that work really well:
- Cover the border with strips of patterned scrapbook paper, mitering the corners at 45° angles for a clean finish
- Wrap washi tape in diagonal stripes across the frame for a graphic, modern look
- Paint the border with a single coat of acrylic paint, let it dry, then stamp a repeating pattern on top
- Glue small paper flowers in the corners for a cottage-style frame
- Layer torn strips of tissue paper in overlapping colors for a decoupage effect
Corner tip: Mitered corners (cut at 45° angles where two strips meet) make a huge difference to the final look. Use a small piece of scrap paper to practice the angle before cutting your decorative paper.
Step 3: Assemble the Frame
Once your frame front is decorated and fully dry, it’s time to put the two pieces together.
- Apply glue along three sides of the frame back, left, right, and bottom edges only
- Press the decorated frame front on top, aligning all edges carefully
- Leave the top edge unglued, this is the slot where your photo slides in
- Press firmly and let it dry flat under a heavy book for at least 20 minutes
Once dry, slide your photo in through the open top. If you’d like a permanent display, add a small line of glue behind the photo once it’s positioned correctly.
For the easel stand: Cut a strip of cardstock about 1×4 inches. Score it 1 inch from one end and fold. Glue the short flap to the center-back of the frame at a slight angle. This lets the frame stand upright on any flat surface.
Step 4: Add the Finishing Touches
The frame is built, now make it memorable.
Small finishing details change everything:
- Tie a piece of twine horizontally across the back and attach a loop at the top for wall hanging
- Add a small paper label to the back with the date and occasion, future you will appreciate this
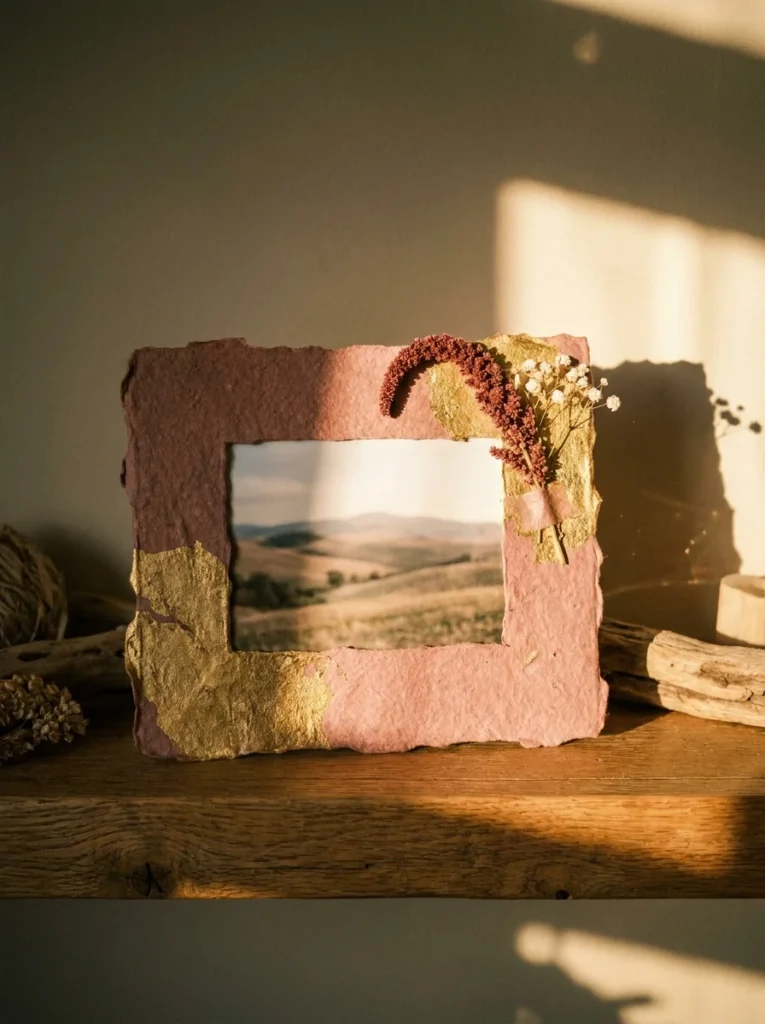
- Seal the outside of the frame with a thin coat of Mod Podge for a polished, slightly glossy finish that also protects the paper from humidity
- Press a dried flower or small leaf under the Mod Podge layer in one corner for a botanical effect
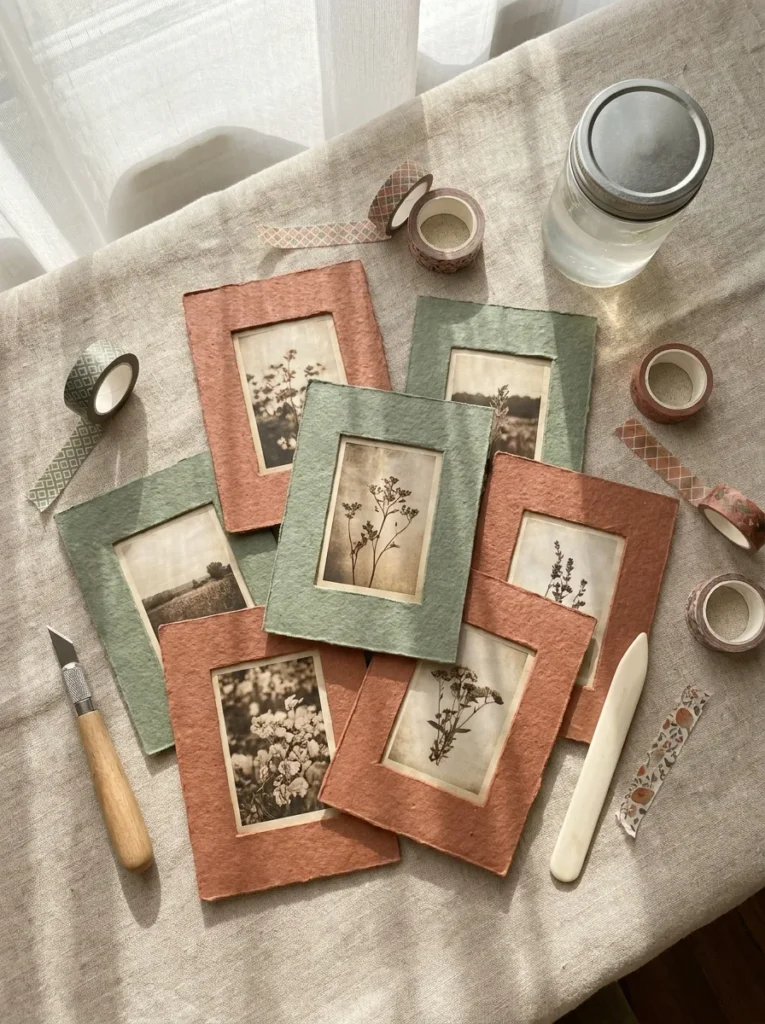
Group three frames together on a shelf in slightly different sizes for a mini gallery display. Mix decorative styles, one geometric, one floral, one painted for a collected, curated look that never feels matchy-matchy.
Save This and Start Folding
Making your own paper photo frames is one of those crafts that gives back far more than the time you put in. You end up with something that’s completely original, built for a specific photo, and meaningful in a way that a store-bought frame simply isn’t.
Start with one frame. Use a photo you love, a few scraps of paper you already have, and whatever glue is in your drawer. Once it’s done and standing on your shelf, you’ll want to make five more, and that’s exactly the point.
Pin this for your next crafting afternoon and share your finished frames, they deserve to be seen.