

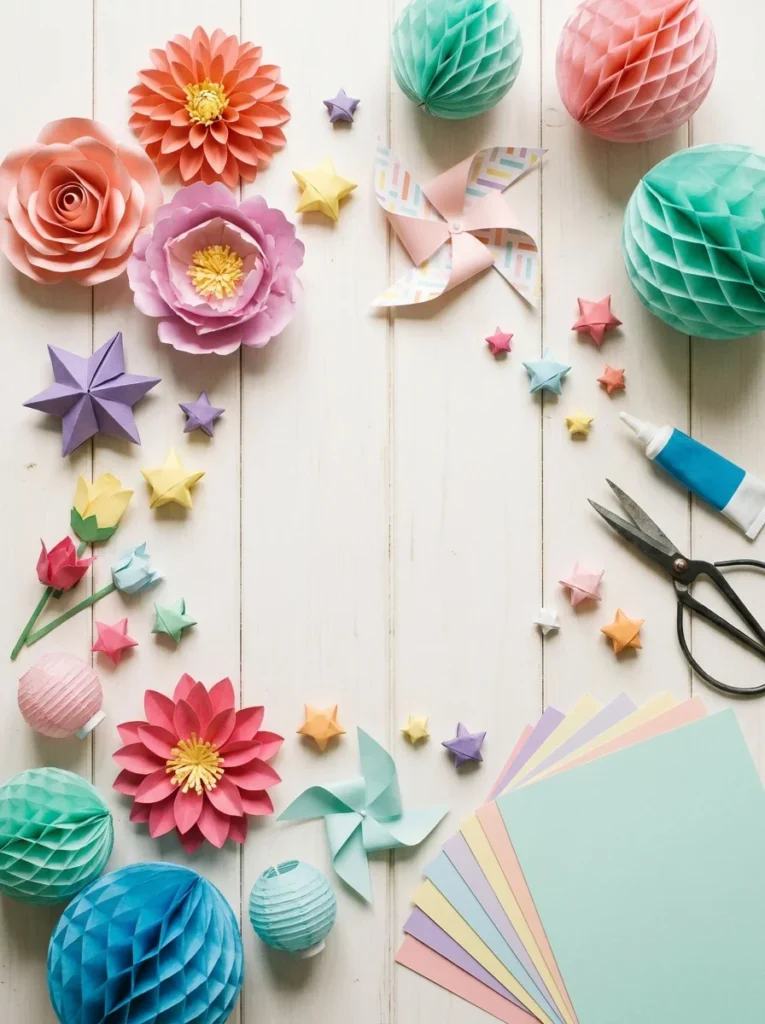
Paper decorations are one of the most affordable and rewarding ways to personalize any celebration. Whether you are hosting a birthday party, a baby shower, a holiday dinner, or a simple weekend gathering, paper crafts can completely change how a space feels.
You do not need expensive supplies or professional skills. A few sheets of cardstock, some scissors, and a little patience are all it takes. Paper crafts also give you total control over color, size, and style so your decorations match your exact theme. From wall displays to table centerpieces, the options are nearly endless.
This list covers 20 creative ideas you can actually make at home, with tips to keep each project affordable and beginner-friendly.
1. Paper Flower Bouquets
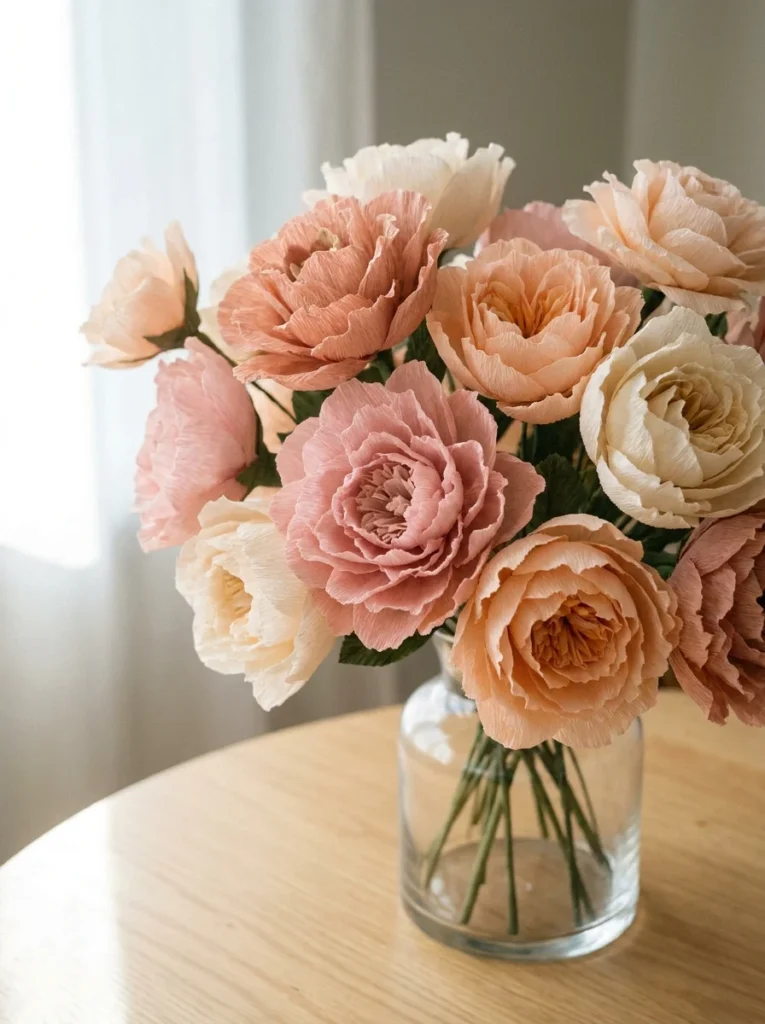
Paper flowers are a go-to decoration for almost any occasion. They last forever, never wilt, and cost a fraction of what real flowers do.
Start with crepe paper. It stretches and curves beautifully, which makes petals look realistic. You can find it at most dollar stores or craft shops for under $2 a roll.
Cut petal shapes freehand or print a template online. Gently stretch each petal between your thumbs to give it a natural curve. Layer five to eight petals around a small paper cone or styrofoam ball center.
Secure each petal with a hot glue gun. A glue gun costs about $5 and is worth every penny for paper crafts. Work from the outside in, overlapping petals slightly.
Once your flower is done, attach it to a wooden dowel, a wire stem, or even a chopstick wrapped in green floral tape.
Group three to five flowers together for a bouquet. You can also tape them flat to a wall or string them along a garland wire.
Budget tip: Use old magazines or newspaper for a rustic, textured look. Peonies, roses, and dahlias all work great with this method. If you want to go further with paper flowers, check out this guide on how to make stunning paper flowers in just 5 easy steps.
2. Paper Lanterns
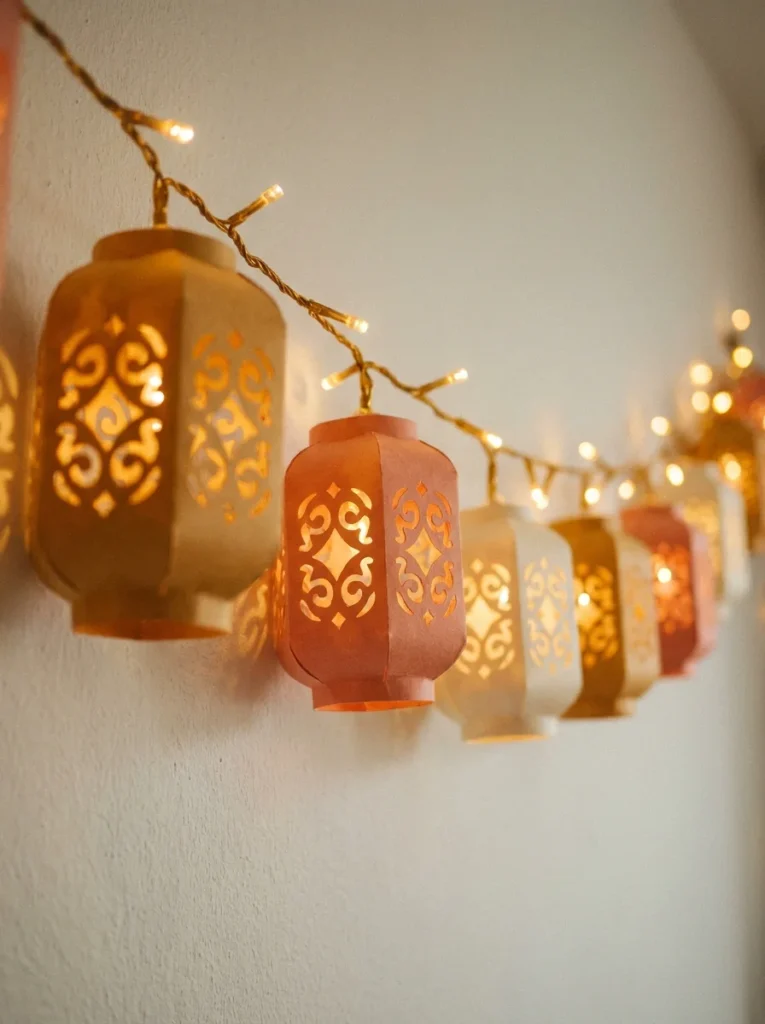
Paper lanterns add instant warmth and charm to any space. They work beautifully at weddings, birthday parties, garden gatherings, or cozy holiday setups.
To make a basic lantern, fold a rectangular sheet of cardstock in half lengthwise. Cut slits from the folded edge toward the open edge, leaving about an inch uncut at the top. Open the sheet, roll it into a cylinder, and tape or staple the ends together.
Add a strip of paper at the top as a handle. You can hang these from string lights, ceiling hooks, or a wooden dowel across a doorway.
For a glowing effect, place a battery-powered LED tea light inside. Never use real candles with paper, it is a fire hazard.
Use a craft hole punch or small scissors to cut decorative patterns into the paper before rolling. Stars, circles, and simple geometric shapes look stunning when lit from the inside.
Mix and match sizes. Small, medium, and large lanterns grouped together create a layered, professional-looking display.
Budget tip: Use plain white copy paper with a tea light inside for the most affordable version, the warm glow hides the simplicity.
3. Paper Bunting and Banners
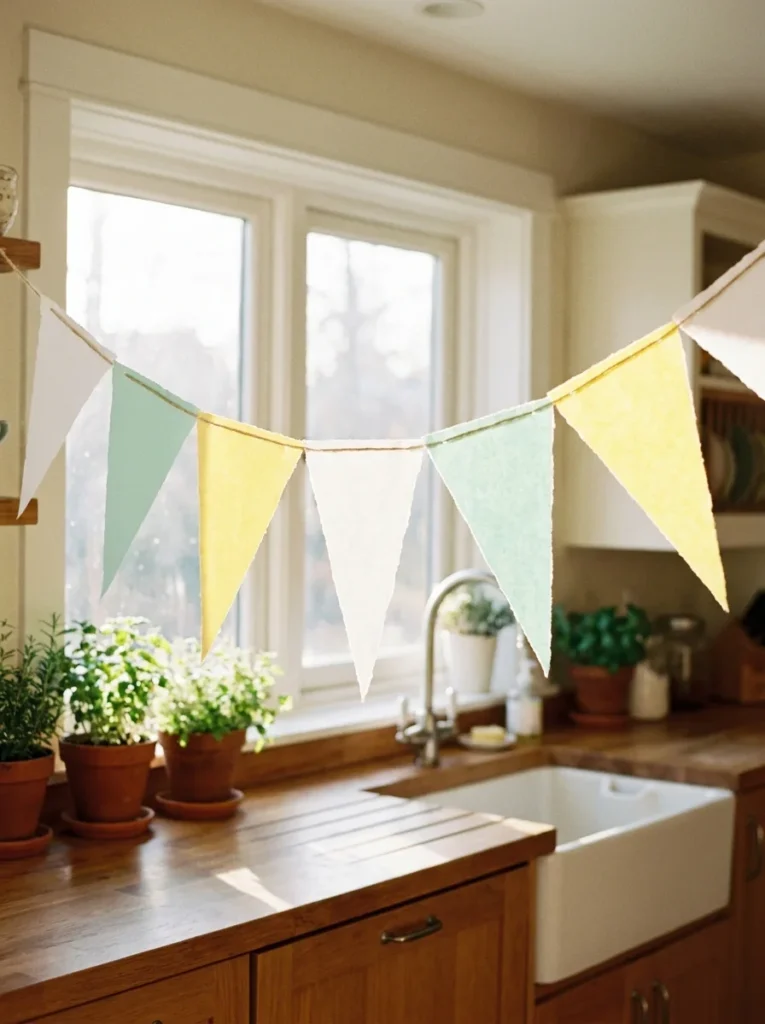
Bunting banners are quick to make, endlessly customizable, and work for literally any celebration. Think birthdays, baby showers, weddings, or even a simple Friday dinner at home.
All you need is cardstock, scissors, a hole punch, and twine or ribbon. Cut identical triangles from your paper, about 5 inches wide and 6 inches tall is a good standard size.
Punch a hole near each top corner. Thread your twine through the holes in a continuous line. Leave extra twine on each end for tying to a wall, chair, or string lights.
Want a cleaner look? Fold the top of each triangle over the twine and secure it with a glue stick instead of punching holes. This hides the twine inside the fold for a neater finish.
You can keep banners plain or add hand-painted patterns, polka dots, or geometric shapes using a sponge and craft paint. Watercolor paper gives a lovely soft texture if you want something that looks more artisan.
Mix solid colors with patterned paper for a layered, dynamic look.
Budget tip: Recycle old wrapping paper or paper shopping bags. Kraft paper bags produce a lovely warm, earthy bunting with minimal effort.
4. Paper Snowflakes
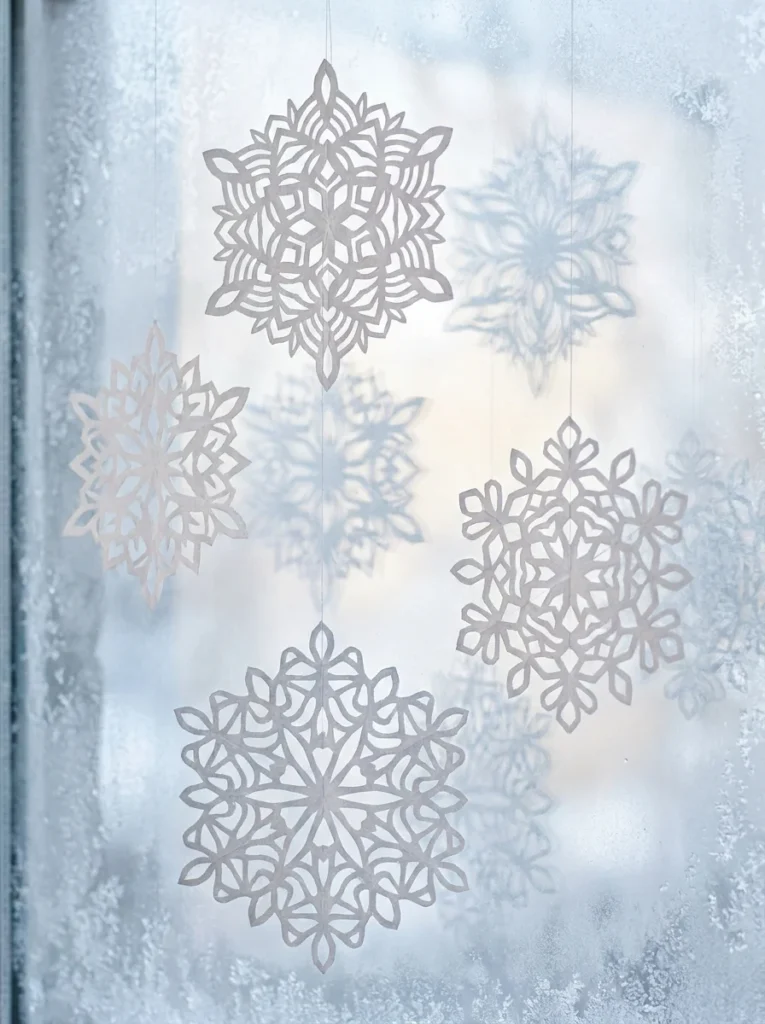
Paper snowflakes are a classic winter decoration that never goes out of style. They are also one of the easiest crafts on this list.
Fold a square piece of paper in half, then fold it into a triangle, and fold that triangle in half once more. Use scissors to cut small shapes, triangles, curves, semicircles, along all the edges and fold lines.
When you unfold, you will have a perfectly symmetrical snowflake. No two cuts create exactly the same pattern, which means every snowflake is genuinely unique.
Use white copy paper for the most traditional look, but try silver or blue cardstock for a more dramatic, modern effect. Metallic paper from gift wrap works beautifully too.
Hang them from the ceiling with clear fishing line for a floating effect. Group them at different heights, some low, some high, for a layered, dimensional display.
Tape a few to a window to catch the light. The cut-out patterns cast gorgeous shadows on walls and floors when sunlight hits them.
Budget tip: Use a standard 8.5″ x 11″ piece of printer paper trimmed into a square. A single piece of white copy paper costs almost nothing and gives great results.
5. Paper Pinwheels
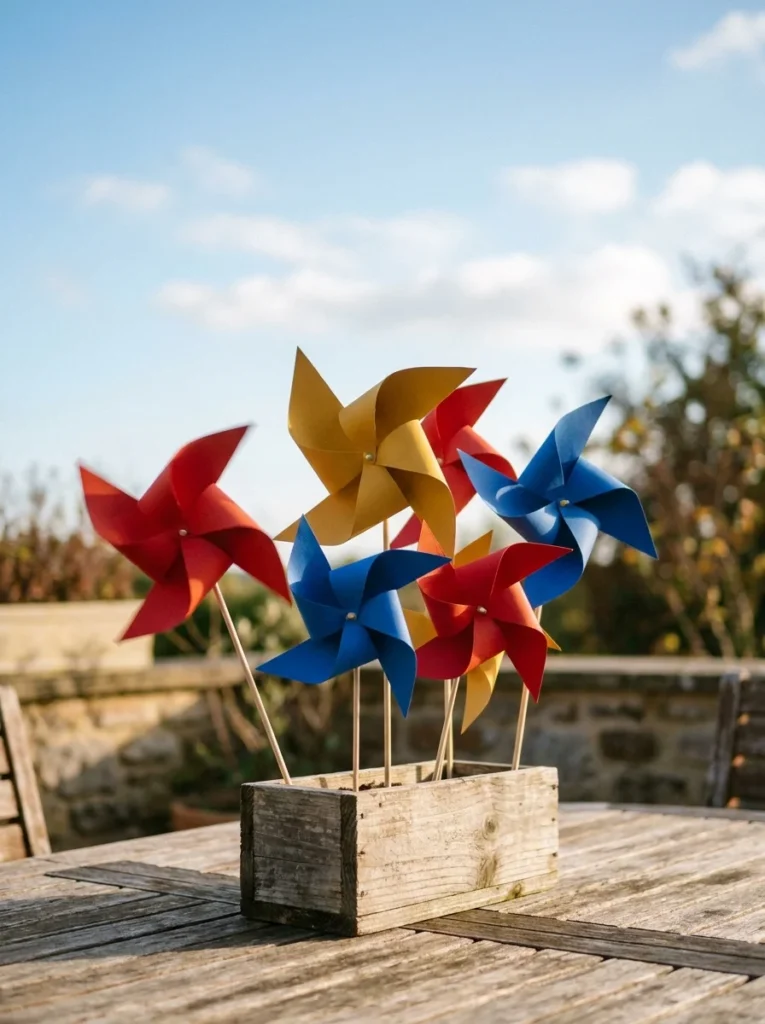
Paper pinwheels are playful, colorful, and incredibly satisfying to make. They work as party decorations, garden accents, or wall displays.
Start with a square sheet of patterned or solid paper. Cut diagonal lines from each corner toward the center, stopping about an inch from the middle. Do not cut all the way through.
Fold every other point toward the center and secure each one with a pin or brad. Attach the brad through the center of the pinwheel and then through a wooden dowel, straw, or stick.
The pinwheel will spin freely in the breeze. This makes them perfect for outdoor parties, garden events, or open windows.
Double-sided paper, where both sides are different colors or patterns, gives you a stunning two-toned spin effect that looks much more impressive than single-sided paper.
Group several pinwheels in a pot filled with sand or floral foam to create an instant centerpiece. Or arrange them across a wall in a cluster pattern for a bold graphic backdrop.
Budget tip: Use pages from old calendars or colorful magazine pages. The existing prints create beautiful patterns when the pinwheel spins.
6. Paper Pompoms
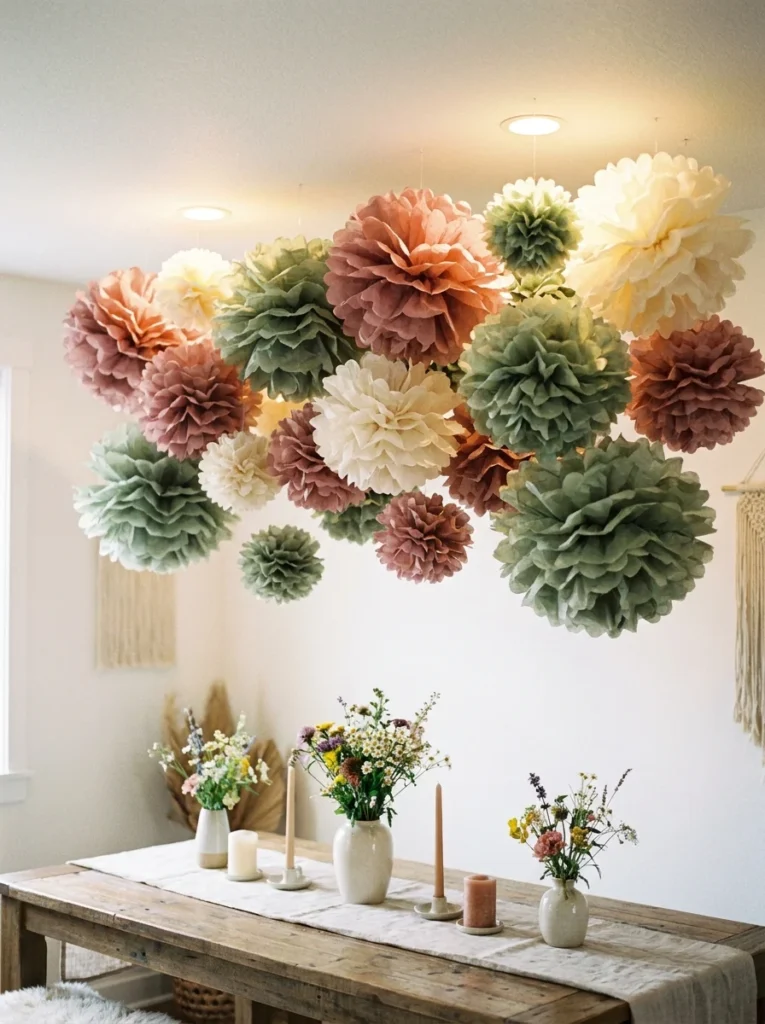
Paper pompoms look impressive but take less than 10 minutes each to make. They are perfect for birthday parties, bridal showers, and kids’ rooms.
You will need tissue paper and a thin wire or pipe cleaner. Stack about eight to ten sheets of tissue paper on top of each other. Fold the entire stack accordion-style, making each fold about 1.5 inches wide.
Pinch the center of the folded stack and wrap your wire tightly around the middle. Trim both ends of the accordion into a rounded or pointed shape depending on whether you want a round or spiky pompom.
Gently pull each layer of tissue paper upward and away from the center on both sides. Work slowly, tissue paper tears easily. Fluff until it looks full and round.
Hang pompoms from the ceiling with clear string or ribbon. Cluster three different sizes together for the most visually interesting display.
Use gradient tissue paper, lighter in the center and deeper at the edges for a beautiful ombre effect.
Budget tip: A pack of 20 tissue paper sheets costs around $1 at a dollar store. You can make two to three pompoms from a single pack, which makes this one of the cheapest decorations on this list.
7. Paper Chain Garlands
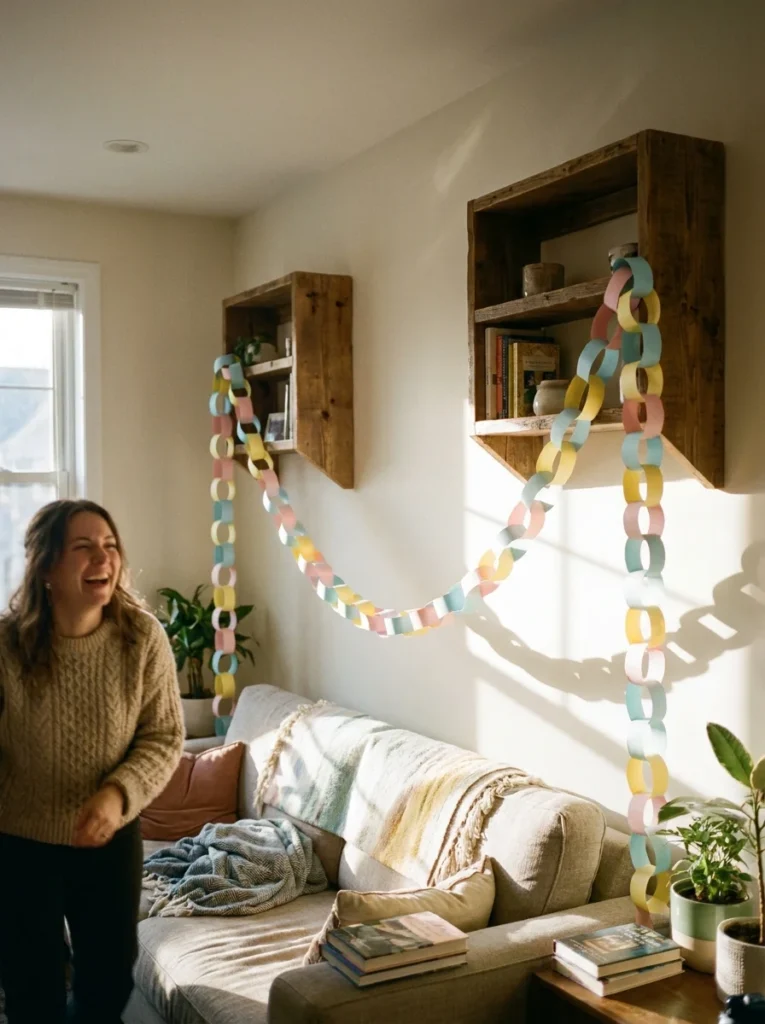
Paper chain garlands are perhaps the most nostalgic paper craft on this list. Almost everyone made them as a child, and they still look great today.
Cut strips of paper about 1 inch wide and 6 inches long. Form the first strip into a loop and tape or glue the ends together. Thread the next strip through the first loop before closing it into its own loop. Repeat until your chain is as long as you want.
The secret to beautiful chains is color variety. Use three to five colors in a repeating or random pattern. Gradient arrangements, going from light to dark, look particularly sophisticated.
Scale up for a bigger impact. Cut wider strips, 2 to 3 inches wide, for large-scale garlands that work as photo backdrops or ceiling displays.
You can also punch small shapes into each strip before assembling, tiny stars, hearts, or circles add subtle detail that looks intentional rather than accidental.
Try metallic paper or foil gift wrap for holiday chain garlands. Gold and silver chains look stunning against evergreen decorations.
Budget tip: Use old magazines, junk mail, or newspaper pages. Torn magazine strips have a colorful, eclectic look that works beautifully for casual, bohemian-style parties. For even more garland ideas, read this tutorial on how to make simple paper garlands in 3 easy steps.
8. Origami Star Decorations
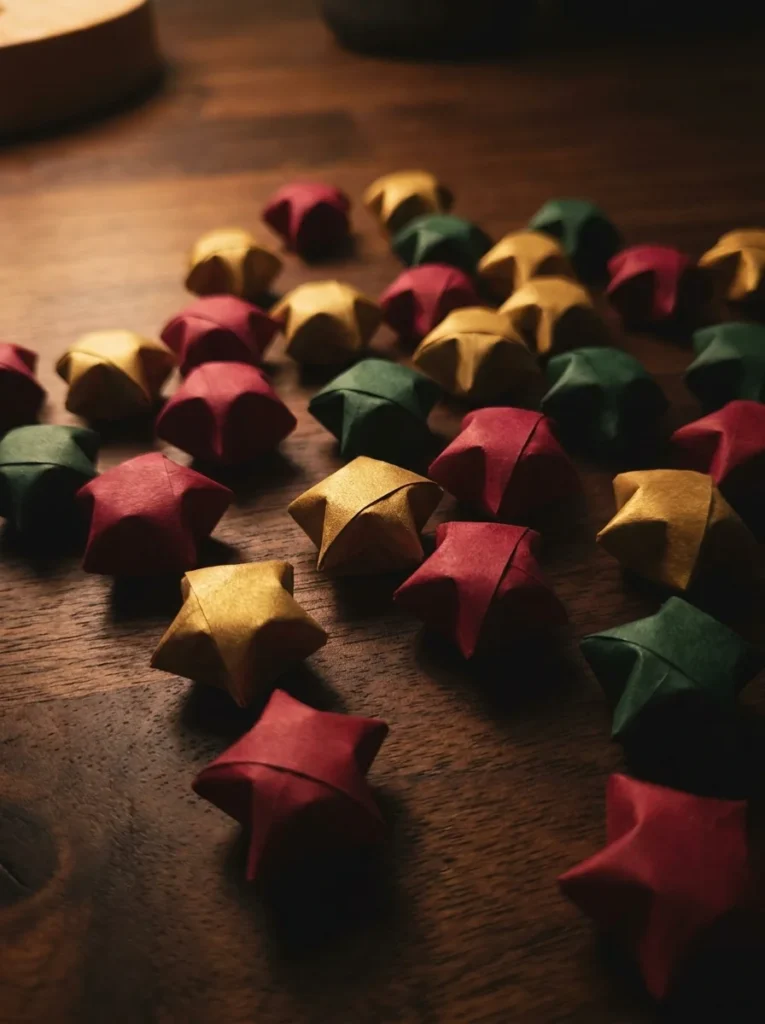
Origami lucky stars, also called puffy stars, are small, three-dimensional stars made from narrow strips of paper. They are quiet, meditative to make, and produce results that look surprisingly high-end.
Cut thin strips of paper about 11 inches long and 0.5 inches wide. Tie the strip into a flat knot at one end, then carefully flatten the knot into a pentagon shape. Wrap the remaining strip around the pentagon, tucking the end inside the last fold.
Gently press inward on each of the five sides with your fingernail. The star will puff up into a small 3D shape.
Fill a glass vase or bowl with dozens of stars for an easy, beautiful centerpiece. Mix colors or keep them monochromatic, both approaches look great.
Scatter stars across a table instead of confetti. They are more eco-friendly and far easier to collect after the event.
String them on thread to make a star garland. This works beautifully as a window decoration, especially with backlight. You can also find more inspiration in this guide on how to make stunning paper stars for decor or gifts.
Budget tip: Use junk mail, old book pages, or magazine pages cut into narrow strips. Printed text on the strips adds an interesting literary texture.
9. Paper Tassel Garlands
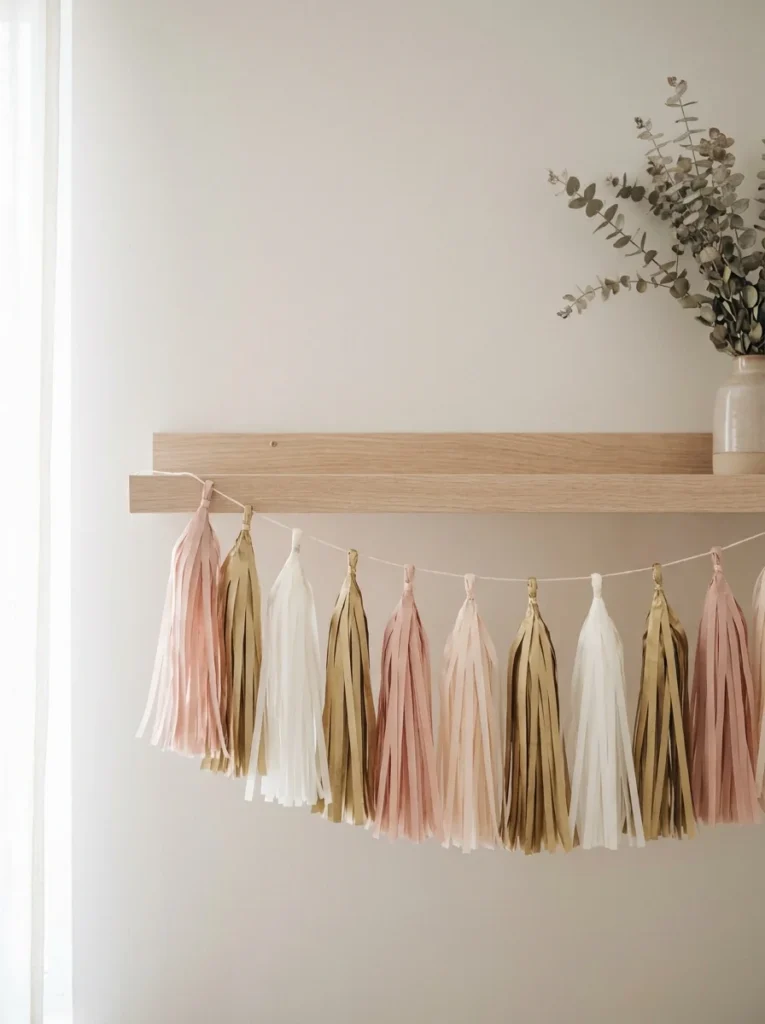
Paper tassel garlands are a step up from basic bunting and have a luxurious look that costs almost nothing to achieve.
To make one tassel, fold a sheet of tissue paper in half lengthwise, then fold it in half again. Cut fringe along the open edge, stopping about an inch from the folded top. Roll the uncut top tightly and fold it in half. Twist the fold into a loop and secure it, that is your hanging point.
String finished tassels onto twine, spacing them a few inches apart. Alternate colors, or go monochromatic for a cleaner, more modern look.
Vary the length of your fringe cuts. Longer fringe creates a boho, festival-style tassel. Short, tight cuts give a more polished, formal look.
You can use tissue paper, crepe paper, or even kraft paper for different textures. Foil tissue paper creates an especially glamorous garland for New Year’s parties or wedding receptions.
Tassels also work great as individual party bag decorations, drink stirrers, or tied to the backs of chairs.
Budget tip: A pack of tissue paper from a dollar store is all you need. One pack makes four to six tassels depending on the size, so you can make an entire garland for $1 to $2.
10. Paper Honeycomb Balls

Honeycomb balls are one of the most visually impressive paper decorations you can make. They look like they came from a party supply store but cost much less to DIY.
To make one, you need two identical sheets of tissue paper, or you can layer and glue many sheets in a repeating accordion pattern. The key is to glue alternating layers at opposite ends, so when you pull the paper apart, it fans out into a sphere.
A simpler approach is to buy pre-cut tissue paper honeycomb sheets from a craft store and assemble them yourself. This cuts the build time significantly while still being cheaper than buying pre-made balls.
Hang honeycomb balls from the ceiling using clear monofilament thread. Stagger them at different heights, some at 5 feet, others at 7 feet, for a professional, layered ceiling installation.
Pair honeycomb balls with paper pompoms of a similar color for a cohesive, full-looking display without buying many different products.
Mix sizes for more visual interest. A 12-inch ball beside a 6-inch ball beside a 4-inch ball creates a natural, dynamic arrangement.
Budget tip: Two-toned tissue paper creates a stunning ombre effect for around $2 per ball.
11. Paper Fan Backdrops
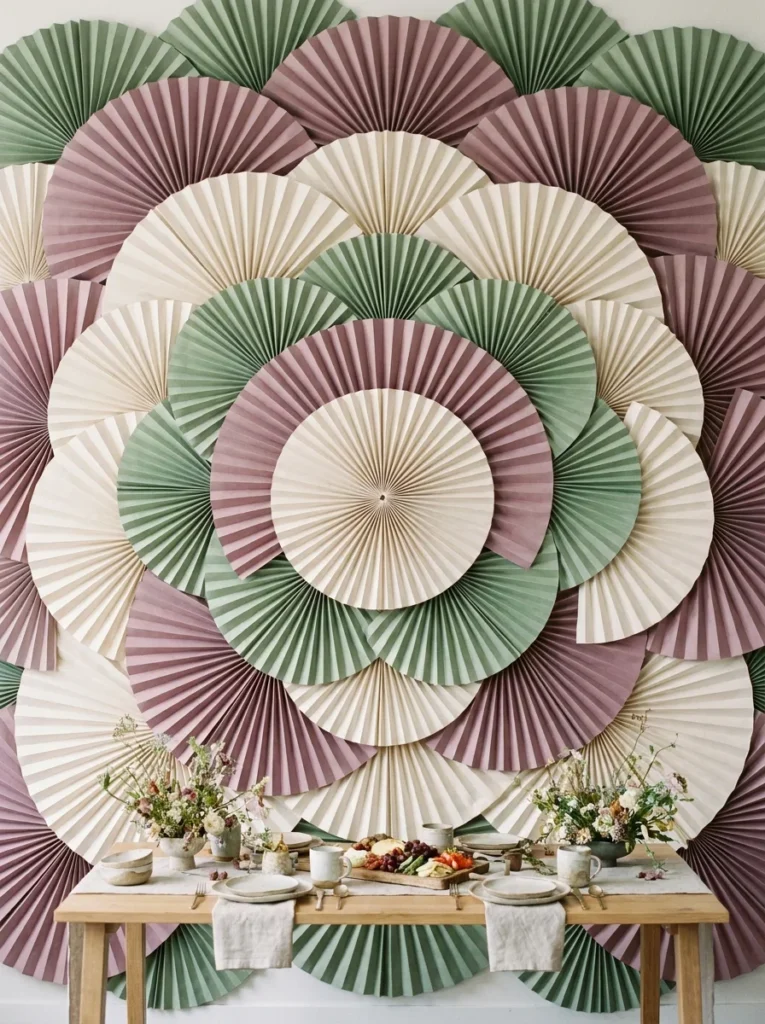
A paper fan wall is one of the most striking backdrops you can create for a party, wedding, or photo opportunity, and it costs far less than fabric or printed backdrops.
To make one fan, stack six to eight sheets of tissue paper or cardstock together. Fold the entire stack accordion-style in 1.5-inch folds. Pinch the stack at the center and secure it with wire or a staple. Fan the paper out on each side into a semicircle and tape the two ends together at the back to hold the shape open.
Make large fans, 12 to 18 inches wide for a dramatic backdrop. Arrange them on a wall in a tightly packed pattern, overlapping the edges slightly. Use removable adhesive strips to avoid wall damage.
Vary sizes and colors across the arrangement. A solid-color wall of fans in three complementary shades creates a gorgeous, salon-worthy backdrop.
Add texture variety by mixing plain cardstock fans with metallic, patterned, or translucent paper fans.
Budget tip: Use large sheets of gift wrap from a dollar store — they come in great colors and are cheaper than craft cardstock for large-scale fan projects.
12. Paper Fortune Cookies
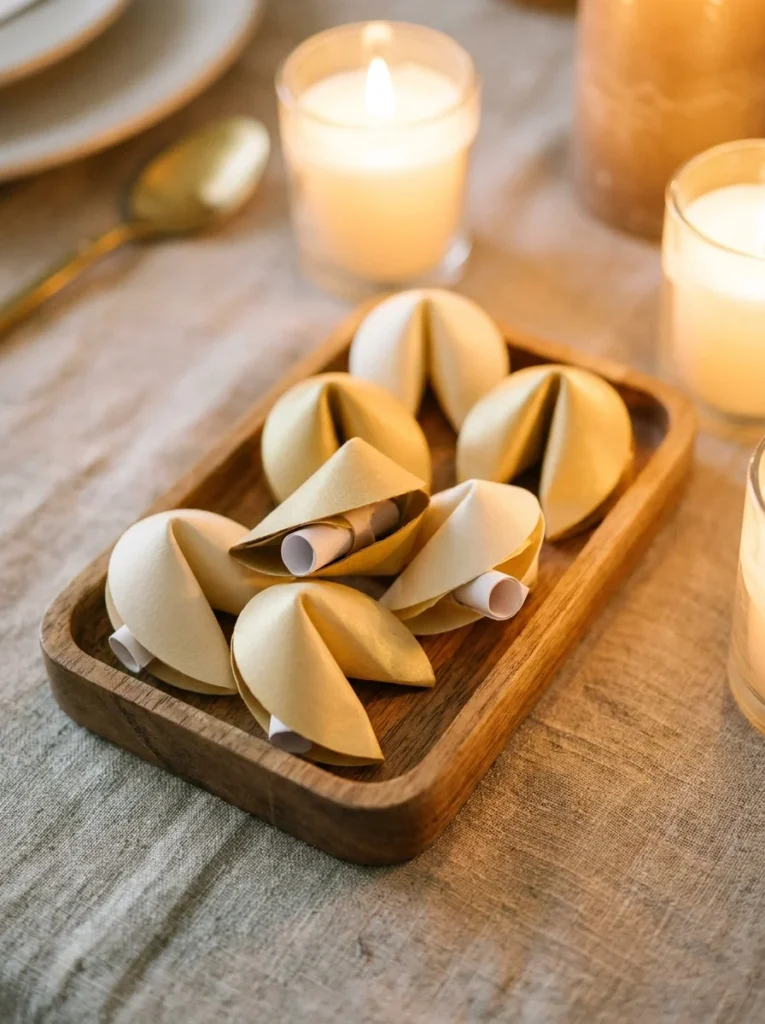
Paper fortune cookies are an unexpected and delightful decoration that doubles as a party favor. Guests love them.
To make one, cut a circle from cardstock, about 3 inches in diameter works well. Write or type a small message and roll it into a tight tube. Place the message tube in the center of the paper circle.
Fold the circle in half over the tube, but do not crease the fold, keep it gently curved. Then bend the two open ends downward and toward each other, pinching them together. Secure the pinch with a small piece of tape on the inside.
The result is a surprisingly convincing fortune cookie shape. Use a bone folder or the back of a spoon to smooth out the curve if needed.
Fill fortune cookies with encouraging quotes, funny jokes, event trivia, or heartfelt notes. This works beautifully at bridal showers, baby showers, dinner parties, and wedding tables.
Display them in a bowl or box as a centerpiece or line them up at each place setting.
Budget tip: Use cream or ivory cardstock for an authentic look. A single sheet of cardstock makes three to four fortune cookies.
13. Paper Butterfly Wall Art
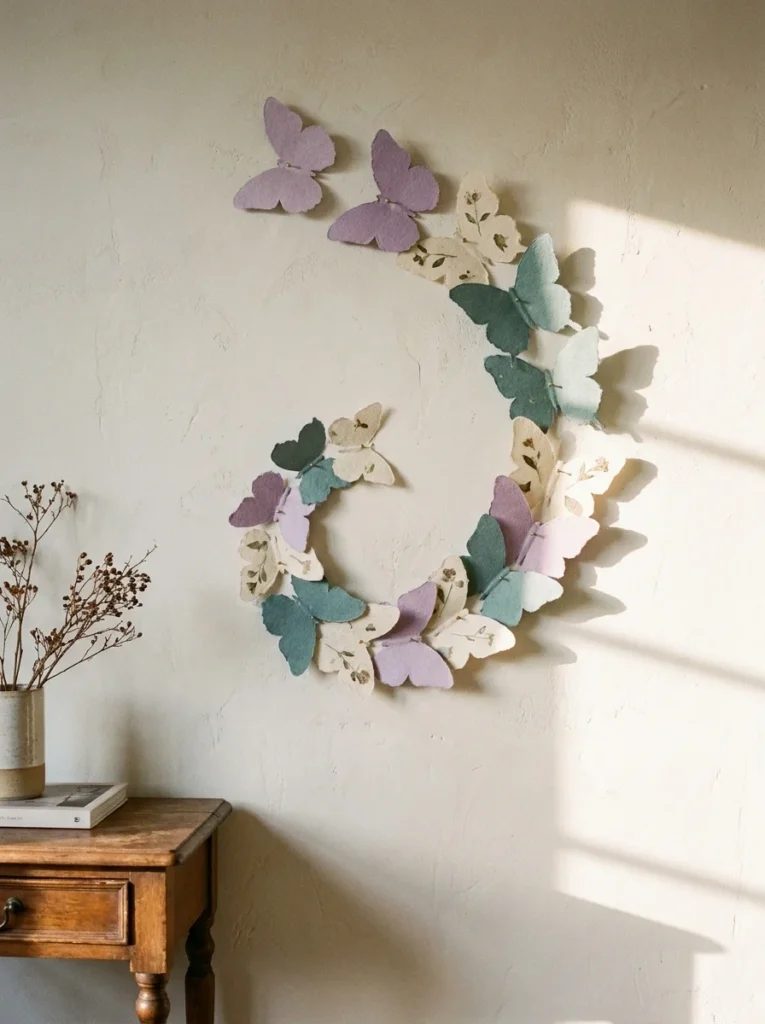
Paper butterflies are elegant, romantic, and work for a wide range of occasions, from garden parties to bedroom wall art to wedding decorations.
To make one butterfly, fold a square of paper in half. Draw half a butterfly shape along the folded edge, a rounded wing with a smaller lower wing. Cut it out. When you open the fold, you have a symmetrical butterfly.
To make it three-dimensional, fold each wing up slightly at the center. Pinch the middle and bend it gently so the wings angle upward like a real butterfly mid-flight.
Attach butterflies to a wall using double-sided tape or removable adhesive dots. Position them at varying angles, some flying upward, some sideways, some tilted, to create a sense of movement.
Layer different sizes and shades of paper for a gradient effect across the whole arrangement.
Coffee-dye plain white paper for a beautiful antique, sepia-toned butterfly wall that looks like a vintage nature display.
Use patterned scrapbook paper for bold, graphic butterflies with complex wing patterns without any drawing required.
Budget tip: Patterned napkins work surprisingly well as butterfly paper. They are thin enough to fold easily and come in gorgeous prints.
14. Paper Cone Party Hats
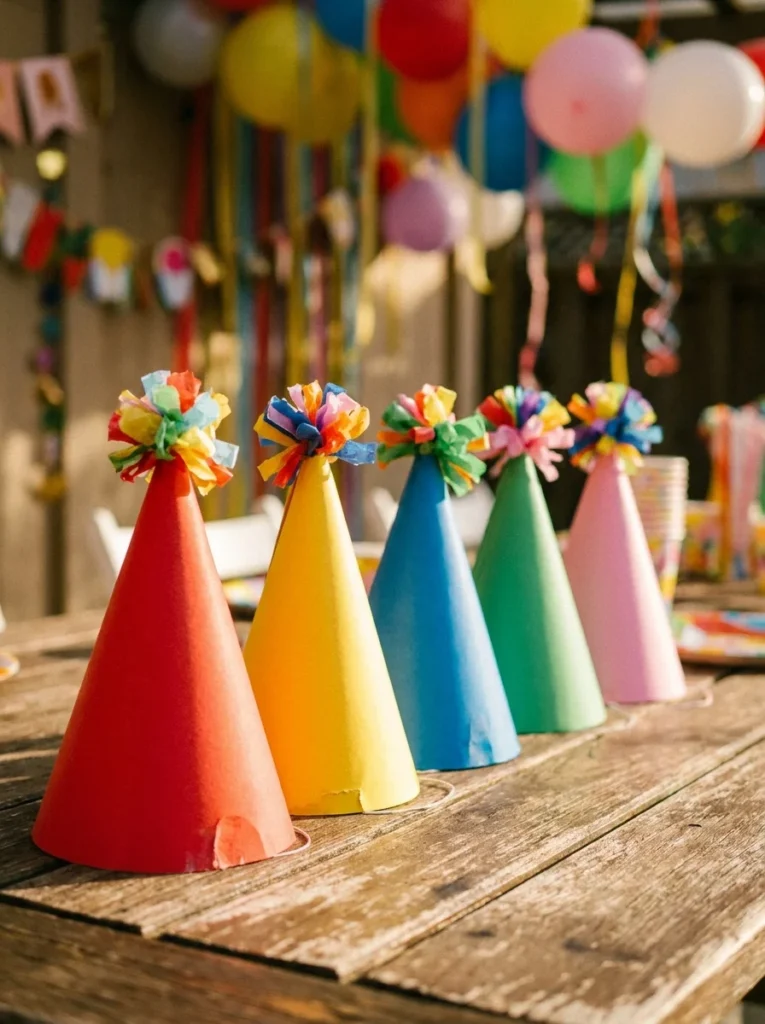
Handmade party hats are a charming, personalized alternative to mass-produced plastic ones. They are easy to customize and surprisingly quick to put together.
Roll a circle of cardstock into a cone shape. A dinner plate makes a great template, trace around it, cut it out, then cut a wedge from the circle and roll the remaining piece into a cone. Adjust the cone height and width by changing how much of the wedge you remove.
Tape or glue the seam on the inside for a clean outer finish. Punch two small holes on opposite sides near the base. Thread elastic cord through both holes and tie knots on the inside to hold it in place.
Decorate the outside with paint, glitter glue, washi tape, stickers, or cut-out shapes. Layer tissue paper strips around the base for a fringed, festive look.
Top each hat with a small paper pompom, a ribbon curl, or a tassel for a polished finishing touch.
Make a set in a matching color scheme to coordinate with your party theme.
Budget tip: Use cardstock from an art supply store, one sheet per hat. A pack of 25 sheets in mixed colors costs around $5 and makes 25 hats.
15. Paper Luminaries
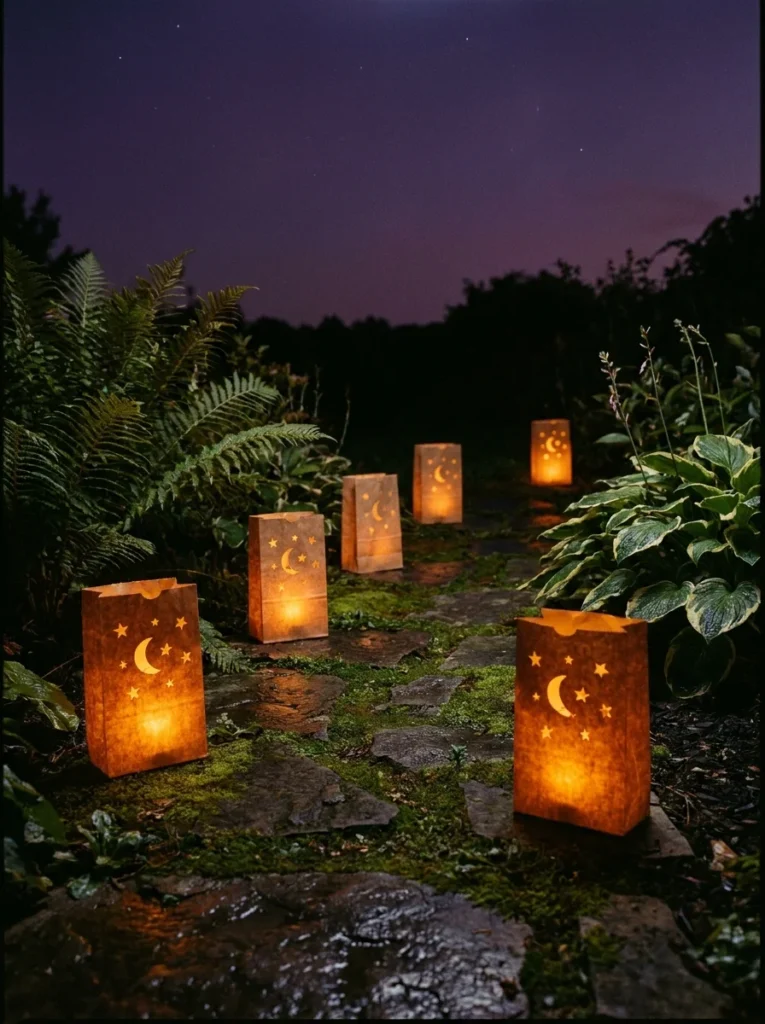
Paper luminaries create a magical, warm atmosphere that is almost impossible to replicate with store-bought decorations. They are especially beautiful at outdoor evening events.
The simplest version uses a brown paper bag. Fold down the top edge, fill the bottom with a few inches of sand or rice for stability, and drop in a battery-powered LED tea light.
For something more decorative, cut patterns into the bag before lighting. Use a craft hole punch for polka dots, or carefully cut stars, moons, and geometric shapes with a craft knife on a cutting mat.
The light glows through each cut-out and casts beautiful patterns on the surrounding ground or wall. The effect is absolutely stunning on garden paths, driveways, or around the perimeter of an outdoor dining area.
Line them up in a row or cluster three bags together in a group for a more dramatic effect.
Use white paper bags for a crisper, cleaner glow. Use colored tissue paper bags for colored light effects.
You can also make cylinder-shaped luminaries from cardstock, roll a rectangle into a tube, tape the seam, and cut your patterns before rolling for easier cutting.
Budget tip: Plain brown paper lunch bags cost pennies each. A 50-pack is usually under $3.
16. Paper Wreath
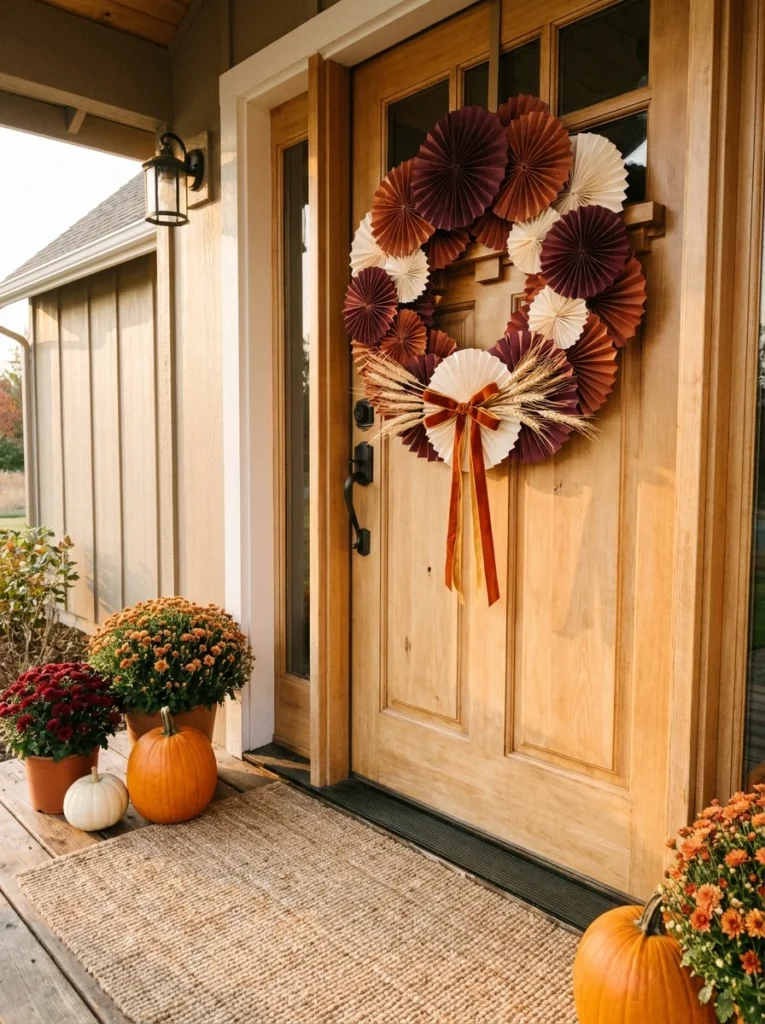
Paper wreaths are a DIY project with a high visual payoff for relatively low effort. They work year-round depending on the paper colors and embellishments you choose.
Start with a styrofoam or cardboard ring as your base. You can cut a cardboard ring from a cereal box or pizza box, just trace two circles, one inside the other, and cut out the ring shape.
Make paper rosettes to cover the ring. Accordion-fold a strip of paper, pinch it at the center, and fan it out into a circle. Glue the two ends together. Each rosette takes about two minutes to make.
Cover your ring base with rosettes, layering them tightly and filling every gap. Use a hot glue gun to attach each one.
Color story matters here. Monochromatic wreaths, all in one shade with slight value variation, look very elegant. Bold, multi-color wreaths look festive and playful.
Add a ribbon bow, dried flowers, greenery, or small paper accents to give the wreath personality.
Seasonal versions: Deep red and gold for autumn, red and green for Christmas, pastels for spring, and navy and white for summer.
Budget tip: Paper bags, magazine pages, and old book pages all work well. Book page wreaths have a beautiful, literary aesthetic.
17. Paper Cupcake Toppers
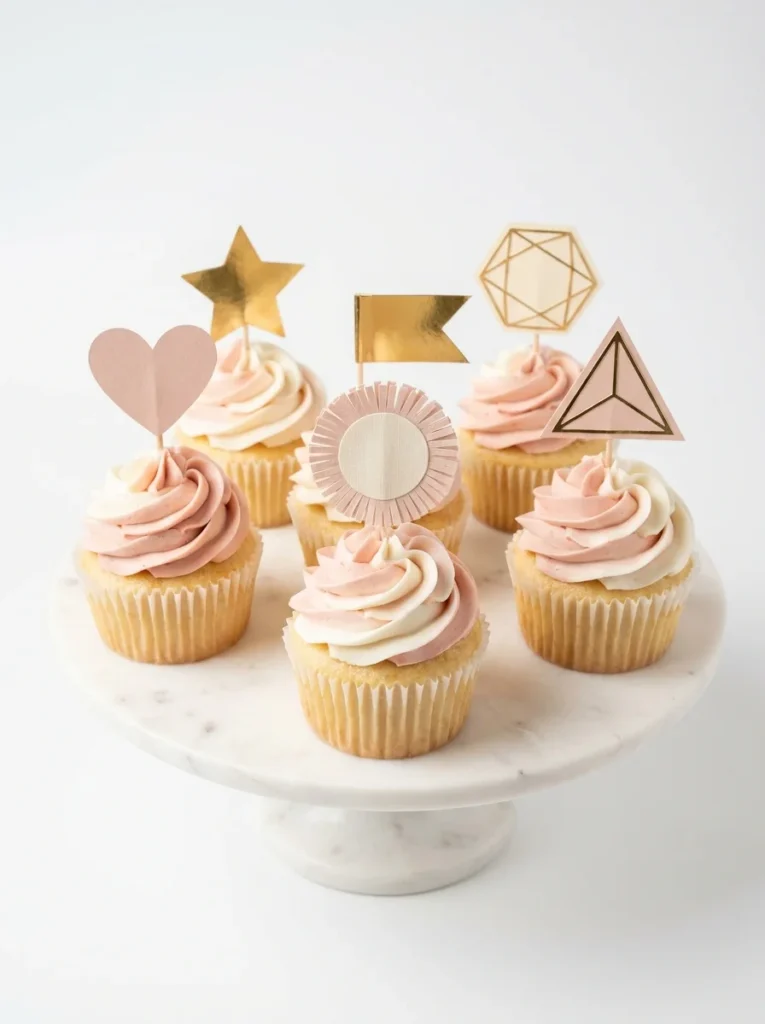
Paper cupcake toppers are one of the quickest ways to elevate a dessert table without any baking skill involved. They are all about the paper.
The basic method: Cut a shape from cardstock, a circle, star, heart, flag, or any simple geometric form. Score and fold the bottom section into a small tab. Glue or tape the tab around a toothpick or bamboo skewer so the shape sits above the cupcake level.
Make the shapes interesting. Cut layered circles of different sizes in complementary colors and stack them with foam dots for a dimensional effect. Add fringe to the edges of circles by cutting tiny slits all the way around the perimeter.
Print text or patterns on your cardstock before cutting for a personalized touch. This works beautifully for baby shower cupcakes, graduation desserts, or birthday tables.
Keep a consistent color palette across all your toppers to tie the dessert table together visually.
Geometric shapes, hexagons, diamonds, and triangles, are easy to cut and look very modern and stylish.
Budget tip: One sheet of cardstock makes 12 to 20 toppers depending on size. Print and cut at home for a fully custom set at almost zero cost.
18. Paper Accordion Fans
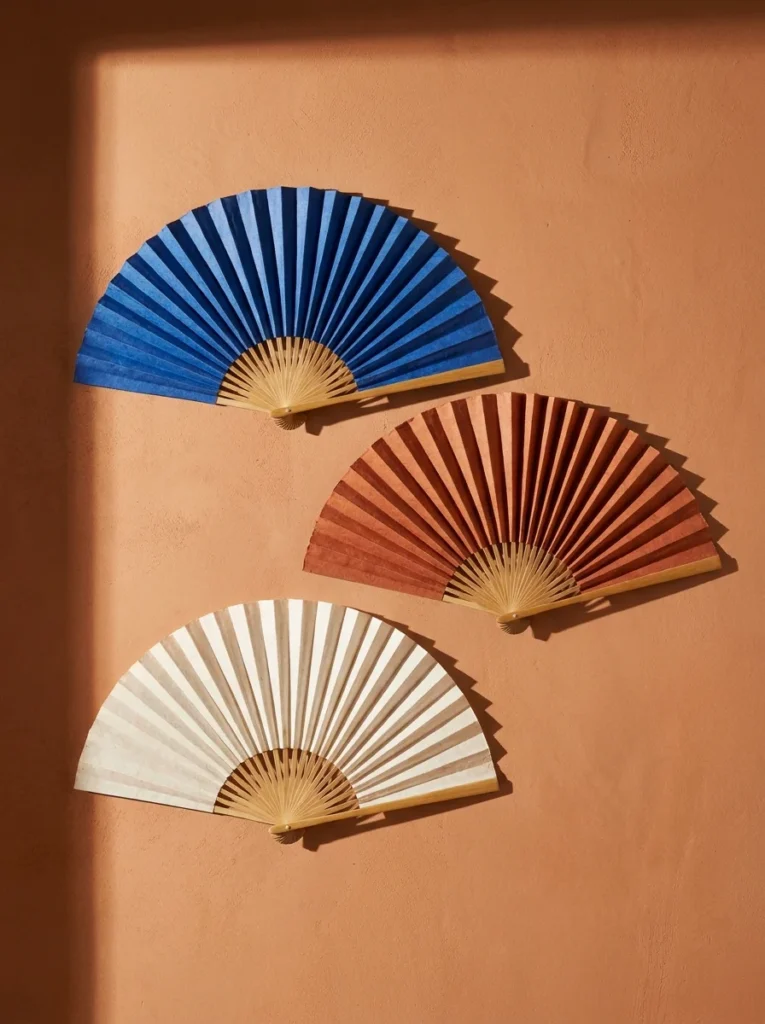
Accordion fans are different from wall fan backdrops, these are smaller, handheld fans that double as beautiful wall decorations between uses. They work for summer parties, outdoor gatherings, and bohemian-themed events.
To make one, take a full sheet of paper and fold it accordion-style, making folds about 0.75 inches wide. Once fully folded, pinch one end of the accordion tightly. Wrap a rubber band or piece of tape around the pinched end to hold it, this becomes the handle.
Fan out the other end into a full semicircle. The result is a neat, handheld paper fan.
For a full circle fan, make two identical accordion fans and glue the pinched ends together. Fan both sides out and secure them so the combined piece forms a complete circle.
Use patterned paper, wrapping paper, or watercolor paper for more interesting results.
Hang them flat on a wall as a grouping of three or five fans in different sizes. They look stunning as standalone wall art in a bedroom or living room, not just at events.
Budget tip: Use pages torn carefully from old art books or atlases. The existing imagery adds a unique, layered quality to each fan.
19. Paper Crown or Tiara
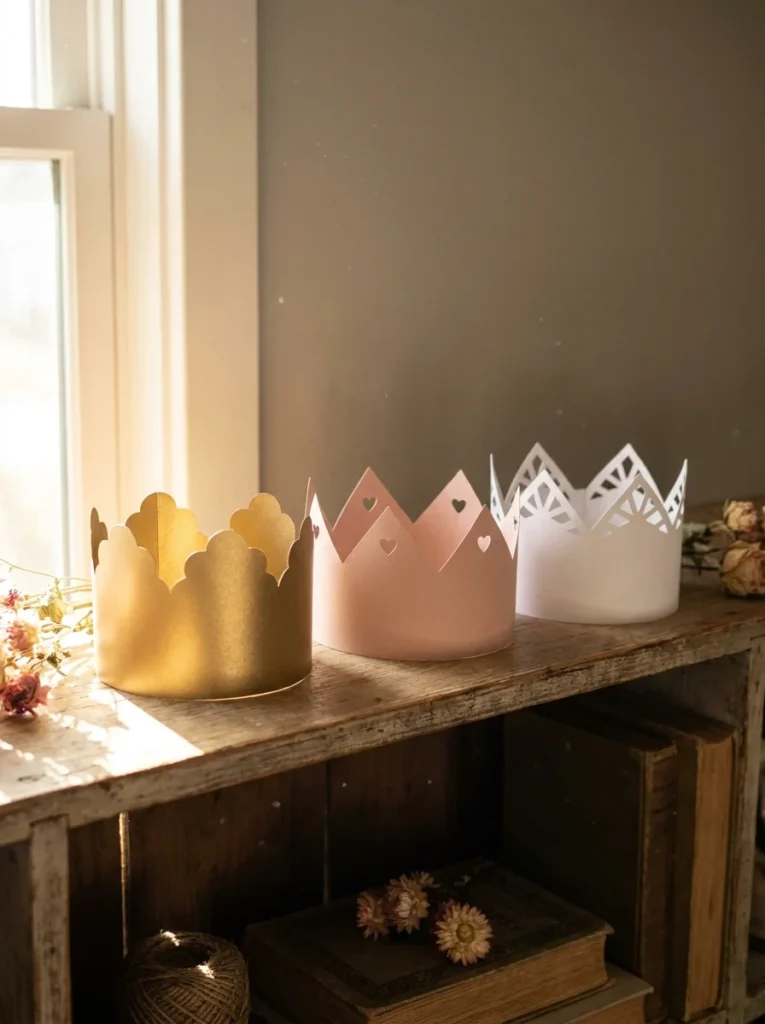
Paper crowns are not just for children. A beautifully made paper crown can be a stunning party favor, a photo prop, or even a genuine head accessory for a themed event.
To make a basic crown, cut a strip of cardstock about 3 inches wide and long enough to wrap around your head with a 1-inch overlap for gluing. Draw and cut a decorative top edge, points, scallops, curved peaks, or geometric notches. Glue or staple the ends together into a circle.
For an elevated look, layer two strips together, a taller back layer and a shorter front layer — for a castle turret effect.
Use gold or silver metallic cardstock from a craft store for an instantly regal look. A single sheet costs around 50 cents and makes one full crown.
Add embellishments using craft jewels, sequins, glitter glue, or punched shapes. Small flowers cut from paper and glued along the base edge look particularly elegant.
Make coordinating sets for a whole birthday table, baby shower, or children’s party.
20. Paper Star Mobile
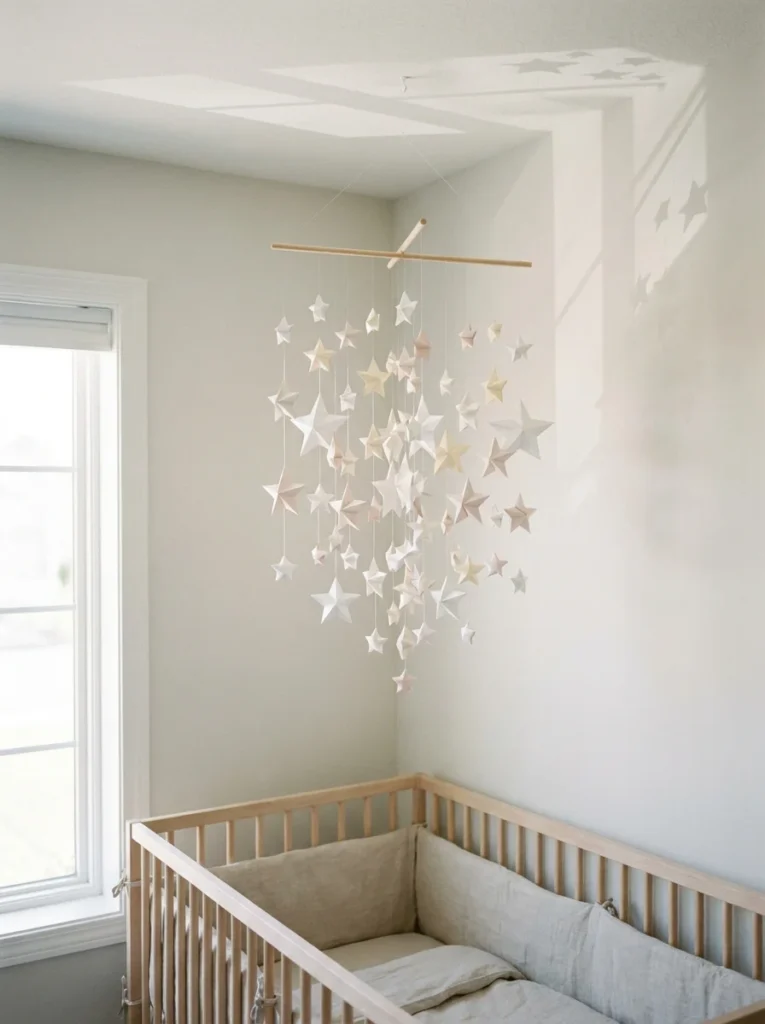
A paper star mobile brings movement, depth, and quiet beauty to any space. It works for nurseries, bedrooms, party ceilings, and window displays.
Start with a wooden dowel, a thin branch, or a wire frame as your support. Cut lengths of clear thread or thin ribbon in varying lengths, some short, some long, so the stars hang at different heights.
Make 3D stars by stacking two identical paper stars on top of each other at opposite angles. Glue them together at the center points only. This creates a full, three-dimensional star shape that catches light from all sides.
Use a range of sizes, 2-inch stars, 4-inch stars, and 6-inch stars, mixed on the same mobile for a layered, dynamic look.
Attach each thread to the tip of a star point with a tiny dot of glue. Tie the other end of the thread to your dowel at intervals across its length.
Balance the mobile by adjusting thread placement until it hangs evenly and rotates gently in air movement.
Budget tip: Metallic origami paper creates stunning mobiles that shimmer as they move. A pack of 100 sheets in mixed metallic colors is usually under $4 online.
21. Paper Rolled Wall Art Circles
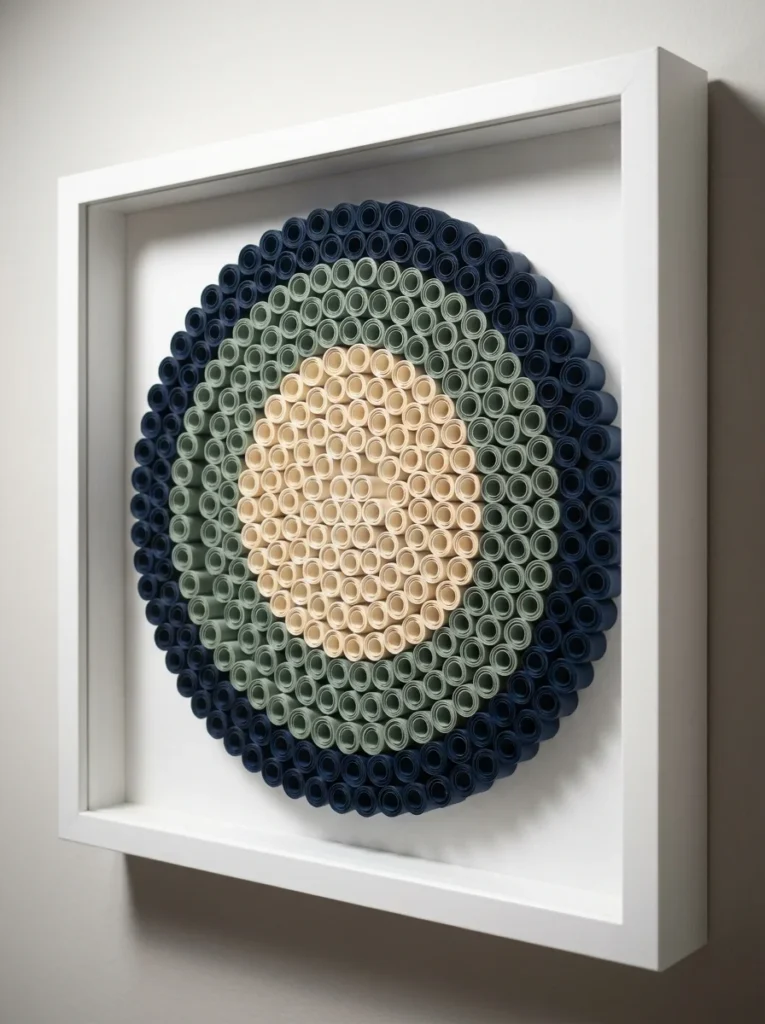
Rolled paper wall art, also called paper quilling art, is a slow, meditative craft that produces beautiful, textured pieces. The result looks like something you would buy in an artisan gallery.
To make a rolled coil, cut a thin strip of paper, about 0.25 inches wide. Roll it tightly around a toothpick or the tip of a pen. Slide it off and allow it to loosen slightly. Pinch, squeeze, or reshape the coil into different forms, circles, teardrops, squares, leaves.
Build a full composition by arranging and gluing these coils inside a shadowbox frame or on a flat canvas. Plan your design first by sketching a simple shape, a flower, a geometric pattern, or a sunburst.
Use different paper widths and lengths to create coils of varying sizes and densities.
A color gradient across the entire composition, from light at one edge to dark at the other, creates a sophisticated, intentional look.
This project takes more time than the others on this list, but the finished piece has staying power as genuine home art. For more ideas on turning paper into lasting home decor, explore these elegant paper crafts for adults.
22. Paper Photo Booth Props
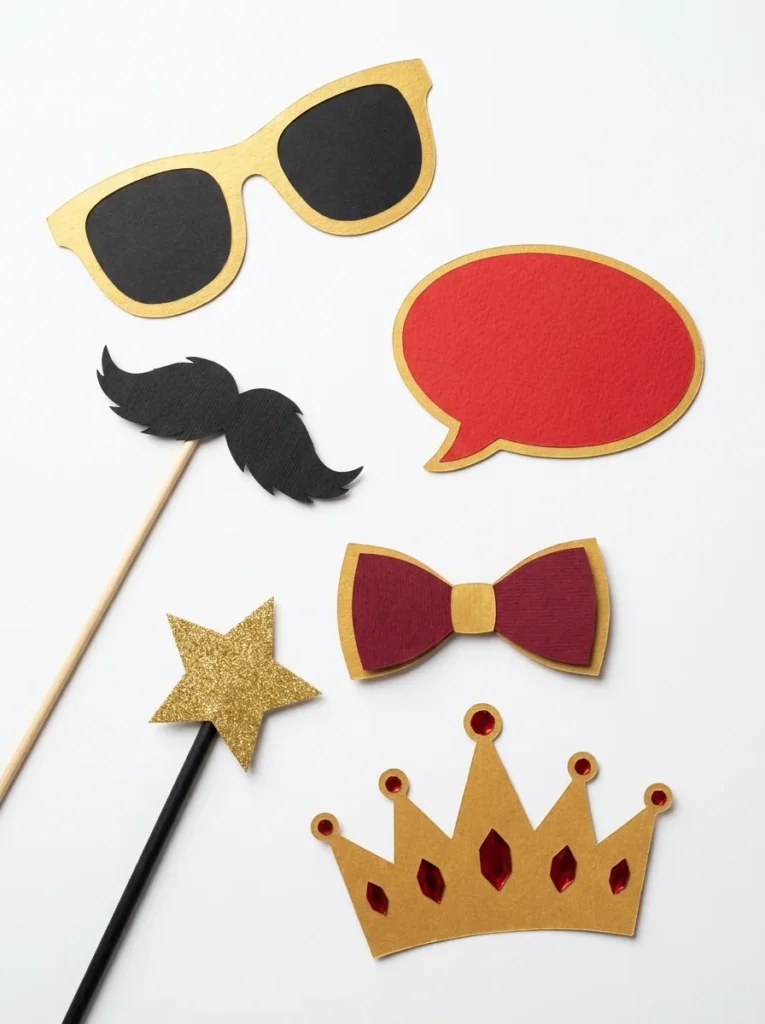
Photo booth props made from paper are a genuinely fun party activity that costs almost nothing and creates memories.
Cut oversized shapes from cardstock, glasses, mustaches, lips, speech bubbles, hats, bow ties, crowns, and wands. Thick black cardstock cut into classic prop shapes is an excellent starting point.
Attach each prop to a wooden dowel or thick straw using tape or a hot glue gun. The prop should sit firmly on the stick and hold upright when guests hold it up for photos.
Add color with paint, markers, glitter glue, or layered paper cutouts. Gold and black is a timeless combination. Pastels work beautifully for baby showers. Bright primaries are perfect for children’s birthdays.
Write funny phrases on speech bubble props with a marker. “I do!” works for weddings. “It’s a Boy!” or “It’s a Girl!” for baby showers. “I’m the birthday one!” for birthday parties.
Make more props than you think you need. Guests grab two or three at once, and having plenty on a table or in a bucket means no one waits.
Budget tip: Print prop outlines from free templates online onto cardstock, then cut and assemble. A full set of 20 props can cost under $3 in materials.
Paper decorations prove that the most memorable parties and spaces do not need a big budget, they need a little creativity and the willingness to make something by hand. Every idea on this list can be made with materials you likely already have at home or can find at a dollar store for under $5. Start with one or two projects that fit your occasion and skill level. Build your confidence from there. The more you make, the faster and better you get. Hand-crafted decorations also carry something that store-bought items simply do not, they show effort, intention, and care. Guests notice that. More importantly, the making itself is enjoyable. Pick your occasion, choose your colors, grab some paper and scissors, and start creating something that is entirely your own. If you are looking for even more inspiration, this roundup of fun and easy paper crafts for your next party has plenty of ideas to keep the creativity going.