

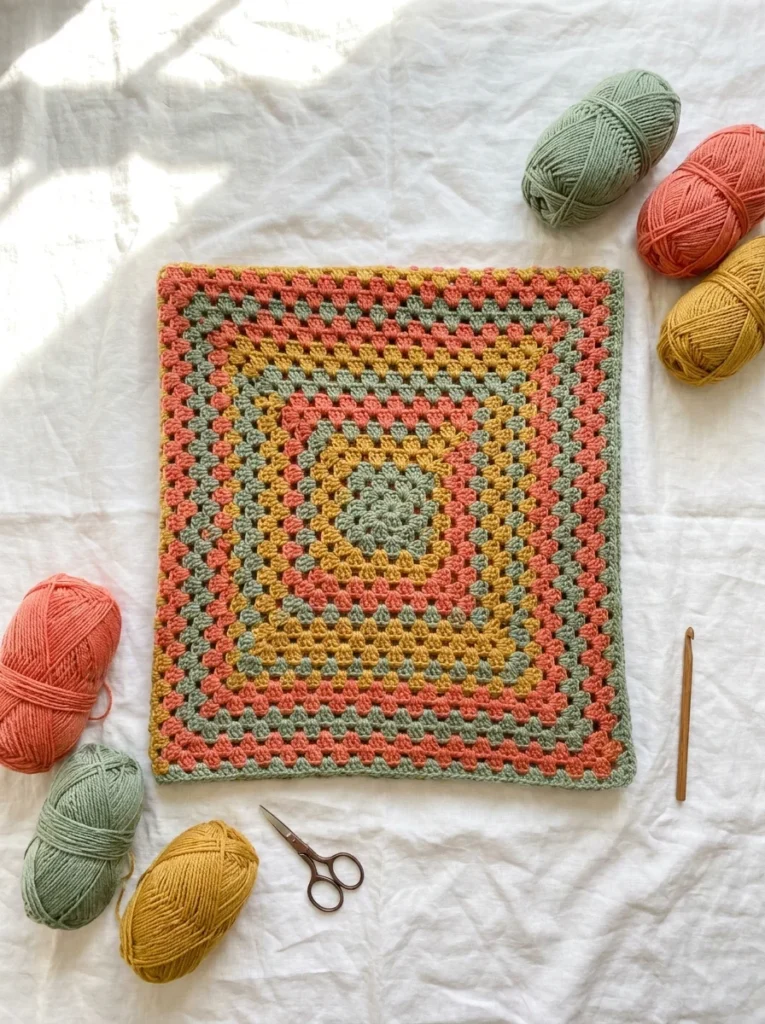
You have seen them everywhere on blankets, bags, pillow covers, and cardigans. The granny square is one of the most iconic things in all of crochet. And here is the part nobody tells you: it is genuinely one of the easiest things a beginner can make.
If you can chain, double crochet, and slip stitch, you already have everything you need. This tutorial walks you through your very first granny square, round by round, without any confusing jargon.
What You Need Before You Start
Keep it simple. You do not need a big supply haul for this project.
- Yarn: Any worsted weight (size 4) yarn works perfectly. Pick two or three colors, one for the center, one for the outer rounds, and one for the border if you want.
- Hook: A 5mm or 5.5mm crochet hook
- Scissors
- Yarn needle for weaving in ends
Budget tip: One skein of each color costs about $3–$5 at most craft stores. You will have plenty left over after your square.
Understanding the Basic Structure
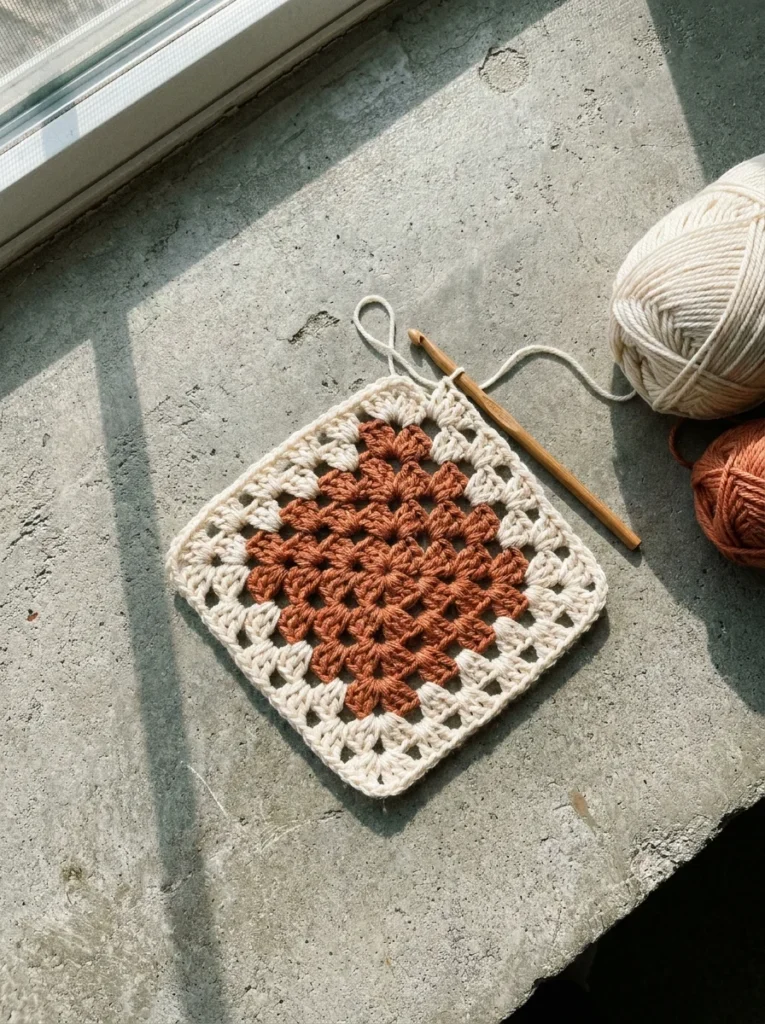
A granny square is built from the center outward in rounds. Each round adds a new layer. The classic three-round granny square looks like this:
- Round 1: A small center cluster of stitches worked into a magic ring
- Round 2: Shells of double crochets fanning out from the center
- Round 3: More shells, creating four distinct corners and a square shape
The corners are what turn a circle into a square. The secret is a chain-two space at each corner, that gap is where the square shape comes from.
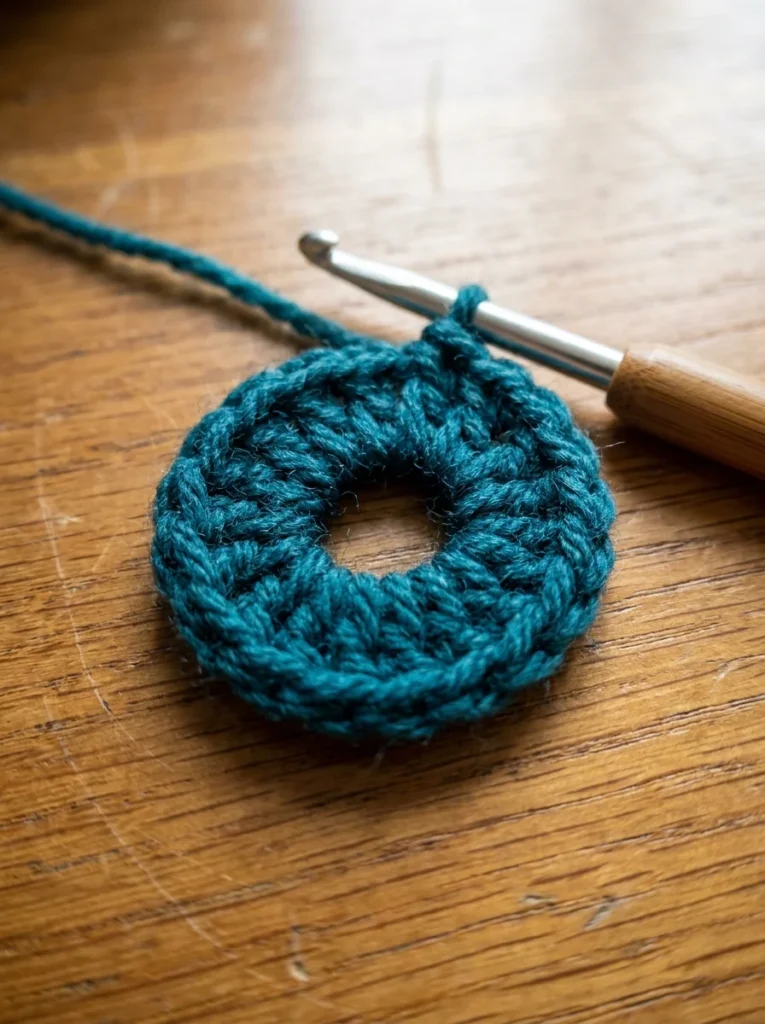
Round 1: Building the Center
Step 1: Make a magic ring. (Or chain 4 and join with a slip stitch to form a small ring, either works.)
Step 2: Chain 3. This counts as your first double crochet.
Step 3: Work 2 more double crochets into the ring. You now have a cluster of 3.
Step 4: Chain 2. This creates a corner space.
Step 5: Work 3 double crochets into the ring. Chain 2. Repeat twice more.
Step 6: Join to the top of your starting chain-3 with a slip stitch.
You now have four clusters of three double crochets with a chain-2 corner between each one. Pull the magic ring tail to close the center hole tightly.
Round 2: Growing the Square
Join your second color (or continue with the same) in any corner chain-2 space.
In each corner space: Chain 3, work 2 double crochets, chain 2, then work 3 more double crochets. That full sequence fills one corner.
Between corners: Work 3 double crochets into the chain-2 side space from Round 1.
Go around all four sides. Join with a slip stitch at the end of the round.
You should now have:
- 2 clusters at each corner (with a chain-2 between them)
- 1 cluster on each side between the corners
This is where the square really starts to take shape. You can see the four corners clearly now.
Round 3: The Finishing Layer
This round follows the exact same logic as Round 2 — just one more layer outward.
- At corners: Chain 3, 2 double crochets, chain 2, 3 double crochets
- On each side: 3 double crochets into every chain-2 space between clusters
By the end of Round 3, you will have 3 clusters on each side and clean, defined corners. Fasten off and weave in all your ends with a yarn needle.
Tips for a Cleaner Square
- Count your clusters at the end of every round. Round 1 = 4 clusters. Round 2 = 8. Round 3 = 12.
- Do not pull your chains too tight at the corners, loose corners keep the square flat.
- If your square is curling or cupping, your tension is too tight. Try going up one hook size.
- Block your finished square by pinning it damp to a foam board. It dries perfectly flat every time.
What to Make With Your Squares
One granny square is just the beginning. Once you can make one confidently, the possibilities open up fast:
- Join 20 squares into a cozy lap blanket
- Make 4 squares and sew them into a tote bag
- Frame a single square as wall art
- String a few together for a boho bunting garland
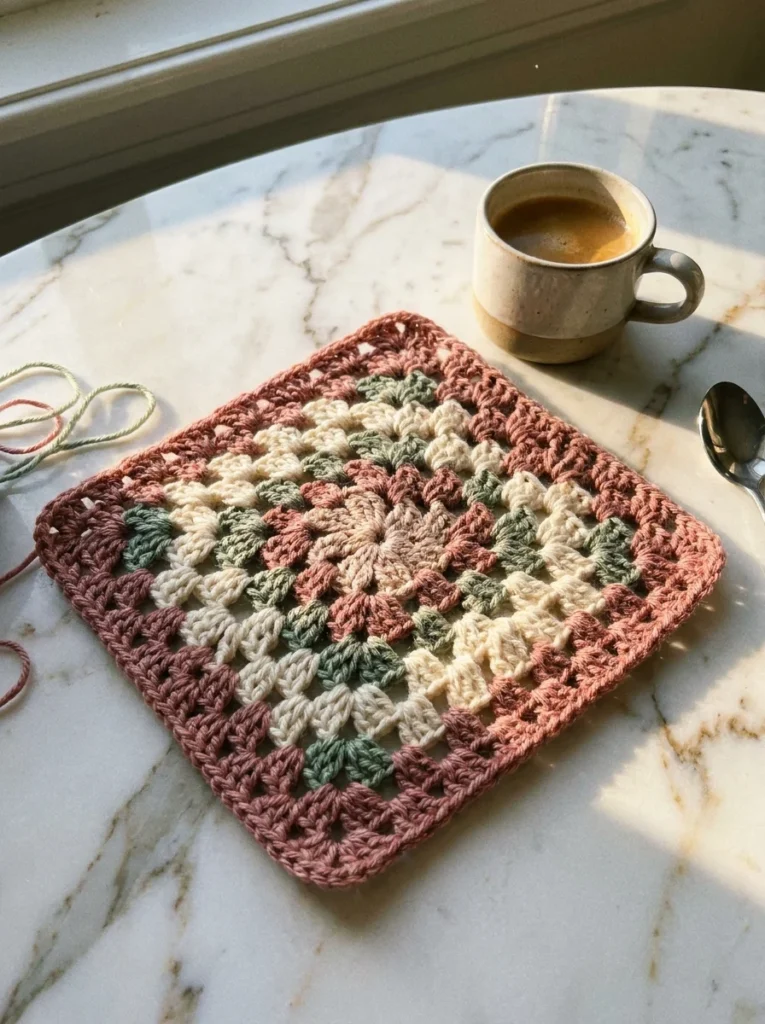
You Made a Granny Square — Now Keep Going
That small square in your hands right now? It is the foundation of an entire crochet skill set. Every blanket, every bag, every colorful project you have ever admired in a craft store or on Pinterest started with someone learning exactly what you just learned.
Save this tutorial, bookmark it, or share it with someone who keeps saying they want to learn crochet. Your next goal: make five more squares and see how fast the muscle memory kicks in. Before you know it, you will be joining them into something you are genuinely proud to show off.