

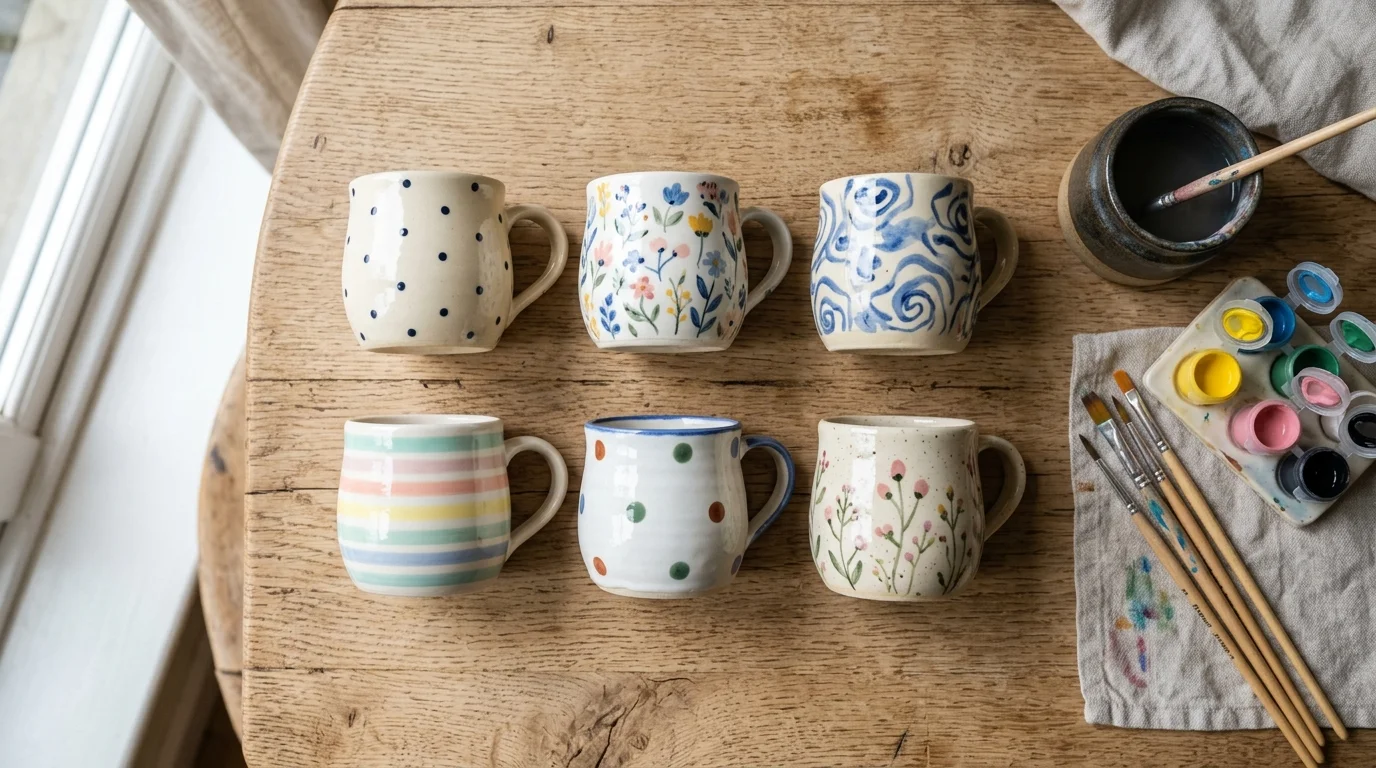
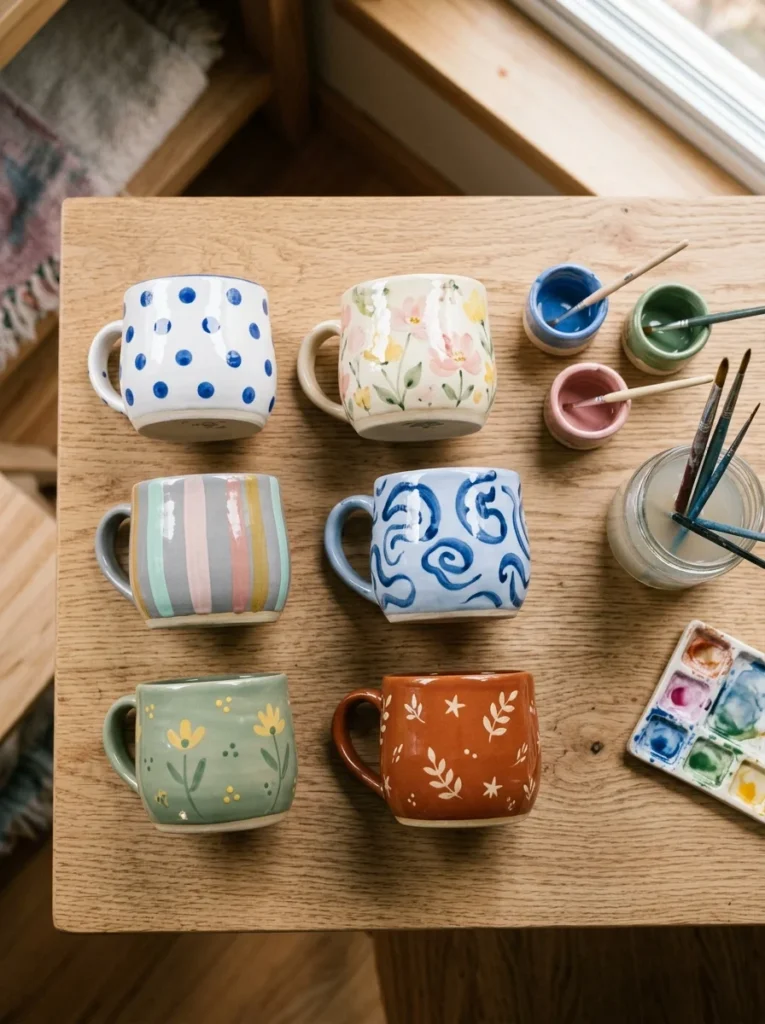
Plain white mugs are cheap, and that makes them the perfect canvas. You don’t need art school or fancy supplies to turn a $1 mug into something you actually love drinking from. With a few paint pens, a dollar-store brush set, and an oven, you can make gifts, refresh your kitchen shelf, or just spend a slow afternoon making something with your hands. These 22 ideas start simple and stay affordable. Each one uses basic shapes, easy techniques, and materials you probably already own. Grab a mug, pick a design, and let’s paint.
1. Cheerful Polka Dot Mugs
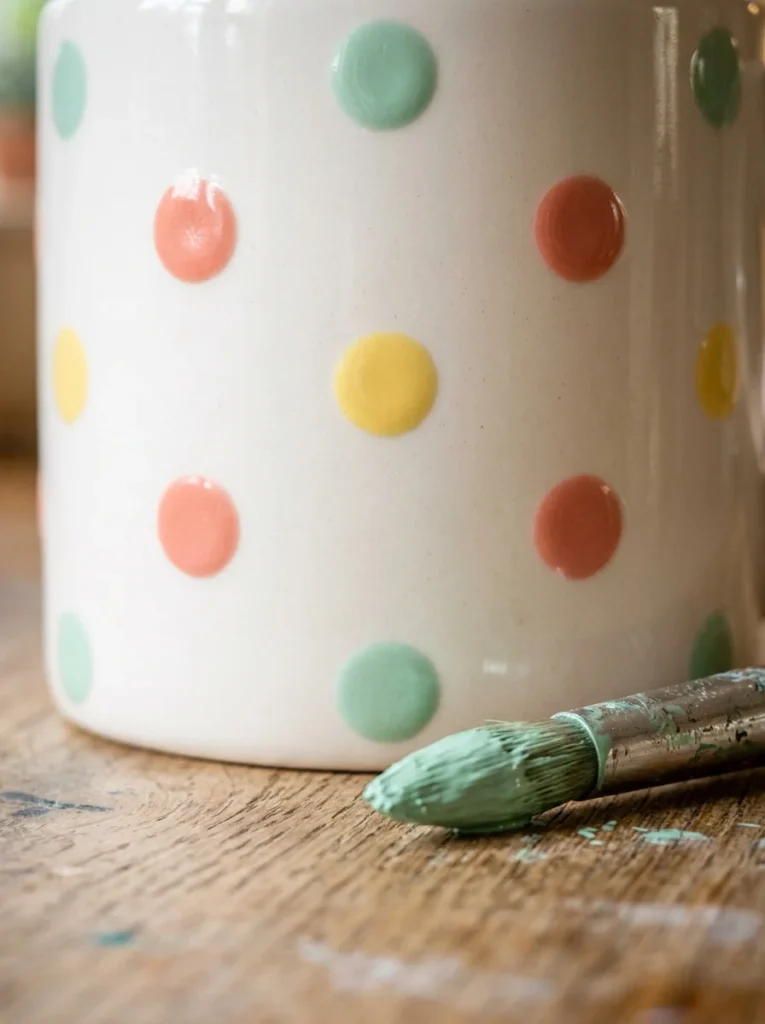
Polka dots are the easiest place to start. No drawing skill required. Just dip and press.
Use the rounded end of a paintbrush or a pencil eraser to stamp perfect circles. Cotton swabs work too. Each one gives a slightly different dot size, so grab a few.
Pick two or three colors that sit next to each other. Coral and peach. Mint and teal. Keep it simple and it looks intentional.
Space your dots by eye. They don’t have to line up. A relaxed, scattered pattern hides small mistakes and reads as cheerful.
Budget tip:
- A $2 set of dollar-store acrylic craft paints covers dozens of mugs. One bottle lasts ages.
- Let the first layer dry before adding more dots on top. Rushing smears them.
- For a mug you’ll drink from daily, use enamel or ceramic paint and bake it. Check the label for oven times, usually around 350°F for 30 minutes.
- Try a color fade from bottom to top. Warm colors low, cool colors high. Small idea, big charm. Done in twenty minutes.
2. Hand-Lettered Quote Mugs
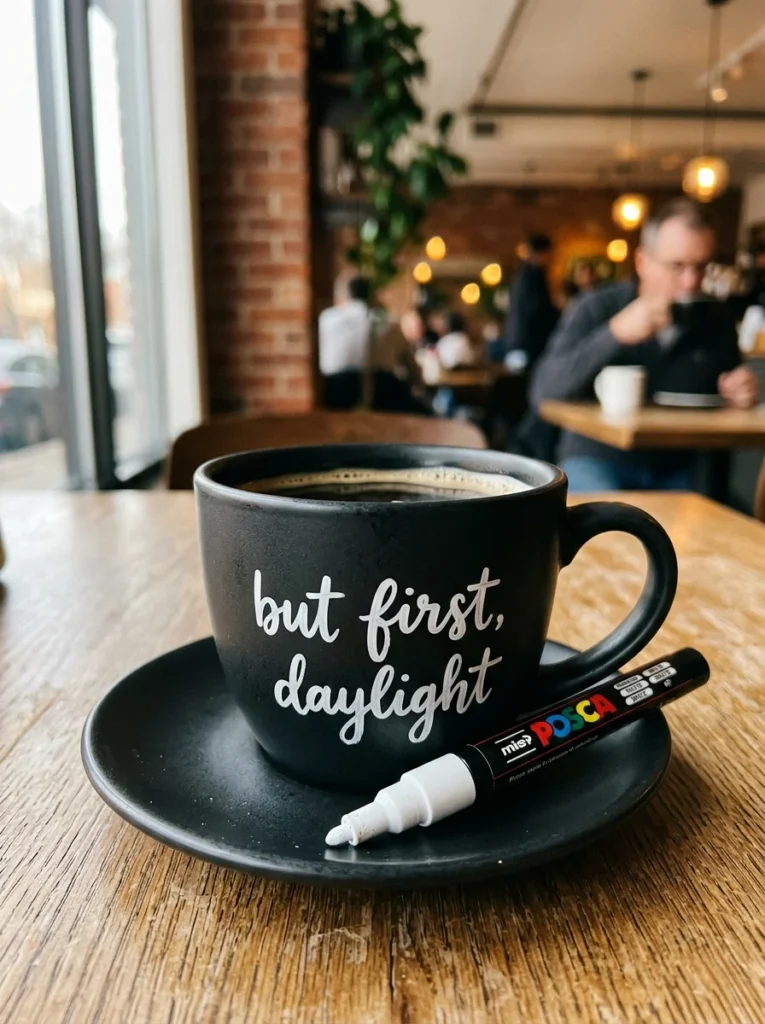
A short phrase turns a mug into a personal gift. “Good morning.” “Hey you.” A friend’s nickname. Keep it to a few words.
You don’t need neat handwriting. Faux calligraphy fakes it easily. Write your word in normal cursive. Then go back and thicken every downstroke. Fill those thick lines in. Suddenly it looks fancy.
A fine-tip oil-based paint pen is your best friend here. It flows smooth and dries opaque. Dollar stores and craft aisles both carry them.
Practice on paper first. Then practice on the mug’s underside where nobody looks.
Pencil a faint guideline if straight text feels hard. Wipe it off after.
Budget tip:
- One paint pen letters ten mugs.
- Buy black and white to cover both light and dark ceramic.
- White pen on a black mug looks modern and clean. Black pen on white looks classic.
- Made a mistake? Wipe wet paint with rubbing alcohol and a cotton swab. Start that letter over.
- Bake to set, then hand-wash to keep the words sharp for years.
3. Dreamy Watercolor Splash Mugs
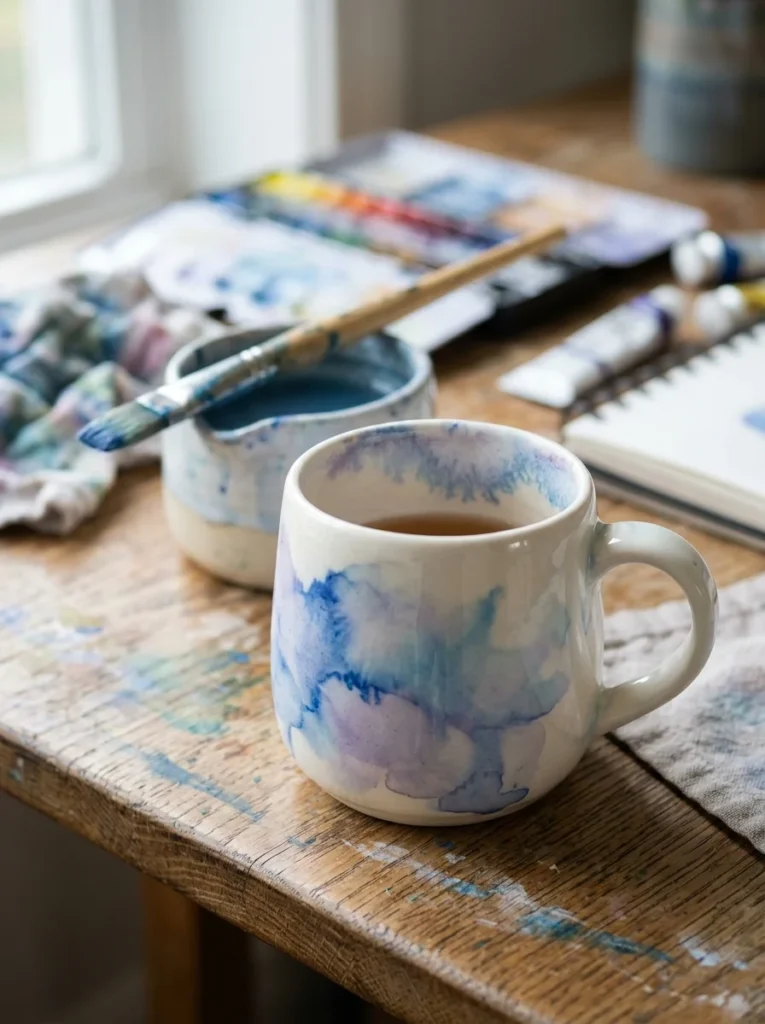
This one looks like real watercolor, but you fake it with watered-down acrylic. Soft, dreamy, and forgiving.
Mix a little acrylic paint with plenty of water. You want it thin and see-through, almost like colored water.
Brush it on in loose patches. Let colors touch so they blend on their own. Blues into purples. Pinks into oranges. Sunset vibes.
Keep it near the top rim and let the bottom stay white. That airy look feels light and pretty.
Dab with a paper towel to lift color and add texture. Every dab looks different.
Budget tip:
- You already own everything. A few craft paints, water, and one soft brush. Zero extra cost.
- Work fast while paint is wet so colors flow together. Once dry, they stop moving.
- Add tiny white or gold dots on top for a “stars in the sky” effect. Optional but sweet.
- Because the paint is thin, seal it well if you want it drink-safe. Or keep these as pretty desk pen-holders and plant pots.
- A soft, calming mug in about fifteen minutes.
4. Bold Geometric Triangle Mugs
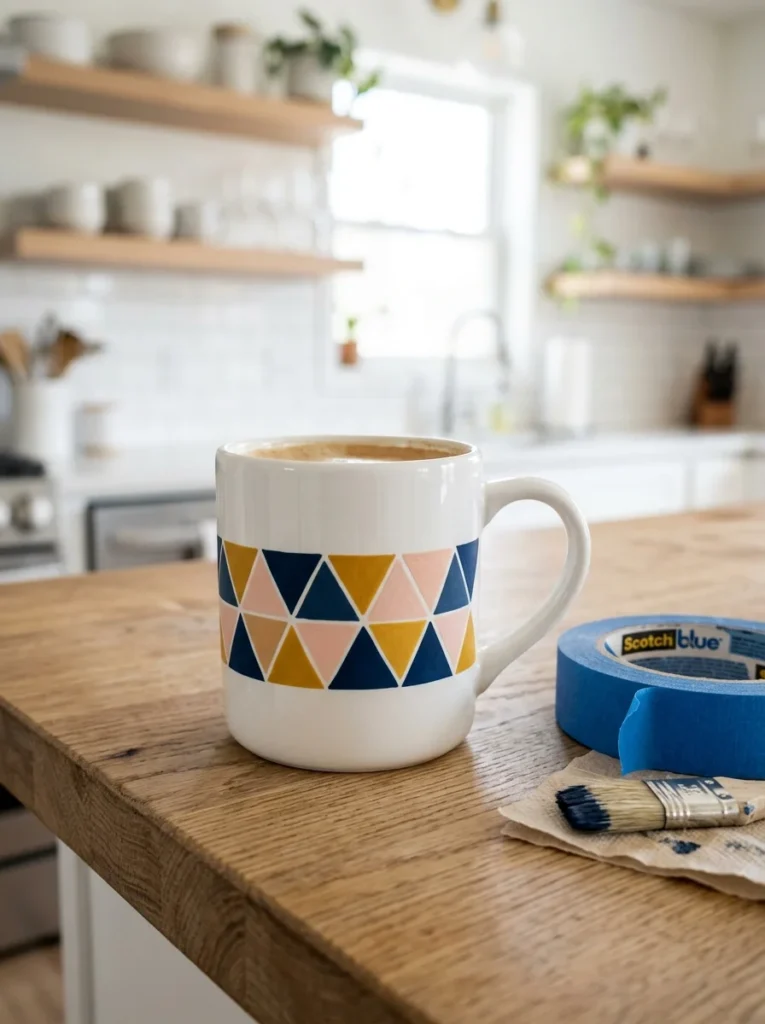
Sharp shapes look modern and pro. The secret is tape. Tape gives you clean edges without a steady hand.
Stick thin painter’s tape across the mug in angles. Cross a few lines to make triangles and diamonds.
Paint inside the taped sections. One color, or a few. Peel the tape off while the paint is still a little wet for the crispest lines.
Pick a tight palette. Navy, mustard, and blush together feel grown-up. Or three shades of one color for a calm look.
Leave lots of white space. Empty areas make the shapes pop.
Budget tip:
- A single roll of painter’s tape costs a couple dollars and does dozens of projects. Reuse leftover strips.
- Press the tape edges down firmly. Any gap lets paint bleed under. Rub with your fingernail to seal.
- Do one color at a time. Let each dry before taping over it for the next.
- This style suits gifts for guys, minimalist friends, and office desks. Clean, simple, done in half an hour.
5.Simple Painted Floral Mugs
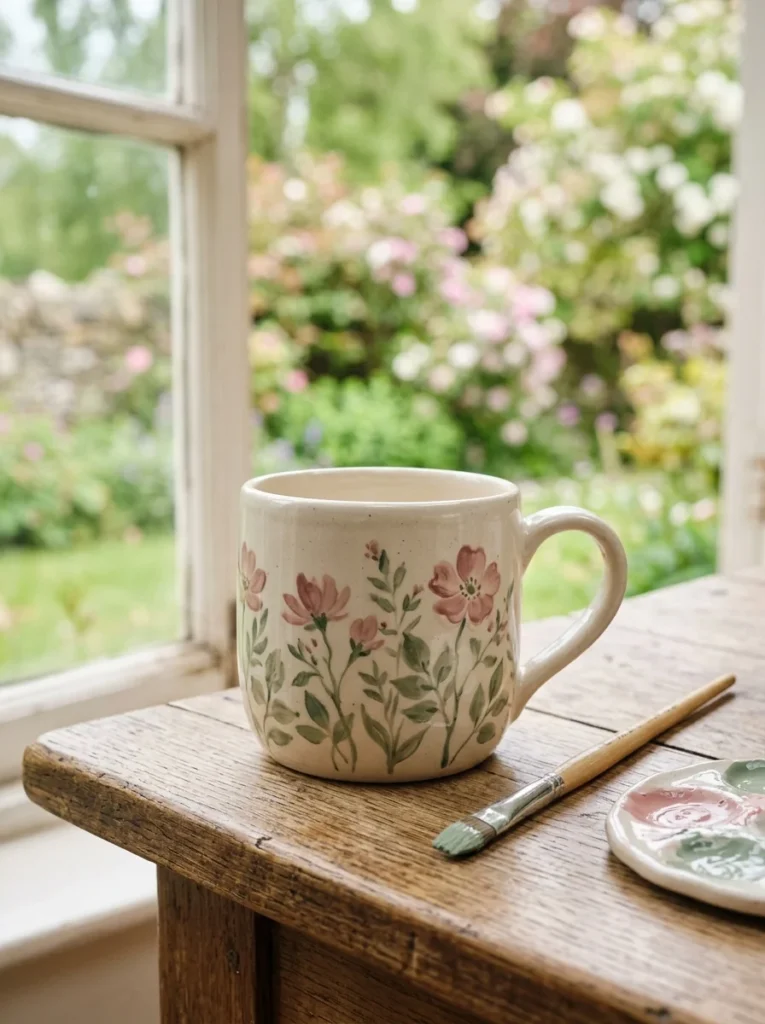
Flowers sound hard. These aren’t. You’re painting simple dots and leaves, not botanical detail.
Start with five little dots in a circle. That’s a whole flower. Add a dot in the middle for the center. Done.
Use a small round brush. Load a bit of paint. Press, don’t drag.
For leaves, make two short comma strokes in green. Easy shapes, quick results.
Scatter a few blooms around the mug. Leave breathing room. Crowded flowers look messy.
Pick soft, muted colors. Dusty pink. Sage. Cream. They feel vintage and calm.
Budget tip:
- One tiny bottle of each color paints many mugs. Craft-store minis cost under a dollar each.
- Add tiny white dots between flowers to fill gaps. It looks finished without extra effort.
- Mess up a petal? Let it dry, then paint over it. Nobody will know.
- Seal and bake for daily use. A hand-painted floral mug feels like a real gift, but you made it in twenty minutes with dots and commas.
6. Cool Faux Marble Mugs
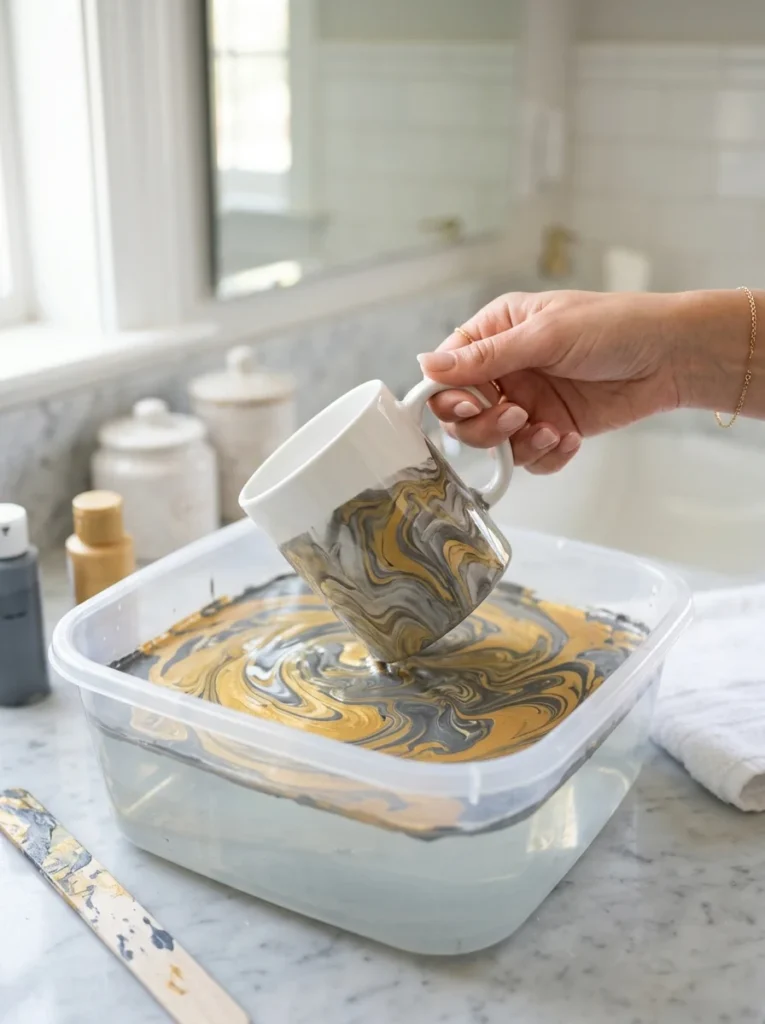
Marble looks expensive. You make it with nail polish and a cup of water. Wild, but it works.
Fill a disposable cup with room-temperature water. Drip a few drops of nail polish on the surface. It spreads into a film.
Swirl gently with a toothpick. Then dip the mug in and roll it through the floating polish. The pattern grabs on.
Grey with a touch of gold looks like real stone. Blues and whites look like ocean marble.
Work fast. Nail polish skins over in about a minute.
Wear gloves and open a window. The fumes are strong.
Budget tip:
- Dollar-store nail polish is perfect here. Buy the cheapest bottles you can find.
- Tape off the rim and inside first so paint stays away from your lips.
- Keep these marble mugs as decorative holders rather than drinkware, since nail polish isn’t food-safe. Pens, makeup brushes, toothbrushes.
- Every dip is different. You can’t mess it up. That’s the fun part.
7. Magical Galaxy Space Mugs
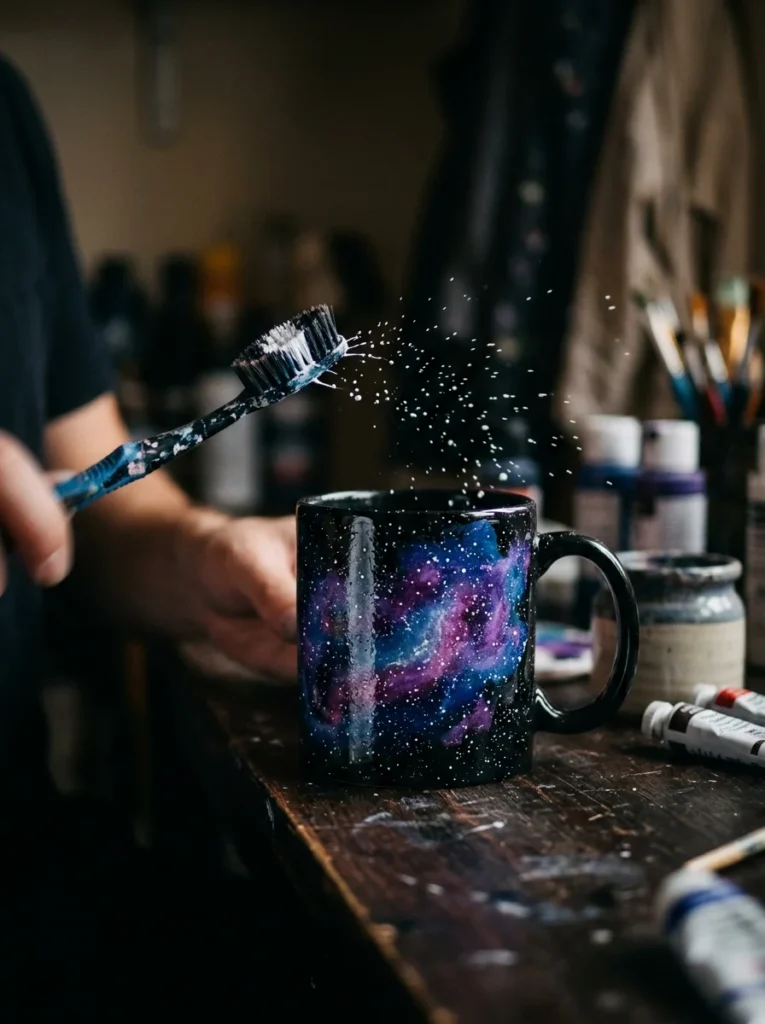
A galaxy mug looks stunning and hides every mistake. Space is supposed to be messy.
Start with a black or dark blue mug. Dab on purple, blue, and pink in cloudy patches with a sponge. Overlap them. Don’t blend too neat.
Add small touches of white or pink in the center of clouds to make them glow.
Now the fun part. Dip an old toothbrush in white paint. Flick it over the mug with your thumb. Instant stars.
Do a few flicks. Spin the mug. Flick again. Uneven stars look real.
Budget tip:
- An old toothbrush and a sponge scrap cost nothing. Raid your bathroom drawer.
- Keep clouds soft by dabbing, not stroking. Sponges give that misty nebula texture for free.
- Let each color dry a touch before adding the next so they don’t turn to mud.
- Seal and bake for a drink-safe finish. Kids and space fans love these.
- You’ll spend more time flicking stars than actually painting. Twenty relaxed minutes, one tiny universe.
8. Playful Cactus Doodle Mugs
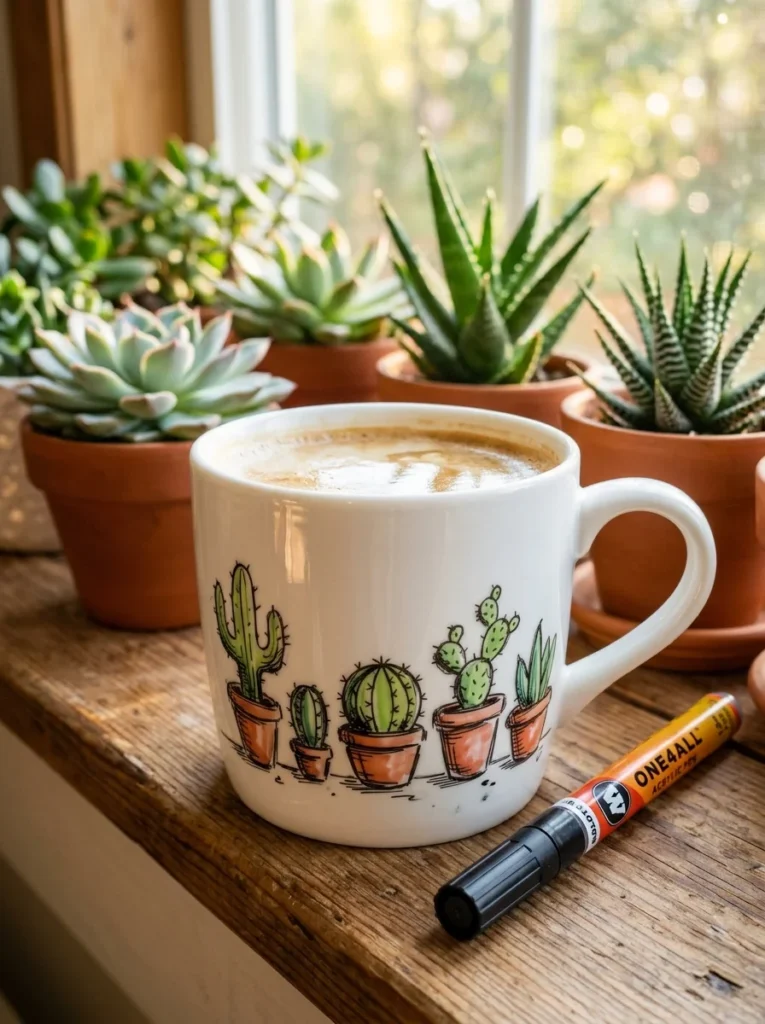
Cacti are the easiest doodle ever. A rounded green blob with tiny lines for spines. That’s it.
Draw little pot shapes in terracotta orange along the bottom. Add a green cactus poking out of each. Keep them chunky and cute.
Little dashes make the spines. A single pink dot makes a flower.
Use a green paint pen for clean lines, or a thin brush if you like. Both work.
Line them up like a shelf of plants. Row them along the middle of the mug.
Budget tip:
- Three colors do it. Green, orange, pink. Buy the small craft-paint bottles for pocket change.
- No two cacti should match. Some tall, some round, some with arms. The variety is the charm.
- Add tiny dots around them to fill space if the mug looks bare.
- Mess up? Wipe wet paint with alcohol and redo one cactus.
- Bake to set. Perfect for the plant lover who kills real plants. These ones survive.
- Fun, forgiving, and finished in fifteen minutes.
9. Rainbow Stripe Mugs
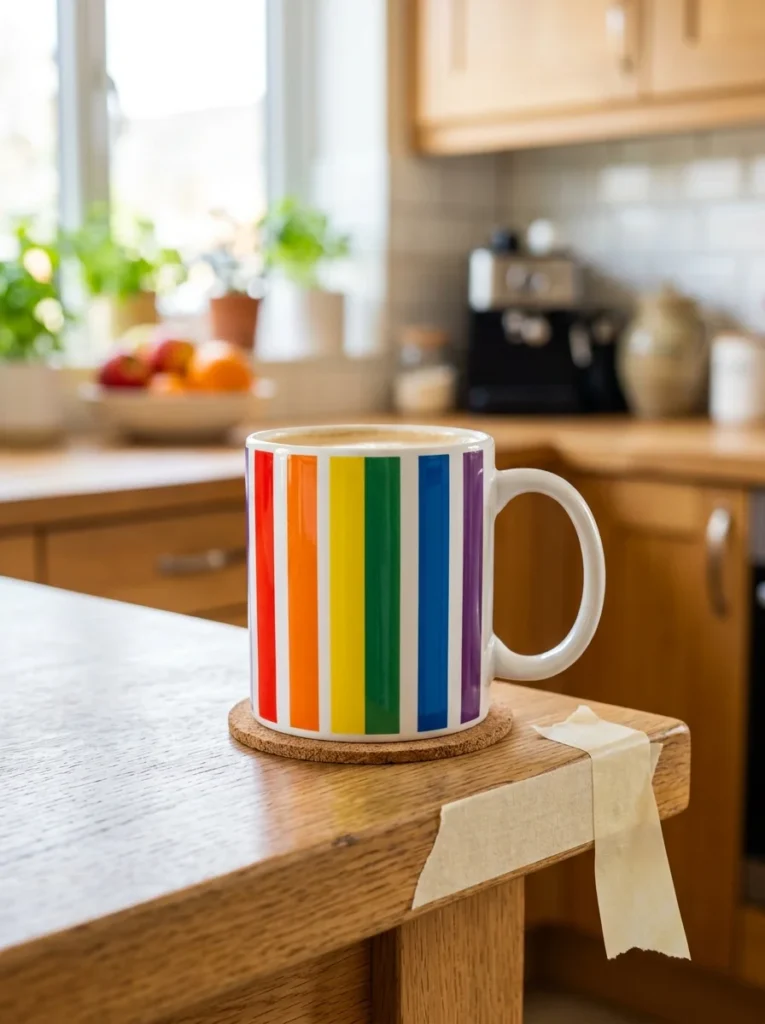
Stripes are simple and cheerful. Tape keeps them straight so your hands don’t have to be.
Run vertical strips of painter’s tape down the mug, leaving gaps between them. Paint the gaps.
Go full rainbow. Red, orange, yellow, green, blue, purple in order. Or pick three colors you love and repeat.
Peel the tape while paint is slightly wet for sharp edges.
Want thin stripes? Use thin tape. Fat stripes? Wider gaps. You control the whole look.
Budget tip:
- Leftover paint from other projects is perfect here. Use up those half-empty bottles.
- Paint one color at a time and let it dry before doing the neighbor. This stops colors bleeding together.
- Try horizontal stripes for a different vibe. Or diagonal for something playful.
- Press tape edges down hard so paint stays put. A fingernail rub seals them.
- Seal and bake for daily drinking.
- Rainbow stripes cheer up any morning. They’re beginner-proof because the tape does the neat work for you. One happy mug, thirty minutes tops.
10. Sweet Fingerprint Heart Mugs
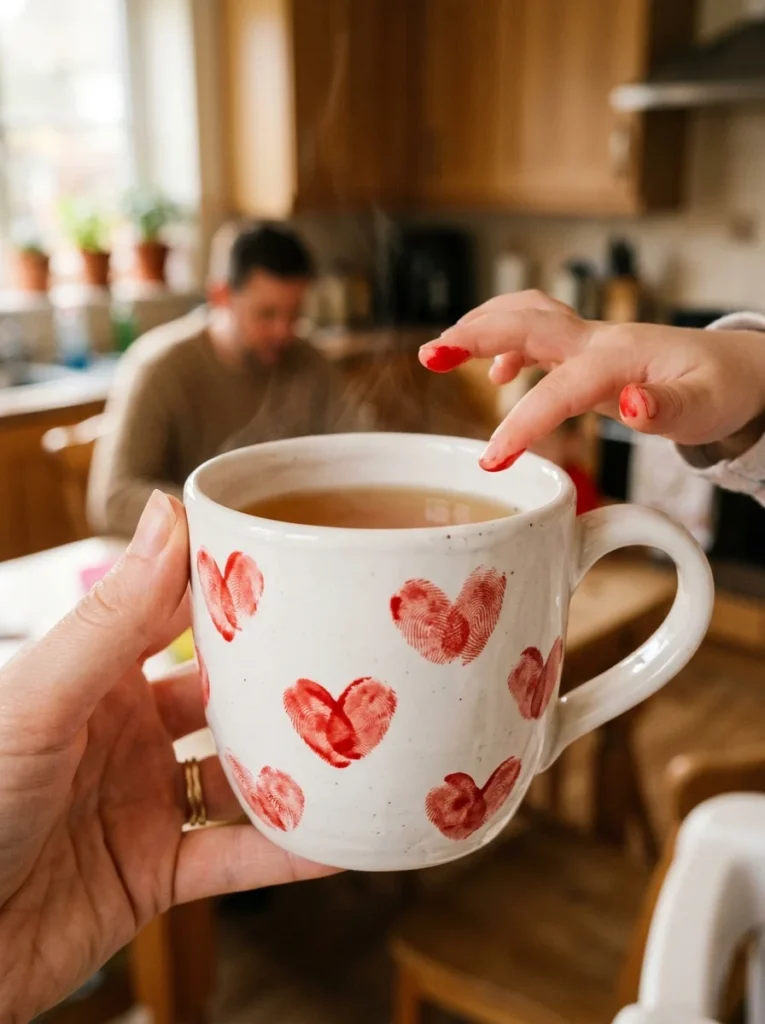
This one’s made for kids and keepsakes. You literally paint with your fingers.
Dip a thumb in red paint. Press two prints at an angle so they meet at the bottom. That’s a heart. Two thumbprints, one heart.
Scatter hearts all over the mug. Different sizes look sweet.
Little hands make little hearts. Big hands make big ones. A family mug with everyone’s prints is a real treasure.
Budget tip:
- Just paint and a finger. The cheapest project on this list.
- Wipe fingers between colors with a damp cloth. Keep a paper towel handy.
- Add a tiny painted “I love you” or a date with a fine pen once dry. Grandparents adore these.
- Let each print dry a moment before pressing a neighbor, or they smear.
- Seal and bake gently. Then hand-wash to protect the prints.
- For Mother’s Day, Father’s Day, or grandparents, nothing beats a mug covered in a kid’s fingerprints. Cheap to make, priceless to keep.
- Ten minutes, zero skill, all heart.
11. Twinkling Constellation Mugs
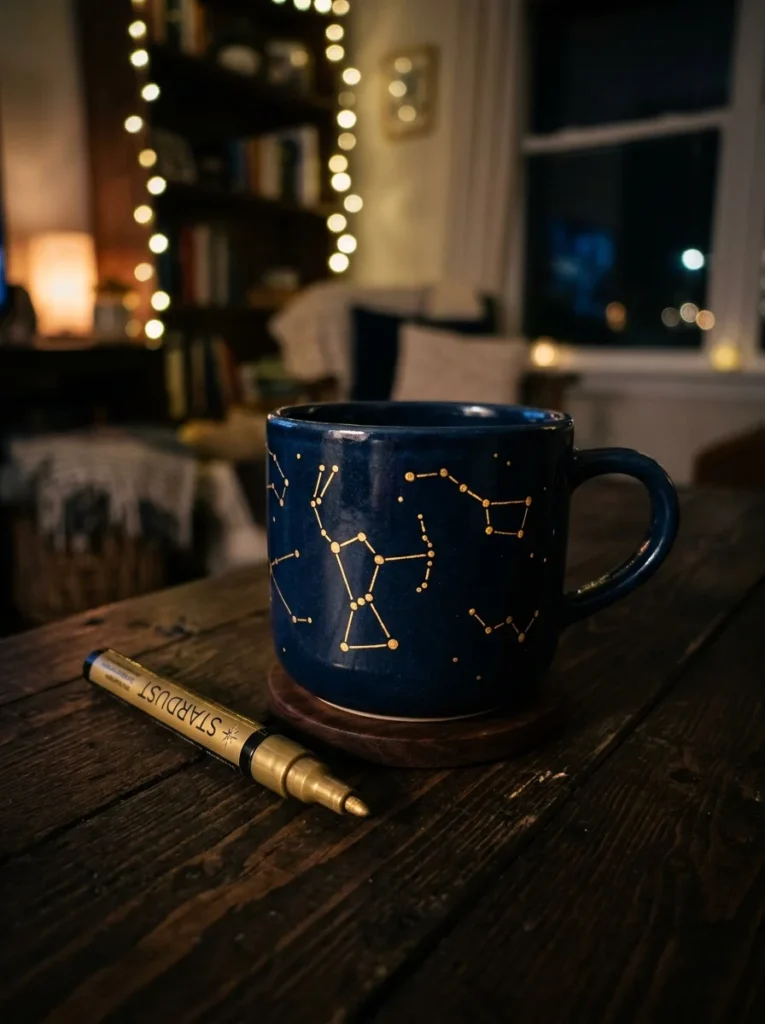
Constellations look thoughtful and cost almost nothing. Dots and lines, that’s the whole thing.
Start with a dark mug. Navy or black shows off gold beautifully.
Use a gold or white paint pen. Dot small stars where you like. Then connect a few with thin lines to make shapes.
Paint a real constellation like the Big Dipper. Or a zodiac sign as a personal gift. Look up a simple star map for reference.
Keep most stars loose and scattered. Only connect a few. Too many lines look busy.
Budget tip:
- One metallic paint pen handles this whole project and many more. Great value.
- Vary your dot sizes. Bigger dots feel like brighter stars.
- A birthday gift with the person’s zodiac constellation feels custom and quietly impressive.
- Steady the pen on the mug and tap gently for round dots.
- Bake to set the gold. Hand-wash so it stays bright.
- Calm, elegant, and genuinely easy. You’re just placing dots on a dark background. Twenty minutes for something that looks like it took real skill.
12. Soft Ombre Gradient Mugs
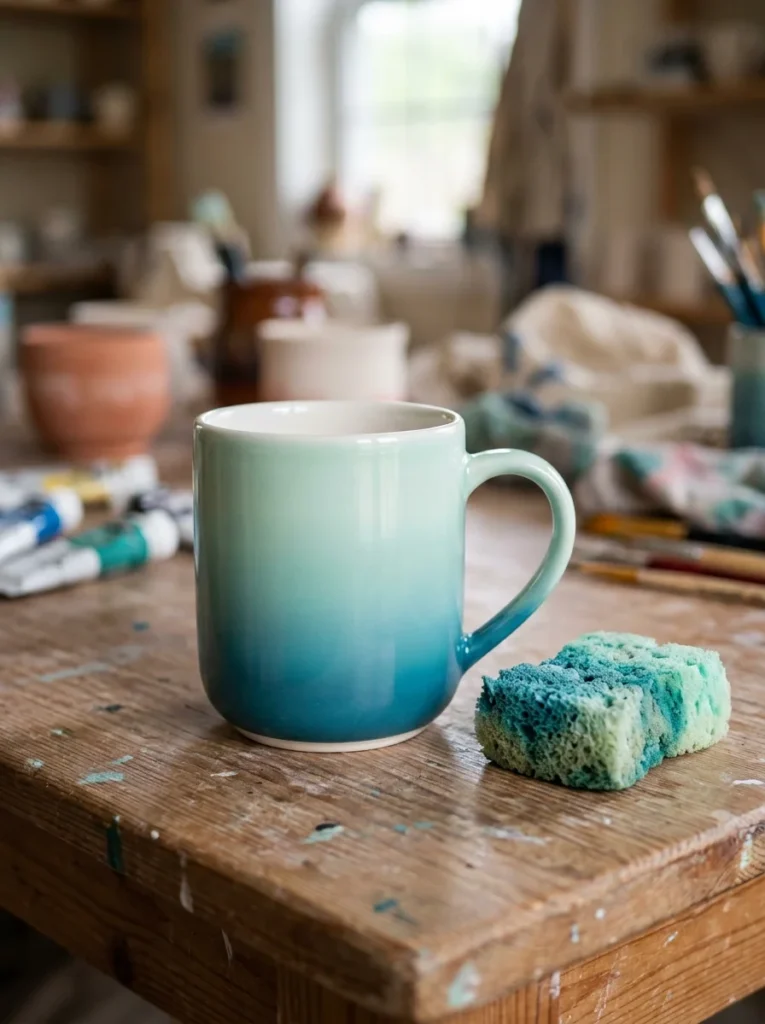
Ombre is that smooth fade from dark to light. It looks pro, but a sponge does the work.
Pick one color and its lighter version. Or mix white into a color as you go up.
Paint the darkest shade at the bottom. Dab with a damp sponge as you move up, adding white to fade it lighter toward the rim.
The sponge softens the line between shades. Keep dabbing until the change looks gradual.
Work while paint is wet. Dry paint won’t blend.
Budget tip:
- You only need one bottle of color plus white. Two paints, endless fades.
- Blues fading to white look like the sky. Pinks to white feel soft and pretty.
- Don’t overthink the middle. Just dab where colors meet until they melt together.
- Wipe your sponge often so old paint doesn’t muddy the new.
- Seal and bake for a drink-safe mug.
- Ombre feels fancy but forgives everything, because a blur is the whole point. Fifteen minutes for a smooth, calming color fade that looks store-bought.
13. Minimalist Line Art Mugs
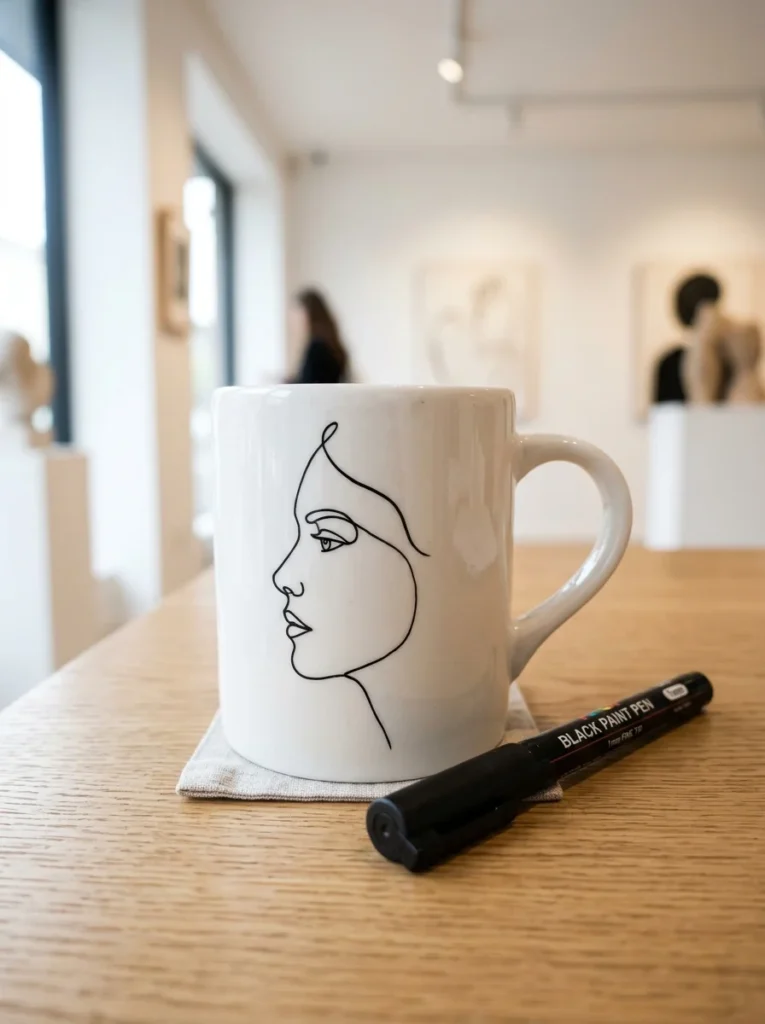
Line art is stylish and stripped-down. One thin black line, no color, no filling in.
Draw a face, a hand, or a leaf in one continuous line without lifting the pen. It looks artsy on purpose, even when it’s wobbly.
A fine black paint pen gives you clean, even lines. Practice the shape on paper a few times first.
Simple works best. A single flower. An abstract squiggle. A tiny mountain range.
Leave tons of white space. The empty mug is part of the design.
Budget tip:
- One black paint pen is all you buy. Under three dollars, dozens of mugs.
- Don’t aim for perfect. The hand-drawn wobble is the whole charm of line art.
- Pencil a light guide first if you’re nervous. Erase after.
- This style suits modern homes, minimalist friends, and clean kitchens. It reads as expensive and intentional.
- Wipe wet mistakes with alcohol and redo the line.
- Bake to set, then hand-wash. Simple, modern, and done in ten minutes with a single pen.
14. Cute Animal Face Mugs
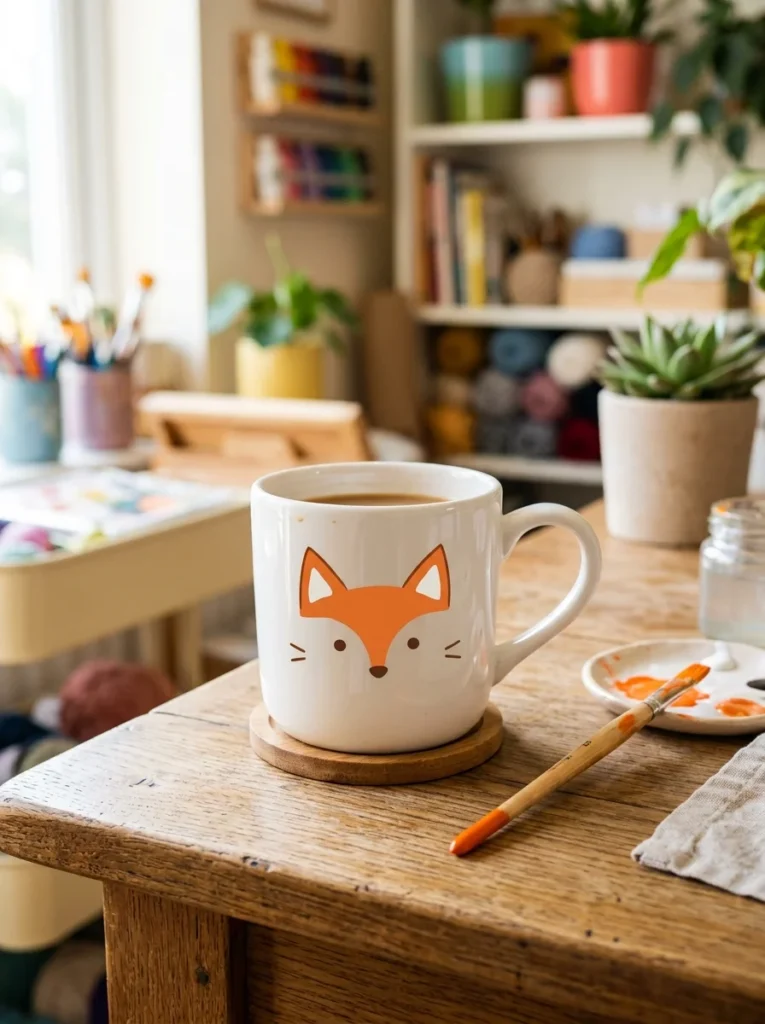
Animal faces make people smile. And they’re just a few simple shapes.
Pick an easy animal. A fox, cat, panda, or bear. Paint two dot eyes, a little nose, and ears.
Triangle ears make a fox or cat. Round ears make a bear or panda. That small change swaps the whole animal.
Keep features chunky and centered on the mug front. Simple beats detailed here.
Add pink cheek circles for cuteness. One brush dab each.
Budget tip:
- Two or three colors per animal. Use paints you already have from other projects.
- Dot eyes are just that. Round dots. A tiny white speck in each makes them shiny and alive.
- Mess up the nose? Let it dry and paint over it.
- A shelf of different animal mugs makes a fun set for kids or a themed gift.
- Steady your hand for the eyes. They set the whole face.
- Seal and bake for daily use.
- Cute, cheerful, and beginner-friendly. Anyone can paint two dots and two ears. Fifteen minutes per happy little face.
15. Textured Sponge-Paint Mugs
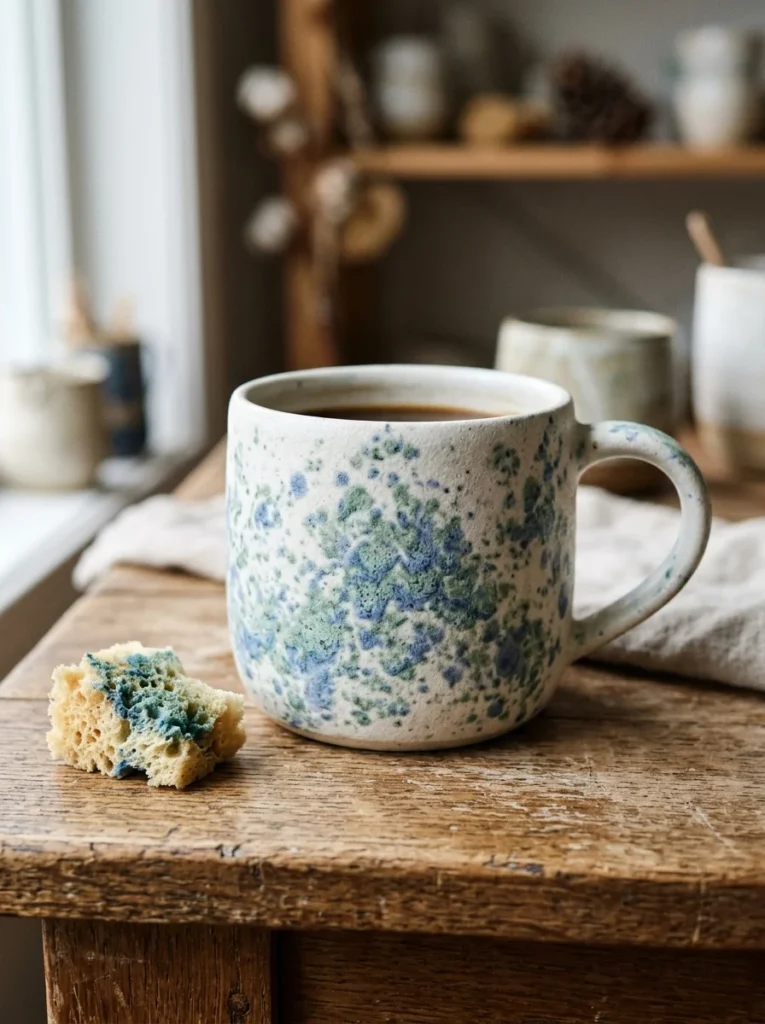
No brush skills? Use a sponge. Sponges make texture that looks intentional and rich.
Tear a kitchen sponge into a small chunk. The rough torn edge gives the best pattern.
Dip it lightly in paint. Dab it on the mug. Don’t drag. Just press and lift.
Overlap two or three colors for a mottled, stony look. Blues and greens feel earthy. Golds and browns feel warm.
Less paint on the sponge means more texture. Blot extra off first.
Budget tip:
- An old sponge from your sink costs nothing. Cut it up and use scraps.
- Layer light over dark for depth. Let each layer dry a bit first.
- This hides shaky hands completely, since the whole point is a rough, uneven finish.
- Try one color for a soft solid-textured mug. Simple and modern.
- Rinse your sponge between colors or keep separate pieces.
- Seal and bake for a drink-safe finish.
- Sponge painting is the most forgiving method here. There’s no wrong way to dab. Ten easy minutes for a rich, textured mug.
16. Personalized Monogram Mugs
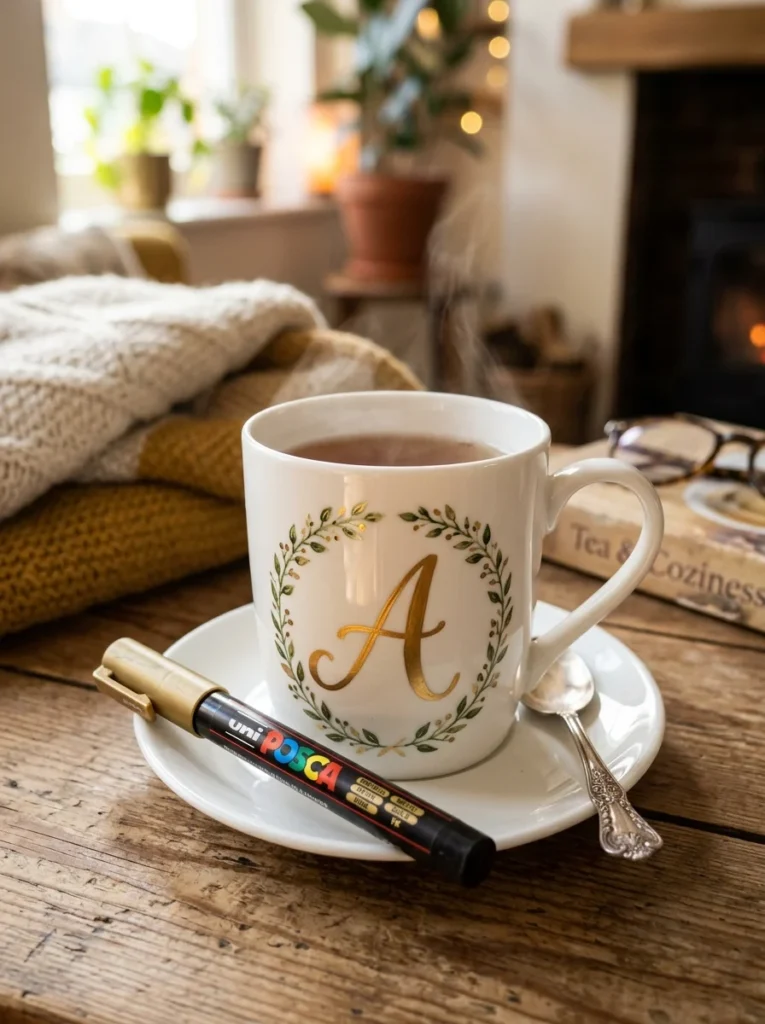
One big letter turns any mug into a personal gift. Fast, classy, and beginner-simple.
Pick a person’s first initial. Paint it large and centered on the mug front.
Use a gold or black paint pen for clean edges. Trace a printed letter through the ceramic if freehand feels scary. Tape the paper inside the mug and follow the shape through the wall.
A simple ring of tiny leaves or dots around the letter makes it feel finished.
Keep the letter chunky. Thin letters look unsteady. Bold ones look confident.
Budget tip:
- One paint pen monograms a whole set of gifts. Buy plain mugs in a multipack to save more.
- Fill the letter solid, or just outline it. Both look good.
- Pencil the shape lightly first. Erase stray marks after.
- Monogram mugs suit weddings, teachers, coworkers, and family. Everyone likes their own initial.
- Wipe wet slips with alcohol.
- Seal and bake, then hand-wash to keep the letter crisp.
- A quick, thoughtful, personal gift. Fifteen minutes and one letter.
17. Fresh Lemon and Fruit Mugs
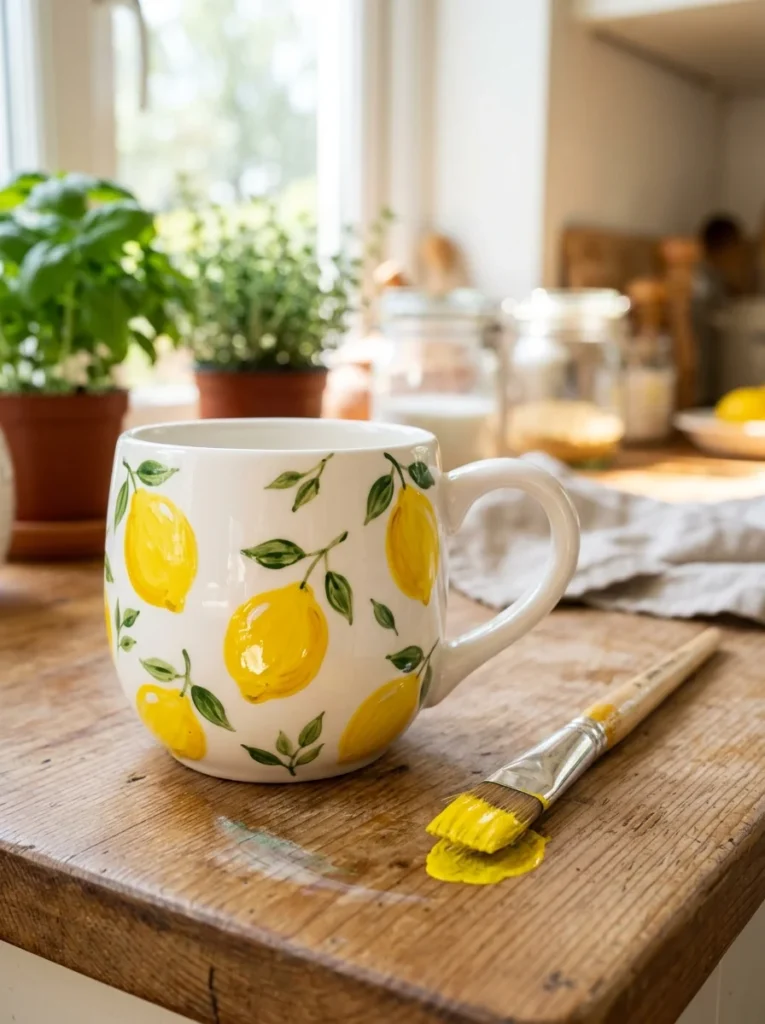
Painted fruit feels sunny and fun. Lemons are the easiest. Just yellow ovals.
Paint yellow oval shapes around the mug. Add a tiny point on each end. That’s a lemon.
Two green comma strokes make leaves. Scatter them near the fruit.
Space the lemons out and let them tilt at different angles. Random looks natural.
Add tiny white specks on each lemon for texture, like real peel.
Budget tip:
- Yellow and green are all you need. Small bottles cost pocket change.
- Try oranges instead. Same oval, orange paint. Or red strawberries with tiny dot seeds.
- A whole fruit set brightens a kitchen. Lemons, oranges, cherries, one design each.
- Keep shapes chunky and simple. Detailed fruit gets fussy fast.
- Mess up a lemon? Dry it, paint over it.
- Seal and bake for morning coffee use.
- Fruit mugs feel like summer all year. They’re cheerful, cheap, and made from simple ovals and commas. Fifteen minutes for a mug that looks straight off a farmhouse shelf.
18. Calm Mountain Landscape Mugs

Mountains look peaceful and take zero drawing talent. They’re just triangles.
Paint overlapping triangle shapes in a row along the mug. Different heights. Different blues.
Add a small white cap on each peak for snow. One brush dab.
Layer darker mountains in front, lighter ones behind. That gives instant depth.
Keep the bottoms flat so they sit like a real range. The tops can be sharp or soft.
Budget tip:
- Two or three shades of blue do it. Mix white into one blue to make the others. One bottle, three colors.
- Add a tiny sun or moon as a single dot above the peaks.
- A thin painted line below the mountains reads as water. Optional, nice touch.
- This suits hikers, nature lovers, and anyone who likes calm designs.
- Wobbly triangles still look like mountains, so relax.
- Seal and bake for daily coffee.
- Peaceful, simple, and forgiving. You’re painting triangles and dotting snow. Fifteen quiet minutes for a mug that looks like a postcard.
19. Clean Tape-Resist Pattern Mugs
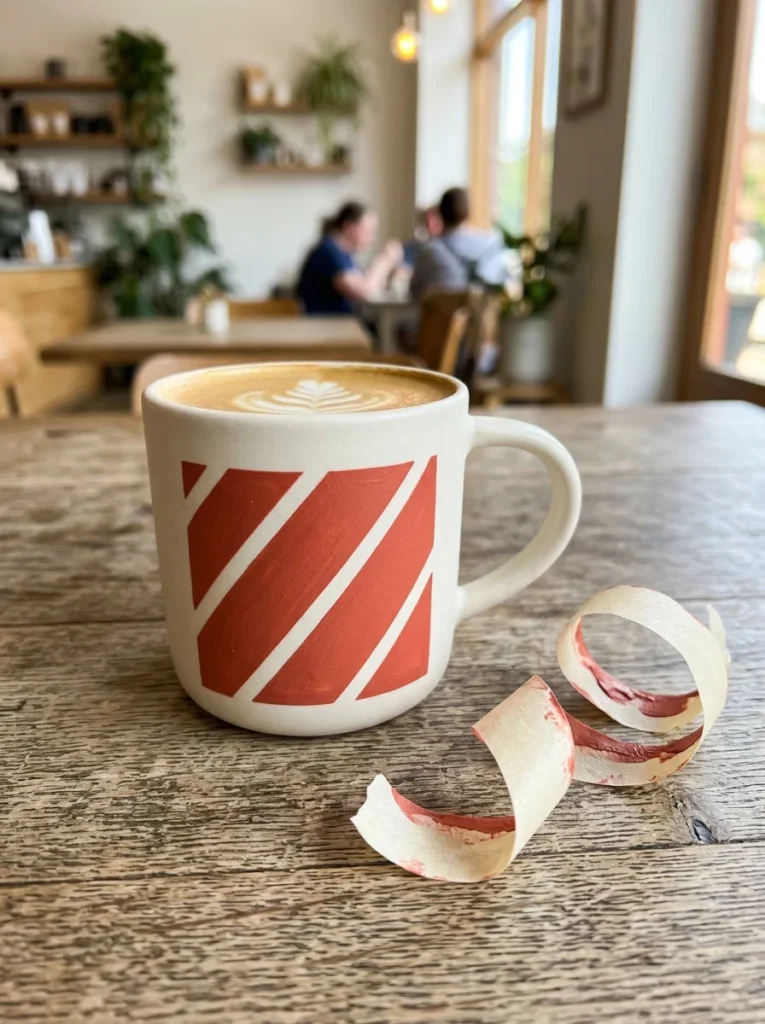
Tape-resist means the tape stays as your design. You paint over it, peel it, and the mug shows through.
Stick strips of tape in a pattern. Diagonal lines. A zigzag. A simple word shape.
Paint the whole area, tape and all. Let it dry a little. Peel the tape off.
Where the tape was, the mug stays clean and white. That white becomes your design.
Sharp, modern, and it looks harder than it is.
Budget tip:
- One roll of tape, one bottle of paint. Both cheap, both reusable across mugs.
- Try cutting tape into thin strips for delicate lines. Wider strips for bold ones.
- Press every tape edge down hard. Gaps let paint sneak under and blur your line.
- Peel while paint is barely wet for the cleanest reveal.
- A single bold color with white cut-through lines looks graphic and cool.
- Seal and bake for everyday use.
- Tape-resist is beginner magic. The tape does all the neat work. Twenty minutes for a crisp, modern mug.
Conclusion
Painting mugs is one of the cheapest, calmest ways to make something with your hands. A dollar-store mug, a few craft paints, and a spare afternoon are all it takes. Start with the easy ones. Polka dots. Sponge texture. A single initial. Each project on this list forgives mistakes and hides shaky hands, so beginners get real results fast.
Pick a design that fits the person or the mood, grab your paint pen, and start dabbing. Seal and bake the ones you’ll drink from, keep the rest as pretty holders, and gift the best ones to people you love. Your next favorite mug is one plain cup and twenty minutes away.
