

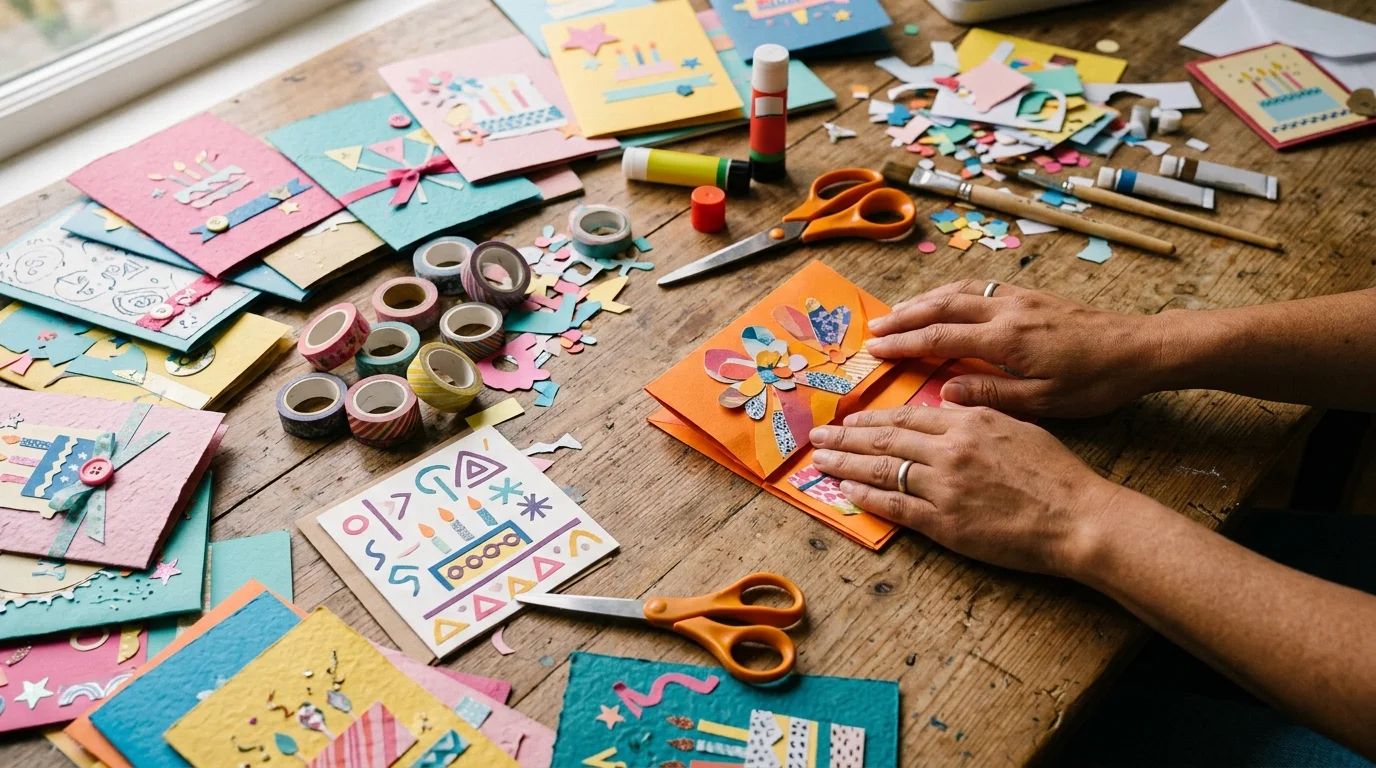
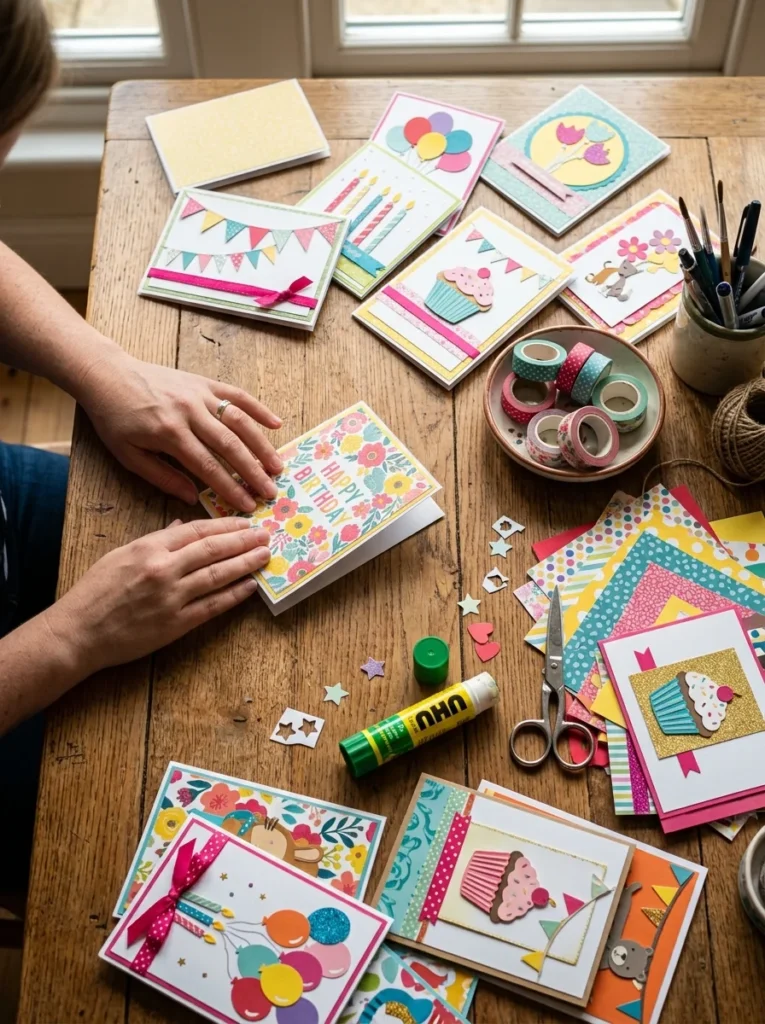
Making a birthday card by hand says more than any store-bought one ever could. You do not have to be an artist. You do not need fancy tools. Most of these projects use paper, glue, and things already sitting in a drawer. Below are 22 simple card ideas anyone can make in an afternoon. Each one is cheap, quick, and easy to change to fit the person you love. Pick one, grab some scraps, and start folding.
1. Pop-Up Balloon Card
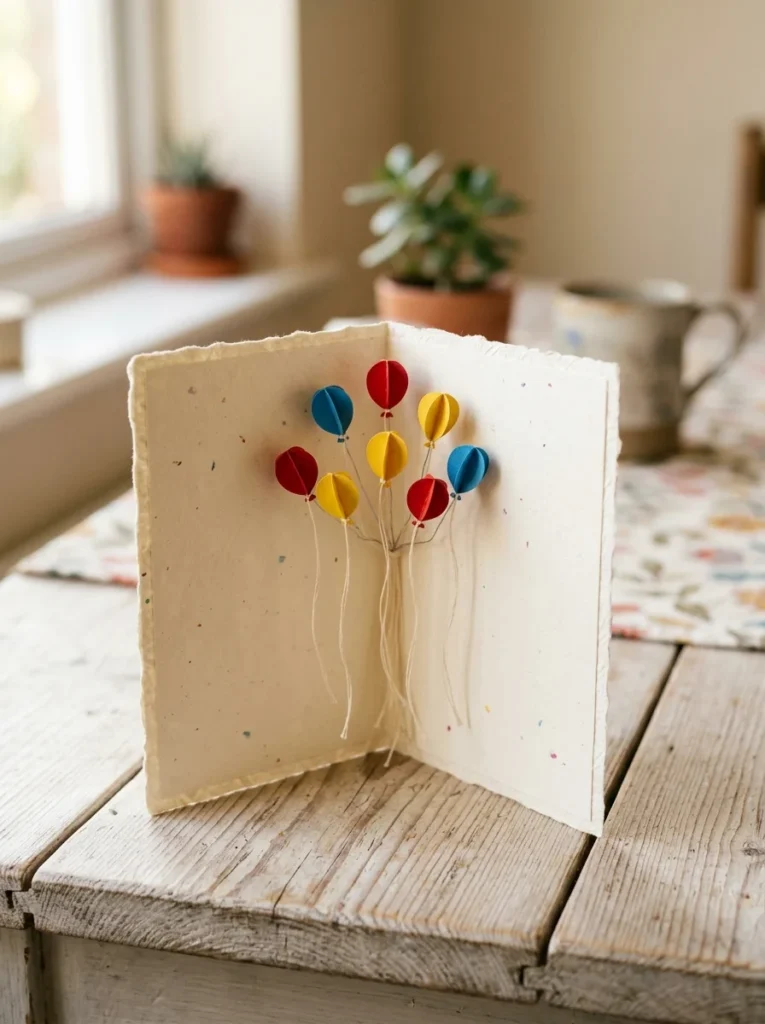
This card looks tricky but takes ten minutes. Fold a piece of cardstock in half. Cut small paper balloons from colored scraps. Glue thin strips of paper behind each balloon so they spring forward when the card opens.
Draw little strings under each balloon with a pen. That small touch makes them feel real.
Use paper you already own. Old wrapping paper, magazine pages, and junk mail all work as balloons. You do not have to buy anything new.
Space the balloons at different heights. This gives the card depth and movement.
Want it fuller? Add five or six balloons instead of three. A tight cluster looks cheerful and hides messy cuts.
Glue matters here. A dab of white glue holds better than tape and stays flat.
Sign the inside before you seal it. Once the pop-up sets, writing gets awkward.
This card suits any age. Bright colors feel young. Soft pastels feel calm and grown-up.
Total cost is close to nothing. One sheet of paper makes the whole thing.
2. Watercolor Wash Card
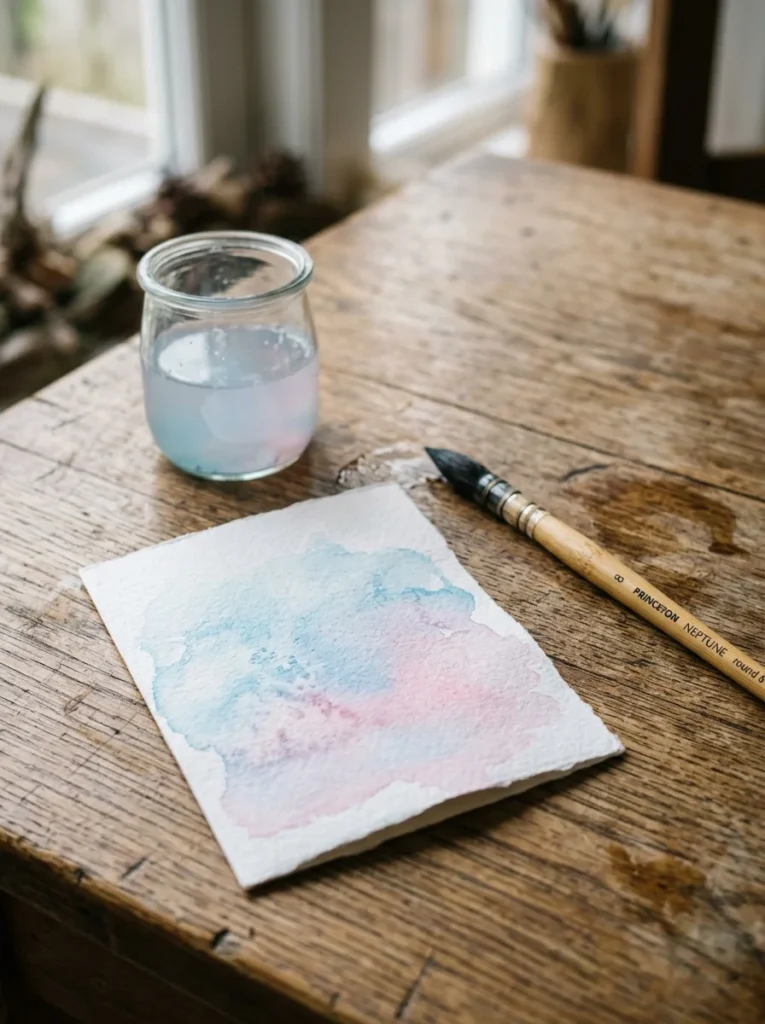
A watercolor background turns plain paper into something special. You only need paint, water, and thick paper.
Wet the paper first with a clean brush. Then drop in two or three colors and let them spread. The blur is the whole charm. Do not overwork it.
No watercolor set? Use a kids’ paint tray. The cheap ones cost almost nothing and give the same soft look.
Let it dry flat so it stays smooth. A warm windowsill speeds this up.
Once dry, add a simple shape on top. A cut-out heart, a stamped star, or a hand-drawn cake all work.
Keep the color light near the edges. This frames the card and leaves room to write.
Mistakes fade into the wash, so relax. Watercolor forgives shaky hands.
Try one color for a calm feel. Try three for a party mood.
Thick paper stops warping. If yours is thin, tape the corners down while it dries.
This card feels handmade in the best way. No two ever turn out the same.
3. Pressed Flower Card
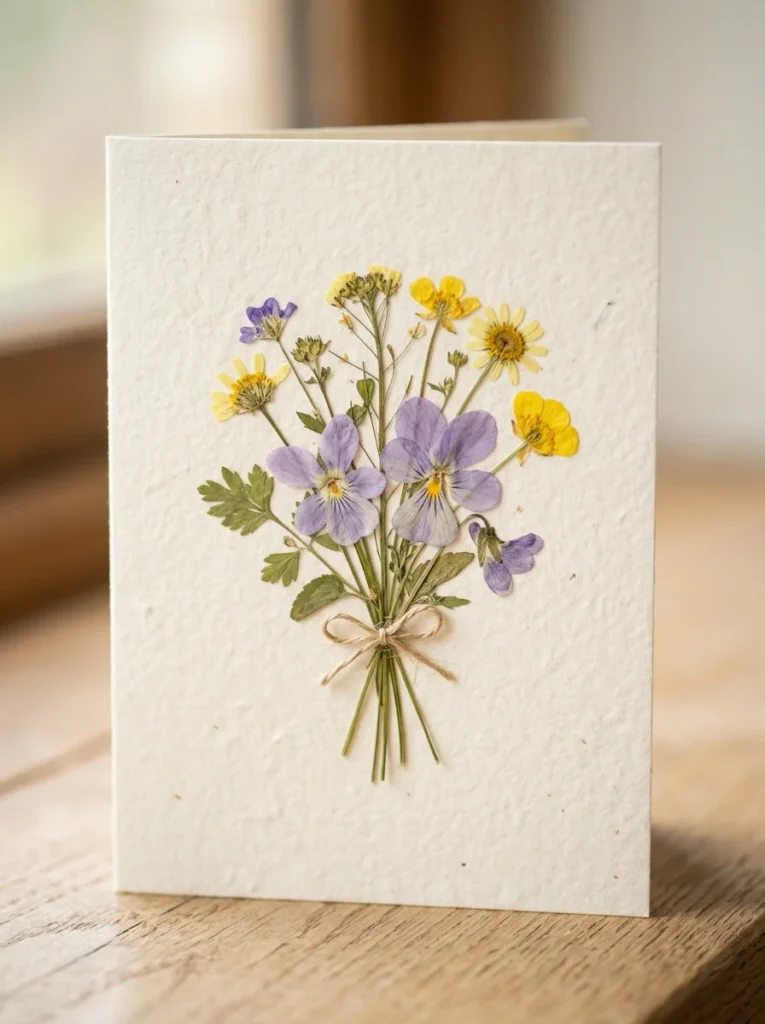
Real flowers make a card feel personal and gentle. You just need blooms and a heavy book.
Pick small, flat flowers like pansies or daisies. Place them between two sheets of paper. Press them under books for a week.
Free flowers grow everywhere. Clover, tiny weeds, and garden trimmings press beautifully. You do not have to buy a bouquet.
Once flat and dry, glue them down with a thin layer of white glue. A cotton swab spreads it without clumps.
Arrange them in a small cluster or a single stem. Less is often prettier here.
Add a paper vase or a hand-drawn ribbon under the stems. This ties the design together.
Seal delicate petals with a light coat of glue on top. This keeps them from crumbling.
Leaves and grasses work too. They add green and fill empty space.
This card suits older relatives and quiet people. It feels soft and thoughtful.
Start pressing flowers now, even without an occasion. Then you always have some ready.
4. Button Confetti Card
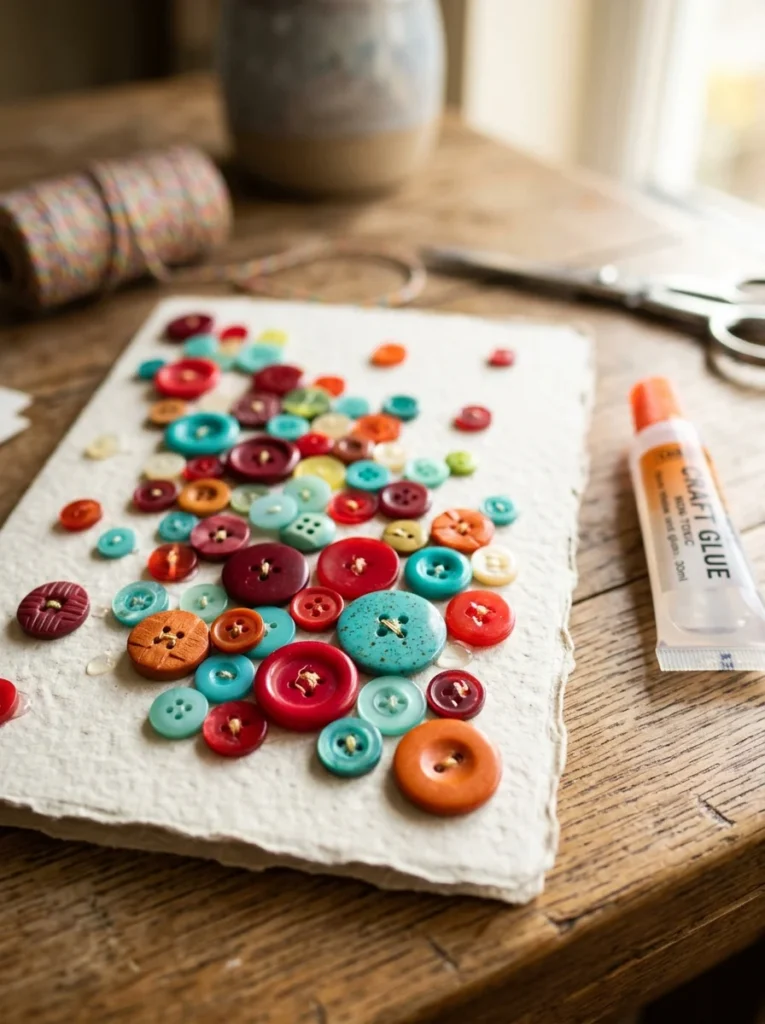
Buttons give a card texture and a fun, playful look. Most homes have a jar of spare buttons somewhere.
Scatter them across the front like tossed confetti. Glue each one down with a strong dot of craft glue.
Raid your sewing kit. Odd buttons from old shirts cost nothing and add charm through their mismatch.
Mix sizes and colors. A random spread feels more festive than a neat grid.
Draw thin lines from the top corner so the buttons look like they are falling. This tiny detail sells the confetti idea.
Group a few near the center and let some drift to the edges. Movement makes it lively.
Small buttons work best on standard cards. Big ones make the card hard to close.
Press each button for a few seconds so it holds. Craft glue needs a moment to grab.
Let it dry flat overnight before you fold or mail it.
This card is loud, cheerful, and cheap. It suits kids and playful adults alike.
5. Washi Tape Stripe Card
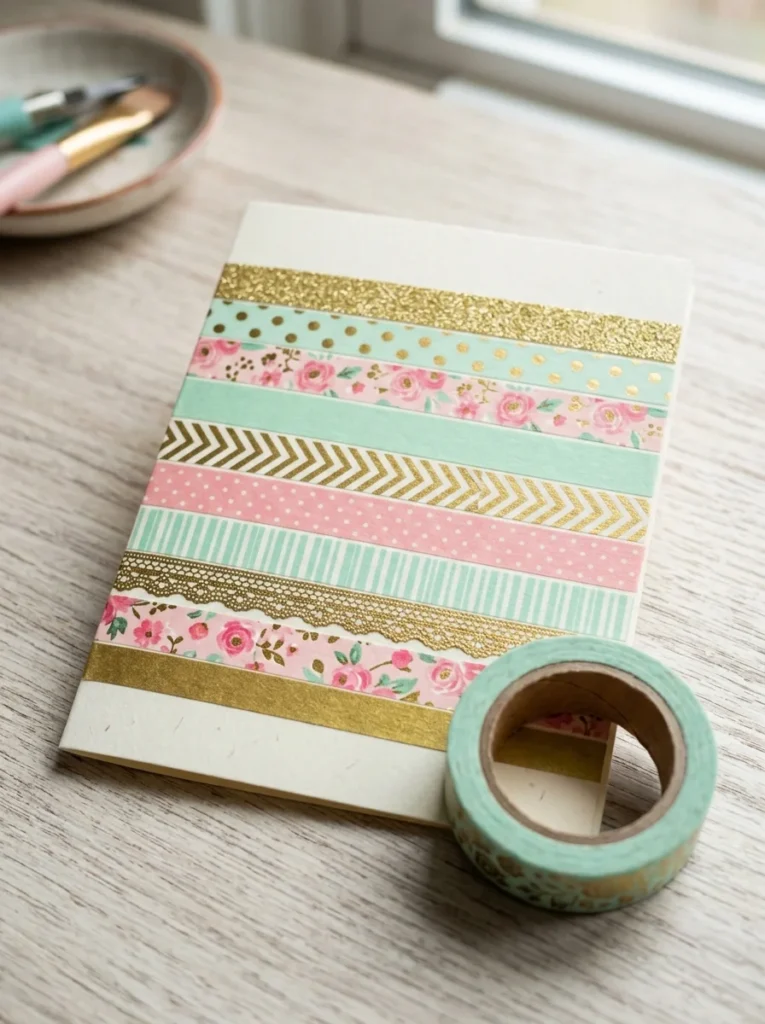
Washi tape is the easiest way to decorate a card. No glue, no drying, no mess.
Lay strips across the front in neat rows. Press them down and trim the ends with scissors.
One roll goes a long way. A single tape roll costs little and covers dozens of cards.
Mix patterns and plain colors for balance. Too many busy prints can clash.
Try a diagonal layout for a modern look. Or stack thin and thick strips for rhythm.
Leave a gap in the middle for a small paper shape or a written name.
Peel and reposition tape if you mess up. It lifts cleanly, unlike glue.
Layer strips over a painted background for extra depth. This mixes two easy ideas into one.
Fold a strip over the card edge to hide rough cuts. It looks tidy and clean.
This card takes five minutes flat. It is perfect when you forgot a birthday until this morning.
Keep a few finished ones on hand for surprise invites.
6. Handprint Cake Card
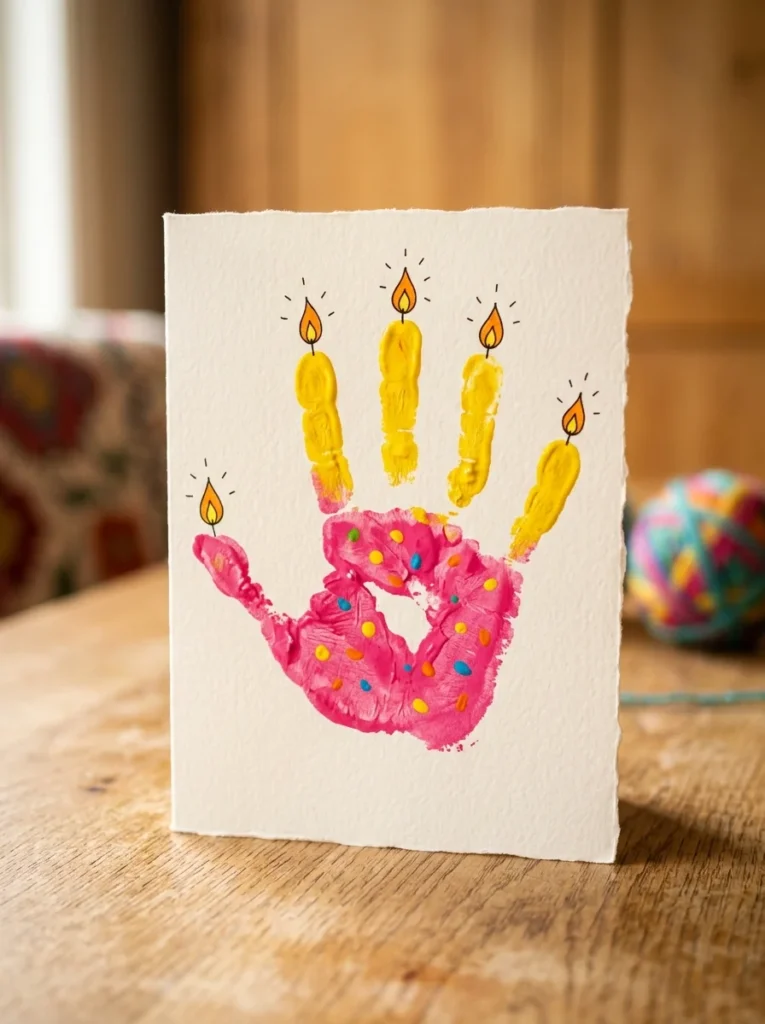
Kids love this one, and grandparents love getting it. A painted hand becomes a cake with candles.
Paint a child’s palm in one bright color. Press it firmly onto the card. The fingers become candles.
Any washable paint works. The cheap classroom kind costs little and cleans up fast.
Add small flame shapes above each finger with a marker. Yellow and orange dots do the trick.
Draw a plate line under the palm to finish the cake shape.
Let the handprint dry fully before writing. Wet paint smears easily.
Use one color for a clean look or mix two for a swirl. Let the child choose.
Sign it with the child’s name and age. That makes it a keepsake worth saving.
Try tiny footprints for babies. Same idea, smaller and sweeter.
Wipe the hand between prints if you want to try again. First tries often smudge.
This card costs pennies and captures a moment in time. Families keep these for years.
7. Folded Paper Heart Card
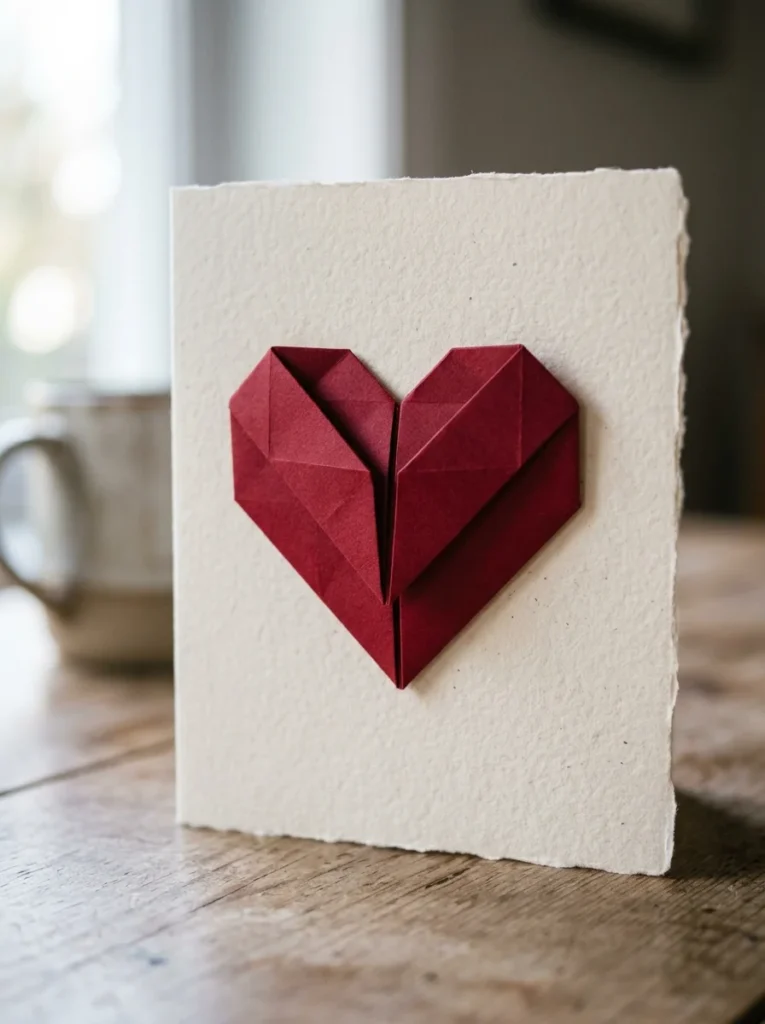
A folded heart adds a handmade touch without any drawing skill. You just need a small square of paper.
Fold a red square into a simple origami heart. Plenty of quick guides show the steps in a minute.
Use scrap paper for practice. Fold a few from junk mail first, then do your final one in nice paper.
Glue the finished heart onto a plain card front. Center it or set it in a corner.
Raised folds catch the light and add depth. This makes a plain card feel crafted.
Try patterned paper for a softer look. Old gift wrap works well.
Add a tiny stitched or drawn line under the heart like a stem. It reads as a little balloon.
Make three small hearts in a row for a border effect. Repetition looks intentional and neat.
Press the folds sharp with your fingernail. Crisp edges look far better than soft ones.
This card suits love-filled birthdays for a partner, parent, or close friend.
Keep folded hearts ready in a jar. They finish a card in seconds.
8. Magazine Collage Card
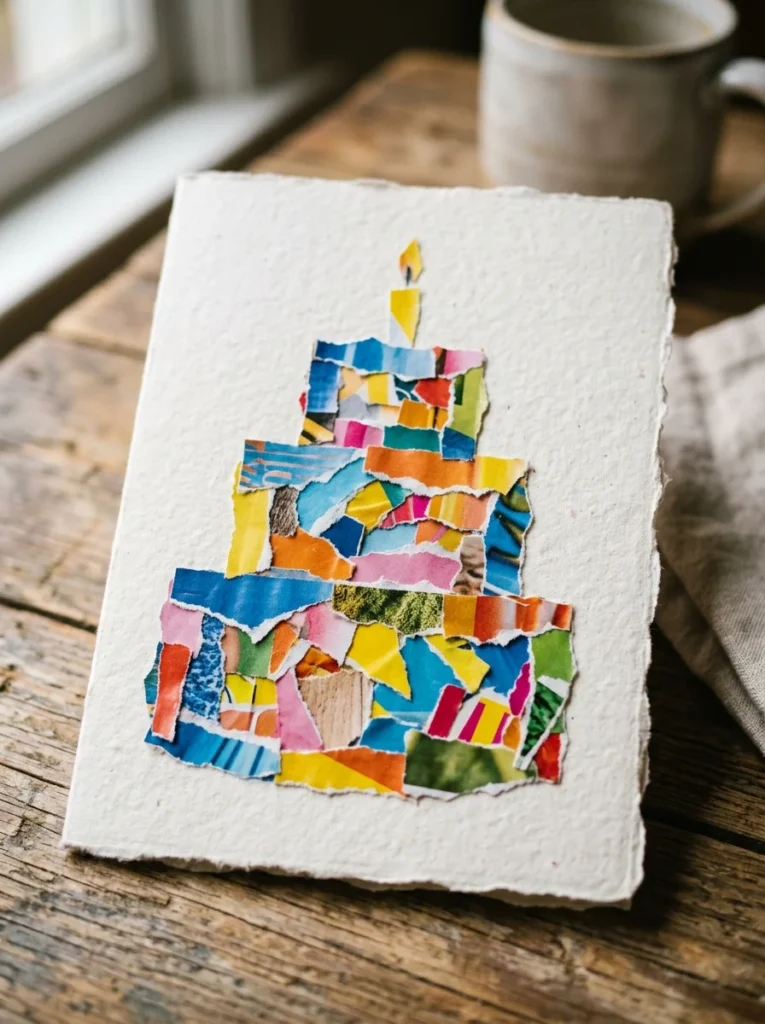
Old magazines are free art supplies waiting in the recycling. Turn them into a bold collage.
Tear or cut colorful pages into shapes. Build a cake, a balloon, or an abstract pattern.
Never buy paper again. Junk mail, catalogs, and old magazines give you every color for free.
Layer torn pieces so edges overlap. This adds depth and texture.
Look for solid blocks of color in ads. These make clean shapes without much cutting.
Glue each piece flat with a glue stick. Too much wet glue wrinkles the paper.
Mix textures for interest. A glossy strip next to a matte one looks rich.
Tear edges by hand for a soft, organic feel. Cut edges look sharp and modern. Both work.
Build the whole design on scrap first. Move pieces around before gluing anything down.
Press the finished card under a book so it lies flat.
This card is bright, free, and one of a kind. No one else will have the same one.
9. Sewn Stitch Border Card
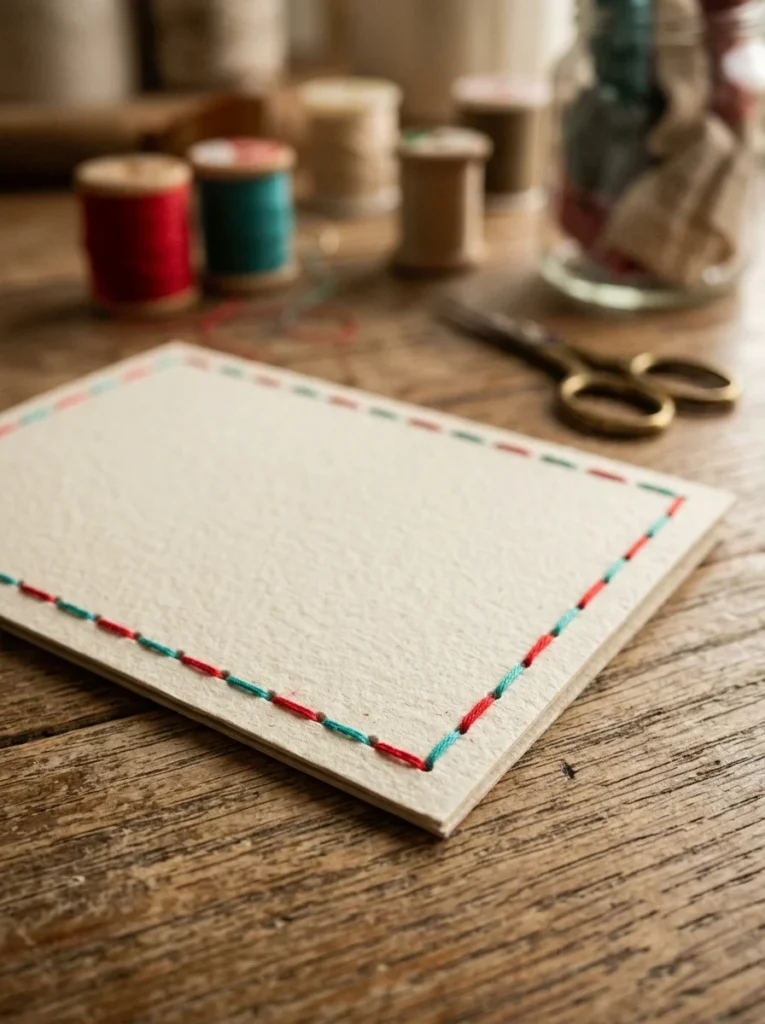
Stitching adds a cozy, handmade feel most cards do not have. It sounds hard but stays simple.
Punch small holes around the edge with a needle. Space them evenly with a ruler.
Then sew a running stitch through the holes with bright thread.
Thread scraps are free. Odd bits from a sewing box cost nothing and add pops of color.
Try a straight border first. Once comfortable, sew a heart or a star shape.
Poke holes on a foam pad or folded towel. This protects your table and keeps holes neat.
Keep stitches loose enough to lie flat. Pulled too tight, the paper curls.
Knot the thread on the back and tape the ends down. This hides the mess inside.
Mix two thread colors for a fun striped stitch. Alternate as you sew.
Thicker paper holds stitches better. Thin paper tears at the holes.
This card feels warm and personal. It suits crafty friends and quiet, thoughtful people.
Take your time. Neat stitches make the whole card shine.
10. Chalkboard Look Card
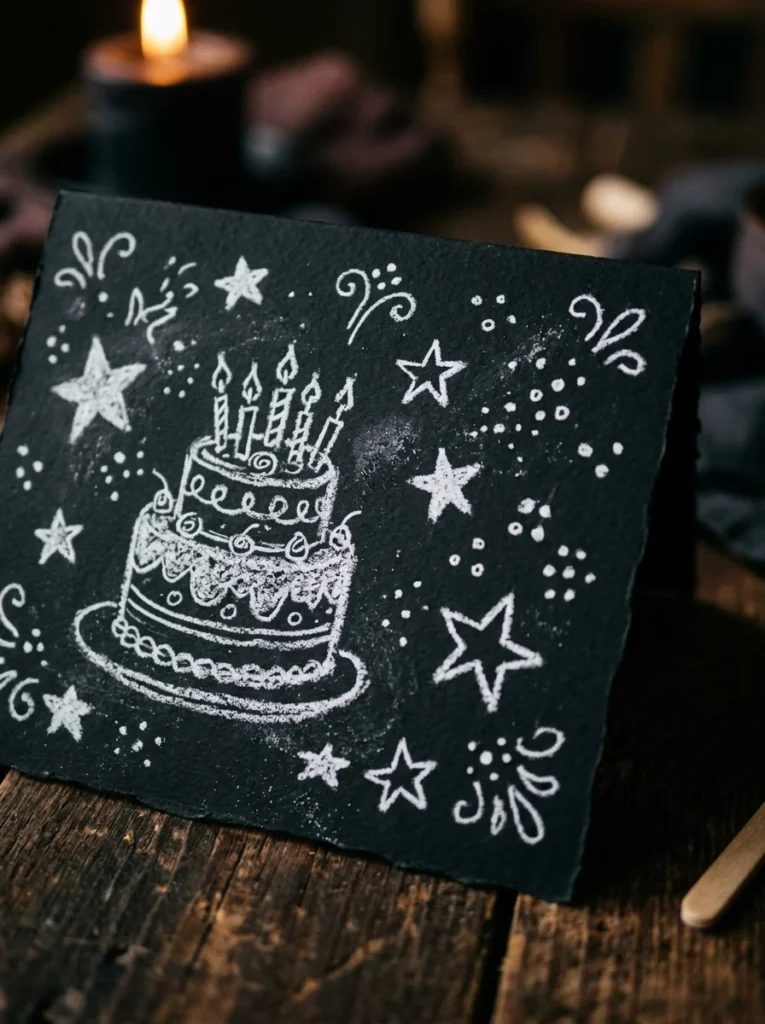
A black card with chalky white doodles looks stylish and modern. It is easier than it seems.
Paint or use a sheet of black cardstock as your base. Then draw on it with a white gel pen or chalk marker.
Black paper is cheap. One pack makes many cards, and the dark base hides small flaws.
Draw simple shapes. A cake, a few stars, or a balloon bunch all pop against black.
White pens give crisp lines. Chalk gives a soft, dusty look. Pick the mood you want.
Keep the design open with lots of black space. Crowded doodles lose the clean vibe.
Add tiny dots and dashes around your drawing. These fill space without effort.
Seal chalk with a light spray so it does not smudge. Hairspray works in a pinch.
Try faux hand-lettering as a shape, not real words, if you want a design-only front.
This card feels grown-up and trendy. It suits teens and stylish adults.
Practice your doodle on scrap first. Black paper hides nothing once you commit.
11. Layered Cake Slice Card
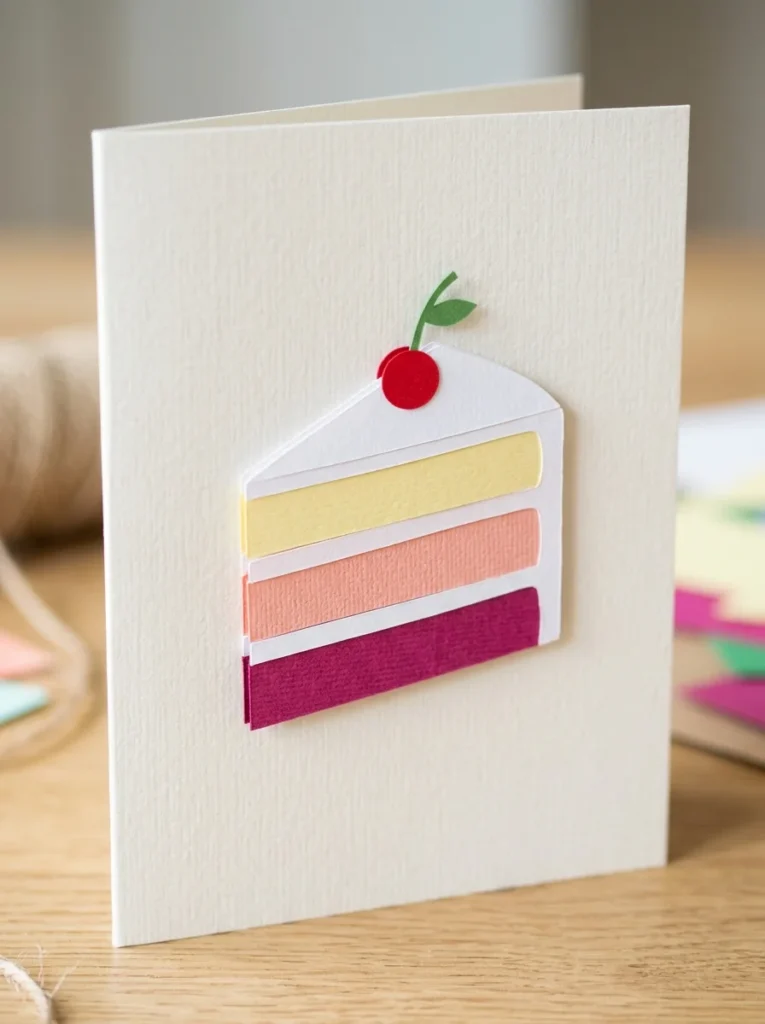
Stacked paper makes a cake slice that looks fancy but takes minutes. Layers do all the work.
Cut a triangle for the slice. Then cut thin strips in different colors for the layers and frosting.
Scraps are perfect here. Small leftover pieces from other projects finish this card for free.
Glue the strips across the triangle, alternating cake and frosting colors.
Add a paper dot on top for a cherry. A hole-punch circle works great.
Keep layers slightly uneven. A little wobble looks charming and hand-cut.
Use a foam dot under the cherry so it sits raised. This adds a nice pop.
Try three layers for a slice or five for a tall cake. More layers look richer.
Draw drips of frosting along the top edge with a white pen.
Match the colors to the person. Their favorite shade makes it personal.
Press it flat under a book so the glue holds smooth.
This card is neat, cheerful, and simple to repeat. Make a batch for the year ahead.
12. Origami Shirt Card
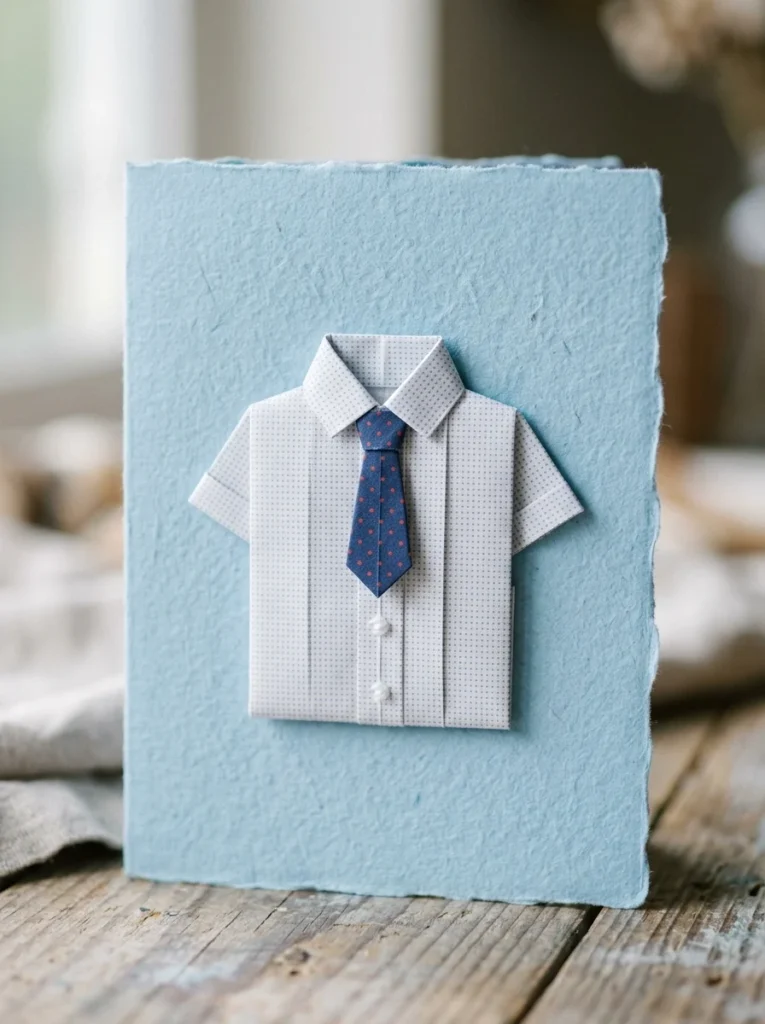
A folded paper shirt makes a smart card for dads, brothers, and stylish friends. It is a classic for a reason.
Fold a square or rectangle into a shirt with a collar. Quick guides walk you through the folds fast.
Any paper works. Old wrapping paper or a printed page makes a patterned shirt for free.
Add a tiny paper tie or bow underneath. Cut it from a bright scrap.
Glue the shirt onto a plain card. A soft blue or gray base suits it well.
Press the collar folds sharp with your fingernail. Crisp lines make it look real.
Draw small buttons down the front with a pen. This finishes the look.
Try a bow tie for a formal feel or a straight tie for casual.
Use patterned paper for a fun, loud shirt. Plaid and stripes look great.
Practice one fold on scrap paper first. The collar takes a try or two.
This card feels clever and thoughtful. People always ask how you made it.
Keep a folded shirt ready for last-minute birthdays.
13. Photo Keepsake Card
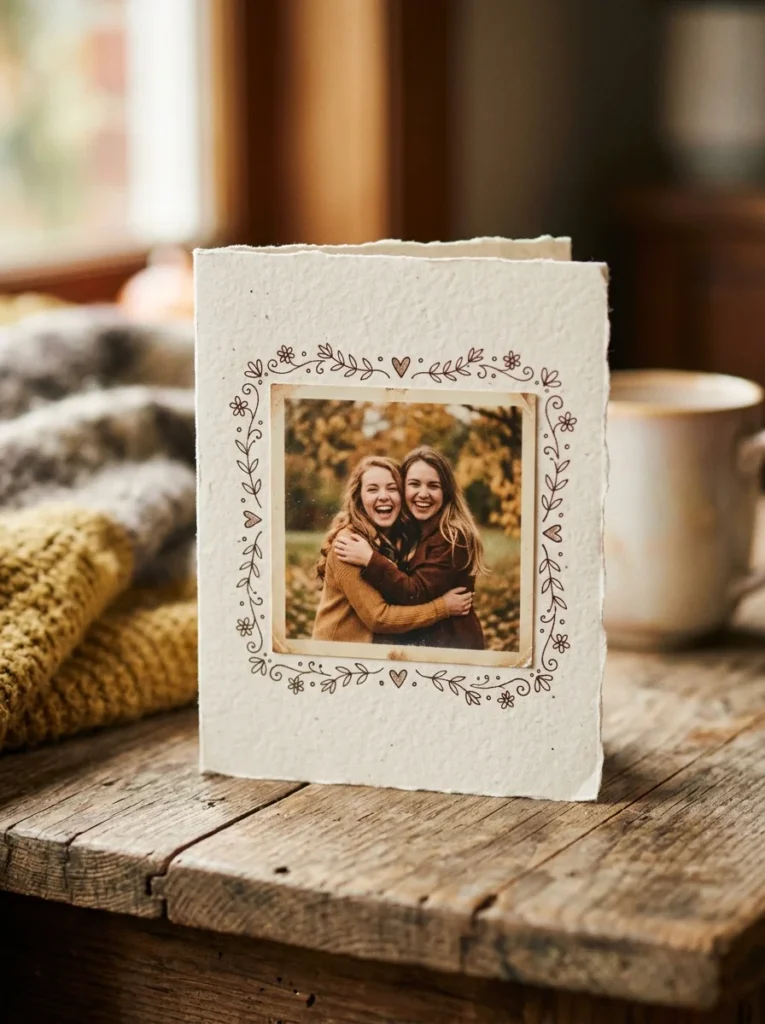
A photo turns a card into a keepsake the person will actually keep. Pick a shared memory.
Print a small photo of you both or of the birthday person. Home printers or a cheap photo kiosk both work.
Print small to save money. Wallet-size photos cost pennies and fit a card perfectly.
Glue the photo to the front. Leave a thin border around it like a frame.
Draw or cut a paper frame around the photo. This makes it feel finished.
Pick a funny or sweet moment. Inside jokes land better than posed shots.
Add a few paper stars or a drawn banner above the photo.
Write the date or a short note under the image inside the card.
Round the photo corners with scissors for a soft look.
Try a strip of three small photos for a film-reel effect.
Old printed photos work too. Dig through a shoebox for gold.
This card hits the heart. It costs almost nothing but feels priceless.
Keep the file so you can reprint it later.
14. Scratch-Off Surprise Card
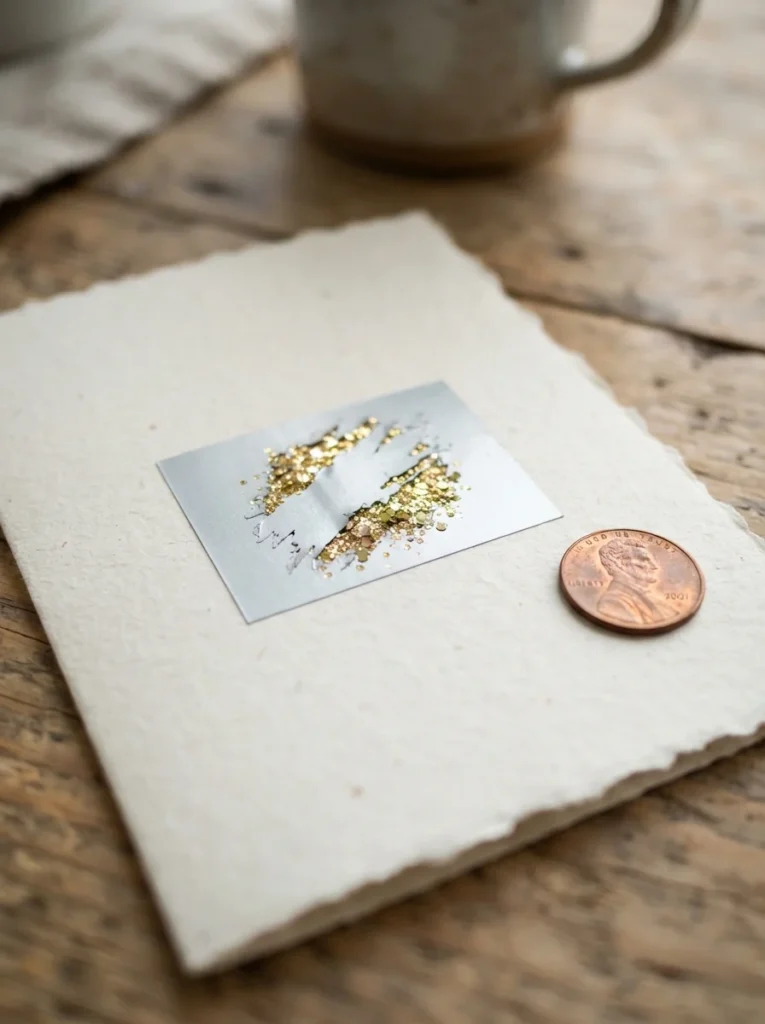
A scratch-off panel hides a fun surprise. It feels like a lottery ticket, and people love scratching it.
Draw or write a hidden message on the card. Cover it with clear tape.
Mix dish soap with silver acrylic paint. Two parts paint, one part soap.
This uses stuff from home. Paint scraps and dish soap cost almost nothing.
Paint the mix over the taped area. Let it dry, then add a second coat.
Once dry, it scratches off with a coin, showing the message below.
Keep the hidden note short and sweet. A birthday wish or a small clue works.
Make the panel small. Big ones need lots of paint and dry unevenly.
Test scratch on a scrap first. Adjust the soap if it will not come off.
Draw a border around the panel so it looks intentional.
Try hiding a gift hint or a plan for the day.
This card brings a real moment of fun. The scratch makes it interactive.
Let it dry fully overnight before mailing.
15. Doily Lace Card
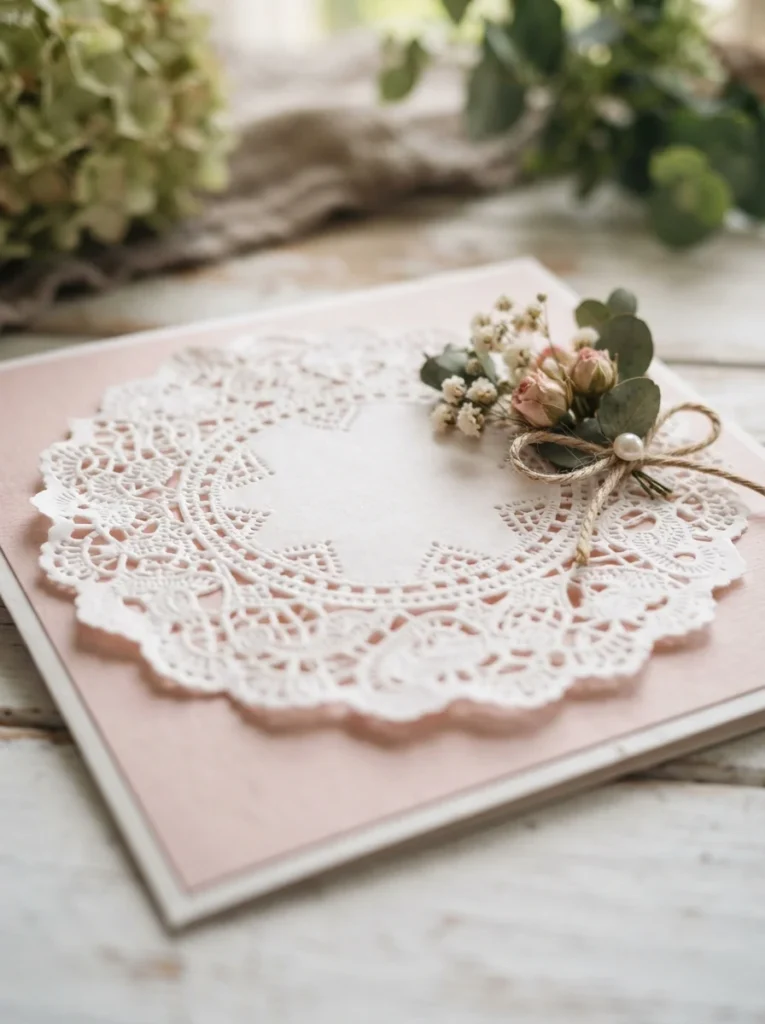
A paper doily brings instant lace and elegance. These cost almost nothing and look expensive.
Glue a doily onto colored cardstock. The pattern shows against the color underneath.
Doilies are cheap in bulk. A pack of them makes many cards for very little.
Fold a doily in half for a fan shape or a border. This changes the whole look.
Layer a small paper shape on top. A heart or a cake center pops against the lace.
Trim the doily to fit if it hangs over the edge.
Use a glue stick, not wet glue. Wet glue soaks through the thin paper.
Pick a bright base under a white doily for contrast. Pink, teal, or gold all glow.
Cut a doily into pieces for scattered lace accents. Nothing goes to waste.
Add a ribbon across the middle for a soft finish.
This card feels dainty and warm. It suits grandmothers, moms, and gentle souls.
Press it flat so the doily bonds fully.
16. Ribbon Bow Card
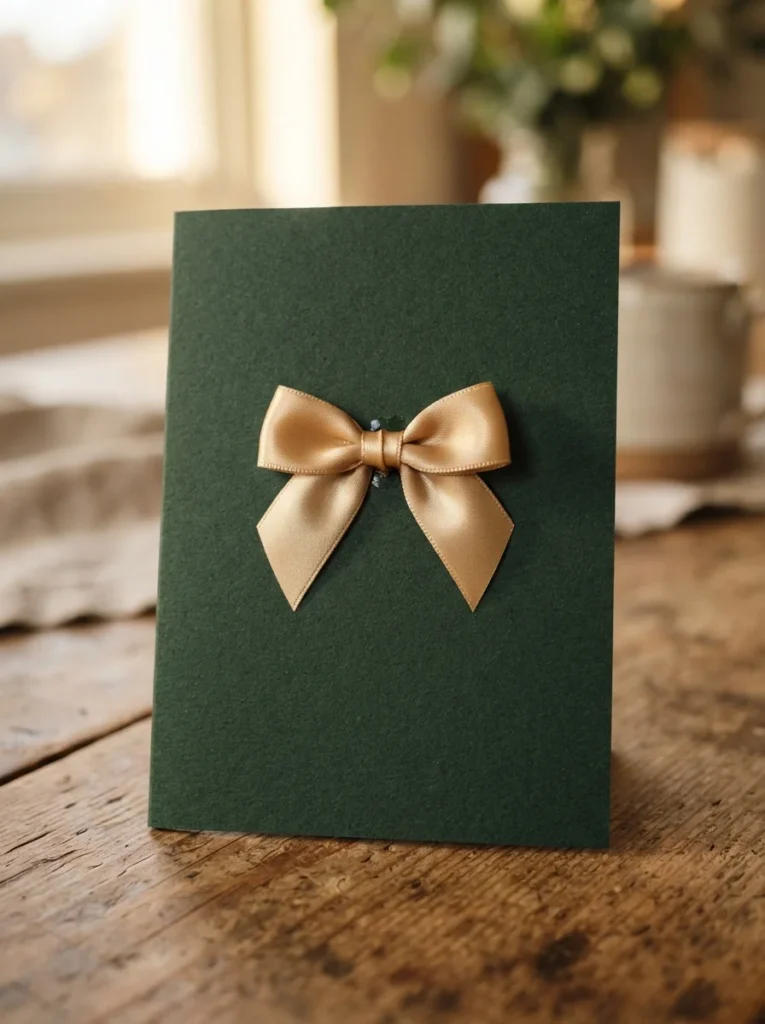
A real ribbon bow adds a soft, gift-like touch. It looks polished with almost no effort.
Tie a small bow from ribbon scraps. Glue it to the front of the card.
Save ribbon from old gifts. The bits you would toss cost nothing and work perfectly.
Wrap a thin ribbon across the whole card like a present. Tie the bow over it.
Pick a color that matches the person. Their favorite shade makes it personal.
Use hot glue or strong craft glue so the bow holds. Tape shows and slips.
Try a small bow in a corner for a subtle look. Or a big one in the center for drama.
Layer the bow over a paper shape for depth.
Trim the ribbon tails at an angle so they do not fray.
Satin ribbon looks rich. Twine gives a rustic feel. Both are cheap.
This card feels dressed up and thoughtful.
Make a few bows at once and store them for later cards.
17. Stamped Confetti Card
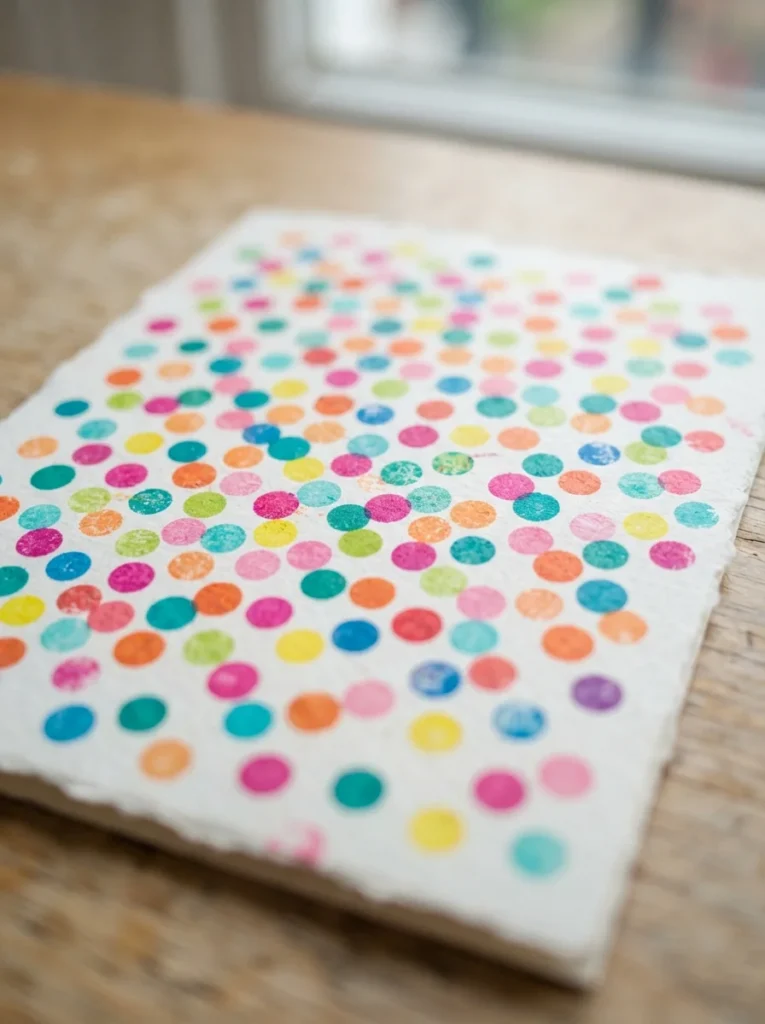
You can stamp cheerful confetti dots with a simple pencil eraser. No stamps to buy at all.
Dip the flat eraser end into paint. Press it onto the card to make round dots.
Your pencil is the tool. A basic eraser makes perfect circles for free.
Scatter dots in many colors across the front. Random spacing looks festive.
Wipe the eraser between colors or use one per shade.
Group some dots and spread others out. This mimics falling confetti.
Try a bottle cap for bigger dots or a cotton swab for tiny ones.
Let each color dry a moment before overlapping. Wet-on-wet can smear.
Draw a few thin lines from a corner so dots look like they are tossed.
Keep the paint thin so dots stay crisp. Thick paint blobs and smudges.
This card is fast, cheap, and full of color. Kids love making it too.
Press it flat and let it dry before folding.
18. Accordion Rainbow Card
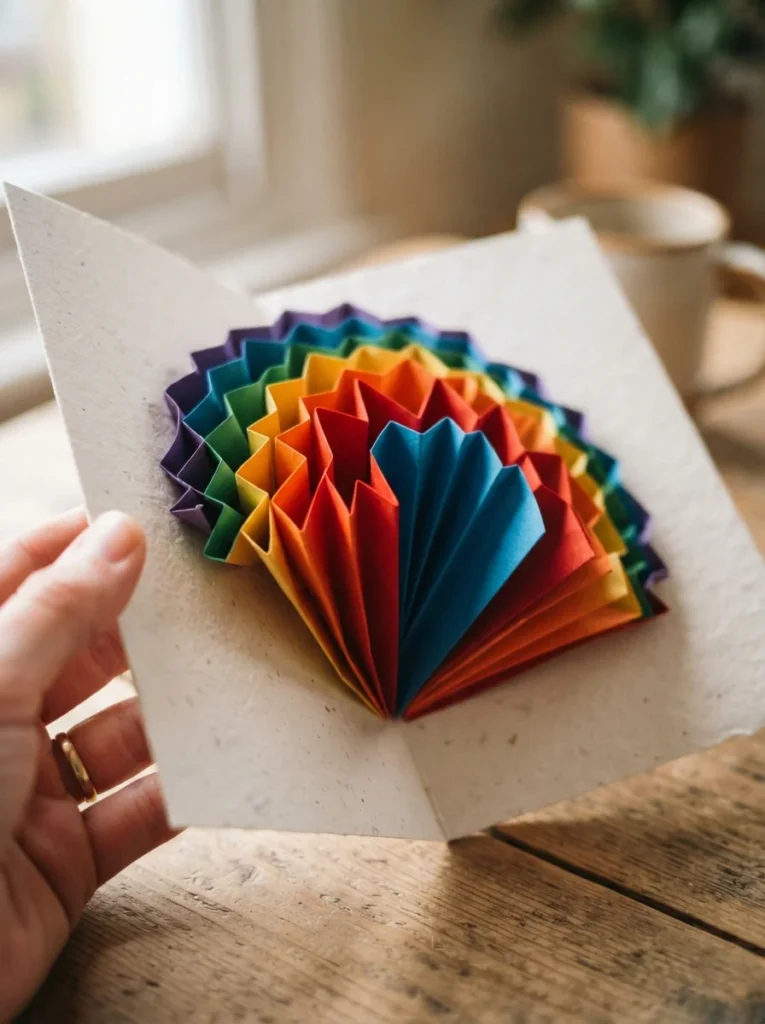
An accordion fold makes a rainbow that fans out when the card opens. It surprises people every time.
Cut strips of paper in rainbow colors. Fold each into a small accordion.
Use any colored scraps. Bits from other projects fill this card for free.
Glue the folded strips inside so they fan open as the card lifts.
Stack the colors in order for a rainbow arc. Or mix them for a burst.
Keep folds even so the fan opens smoothly. A ruler helps crease straight lines.
Glue only the ends so the middle can spring. This creates the pop.
Add small paper clouds at each end of the rainbow.
Try a half-circle fan or a full burst. Both look lively.
Press the folds sharp so the accordion holds its shape.
Test the open-and-close before sealing anything.
This card feels magical and cheerful. It suits kids and anyone who loves color.
Make the strips longer for a bigger, bolder fan.
19. Money Holder Card
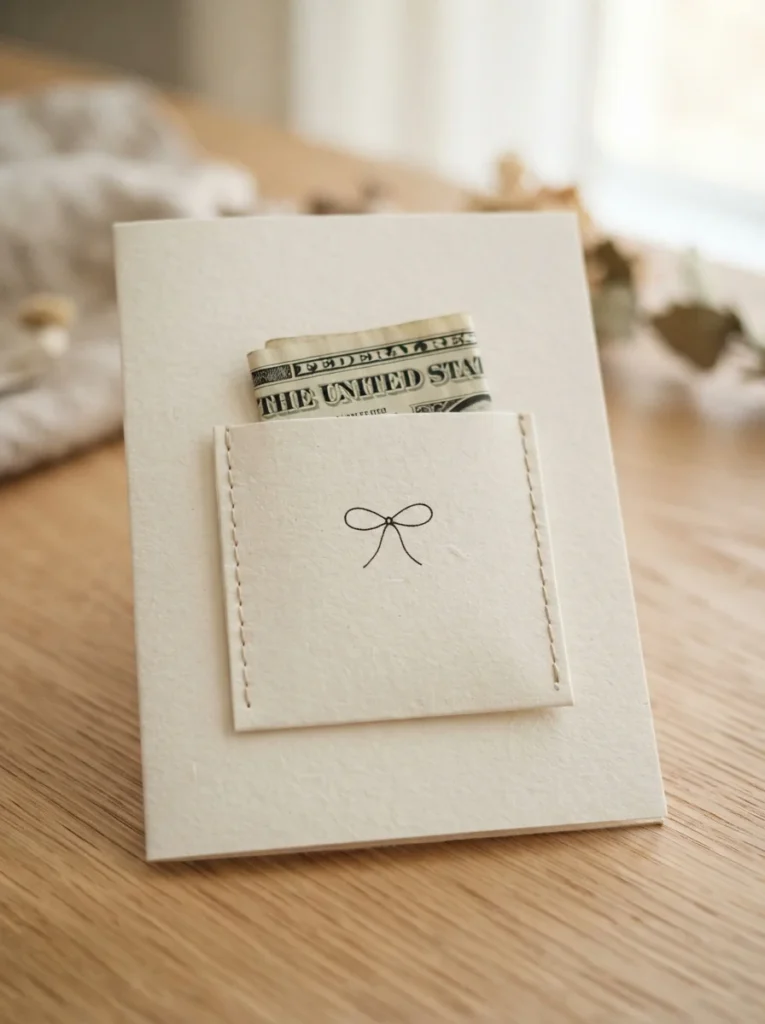
A money holder card makes cash feel like a real gift. It is practical and quick.
Fold a small paper pocket and glue it inside or on the front. Slide a bill or gift card in.
The card itself costs almost nothing. You add the money, so the craft stays cheap.
Cut a slot with a decorative flap to hold the cash. Fold the flap over to close it.
Decorate around the pocket. A drawn bow makes it look like a wrapped gift.
Make the pocket snug so nothing slips out.
Add a small window so a bit of the bill peeks through. This teases the surprise.
Fold the money into a fun shape for extra charm. A simple fan works.
Label the pocket with a drawn arrow or star pointing to it.
Use a sturdy pocket so it holds through the mail.
This card suits teens, grads, and anyone hard to shop for.
Keep a few pockets pre-made for quick gifting.
20. Pop-Up Cake Card
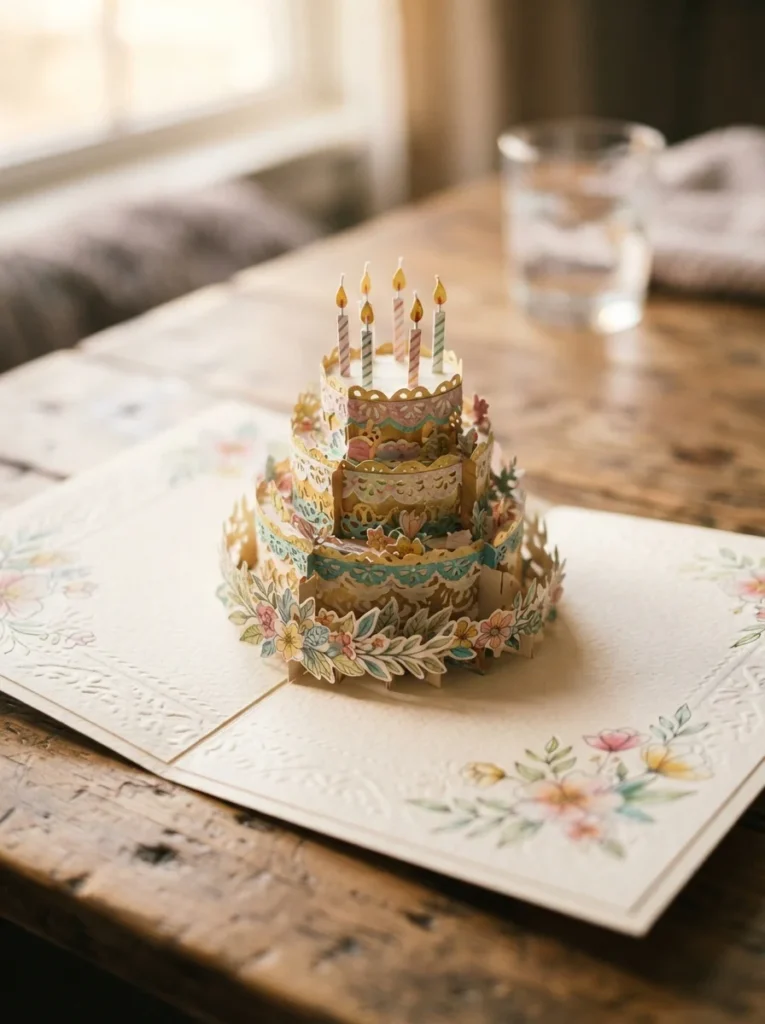
A pop-up cake springs to life when the card opens. It looks impressive but uses one simple fold.
Fold the card in half. Cut two parallel slits in the center fold. Push the flap forward to make a box.
Scrap cardstock is enough. One sheet builds the whole pop-up for free.
Glue a paper cake onto the pushed-out flap. It stands up as the card opens.
Add thin paper candles on top. Draw tiny flames above them.
Keep the pop-up box small so it folds flat when closed.
Decorate the cake with drawn frosting drips and dots.
Test the fold before gluing anything. The flap should stand cleanly.
Layer two flaps for a taller cake with more pop.
Use a bright cake color against a soft background.
Sign the card before the pop-up sets. Writing gets tricky after.
This card wows people and costs nearly nothing.
Practice the slits on scrap first to nail the fold.
21. Fabric Scrap Card
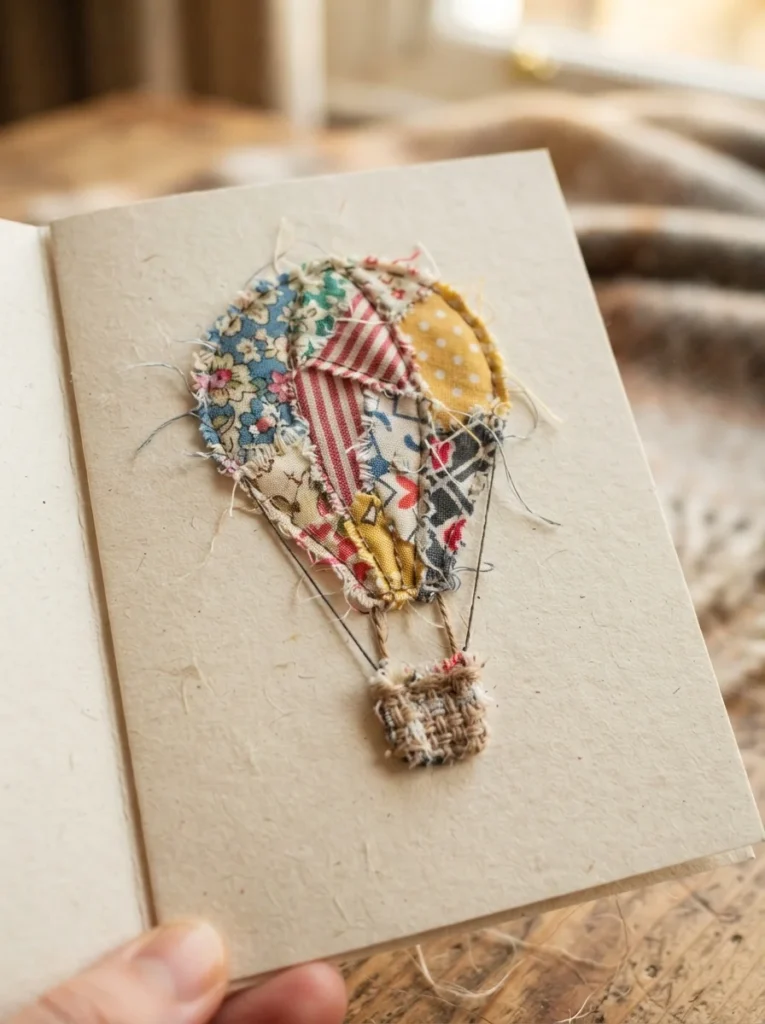
Fabric scraps add warmth and texture no paper can match. Old clothes give you plenty.
Cut small shapes from fabric bits. Glue them onto the card front.
Raid the rag bag. Worn shirts and leftover cloth cost nothing and add rich texture.
Make a balloon, a cake, or a simple patch shape. Frayed edges add charm.
Use fabric glue or strong craft glue so it holds. Let it dry fully.
Mix patterns for a playful, quilted look. Stripes next to florals work well.
Add a drawn string under a fabric balloon. It ties the design together.
Keep pieces small so the card still closes flat.
Layer fabric over paper for a soft, raised feel.
Cut felt shapes for clean edges that do not fray.
This card feels cozy and handmade. It suits crafty, warm-hearted people.
Press it under a book so the glue sets flat.
Save even tiny scraps. They always come in handy for the next card.
22. Star Constellation Card
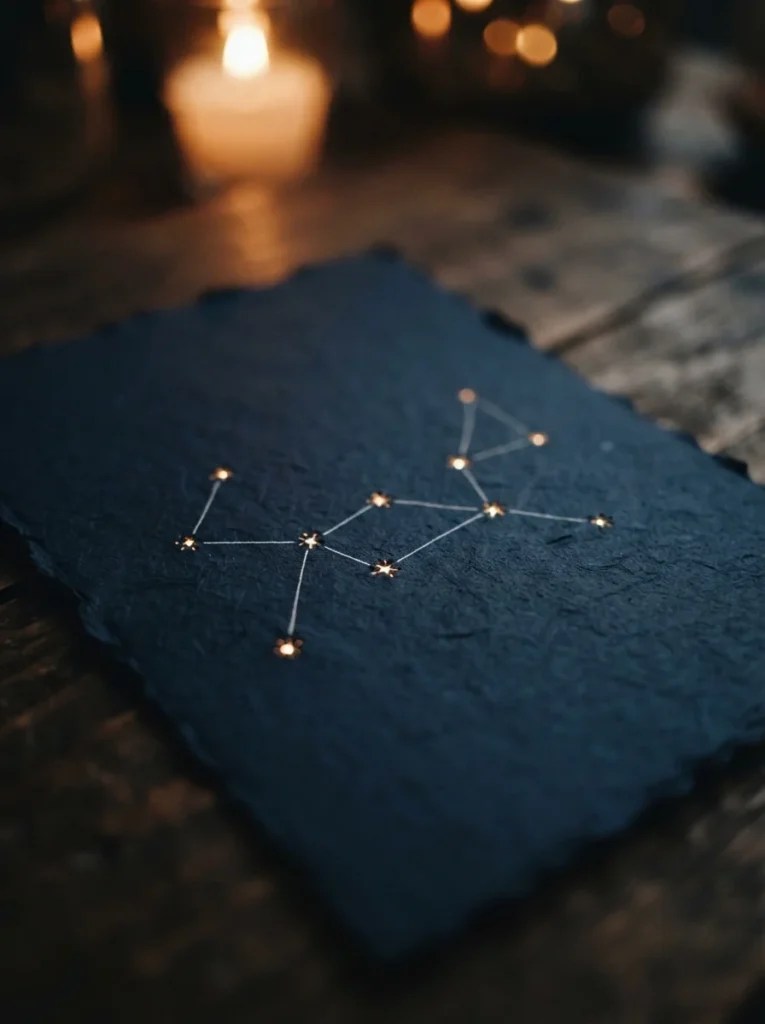
A constellation card feels dreamy and personal. Perfect for stargazers and quiet souls.
Use a dark blue or black card as the night sky. Punch or dot small white stars across it.
Dark paper hides flaws. One sheet makes a striking base for very little.
Connect a few stars with thin drawn lines to form a shape. A simple pattern reads as a constellation.
Poke tiny pinholes so light glows through when held up.
Add a few larger stars for depth. Vary the sizes.
Use a white gel pen for crisp star points and lines.
Draw a small moon in a corner for extra charm.
Keep the sky mostly empty. Space makes the stars stand out.
Try shaping the stars into a heart or their initial.
Scatter tiny dots as far-off stars in the background.
This card feels calm and special. It suits romantic and thoughtful birthdays.
Hold it to a lamp to check the pinhole glow before you finish.
Conclusion
Handmade birthday cards win hearts because they show real effort. Every idea here uses cheap supplies and a bit of time. You do not have to be crafty. You just have to start.
Pick one project that fits the person. Grab scraps, glue, and a free afternoon. Even a simple folded card means more than anything from a shelf.
Save leftover pieces from each try. Soon you will have a stash ready for any birthday that sneaks up on you. Make one card this week and see how good it feels to give something you made with your own hands.
