

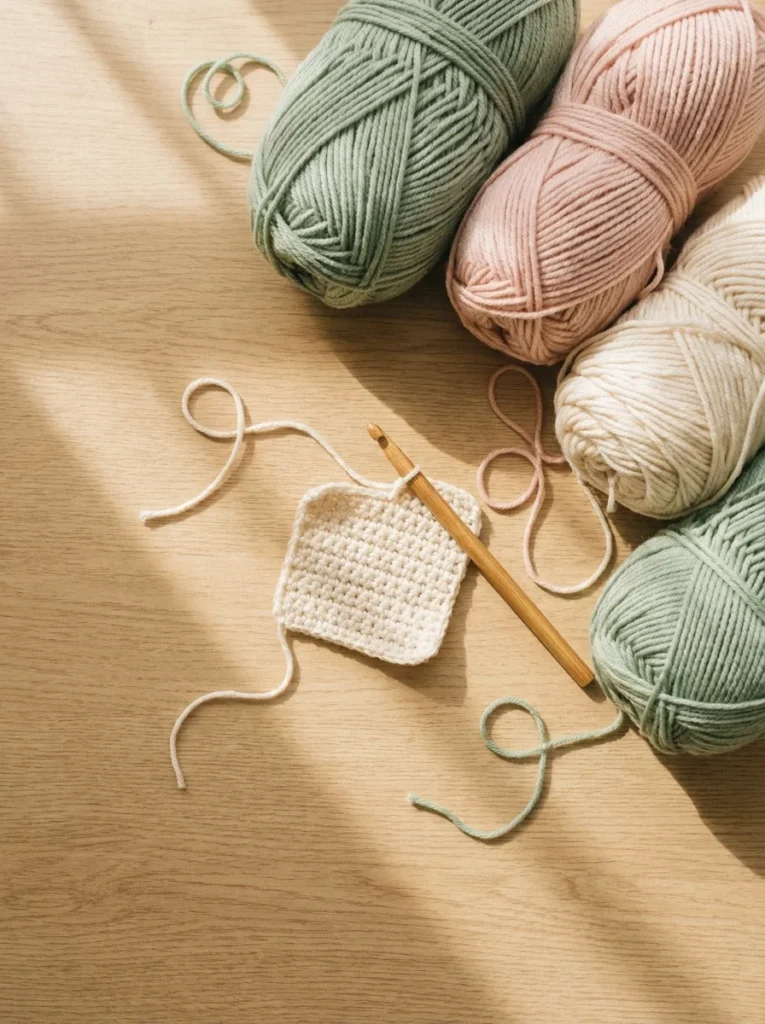
Learning to crochet feels impossible until the moment it suddenly clicks. That moment usually happens faster than people expect, especially when you start with the right stitches. The 22 stitches in this list were chosen specifically because they are simple enough to try on a Saturday morning and satisfying enough to keep you going all weekend. Each one builds on basic hand movements you will naturally pick up as you go. Whether you have never held a crochet hook before or you tried once and gave up, this guide gives you a clear, honest starting point. No complicated patterns. No expensive tools. Just yarn, a hook, and stitches that actually make sense to a beginner.
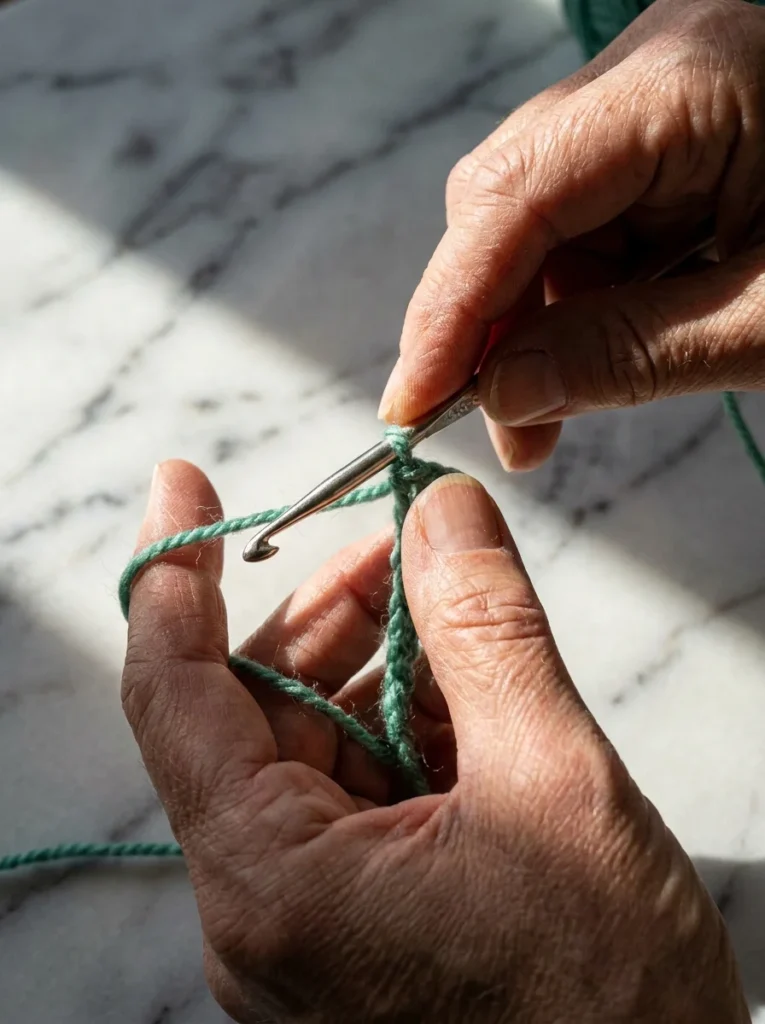
1. Chain Stitch: The Foundation of Everything
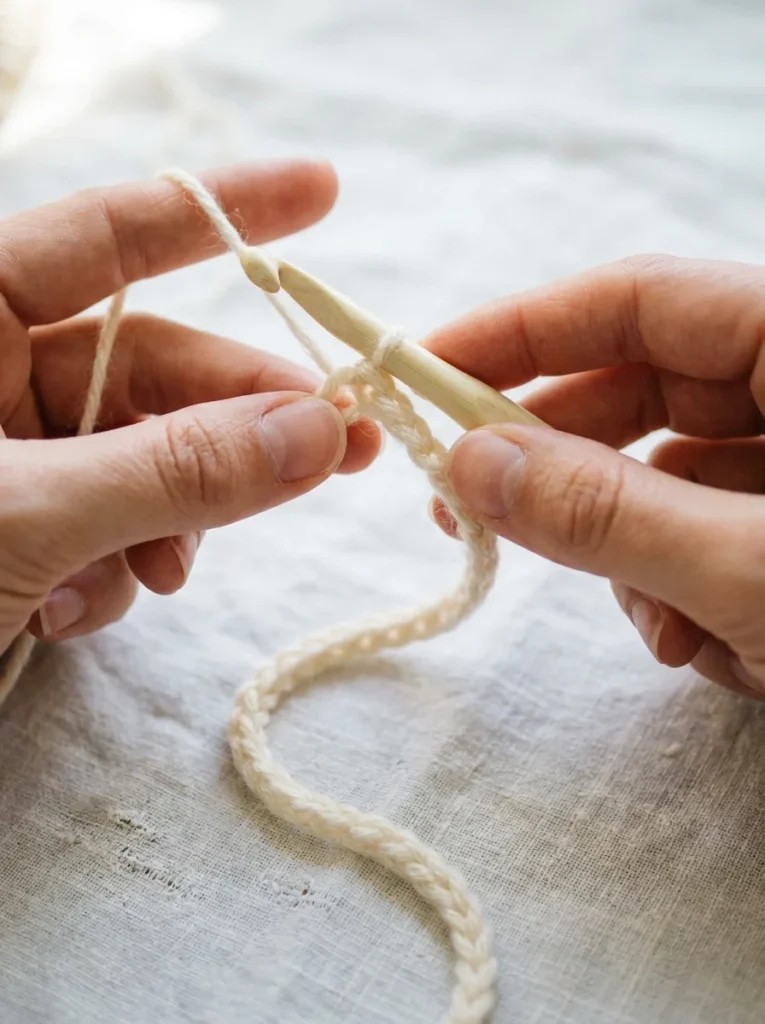
The chain stitch is where every single crochet project begins. Think of it like the cast-on in knitting or the baseline in drawing, nothing works without it.
To make one, you start with a slip knot on your hook. Then you wrap the yarn over the hook (called a yarn over) and pull it through the loop already sitting on your hook. That’s one chain.
It takes about five minutes to get your first clean chain going.
The chain stitch has no decorative purpose on its own, but it creates the foundation row your other stitches will anchor into. It also appears inside patterns as a spacer, so once you learn it, you will use it constantly.
Budget tip: Practice with any yarn you already have at home. Old acrylic yarn from a craft store haul, even a spool of kitchen twine, works perfectly for learning the motion. Save the nice yarn for your first real project.
One thing beginners get wrong: they pull the chains too tight. Keep your grip loose. Each chain should slide easily along the hook, not grip it. If your hook is dragging through, loosen up. Relaxed hands make better stitches.
Practice ten chains, pull them out, and do ten more. That repetition is the fastest way to build muscle memory.
2. Slip Stitch: Small but Mighty
The slip stitch looks almost too small to matter. But it quietly does a lot of important work.
You will use it to join rounds when crocheting in a circle. You will use it to move your yarn to a new position without adding height to your piece. And you will use it to close seams when finishing a project.
Making one is simple: Insert your hook into a stitch, yarn over, and pull the yarn all the way through both the stitch and the loop on your hook in one smooth pull. That’s it. One step.
Because it creates almost no height, the slip stitch is not usually used to build fabric on its own. But in circular projects, like granny squares or hat brims, it appears at the end of every single round.
Practical tip: When you are joining a chain into a ring (to start a circular project), the slip stitch is what locks it closed. Practice this early. It will save you from a lot of frustration later.
Budget-friendly practice: Use any scrap yarn and a size 5mm hook (the most common beginner size). Draw a small circle on paper, try crocheting around it, and use the slip stitch to close each round. Simple, free practice.
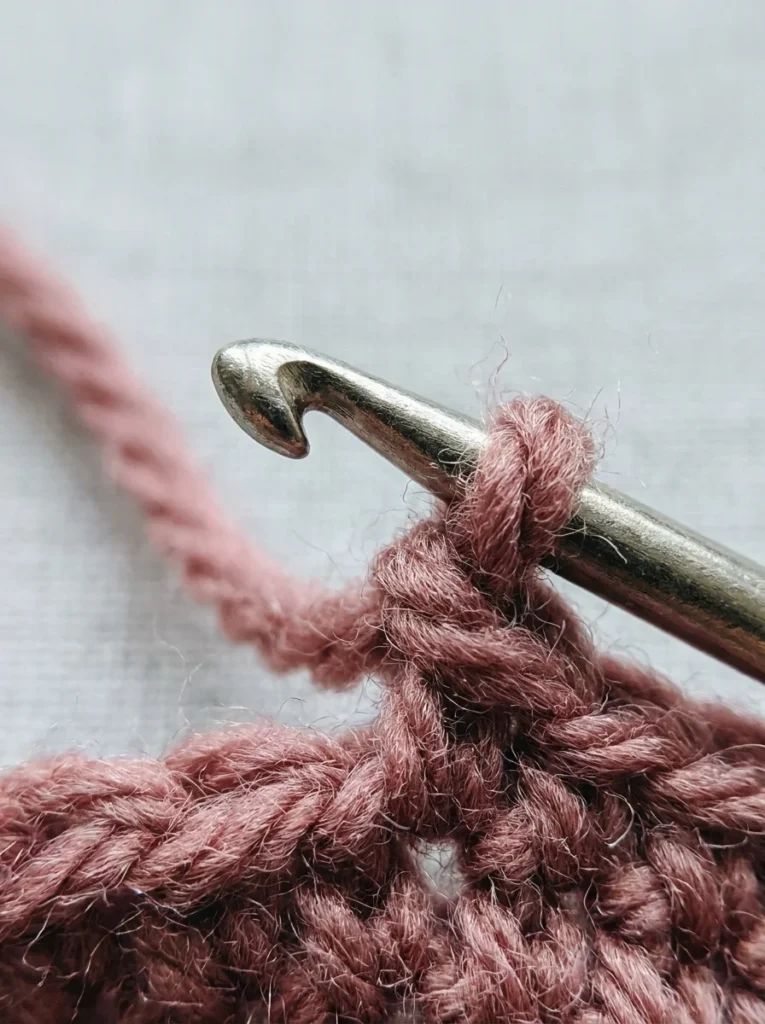
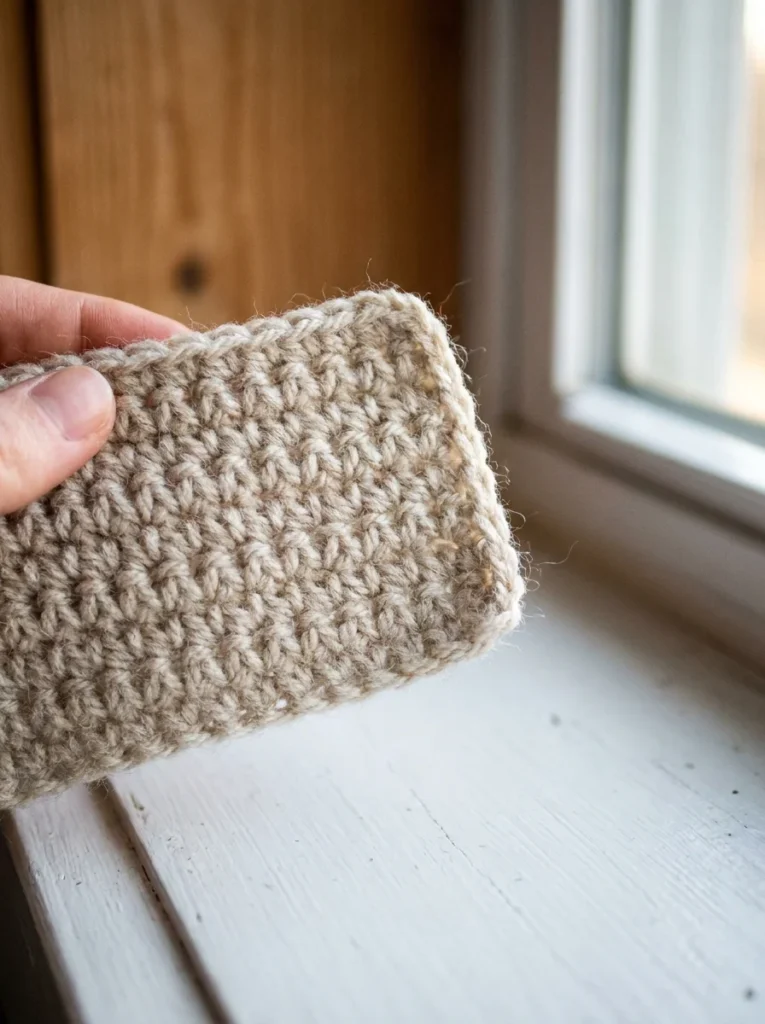
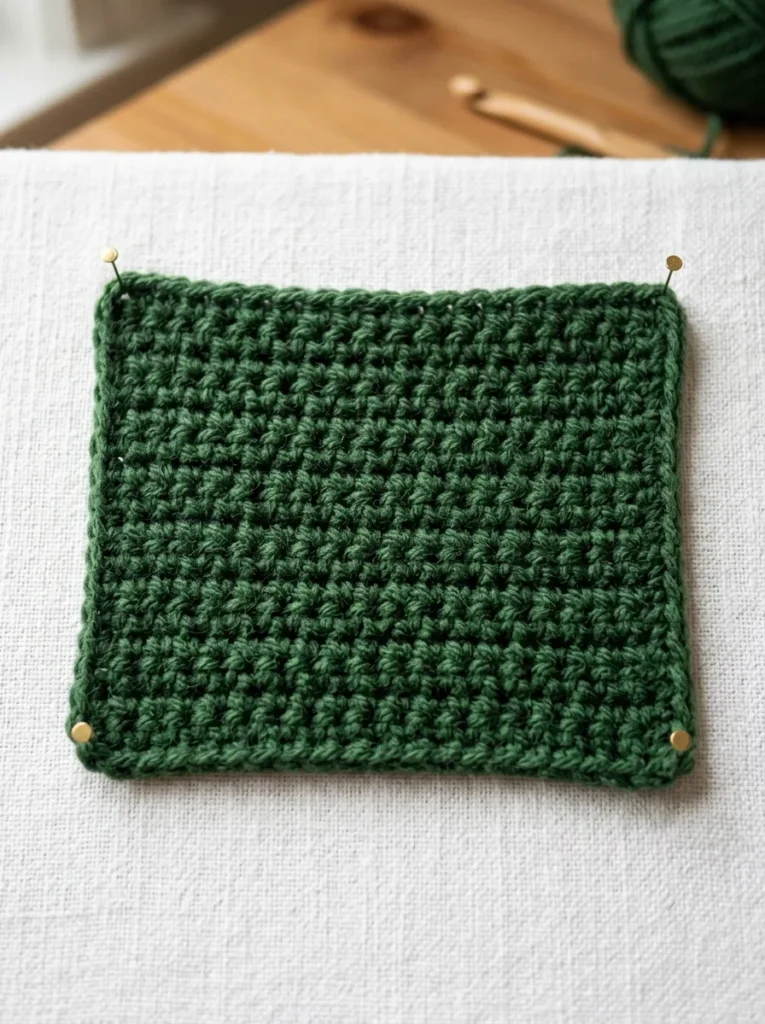
3. Single Crochet: The Workhorse Stitch
Single crochet is the stitch most people think of when they picture crochet. It creates a tight, sturdy fabric with a distinctive bumpy texture.
Here is the basic move: Insert your hook into a stitch. Yarn over. Pull up a loop (now you have two loops on your hook). Yarn over again. Pull through both loops. Done. That is one single crochet.
It feels awkward at first. Your hands will feel clumsy and slow. That is normal. After twenty or thirty stitches, your fingers start to remember the rhythm.
Single crochet is perfect for:
- Dishcloths and washcloths (great first project)
- Coin pouches and small bags
- Pot holders
- Amigurumi (stuffed animals)
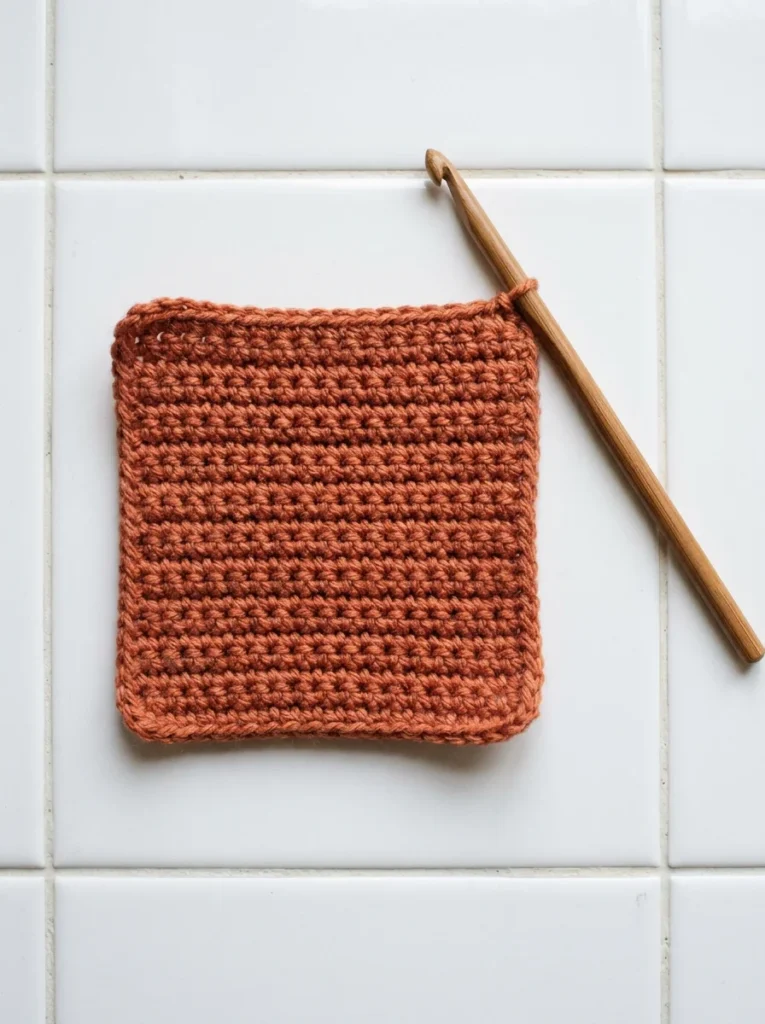
The fabric it creates is dense, which makes it great for anything that needs to hold its shape.
Budget tip: A skein of basic cotton yarn costs around $3 to $5. Cotton is easier on your hands than acrylic for practice because it does not stretch as much, making it easier to see your stitches clearly. Look for “Lion Brand 24/7 Cotton” or any store-brand cotton yarn.
Once you can single crochet ten rows without dropping stitches or adding extras, you are officially past the hardest beginner stage.
4. Half Double Crochet: The Middle Ground
Half double crochet sits right between single crochet and double crochet in height. It creates a slightly looser, slightly softer fabric than single crochet.
How to make it: Yarn over first (before inserting your hook). Insert hook into stitch. Yarn over again. Pull up a loop (three loops now on your hook). Yarn over one more time. Pull through all three loops at once. Done.
That extra yarn-over at the start is what makes it different from single crochet. It adds just a little extra height and creates a slightly different texture, softer, with a subtle ridge on the back.
Half double crochet is great for:
- Baby blankets (soft and quick to work)
- Scarves
- Hats (the fabric has a nice drape)
- Headbands
It works up faster than single crochet, so projects feel less endless.
Beginner tip: The “three loops on hook” moment can feel confusing at first. Just remember: yarn over, insert, yarn over, pull up, yarn over, pull through all three. Say it out loud until your hands know the sequence.
Budget tip: Half double crochet uses slightly more yarn than single crochet per inch of fabric, so pick a mid-weight (worsted) yarn for practice. A $4 skein gets you a solid practice session and a small sample square to keep.
5. Double Crochet: Tall and Satisfying
Double crochet is the stitch that makes crochet feel productive. It is twice the height of single crochet, which means your projects grow much faster.
How to make it: Yarn over. Insert hook into stitch. Yarn over. Pull up a loop (three loops on hook). Yarn over. Pull through first two loops (two loops remain). Yarn over. Pull through last two loops. Done.
It sounds like a lot of steps. But it becomes automatic quickly. The rhythm is, over, in, over, pull, over, pull, over, pull. Once you find that rhythm, you will not even think about the steps.
Double crochet is the most commonly used stitch in beginner and intermediate patterns. If you only learn one stitch beyond single crochet, make it this one.
Great for:
- Granny squares
- Blankets (they grow so much faster than with single crochet)
- Market bags
- Shawls
Speed tip: Double crochet works up about three times faster than single crochet for the same size fabric. If a pattern feels like it will take forever, switching to double crochet (on larger yarn) cuts your time way down.
Budget tip: Use a size 5.5mm or 6mm hook with worsted yarn. You will see the stitch definition clearly and your practice square will look polished fast.
6. Treble Crochet: Tall, Open, and Airy
Treble crochet (also called triple crochet) is taller than double crochet. It creates an open, almost lacy fabric that looks impressive but is actually just a few extra steps.
How to make it: Yarn over twice. Insert hook into stitch. Yarn over. Pull up a loop (four loops on hook). Yarn over. Pull through two loops. Yarn over. Pull through two loops again. Yarn over. Pull through the last two loops. Done.
The key difference from double crochet is that you yarn over twice at the start instead of once. This adds extra height and creates more space between stitches.
Best used for:
- Lacy shawls
- Summer tops (in cotton yarn)
- Decorative trim on blankets
- Prayer shawls
Because the stitch is tall, fabric made with treble crochet has great drape, it hangs loosely and flows rather than being stiff.
Beginner tip: Count your loops at each step. Four loops, then two, then two, then two. If you lose count, stop and count before pulling through. Rushing is where mistakes happen.
Budget tip: Treble crochet uses more yarn per stitch. Start practicing with a thicker yarn (bulky weight) so you can clearly see each loop on the hook. A $6 skein of bulky yarn gives you plenty to practice.
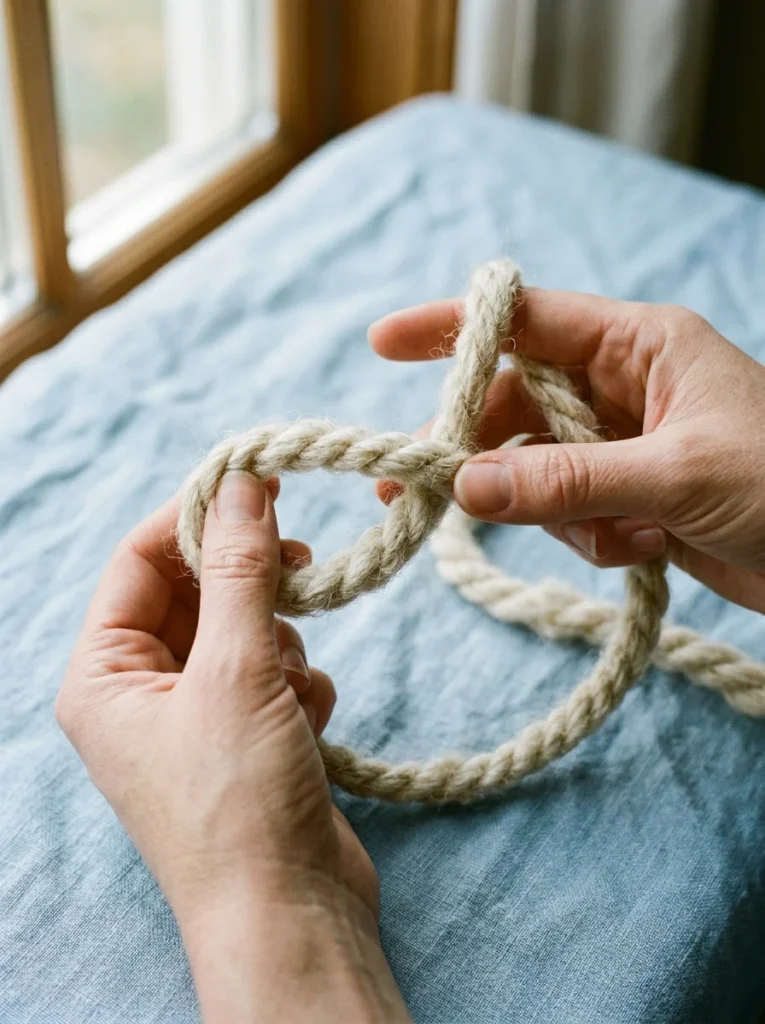
7. Magic Ring: Starting Circles Without a Gap
The magic ring (also called a magic circle or adjustable ring) sounds intimidating. But it solves a real, annoying problem: when you start crocheting in a round by joining a chain, you often get a little hole in the center. The magic ring closes that hole completely.
How to make it: Wrap yarn around two fingers to form a loop. Insert hook through that loop. Pull up the working yarn. Chain one to lock it. Crochet your first round into the center of that loop. Then pull the tail end to tighten the ring closed.
It takes about ten tries to get it comfortable. That is normal. Every crocheter remembers struggling with this the first few times.
Use it for:
- Granny squares
- Amigurumi (stuffed toys)
- Circular hats
- Mandalas and coasters
Once you can make a clean magic ring, a whole world of circular crochet opens up to you.
Budget tip: Practice on a short piece of yarn cut from your practice skein. You only need about 8 inches to practice the ring itself. Do it ten times in a row before moving on to actual project starts.
Beginner mistake to avoid: Do not pull the ring tight before finishing your first round. Crochet all your stitches in first, then pull.
8. Single Crochet Increase: Shaping 101
Once you can do a basic single crochet, learning to increase is the next step toward making actual shaped objects, not just flat rectangles.
An increase is simple: Instead of working one stitch into a stitch, you work two single crochets into the same stitch. That one extra stitch widens your fabric by one column each time you do it.
It sounds almost too easy. But this small technique is what allows you to crochet circles, triangles, hats, amigurumi bodies, and anything that is not a flat, straight rectangle.
Where to use increases:
- To widen a flat circle outward
- To add shape to the body of a stuffed toy
- To create the crown of a hat
- To shape the brim of a hat outward
Practical example: To crochet a flat circle, you place increases at evenly spaced points in every round. Each round gets a little wider. After six rounds, you have a small circle. After twelve, a coaster. After twenty, a rug.
Budget tip: Practice increases on a cotton dishcloth project. Make a square first, then try making a circle. The cotton yarn is cheap, the project is useful, and you will practice increases naturally throughout.
The stitch count goes up by one each time you increase, so keep track by counting at the end of each row.
9. Yarn Over: The Tiny Technique Behind Everything
Yarn over is not really a stitch on its own, it is the micro-movement that is part of almost every crochet stitch you will ever make. But understanding it properly fixes most beginner tension problems.
A yarn over means bringing the working yarn (the yarn attached to your ball) from behind the hook, over the top of the hook toward you, and settling it into the hook’s groove. It is a small rotation of the hook or a small swing of the yarn.
Why it matters: If your yarn over is inconsistent, sometimes too tight, sometimes loose, your stitches will look uneven. Consistency in this tiny motion is what makes fabric look clean.
Common beginner problem: New crocheters sometimes yarn over in the wrong direction (under instead of over). This creates a twisted stitch that tightens as you crochet. Always come over the top.
Fixing tension through yarn over: If your work is too tight, consciously relax your grip after each yarn over and let the yarn slide freely. If it is too loose, hold the working yarn with slightly more tension through your non-dominant hand fingers.
Practice tip: Before crocheting a single stitch, hold your hook and just practice the yarn over motion 50 times in a row. No stitching. Just the motion. Your hands will thank you when you start stitching for real.
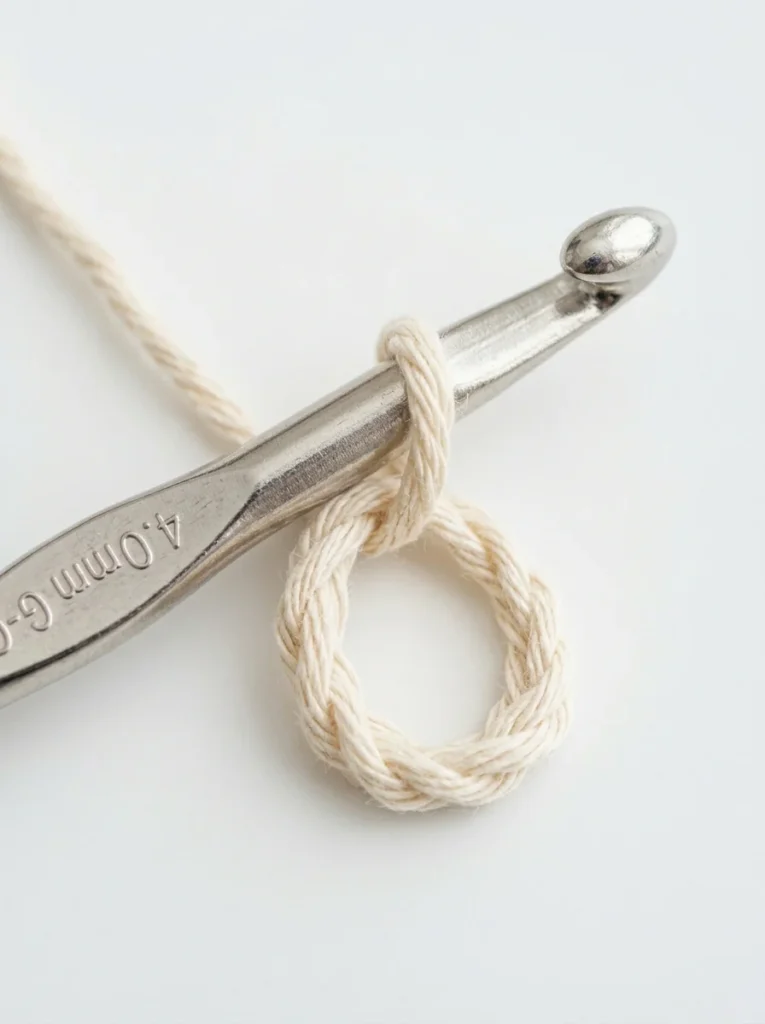
10. Slip Knot: Your Very First Move
Before any stitch happens, the slip knot happens. It is the very first thing you put on your hook, and it anchors everything that follows.
How to tie one: Make a small loop by crossing the yarn over itself. Reach through the loop with your fingers (or hook), grab the working yarn, and pull it through to create a new loop. Slide that loop onto your hook and tug the tail end gently to snug it up.
The slip knot should sit on your hook without sliding off, but it should not be so tight that you cannot move the hook through it.
Signs your slip knot is wrong:
- It falls off your hook (too loose)
- Your hook cannot move through it (too tight)
- It unravels when you tug the tail (not a real slip knot, just a loop)
The fix: Practice making and releasing slip knots ten times with a piece of scrap yarn before you even pick up a hook. Get the motion into your fingers first.
Budget tip: You literally need nothing for this practice, just a 12-inch piece of any yarn or even a shoelace. This is your zero-cost first step into crochet.
Once your slip knot goes onto the hook cleanly and sits in the right spot (not at the very tip, not crammed at the base), you are ready to chain.
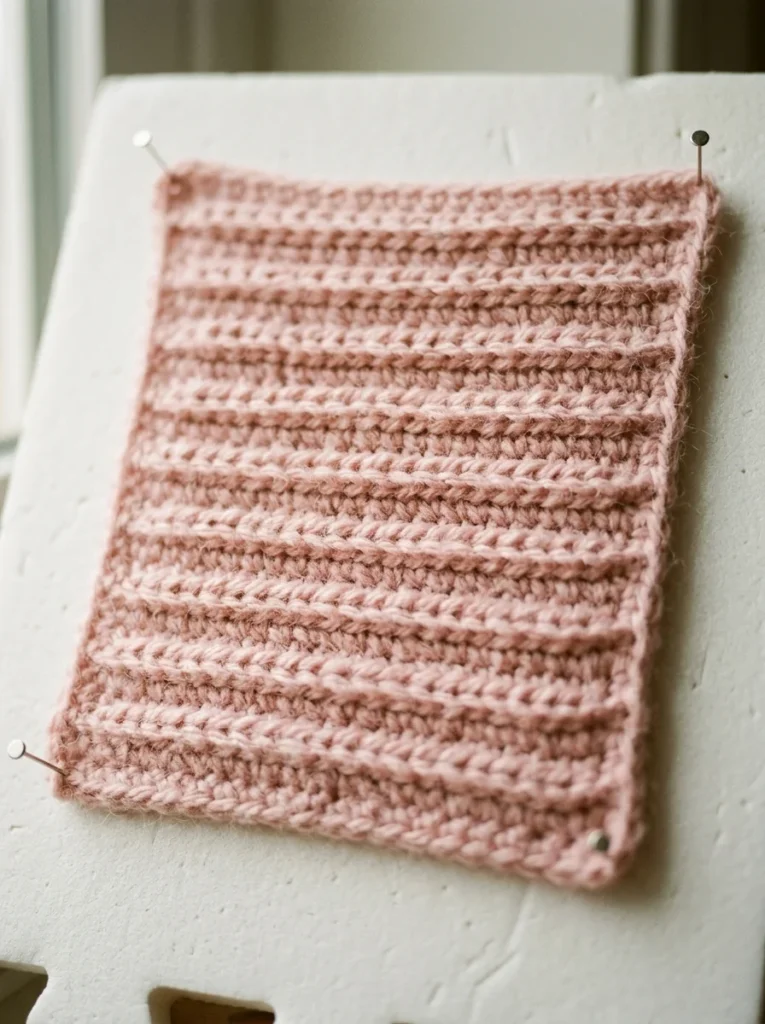
11. Back Loop Only (BLO): Adding Texture in One Move
Every crochet stitch has two loops at the top, a front loop (closest to you) and a back loop (farther away). Normally, you insert your hook under both. But if you only go into the back loop, you create a ridged texture on the surface of your work.
This is called working “back loop only” or BLO, and it is one of the easiest ways to add visual interest without learning a new stitch.
What it creates: A row of horizontal ridges that look like ribbing. Great for:
- Hat brims (creates stretch and texture)
- Cuffs on fingerless gloves
- Pot holders with a gripped feel
- Decorative blanket borders
How to do it: Simply insert your hook only under the back loop (the loop farther from you) instead of under both loops. Every other step stays the same.
Budget tip: Add BLO rows to an otherwise plain practice swatch to make it look intentional and decorative. This is how you turn a boring practice square into something that actually looks designed.
Common mistake: Beginners sometimes accidentally go back to both loops mid-row. This creates an uneven surface. Keep checking which loop your hook goes under on every single stitch until the habit is set.
12. Front Loop Only (FLO): The Softer Ridge
Front loop only (FLO) works the same way as BLO but on the opposite loop. You insert your hook only into the front loop, the loop closest to you, and work your stitch normally.
The effect is slightly different: FLO creates ridges that sit on the back of the piece (because you left the back loop free). This gives a softer, less pronounced texture than BLO.
Where FLO shines:
- Joining pieces together (leaving the front loop free creates a seam)
- Adding edging to blankets
- Creating fold lines in baskets or boxes
- Decorative rows in dishcloths
Real DIY example: Crochet a small rectangular basket. When you want the sides to fold up cleanly from the base, work one round in FLO at the edge of the base. This creates a natural fold line where the walls can stand straight up.
Budget tip: A small crocheted basket made from cotton rope or thick cotton yarn is a practical beginner project that uses FLO. Cotton rope costs around $8 for a large ball, enough for several baskets.
Beginner tip: Mark the row where you switch to FLO with a stitch marker so you do not lose track. Even one row worked into the wrong loop ruins the fold line effect.
13. Extended Single Crochet: Slightly Taller, Much Smoother
Extended single crochet sits in height between single crochet and half double crochet. It creates a smoother, flatter surface than regular single crochet, with less of the bumpy texture.
How to make it: Insert hook into stitch. Yarn over. Pull up a loop (two loops on hook). Chain one. Then yarn over and pull through both loops.
That one extra chain in the middle is the only difference from regular single crochet. But it subtly changes how the stitches sit, slightly taller and more evenly distributed.
Why use it:
- When you want a smoother fabric than single crochet gives
- For baby items where a soft, flat texture is better
- For bags and pouches where a cleaner look matters
- As a substitute when a pattern feels too tight in single crochet
Tension tip: Because of the extra chain step, this stitch can sometimes tighten up. If you notice your swatch curling, try going up one hook size.
Budget tip: This stitch uses almost exactly the same amount of yarn as regular single crochet. So any practice yarn you have works perfectly. Use it to make a simple coaster, a 12-stitch, 12-row square makes a beautiful, clean coaster that feels polished.
14. Shell Stitch: Pretty and Beginner-Friendly
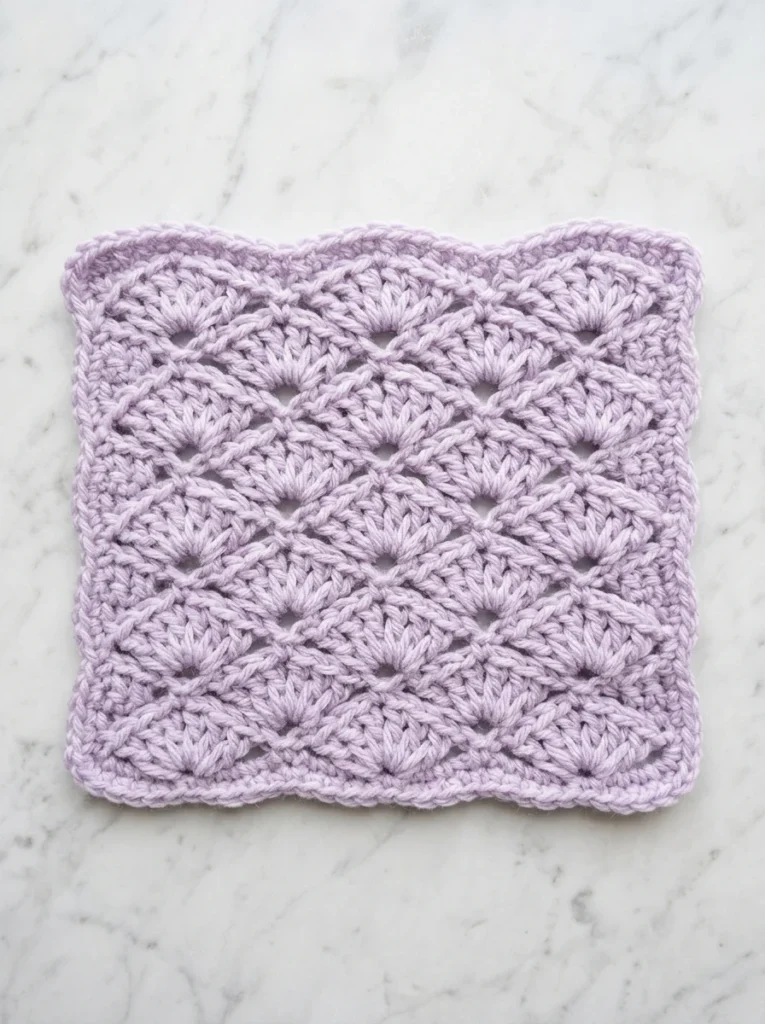
The shell stitch looks like something an experienced crocheter made. In reality, it is just five double crochets worked into the same stitch, no complicated technique required.
Basic shell: Chain a multiple of six plus one. Work five double crochets into the same stitch. Skip two stitches. Single crochet into the next stitch. Skip two stitches. Five double crochets into the next stitch. Repeat.
The result is a row of fan-shaped clusters that look intricate but are built from only two stitches you already know.
Great for:
- Blanket borders
- Baby blankets
- Scarves
- Shawl edging
Budget tip: Shell stitch works beautifully in a single solid color. No need for multi-colored yarn. A $5 skein of a soft worsted yarn is all you need to make a small shell stitch scarf that looks shop-worthy.
Beginner tip: The tricky part is keeping track of where your single crochet goes between shells. Use a stitch marker to mark the single crochet point in each row until the pattern feels automatic.
Time check: Most beginners can learn the shell stitch in one afternoon. By the second afternoon, you will have a respectable-looking piece to show.
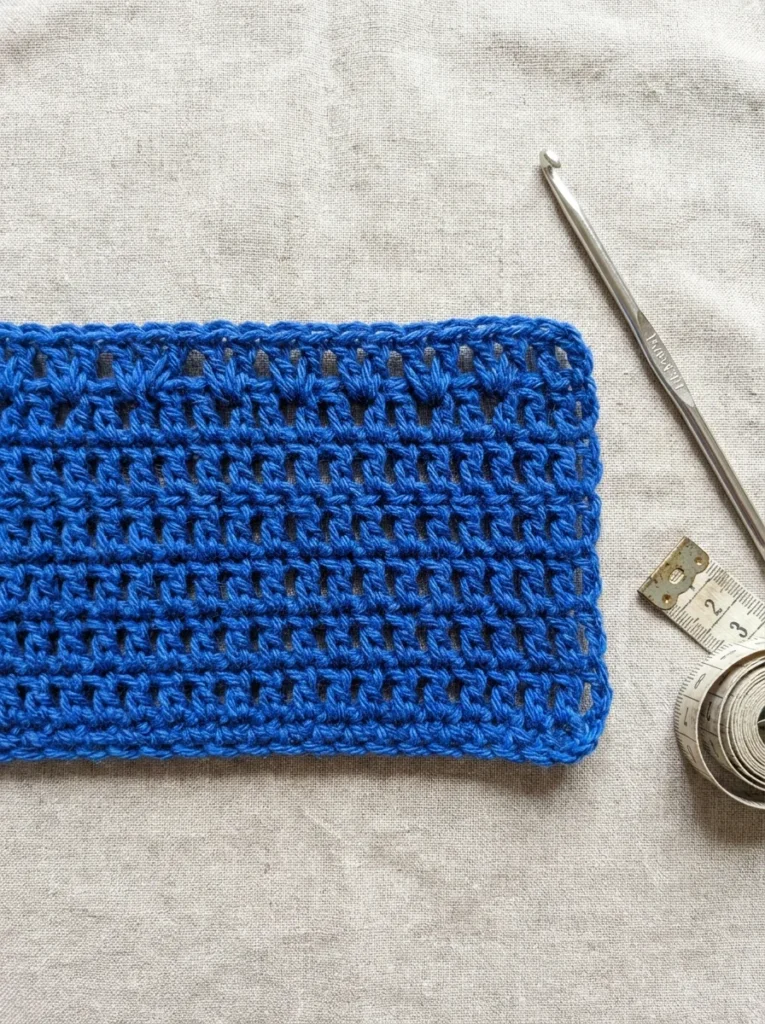
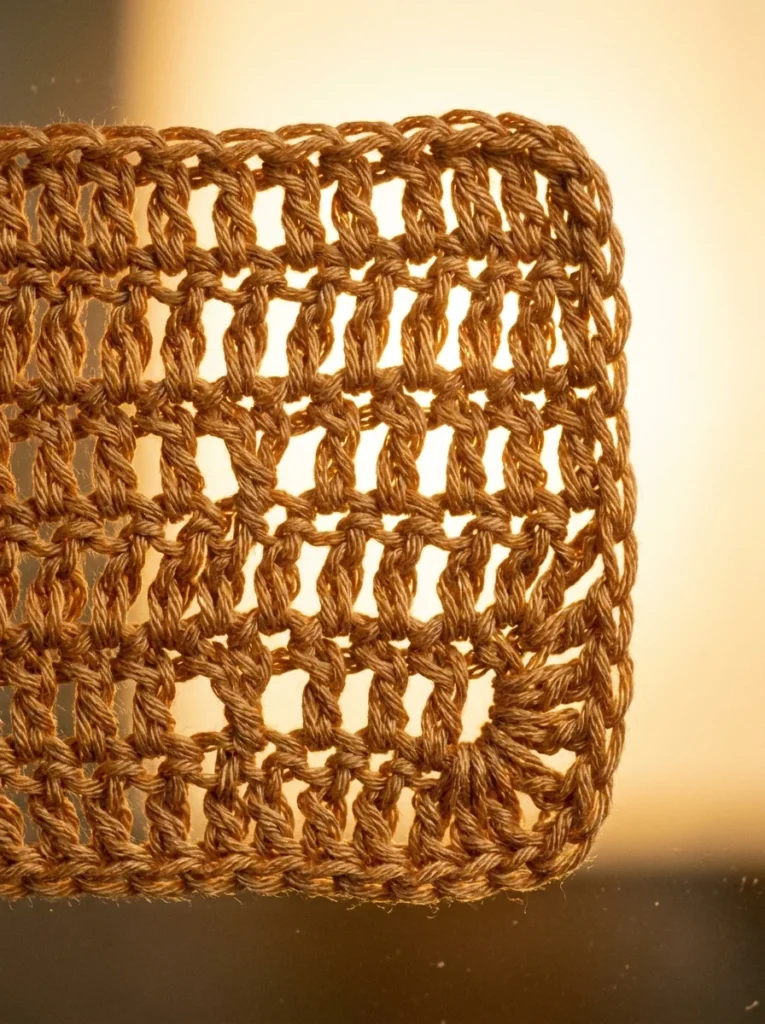
15. V-Stitch: Open and Elegant

The V-stitch is exactly what it sounds like, each stitch forms a small V shape in your fabric. Together, they create a light, open fabric with a geometric pattern that looks well-designed without requiring advanced skills.
How to make it: Work one double crochet, chain one, then work one more double crochet, all into the same stitch or space. That pair of double crochets with a chain-one gap between them is your V.
In the next row, you work another V into each chain-one space from the previous row.
Why beginners love it:
- It looks fancy but uses only double crochet
- The open spaces mean it works up quickly
- Less yarn is used compared to solid stitches, so projects are more affordable
Good for:
- Summer shawls
- Market bags
- Baby blankets
- Lightweight scarves
Budget tip: Because V-stitch uses less yarn (those chain-one gaps are air, not yarn), your skein goes further. A $4 to $6 skein of cotton or acrylic gets you a decently sized scarf panel.
Counting tip: Count your V-stitches at the end of each row, not your individual double crochets. This keeps your stitch count accurate as your project grows.
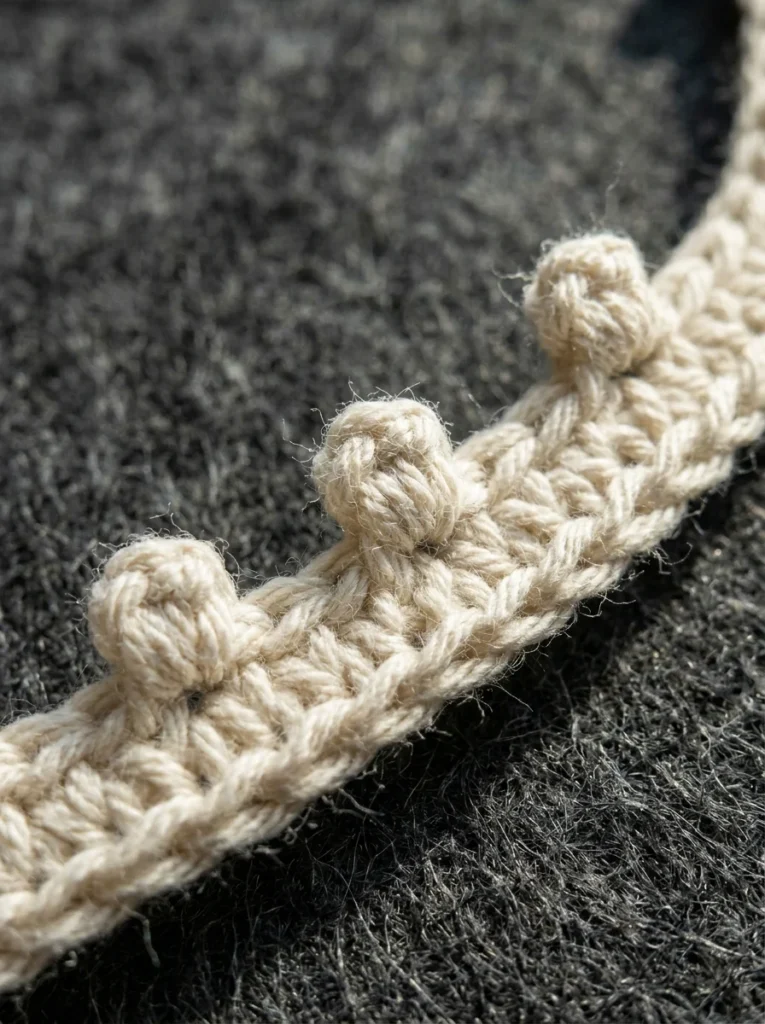
16. Bobble Stitch: Big Texture, Simple Method
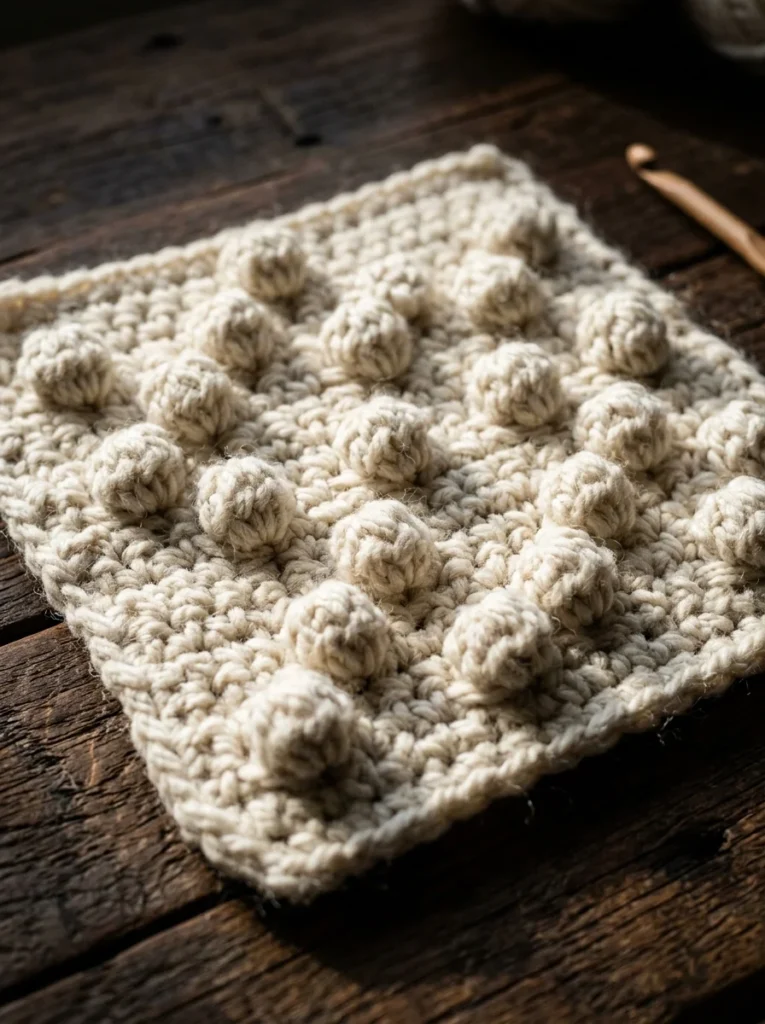
Bobble stitches are little raised clusters that pop out from the surface of your fabric. They look impressive and tactile. And they are really just a group of incomplete double crochets worked into one stitch.
Basic bobble: Yarn over, insert hook, pull up loop, yarn over, pull through two loops (leaving two on hook). Repeat this four more times into the same stitch, five times total. You will have six loops on your hook. Yarn over once and pull through all six loops at once. That cluster of yarn is your bobble.
They look 3D and puffy. One side of the fabric will be flat; the other side will show the raised bumps. The raised side is usually treated as the “right side” (the front).
Great for:
- Baby blankets (soft, textured, and loved by babies)
- Pot holders (adds grip)
- Pillow covers
- Decorative throw blankets
Budget tip: Bobble stitches use more yarn than flat stitches because of all those extra loops. Pick a mid-weight acrylic that comes in large skeins (200+ yards) to get the most coverage. Big-box craft store brands like Red Heart or Lion Brand give great value.
Beginner tip: The first few bobbles feel awkward because of all the loops. Count your loops before the final pull-through every single time.
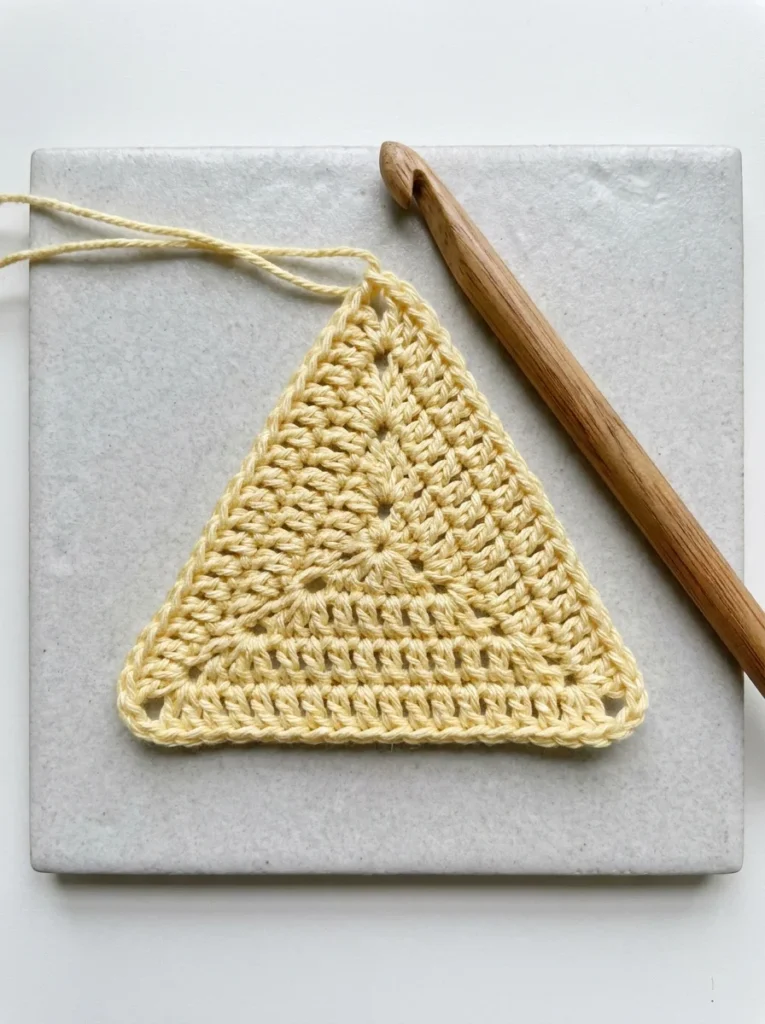
17. Granny Square: The Iconic Beginner Project

The granny square is probably the most recognized crochet motif in the world. It starts from a magic ring in the center and builds outward in rounds. Each round adds a new layer of shell clusters separated by chain spaces.
Basic granny round structure: Chain 4, join into a ring. Chain 3 (counts as first double crochet), work two more double crochets into the ring. Chain 2. Work three double crochets into the ring. Chain 2. Repeat twice more. Join. That is round one, a small four-sided shape.
Round two and beyond add more shells into the corner spaces, growing the square outward.
Why learn it: Granny squares are modular. You can make dozens and join them together to make blankets, bags, pillow covers, even garments. If you want a detailed walkthrough, this foolproof granny square tutorial for beginners covers the whole process step by step.
Budget tip: This is the perfect stash-buster project. Use all your random leftover yarn scraps. Each square can be a completely different color. The more chaotic, the better a granny square blanket looks.
Practical project: Make 20 granny squares over a weekend (about 15 minutes each once you get the pattern). Join them into a small lap blanket or wall hanging. Total yarn cost: whatever scraps you already have.
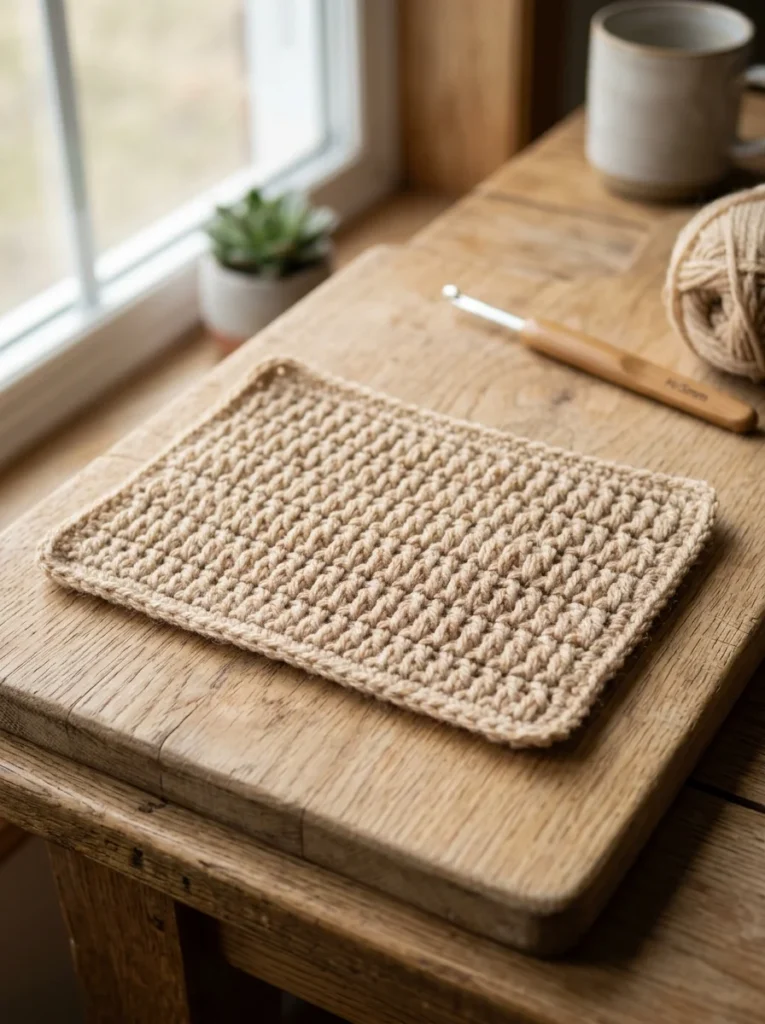
18. Moss Stitch: Simple Texture Anyone Can Do
The moss stitch (also called the linen stitch or granite stitch) creates a small, even, pebbly texture that looks more complex than it is.
How to do it: Single crochet into the first stitch. Chain one. Skip the next stitch. Single crochet into the stitch after that. Chain one. Skip. Repeat.
The key is the alternating pattern, stitch, chain, skip, stitch, chain, skip. In the next row, you single crochet into the chain spaces from the previous row and chain over the stitches.
What it looks like: Small, evenly spaced V-shapes on a tight grid. The result is subtle and elegant, not flashy, but clearly textured.
Ideal for:
- Kitchen towels and dishcloths
- Tote bags
- Placemats
- Scarves in cotton yarn
Budget tip: Cotton yarn in the $3 to $5 range is perfect for moss stitch dishcloths. Make a set of four for about $12 in yarn. They look handmade-on-purpose and make a great gift.
Speed note: Moss stitch works up more slowly than double crochet because the stitches are short. But the texture it creates is worth the extra time.
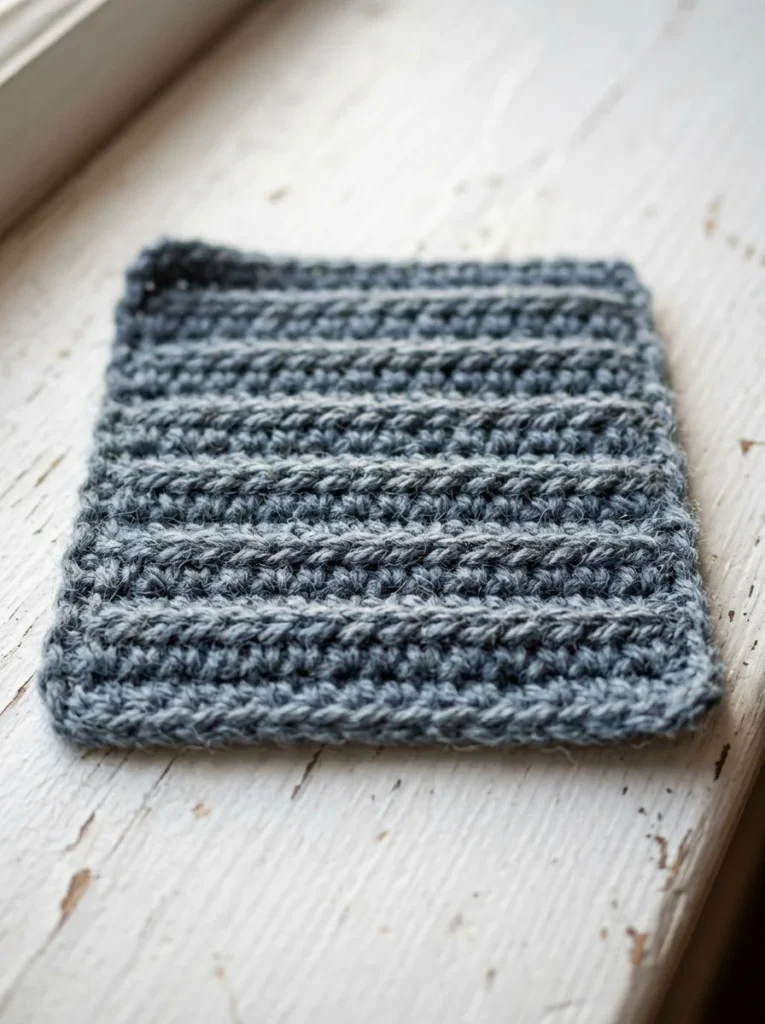
19. Tunisian Simple Stitch, A Different World of Crochet
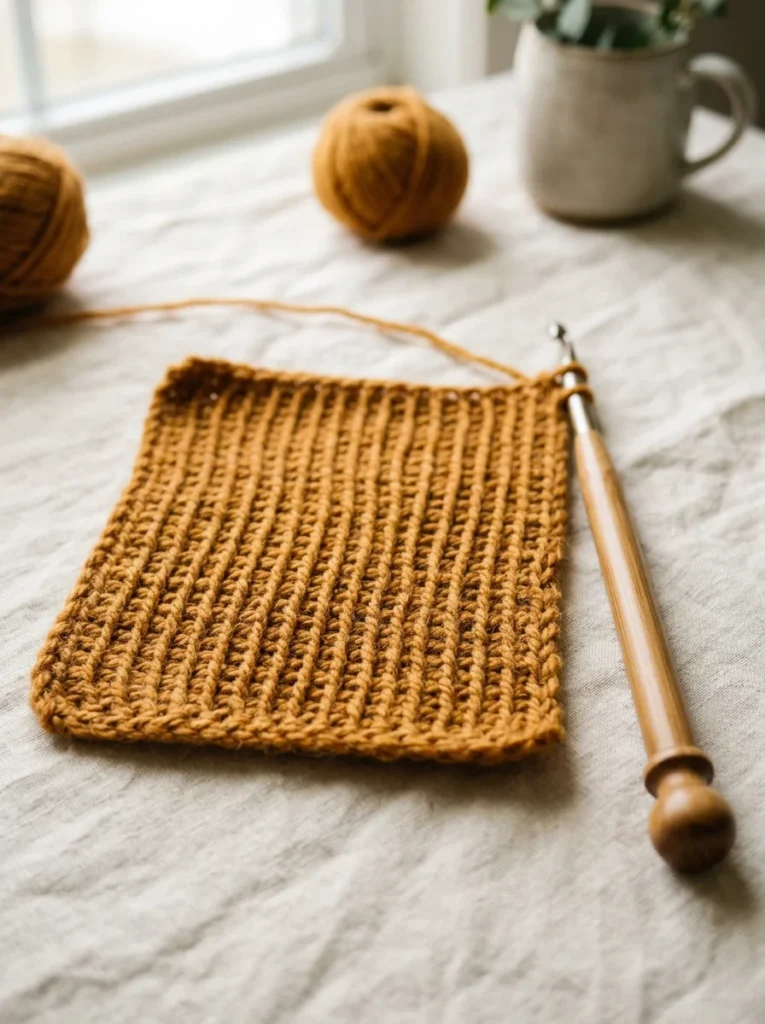
Tunisian crochet uses a special long hook (like a cross between a crochet hook and a knitting needle) and works differently from regular crochet. Instead of working one stitch at a time and turning, you pick up a whole row of loops on your hook (the “forward pass”) and then work them off one by one (the “return pass”).
Tunisian simple stitch: Insert hook into the second chain from the hook. Yarn over. Pull up a loop — do not turn, do not pull through. Keep picking up loops across the whole row. Then work back: yarn over, pull through one loop, then yarn over and pull through two, all the way to the end.
The fabric it creates looks almost woven, flat, dense, and with clear vertical columns.
Good for:
- Blankets
- Scarves
- Pot holders
- Small bags
Budget tip: You need a Tunisian crochet hook, which typically costs $5 to $10 at a craft store. This is the one small investment worth making. The long hook is also available in affordable sets on online marketplaces.
Key difference from regular crochet: You never turn your work. You always face the same side. That takes adjustment if you are used to standard crochet.
20. Picot Stitch — Tiny Decorative Loops
Picot stitches are small decorative loops that sit along the edge of a crocheted piece. They look like tiny bumps or points, adding a delicate, finished look to blanket edges, collars, and hems.
How to make a basic picot: Work a single crochet into the fabric edge. Chain three. Slip stitch back into the first chain you made. That creates one tiny loop. Single crochet a few stitches along the edge. Repeat.
The chain-three creates the loop; the slip stitch anchors it closed.
Where to use them:
- Along the edge of a baby blanket
- On the hem of a crocheted top
- Around the border of a granny square
- On handmade greeting card embellishments
Budget tip: Picot stitches use almost no extra yarn. You can add a decorative border to any existing crochet piece without buying a new skein. Use leftover yarn from a previous project for contrast-color picots.
Beginner mistake: New crocheters sometimes make their picots too loose or too tight, making them look uneven. Keep consistent tension through the chain-three steps. If it helps, count “one, two, three” aloud for each chain.
Picot edging is the kind of detail that makes handmade items look genuinely professional.
21. Standing Single Crochet: Starting a Row Without a Slip Knot
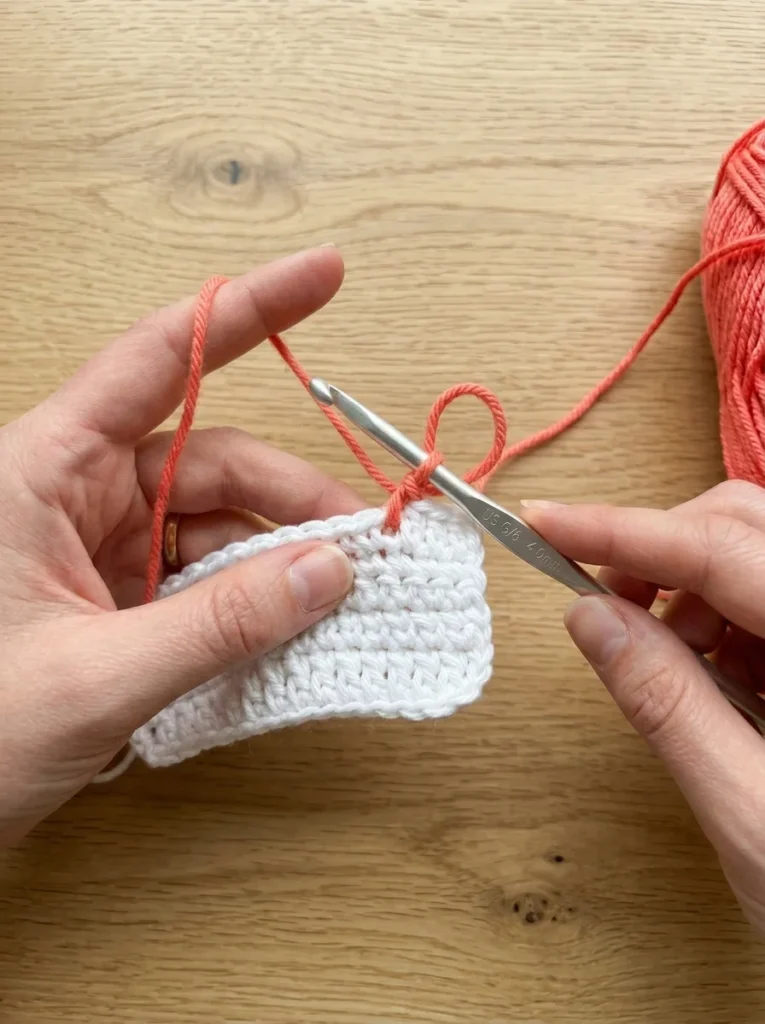
The standing single crochet is a small technique that solves a specific, annoying problem: starting a new color (or new yarn) at the beginning of a row without having a messy slip knot or a dangling starting chain to weave in.
How to do it: Make a slip knot and remove it from your hook (just hold the loop on your finger). Insert the bare hook into the first stitch. Place the yarn over the hook. Pull up a loop (two loops on hook, one from your held loop, one pulled through). Yarn over. Pull through both. Done. That is your first stitch, and there is no chain-turning stitch needed.
Why it matters:
- Cleaner color joins on striped blankets
- Fewer ends to weave in
- Neater starting edge on rows
Real use case: You are making a striped baby blanket. Instead of joining each new color with a slip knot and a turning chain (which can look messy at the edge), use a standing stitch. The edge looks clean and intentional.
Budget tip: No extra tools required. Just a small change in how you start. This technique alone makes colorwork projects look much more polished, free upgrade.
Conclusion
Twenty-two stitches. One weekend. That is genuinely all it takes to go from complete beginner to someone who can look at a crochet pattern and recognize what is happening.
The most important thing is to start with just one or two stitches and get comfortable before moving to the next. The chain stitch leads to single crochet. Single crochet leads to double crochet. Double crochet leads to granny squares, shell stitch, and everything beyond. Each stitch you learn makes the next one feel less confusing.
None of this requires expensive supplies. A basic hook set costs under $10. A skein of practice yarn runs $3 to $6. You can learn the fundamentals of crochet for less than a single takeout meal.
The stitches in this list build on each other naturally. Once your hands know the yarn-over rhythm, the rest follows. Give yourself permission to crochet ugly swatches and pull them out and start again, that is exactly how it works. Every experienced crocheter has a pile of frogged (unraveled) practice pieces in their past.
Pick up the hook. Make a chain. Try single crochet for twenty minutes. The weekend is already enough time to change how you relate to making things with your hands. When you are ready to take the next step, these beginner crochet projects give you simple, satisfying things to make once your stitches feel solid. And if patterns still feel confusing after that, this guide on how to read a crochet pattern walks you through every abbreviation and symbol without the overwhelm. You can also browse free beginner crochet patterns to find your first real project the moment you feel ready.