

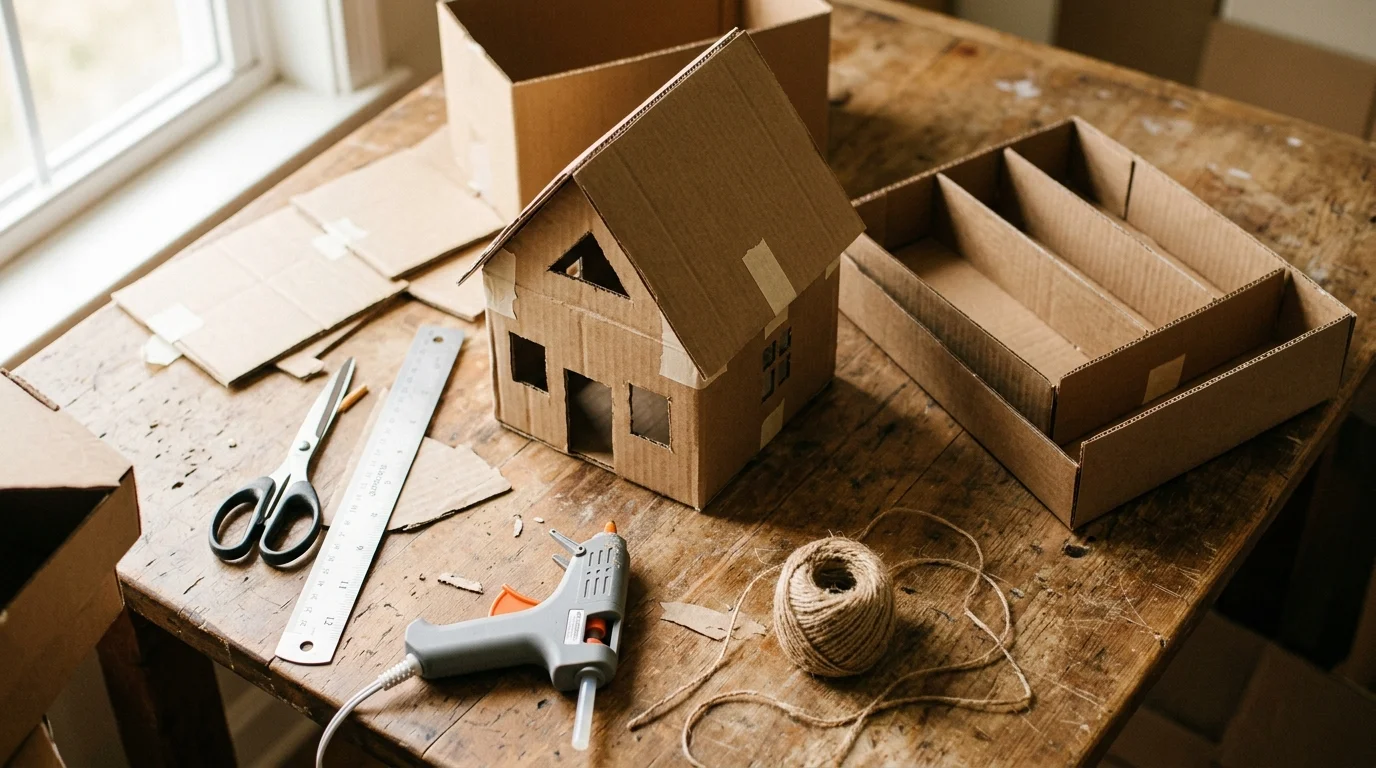
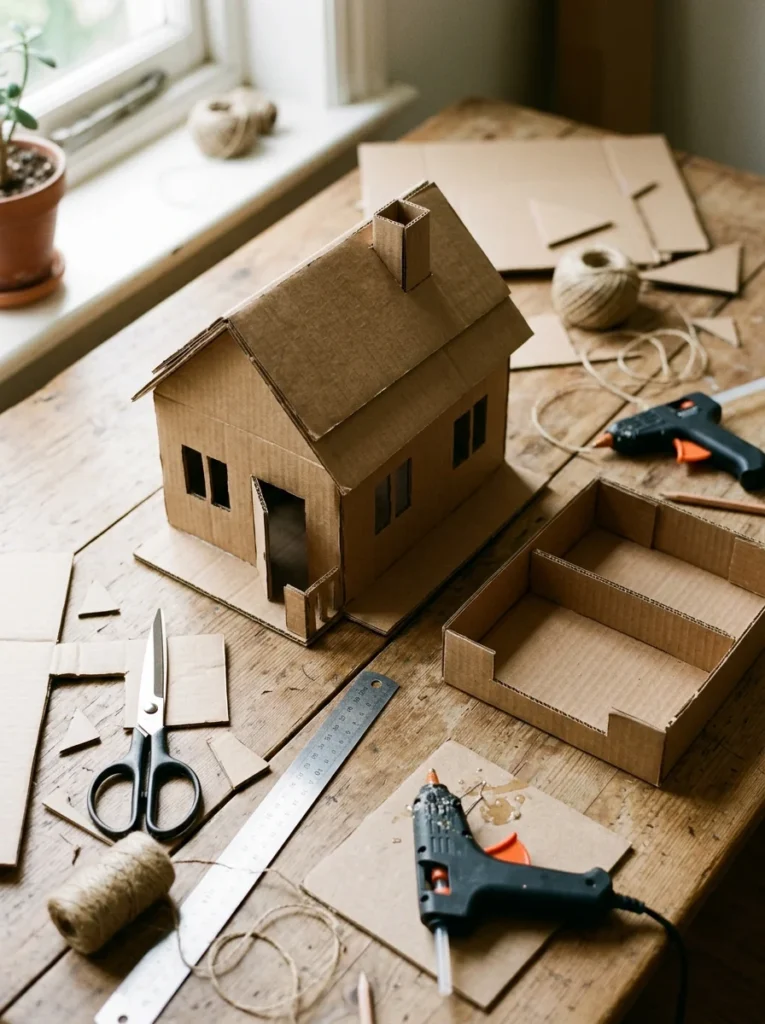
Empty boxes pile up fast. After every delivery, you toss another one in the corner. But that brown cardboard is free building material sitting in your home right now. With a pair of scissors, some glue, and a little patience, you can turn a plain box into something you actually want to keep. These projects cost almost nothing. Most use stuff you already own. Whether you want storage, decor, or a fun afternoon with the kids, there is a project here for you. Grab a box and let’s make something.
1. A Cozy Cat House Your Pet Will Actually Use
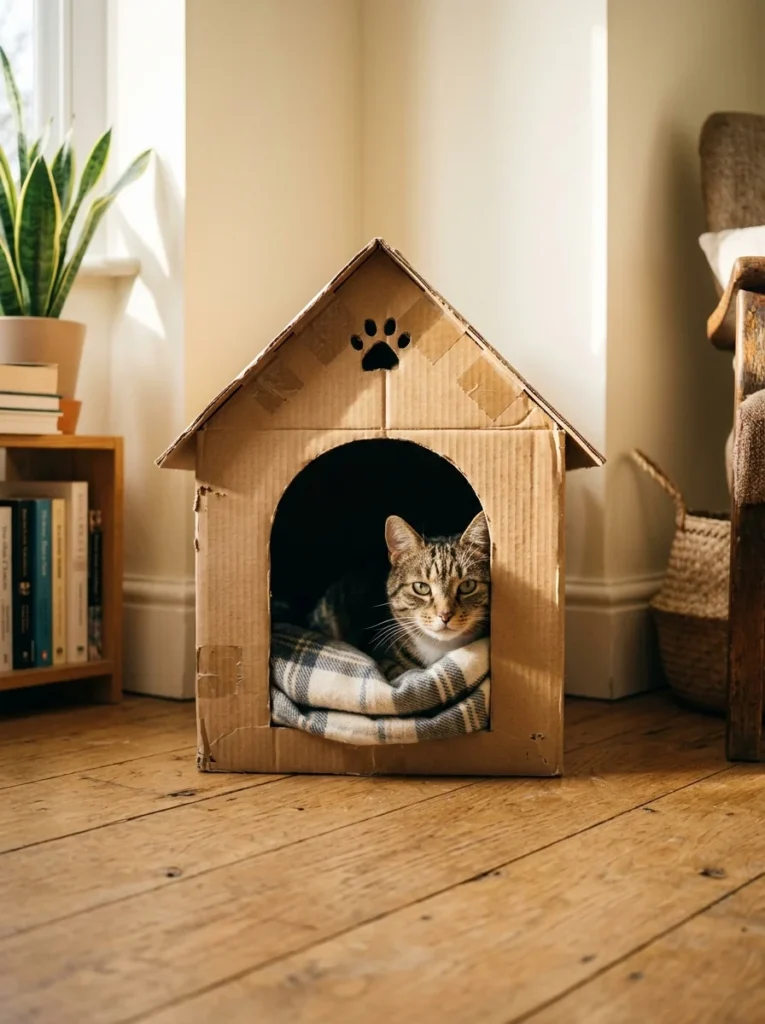
Cats love boxes. So give them a proper home. Take one sturdy box and cut an arched doorway on the front. Add a couple of small round windows on the sides for airflow and peeking.
Flip a second flat piece into a slanted roof. Tape it on at an angle. That simple shape makes it feel like a real little house.
Want it to last? Reinforce the corners with packing tape on the inside. This keeps the walls from sagging when your cat leans on them.
Drop a folded towel or an old sweater inside for a soft floor. Your cat will claim it within minutes.
Budget tip: Use leftover wrapping paper or fabric scraps to cover the outside. It hides the brown and matches your room.
For a fancier look, cut tiny shingles from extra cardboard and glue them on the roof in rows. It takes ten minutes and looks adorable in photos.
Skip the paint if you want. Plain brown looks rustic and clean. This whole project costs nothing if you already have tape and a spare box.
2. Stackable Desk Organizers That Tidy Your Clutter
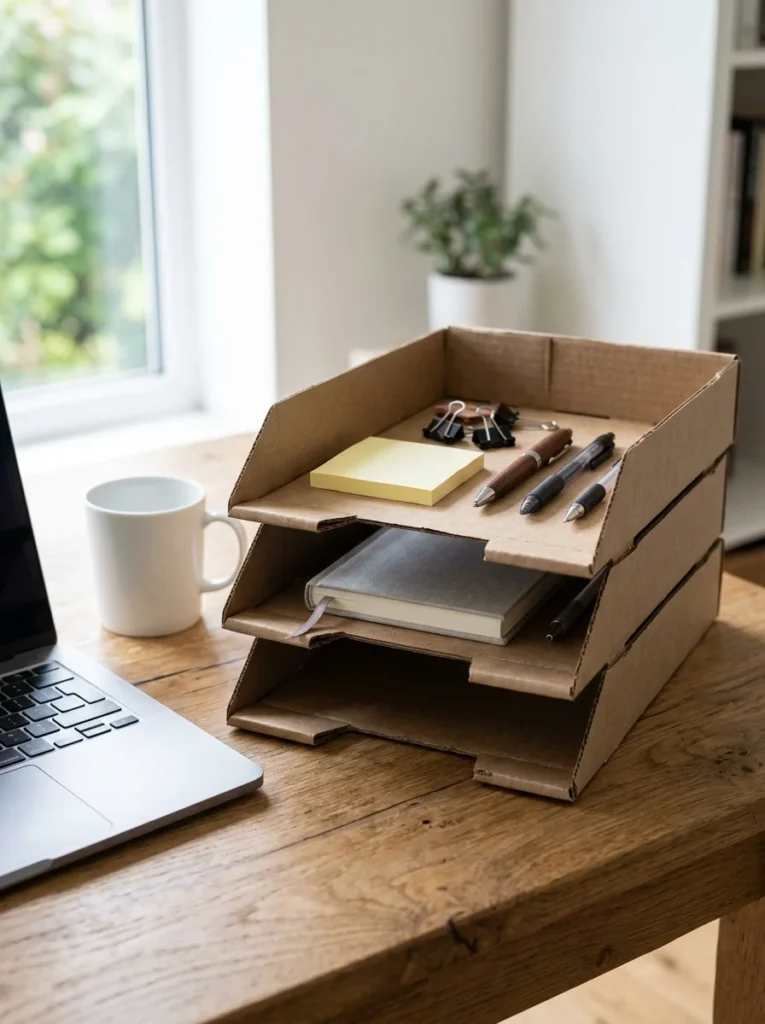
Pens everywhere. Cables tangled. Sticky notes lost under papers. A simple cardboard organizer fixes all of it.
Cut a box down to about three inches tall. That becomes your base tray. Make two or three more in slightly different sizes.
Now stack them or line them up side by side. Each one holds a different thing. One for pens. One for notes. One for chargers.
Glue thin cardboard dividers inside to make small sections. This keeps tiny items from rolling around.
Budget tip: Cover them with plain kraft paper or a roll of cheap contact paper. Suddenly they look store-bought.
Want them to match? Wrap each tray in the same color so your desk feels pulled together.
Measure your drawer first if you want them to fit inside. A snug fit stops everything from shifting when you open and close it.
These trays hold up well for months. When one wears out, you just make another from the next delivery box.
Start with one tray today. You will want more by tomorrow.
3. Mini Drawer Dividers for Messy Spaces
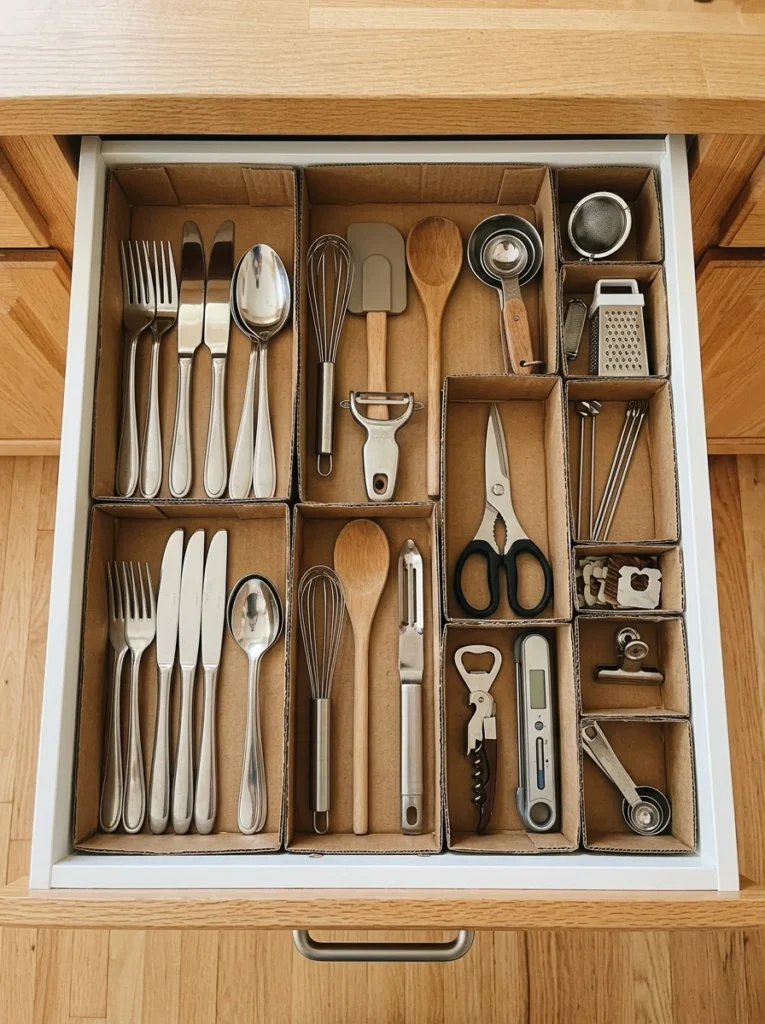
Junk drawers swallow everything. Keys, batteries, rubber bands, all mixed together. Cardboard dividers bring order back fast.
Measure the inside of your drawer. Write the numbers down so you cut the right size.
Cut long strips of cardboard the same height as the drawer. Slot them together in a grid using small notches. No glue required if the fit is tight.
Drop the grid into the drawer. Each little box now holds one type of item.
Budget tip: This costs zero dollars. You are using a box you would have recycled anyway.
Use thicker cardboard for drawers you open a lot. It survives the daily tug and pull better than thin sheets.
Want it cleaner? Wrap each strip in white paper before assembling. The bright look makes the drawer feel fresh and roomy.
This works in the kitchen, the bathroom, even your nightstand. Anywhere small things get lost, a divider grid saves you.
Spend fifteen minutes on one drawer. The calm feeling of opening it afterward is worth the effort. Then move on to the next messy spot.
4. Picture Frames With Charm and Texture
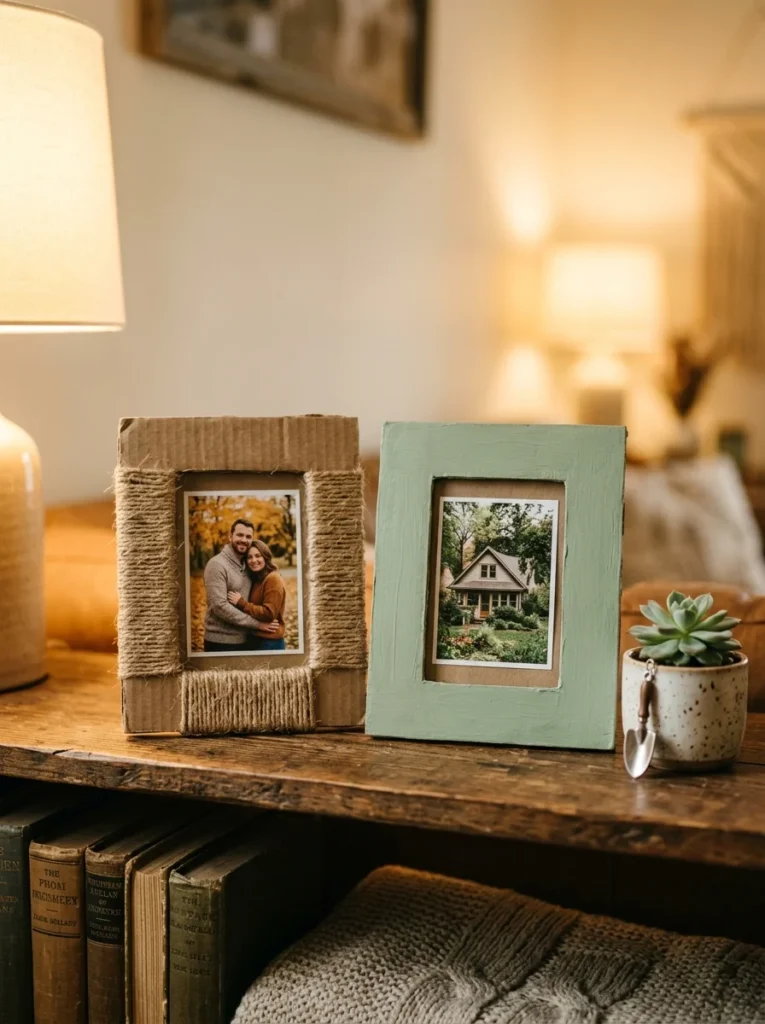
Store frames cost more than the photo inside. Make your own and spend nothing.
Cut two pieces of cardboard the same size. On the front piece, cut out a window where the photo will show. The back stays solid.
Glue the photo to the back piece. Then glue the front frame over it. Leave one side open if you want to swap photos later.
Add a folded cardboard stand on the back so it props up on a shelf.
Budget tip: Wrap the frame in twine, fabric, or old book pages for instant texture. These cost pennies and look handmade in the best way.
Paint it if you have some lying around. A soft color makes the photo pop.
Want a gallery wall? Make five or six in different sizes. Hang them with small tape strips. The mismatched look feels warm and personal.
Cardboard frames weigh almost nothing. That makes them safe and easy to hang anywhere, even on weak walls.
Print a favorite photo and frame it tonight. It is the kind of gift people keep for years.
5. Floating Shelves for Tiny Treasures
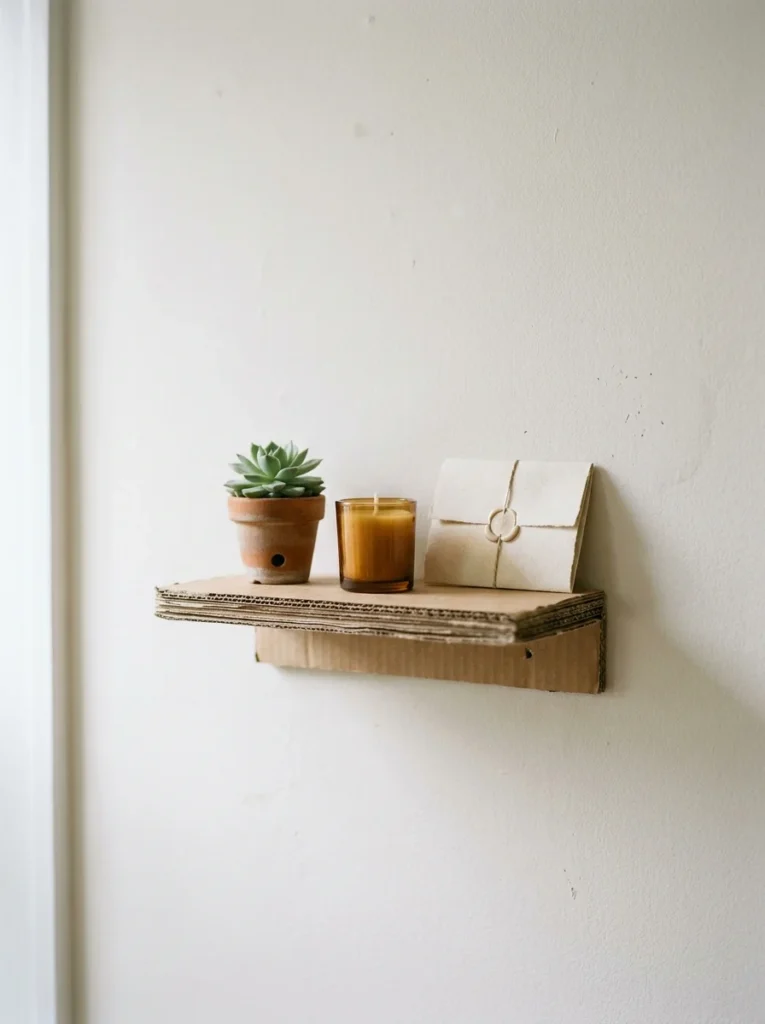
You do not need power tools for a shelf. Cardboard handles light items just fine.
Fold a long strip of cardboard into a triangle or box shape. This gives the shelf strength. A flat sheet alone would bend, but a folded shape holds firm.
Tape the folds tightly. Then reinforce the top surface with a second layer so it stays flat under weight.
Mount it with strong double-sided tape or small adhesive hooks. No drilling needed.
Budget tip: Stack two or three layers of cardboard and glue them together for a thicker, stronger shelf. Still free, still simple.
Keep it for light things only. Think small plants, candles, or a few postcards. Skip heavy books.
Cover the front edge with washi tape or paper to hide the cardboard layers. This small touch makes it look finished.
Want a set? Mount three at staggered heights for a stepped look. It fills empty wall space without committing to real shelves.
Pick one bare wall and add a little shelf today. Style it with whatever small thing makes you smile.
6. A Toy Car Garage Kids Will Love
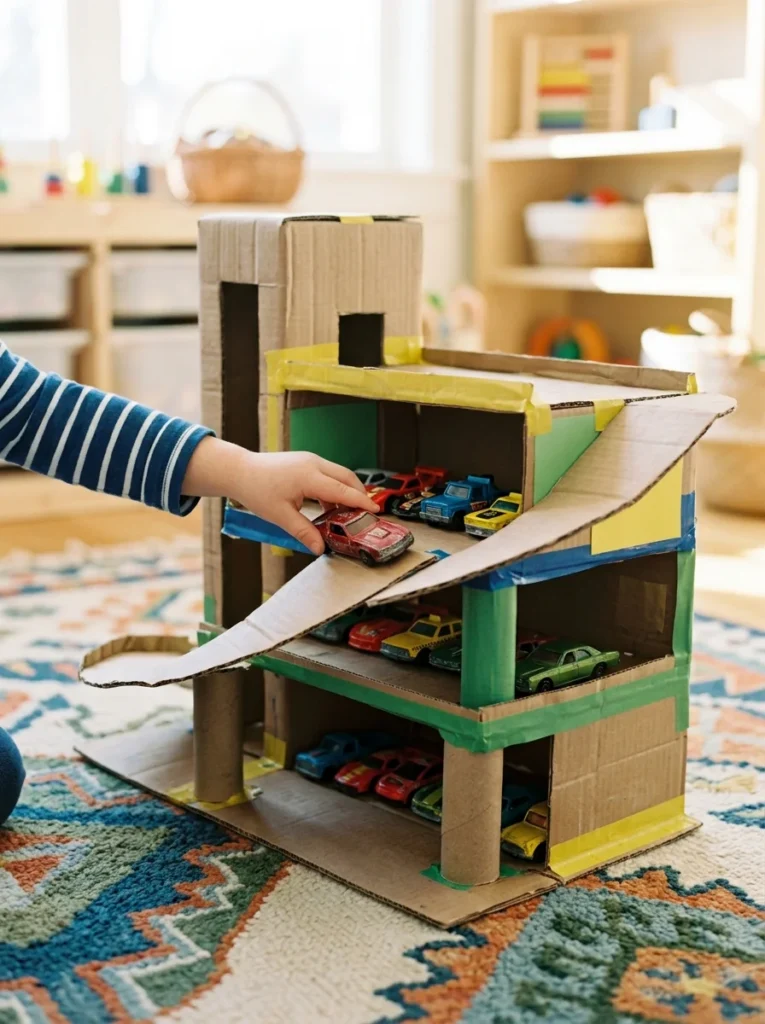
Kids burn through toys but never tire of a good garage. Build one from a tall box.
Cut horizontal shelves inside the box to make parking levels. Space them so toy cars fit under each one.
Add a ramp between levels using a flat strip angled down. Now the cars can drive up and down on their own.
Cut a big opening on the front for the main entrance.
Budget tip: Let your kid color it with crayons or markers. Free decoration and they feel proud of their work.
Add a spinning elevator from a small box and a cardboard tube if you want to get fancy. It moves cars between floors and kids find it magic.
Reinforce the shelves with tape so they hold the weight of metal cars without bending.
Glue on small paper signs for parking spots. Numbers and arrows make it feel like a real garage.
This project keeps kids busy for an entire afternoon, both building and playing. And when it wears out, the next box becomes garage number two.
7. A Marble Run That Defies Gravity
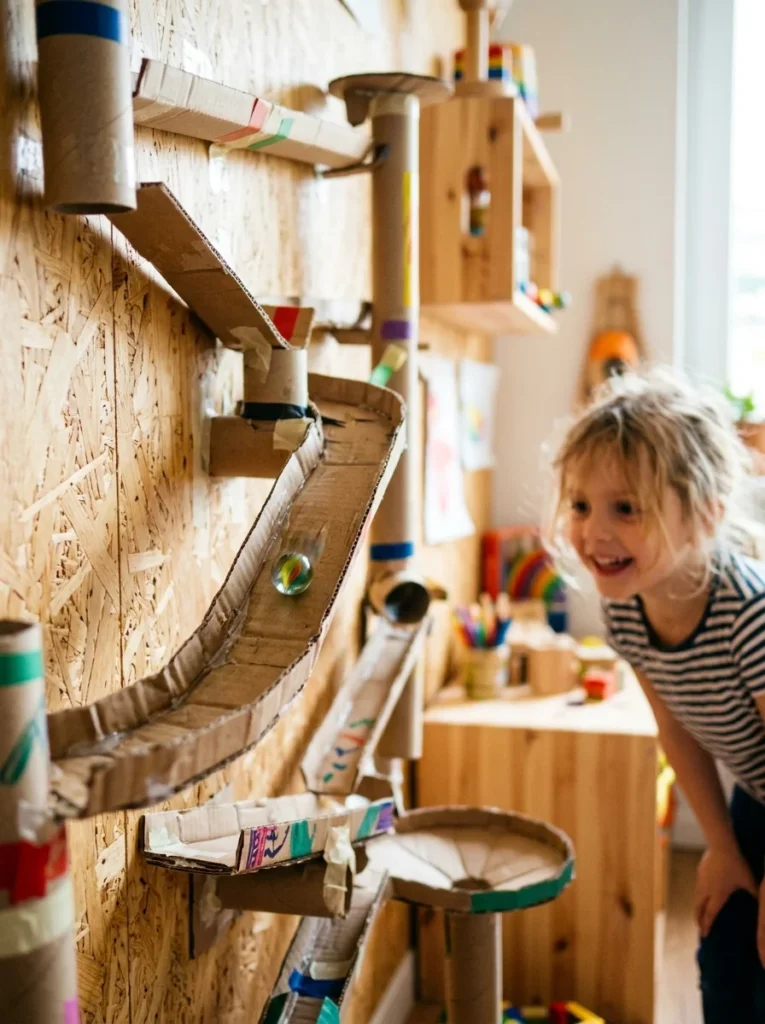
Marble runs sell for a lot. Build a better one for free using cardboard tubes and box pieces.
Cut tubes in half lengthwise to make open tracks. Tape them to a large flat cardboard backing at gentle downward angles.
Connect each track so a marble drops from one into the next. Test as you go. Drop a marble and watch where it falls off, then adjust.
Add little catch cups at the bottom from cut paper cups or folded cardboard.
Budget tip: Save paper towel and toilet rolls for weeks. They are the perfect free tracks for this.
Lean the whole board against a wall or tape it up. The steeper the angle, the faster the marbles fly.
Want loops and jumps? Curve a strip of cardboard into a half-pipe shape for tricks. Kids love the chaos.
Color-code the tracks so each path has its own look. It helps younger kids follow the marble.
This teaches patience and basic physics without feeling like a lesson. Build the first track, drop a marble, and you are hooked.
8. Gift Boxes That Look Bought, Not Made
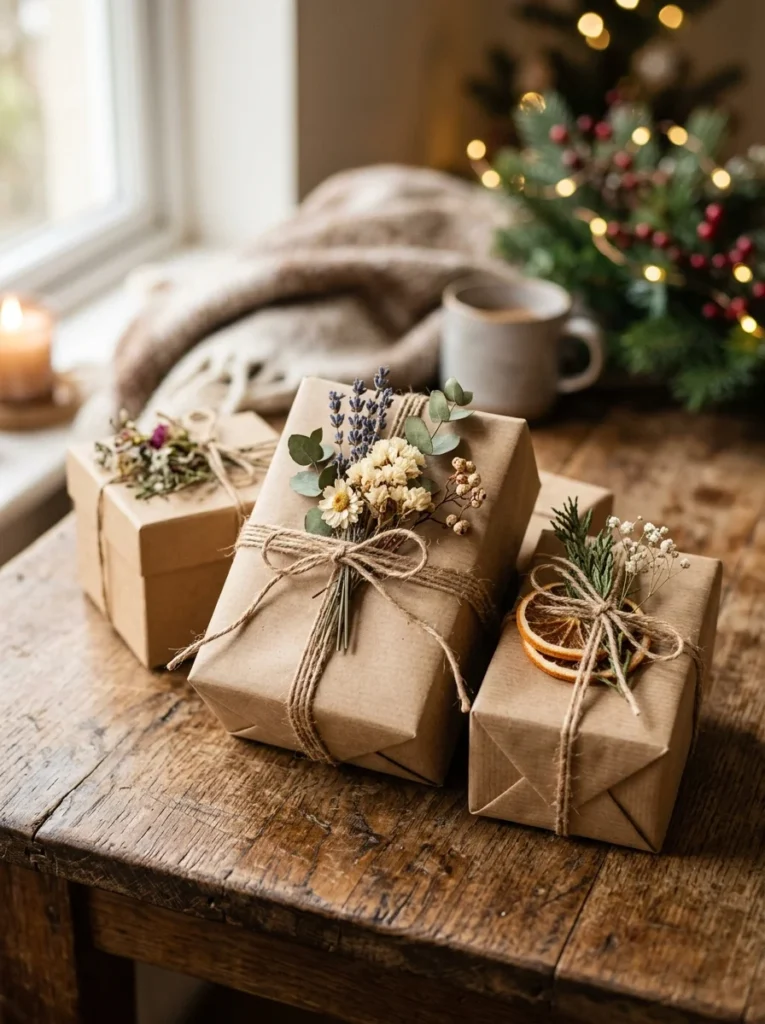
Stop buying gift boxes. A flat piece of cardboard folds into a perfect one.
Search for a simple box template, trace it onto your cardboard, and cut. Score the fold lines with a dull edge so they bend cleanly.
Fold up the sides and tuck the flaps. You have a sturdy box that holds its shape better than thin store versions.
Budget tip: Wrap it in kraft paper or newspaper and tie it with string. This look is trendy and costs almost nothing.
Make the box slightly bigger than your gift so it closes easily.
Add a dried flower, a sprig of greenery, or a hand-drawn tag on top. These small extras make people think you spent real money.
For fragile gifts, line the inside with crumpled paper or fabric scraps. It cushions the contents and feels thoughtful.
Make a few at once around the holidays. Having them ready saves a panicked trip to the store later.
The person opening it will not believe you made the box yourself. That little surprise is half the fun.
9. Sturdy Bookends That Hold the Line
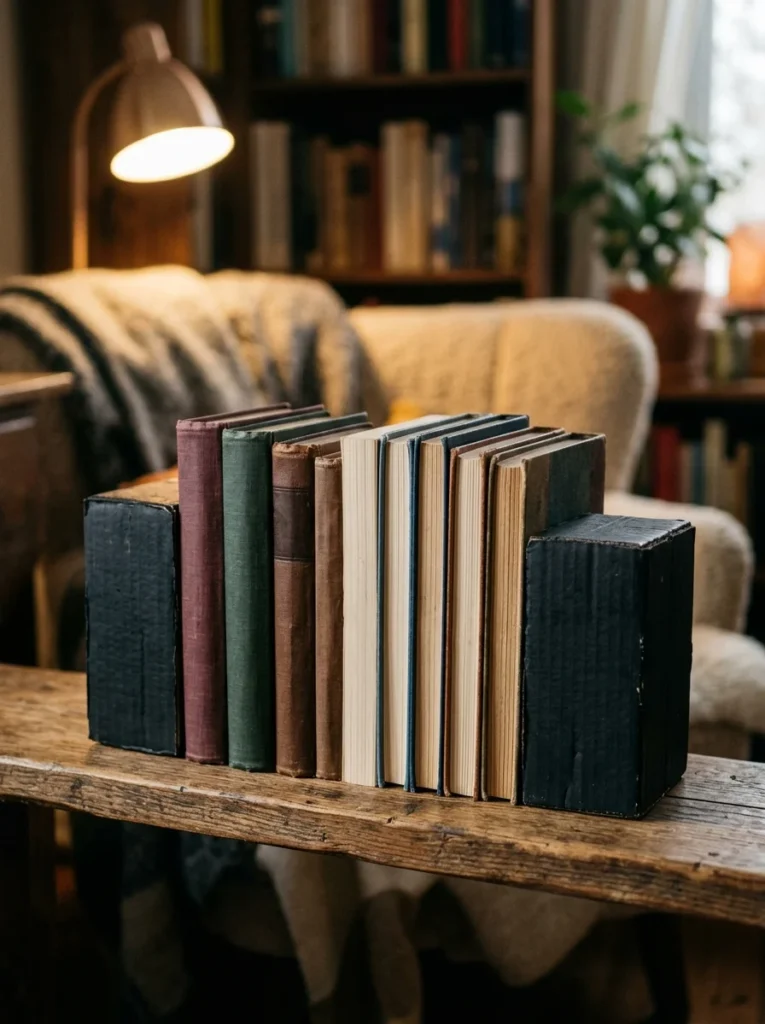
Slumping books look messy. Bookends fix that, and cardboard ones can be surprisingly tough.
Cut an L-shape from thick cardboard. The bottom slides under the books and their weight holds it down. The tall part stops them from falling.
Glue several layers together for real strength. One sheet bends, but five glued sheets stand firm.
Fill the inside hollow with sand, rice, or pebbles if you build a box shape. The extra weight stops it from sliding.
Budget tip: Cover them in paint, paper, or fabric to match your shelf. Free material, custom look.
Make them in fun shapes. A simple mountain, a cat silhouette, or a plain block all work.
Weight matters most here. A light bookend just slides across the shelf, so add filling for heavier books.
Want a pair that matches? Cut both from the same template so they look like a real set.
These hold paperbacks and light hardcovers with ease. Skip them for huge encyclopedias.
Tidy one shelf today. Standing books look ten times calmer than a leaning pile.
10. A Laptop Stand for Better Posture
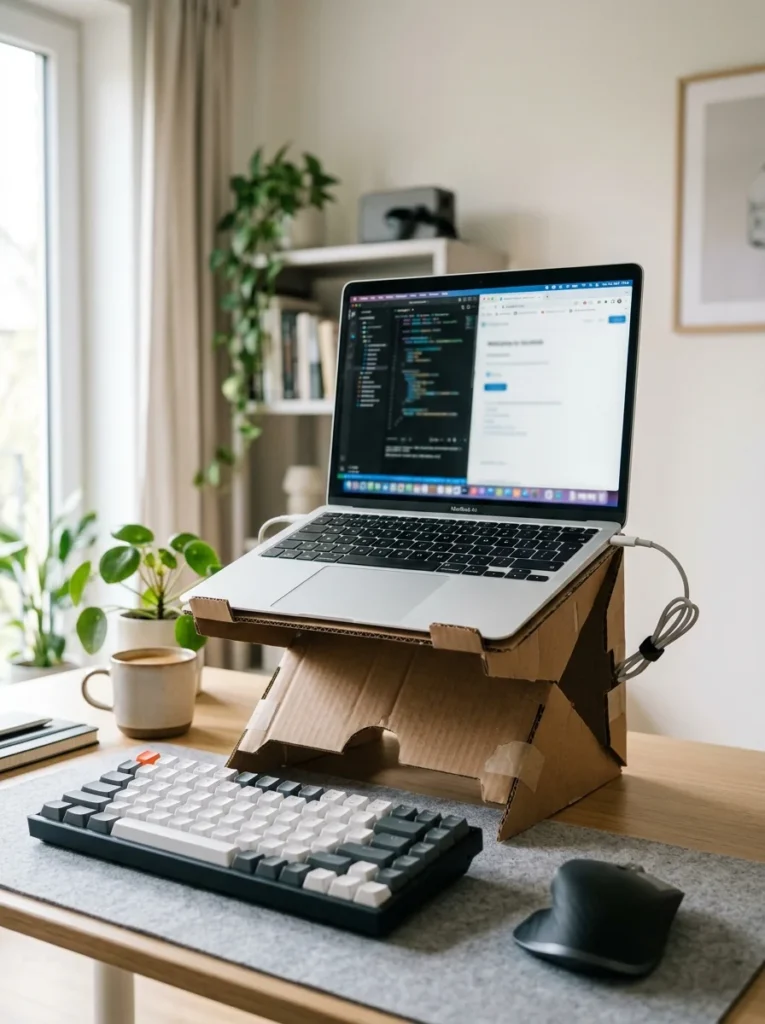
Hunching over a laptop hurts your neck. A simple cardboard stand lifts the screen to a healthier height.
Fold thick cardboard into a triangular prism. This shape is strong and holds steady weight without collapsing.
Cut a small lip at the front so the laptop does not slide off. Cut slots in the back for airflow so your laptop stays cool.
Stack and glue layers for the legs so they bear the load. Test the wobble before you trust it with your computer.
Budget tip: This replaces a stand that sells for a fair bit of money. Yours costs nothing.
Raise the screen until the top lines up with your eyes. That is the sweet spot for your neck.
Add a separate keyboard since the laptop now sits higher and farther away.
Cover it in paper or fabric for a clean desk look. Plain works too.
Make sure your base is wide enough so it never tips. A heavier laptop wants a sturdier build.
Set it up this morning. Your neck will thank you by lunch.
11. Geometric Wall Art From Scrap Pieces
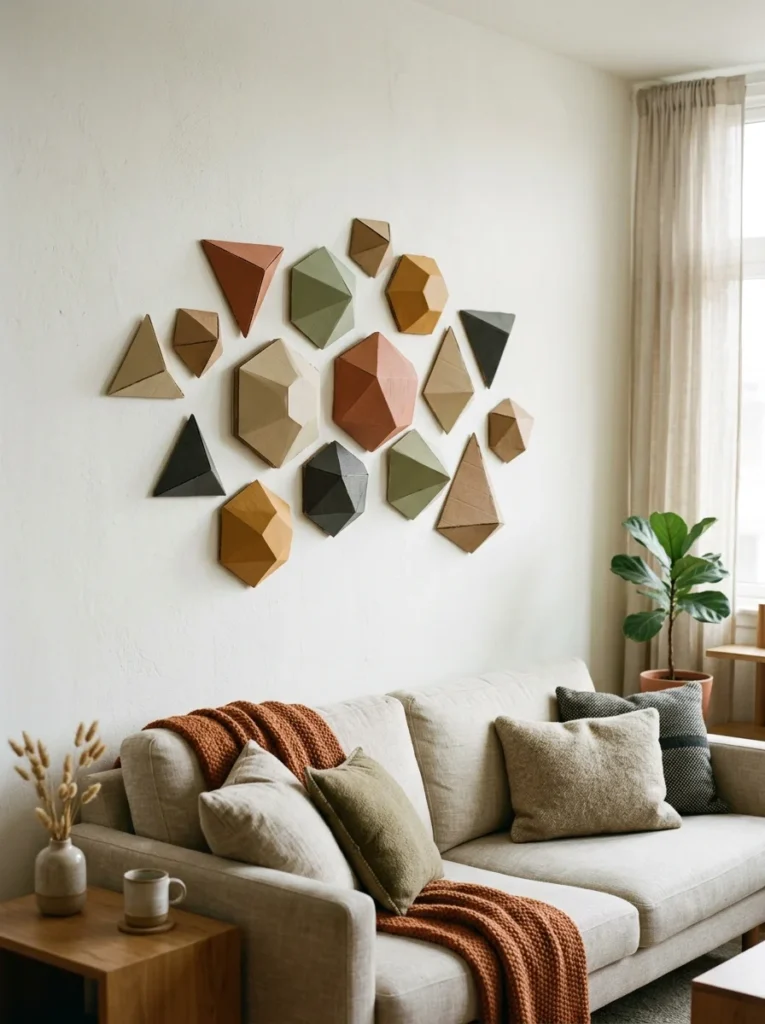
Empty walls feel cold. Cardboard art warms them up for free.
Cut triangles, circles, and hexagons from scrap cardboard. Mix the sizes so the wall has rhythm.
Paint each one a different shade of the same color family. Earthy tones look modern and calm.
Layer some shapes on top of others for depth. Glue a small triangle onto a bigger circle to add shadows and texture.
Budget tip: Use paint samples or leftover wall paint. A little goes a long way on cardboard.
Stick them up with removable tape so you can rearrange anytime without wall damage.
Want a 3D effect? Fold some shapes so they pop off the wall slightly. The shadows make the whole piece feel alive.
Plan the layout on the floor first. Snap a photo, then copy that pattern on the wall.
Group them tight for a bold cluster or spread them out for an airy feel. Both look intentional.
This fills a big empty wall for the price of nothing. Cut a few shapes tonight and start your own gallery.
12. Pretty Storage Bins for Shelves and Closets
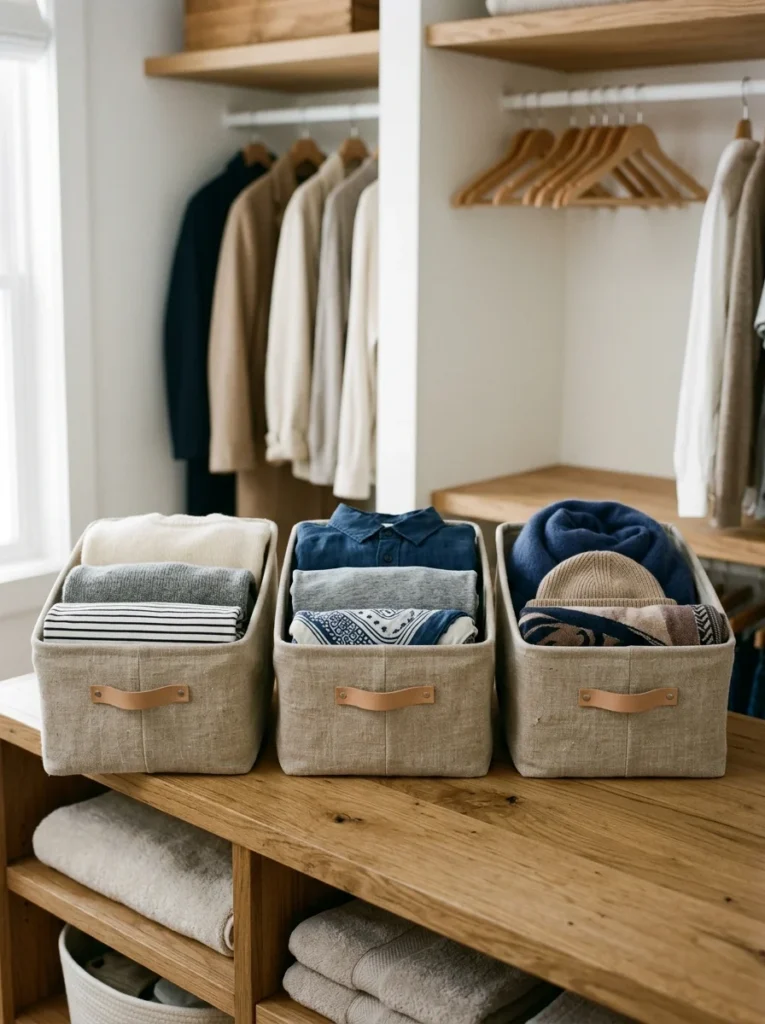
Plastic bins cost money and look harsh. Fabric-covered cardboard bins look soft and warm instead.
Take a sturdy box and cut it to the height you want. Round off the top edges so it looks intentional, not cut.
Wrap the outside in fabric or paper and glue it down tight. Tuck the edges inside for a clean finish.
Add rope or fabric handles on the sides. Just poke two holes and thread the rope through, then knot it inside.
Budget tip: Old pillowcases and worn sheets make perfect free fabric covers.
Line the inside too if you want a polished look. A second layer hides any cardboard seams.
Make a matching set in three sizes. Lined up on a shelf, they bring instant order to any room.
Use them for scarves, toys, cables, or pantry snacks. They suit almost any space.
Keep them out of damp areas like under sinks. Cardboard and water do not mix.
Tackle one cluttered shelf this weekend. A few matching bins change how the whole room feels.
13. A Play Kitchen That Sparks Imagination
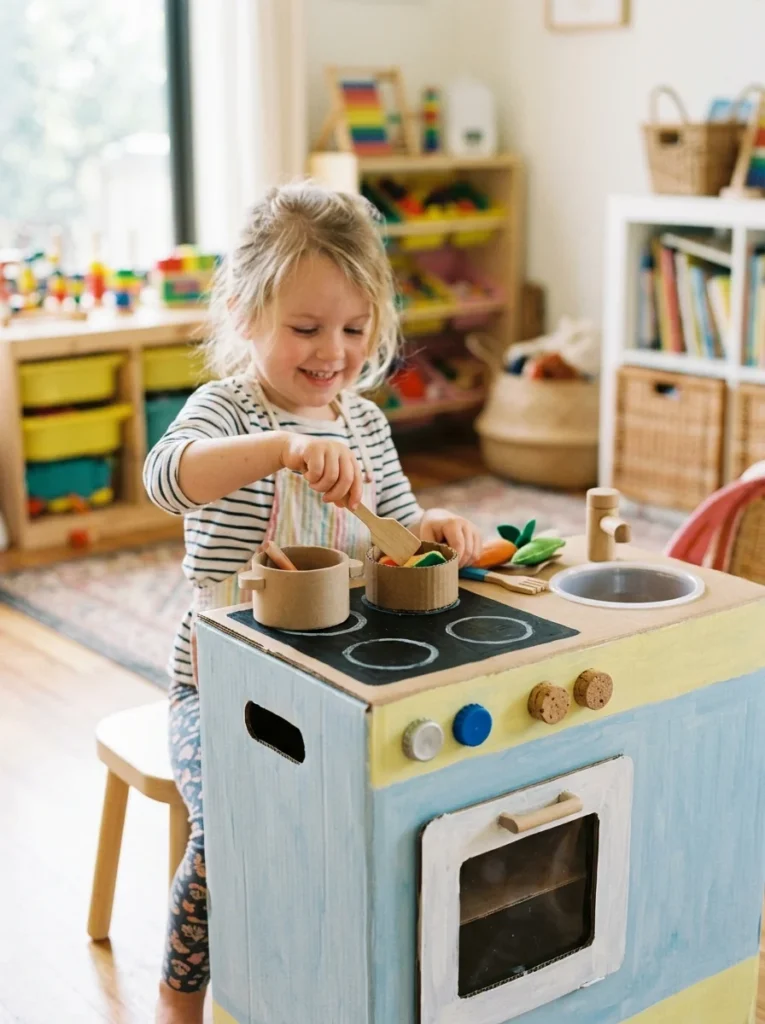
Real play kitchens cost a lot. A cardboard one delights kids just as much.
Stand a big box upright for the body. Cut an oven door on the front that opens on a tape hinge.
Draw burners on the top with markers, or glue on round cardboard circles for a 3D stove.
Cut a hole and drop in a small bowl for the sink. Add a bent cardboard tube as the faucet.
Budget tip: Bottle caps make great knobs. Glue them on and they even twist a little.
Let your child paint and decorate it. They feel ownership, and you skip buying paint.
Add a shelf inside for pretend pots and play food. A few small boxes become the cupboards.
Reinforce the base so it does not tip when an excited kid leans on it.
Keep the design simple. Kids fill in the rest with imagination, no fancy details required.
Build it over a weekend. The hours of pretend cooking that follow make every minute worth it.
14. A Jewelry Organizer for Tangle-Free Mornings
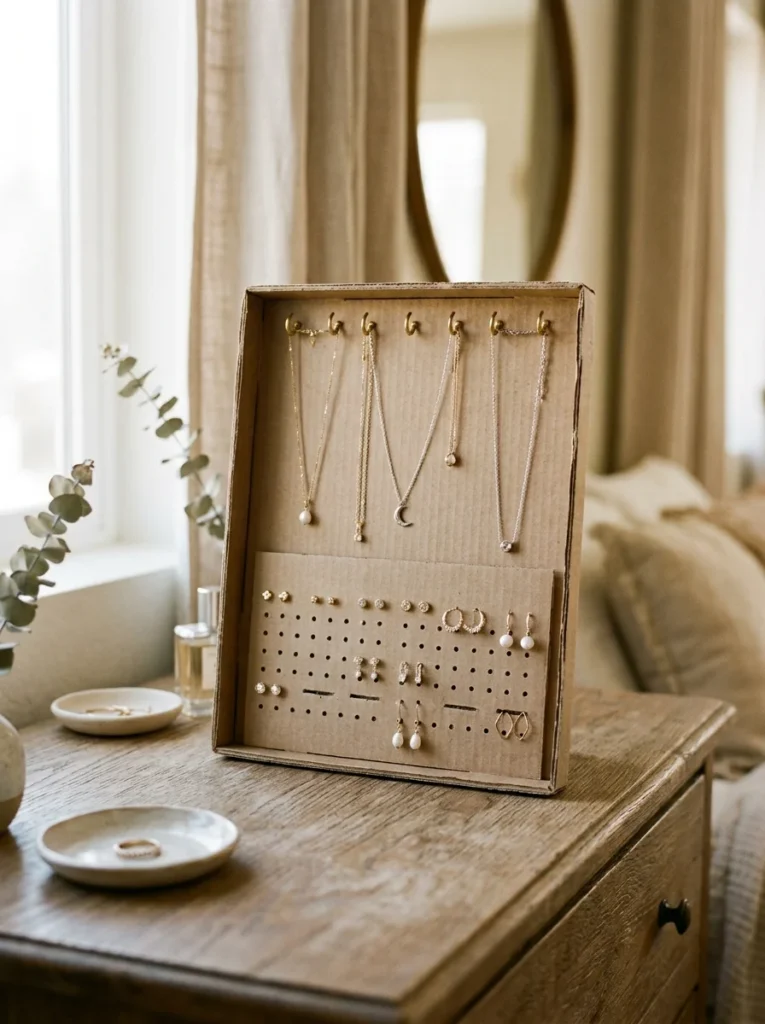
Tangled necklaces ruin a quick morning. A cardboard organizer keeps every piece in its place.
Stand a flat piece of cardboard upright on a folded base. This becomes your display board.
Punch small holes in a grid for earring hooks. The posts slide right through and the backs hold them.
Glue small cardboard hooks or paper clips along the top for necklaces. Each one hangs separate, so no more knots.
Budget tip: Cover the board in fabric or paper that matches your room. It turns a plain box into a pretty piece.
Add a small tray at the bottom for rings and bracelets. A shallow cardboard box works perfectly.
Make sections so similar items stay together. Studs in one spot, hoops in another.
Stand it on your dresser or hang it on the wall with tape.
Want it to last? Reinforce the base so it does not tip under the weight of heavier necklaces.
Build it once and your jewelry stays sorted for good. No more digging through a tangled pile before work.
15. Seedling Planters You Can Plant Right in the Soil
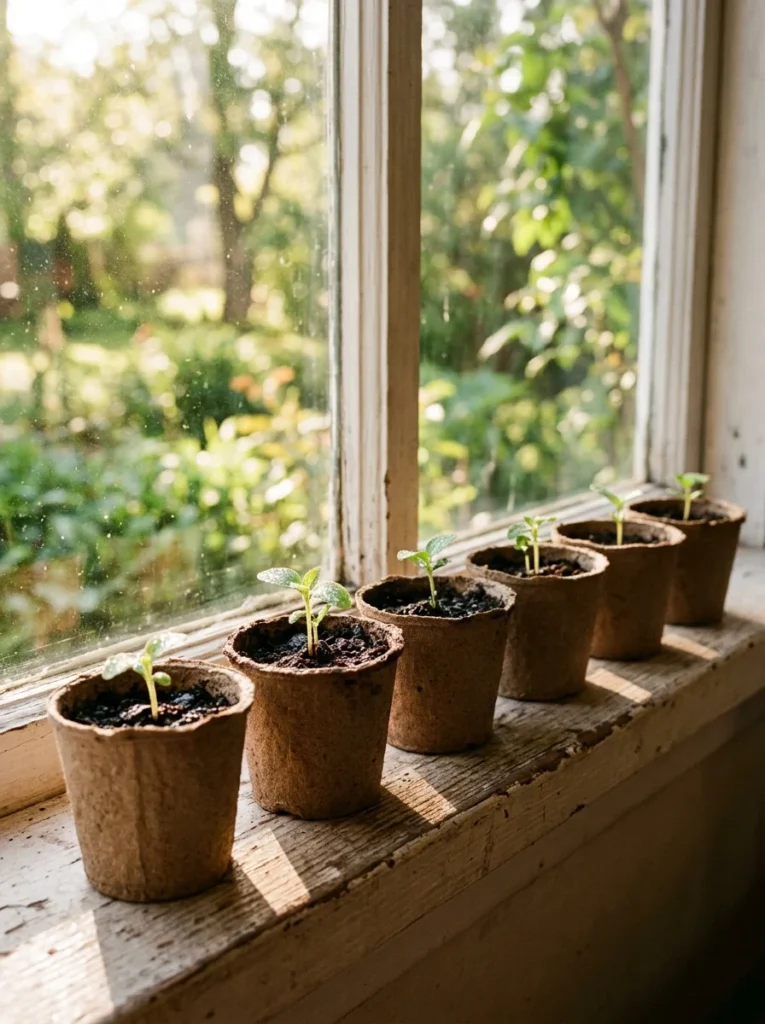
Starting plants from seed gets pricey when you buy little pots. Cardboard ones are free and they help the planet too.
Cut a cardboard tube into short rings. Fold the bottom flaps inward to close one end. Now you have a small pot.
Fill each one with soil and drop in a seed. Line them up on a tray near a sunny window.
Budget tip: Toilet paper rolls work great here. Save them for a couple of weeks and you have a whole tray.
When the seedling is ready, plant the whole pot in the ground. Cardboard breaks down in the soil, so the roots stay undisturbed.
Water gently. Cardboard softens when wet, so do not soak it.
Label each pot with a small marker so you remember what is growing where.
This works for herbs, flowers, and veggies. Basil and tomatoes love this method.
Plant a few this week. Watching that first sprout push up never gets old, and you spent nothing to grow it.
Conclusion
That stack of empty boxes is full of possibility. From a cozy cat house to tidy drawer dividers to a play kitchen that keeps kids busy for hours, these projects prove you do not need a big budget to make useful, charming things. Most use scissors, glue, and stuff you already have. Each one saves money you would have spent on store versions, and turns a recycling problem into something you are proud to show off. So before you flatten that next box, ask what it could become. Pick one idea from this list, grab a box, and start cutting today. Your first project is only an afternoon away.
