

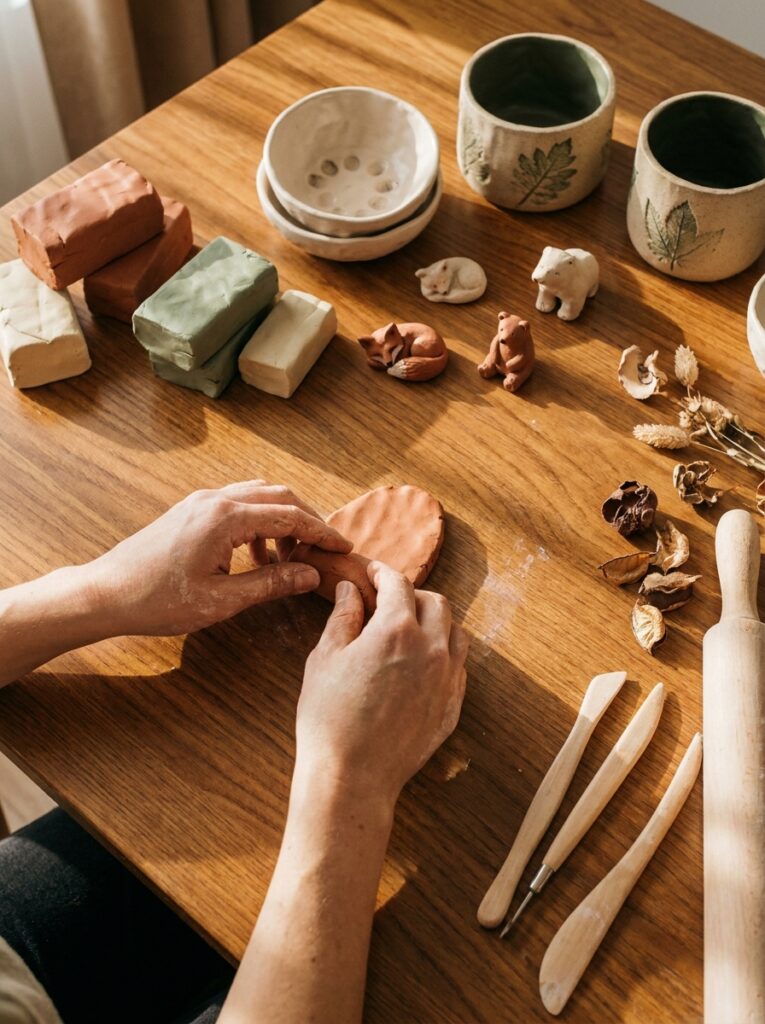
Clay crafting is one of those rare hobbies where you need almost nothing to get started but can end up making something genuinely beautiful. Whether you are working with air-dry clay from a dollar store or a block of polymer clay from a craft shop, the possibilities are wide. You do not need a kiln. You do not need a pottery wheel. You do not need art school training. What you do need is a free weekend, a flat surface, and a willingness to get your hands a little dirty. This list covers 25 original projects from tiny jewelry pieces to functional home décor, that real people are making right now with basic tools and a small budget. Each one is beginner-friendly, satisfying to complete, and genuinely useful or gift-worthy when done.
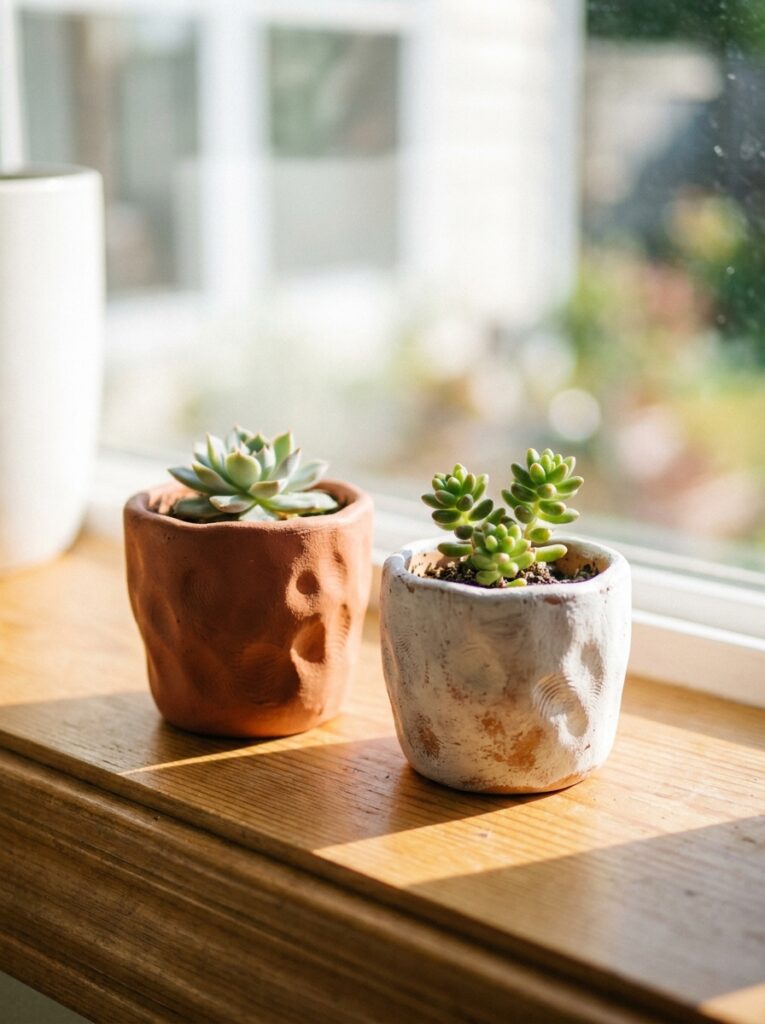
1. Pinch Pot Succulent Planter
A pinch pot is the most basic clay project you can make, and it is also one of the most useful.
All you do is press your thumb into a ball of clay and pinch outward. Rotate the ball as you work, keeping the walls even. It takes about ten minutes to shape one.
Use air-dry clay for this. It costs around $5 for a large block at any craft store or online.
Once dry, sand the rough edges lightly. Then paint with acrylic paint. A single coat of terracotta paint looks stunning with no effort.
Add a drainage hole with a skewer before the clay dries if you plan to use it as a real planter. Otherwise, keep it decorative and drop a small succulent cutting inside a tiny pot liner.
These make great gifts. A set of three in different sizes, tied with twine, feels handmade and thoughtful.
Budget tip: Air-dry clay and a set of acrylic paints can be found together for under $10 at most dollar stores or discount craft retailers.
The fingerprint texture left on the surface is part of the charm, do not try to smooth it out completely. That organic, handmade look is exactly what people love.
2. Clay Ring Dish
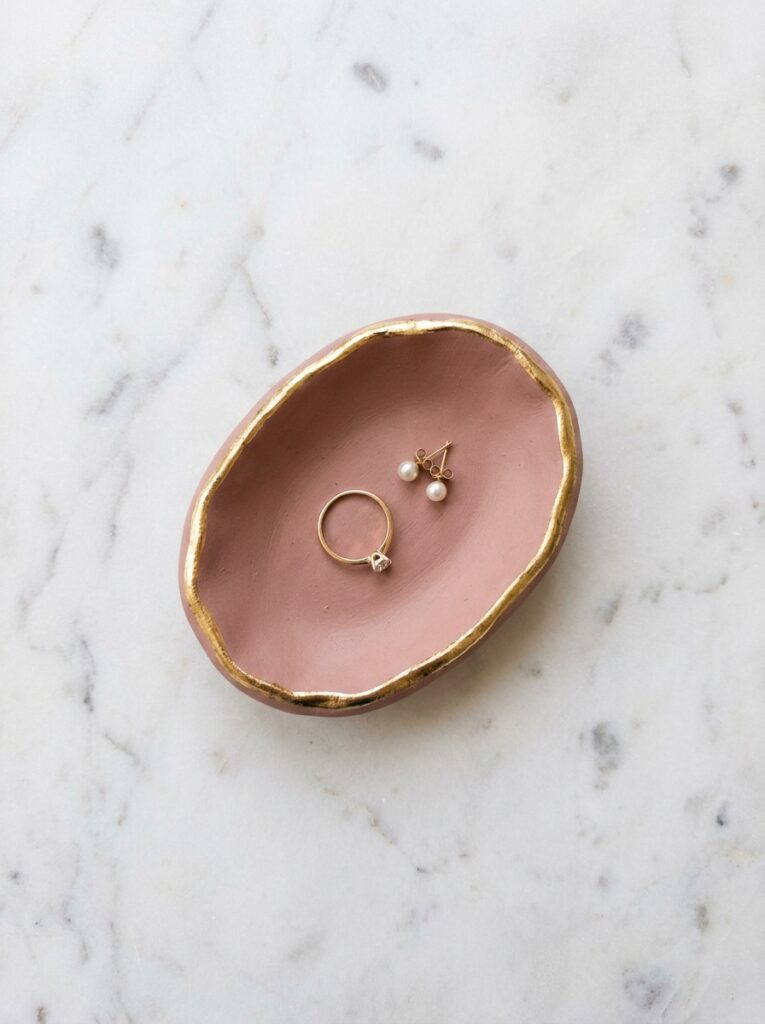
A ring dish is practical, pretty, and takes less than 30 minutes to make.
Roll your clay flat, about 5mm thick. Cut out an oval or round shape using a cookie cutter or freehand with a knife.
Press the edges gently upward while the clay is still soft to create a shallow bowl shape. You can drape it over a small bowl to get a perfect curve while it dries.
Let it dry completely. Air-dry clay usually takes 24–48 hours depending on thickness.
Sand it smooth when dry. Then paint in any color you love, matte shades look more refined than glossy ones. For a luxury feel, add a thin line of gold leaf paint around the rim using a fine brush.
This project costs almost nothing. A single block of air-dry clay makes at least six to eight ring dishes.
Practical tip: Make a batch and wrap them as gifts. Add a small stamp or initial before the clay dries for a personalized touch.
These sell well at craft markets too. Many people charge $8–$15 each for hand-painted clay ring dishes so your $5 block of clay can go a long way.
3. Polymer Clay Earrings
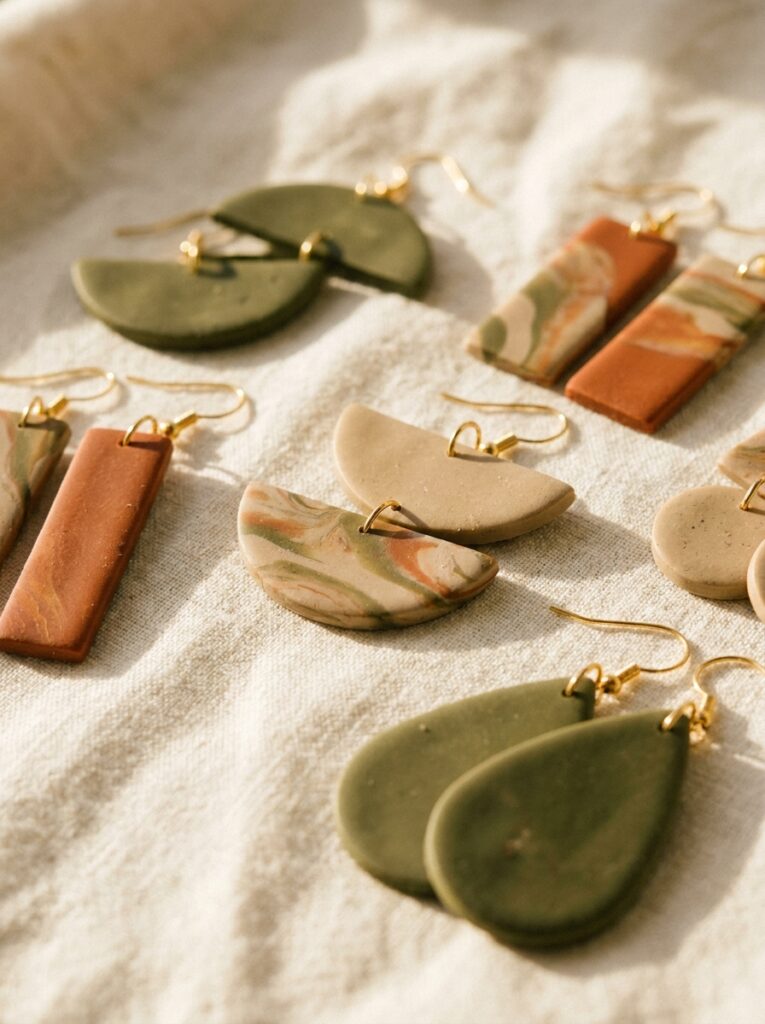
Polymer clay earrings blew up on social media for a reason, they are lightweight, colorful, and surprisingly simple to make at home.
You need polymer clay (brands like Sculpey or Fimo cost around $3–$5 per block), a rolling pin, a sharp blade or craft knife, and an oven.
Roll the clay to about 3mm thick. Cut out shapes, half-moons, rectangles, teardrops, or abstract forms. Use a toothpick to poke a small hole at the top for the ear wire.
Bake according to your clay brand’s instructions. Usually around 130°C (265°F) for 15–30 minutes.
Once cooled, sand with fine-grit sandpaper for a smooth finish. You can leave them matte or add a thin layer of resin for a glossy look.
Attach gold or silver ear hooks, available in bulk packs online for very little money.
Color tip: Marble two colors together by twisting and folding the clay before rolling it flat. The swirled pattern looks high-end and professional.
A single $5 block of polymer clay makes approximately 10–15 pairs of earrings. That is a very affordable creative project with beautiful results.
4. Air-Dry Clay Wall Art Tiles
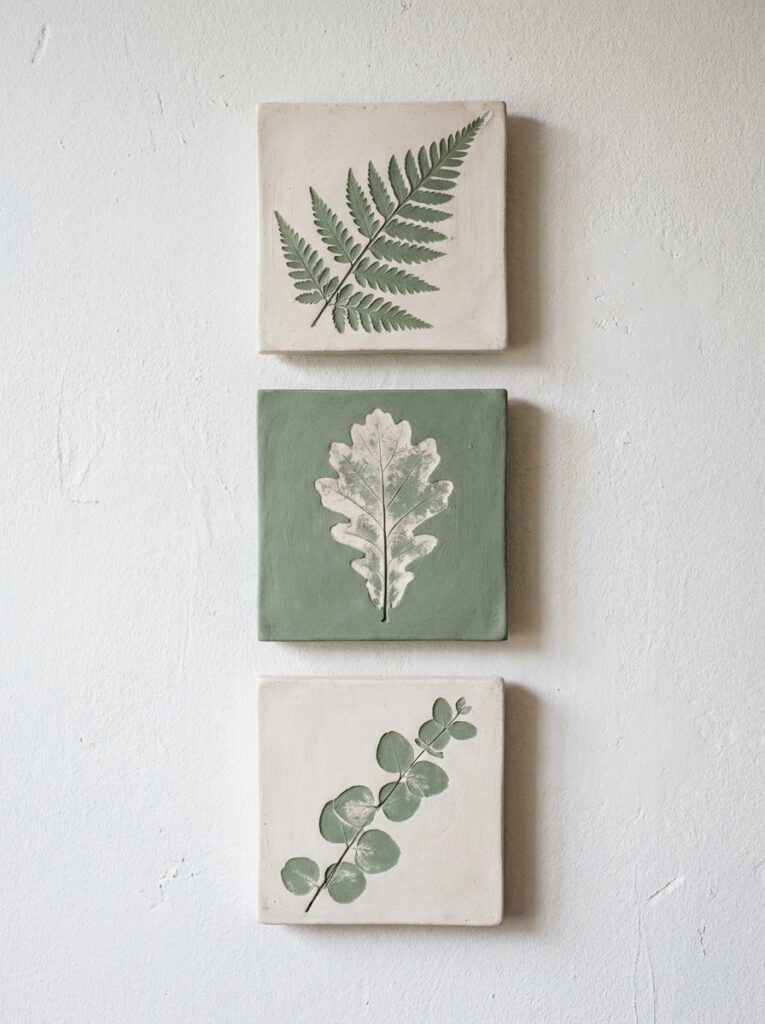
Wall art tiles are a low-cost way to add something handmade and textured to any room.
Roll your air-dry clay into a flat slab, about 1cm thick. Cut into equal squares or rectangles using a ruler and craft knife for clean edges.
Now press things into the surface while the clay is still soft. Fresh leaves, lace fabric, a fork, a carved stamp, or even your fingernail. Each texture creates a completely different look.
Make a small hole at the top with a skewer before drying, this is how you will hang them.
Let them dry flat for 24–48 hours. Paint with a single matte color and dry-brush a lighter shade over the raised texture to make the pattern pop.
Seal with a matte varnish. Thread a small loop of twine through the hole and hang on the wall.
Grouping tip: Make three or five tiles in matching colors but different textures. Arrange them in a grid on the wall for an art installation feel.
This project costs under $10 for everything, clay, paint, and varnish. The result looks like something from a boutique home décor shop.
5. Clay Candle Holders
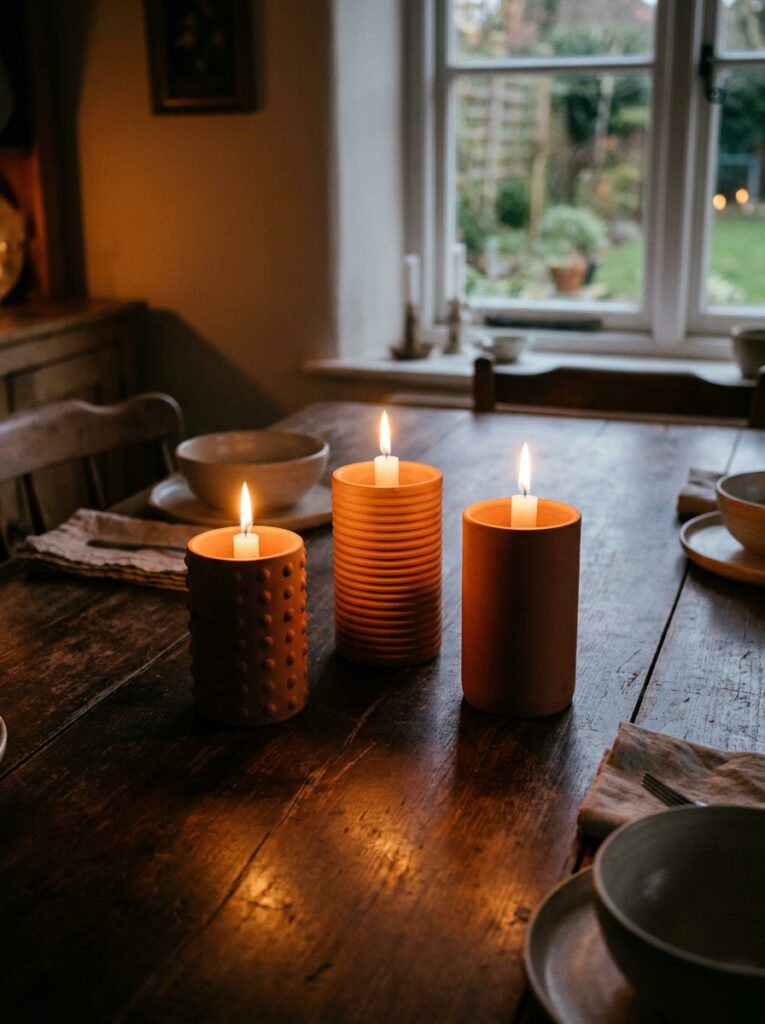
Clay candle holders are functional, beautiful, and one of the easiest projects on this list.
Build a cylinder shape by rolling a slab of clay and wrapping it into a tube. Score and smooth the seam where the edges meet so it stays together.
Cut a flat circle for the base and attach it the same way, score, smooth, and blend.
Before the clay dries, add texture. Press a comb across the surface for ridges. Use a pencil eraser to stamp dots. Carve lines with a toothpick. These small details make the piece look intentional.
Let it dry fully. Paint in matte black, terracotta, or white, all of which look beautiful with candlelight flickering inside.
If you are using a taper candle, make the cylinder just wide enough to hold it. For a votive candle or tea light, a short wide cylinder works perfectly.
Safety note: Never leave candles burning unattended, and do not place tea lights directly on unfinished clay, use a small glass insert inside the holder for safety.
A full set of three holders costs under $8 to make and looks stunning grouped together on a dining table.
6. Clay Plant Markers for the Garden
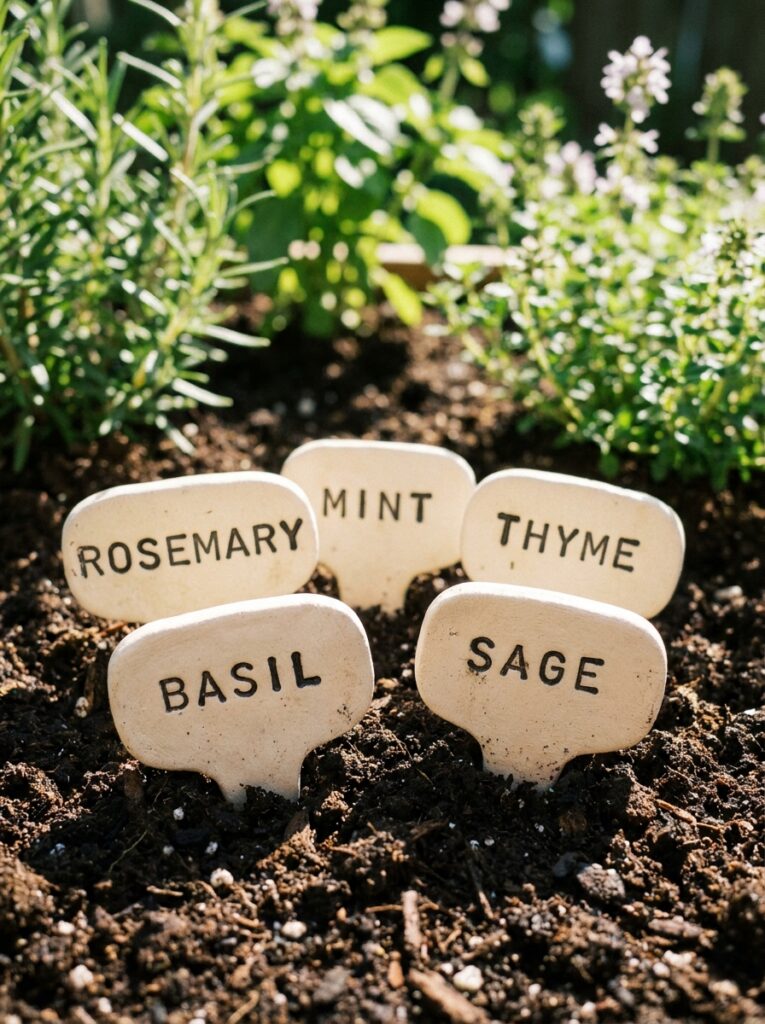
If you grow herbs or vegetables, clay plant markers are one of the most practical things you can make.
Roll air-dry clay flat. Cut small rectangle or rounded tag shapes. Before the clay dries, stamp or press words into the surface using letter stamps (available cheaply online or at craft stores).
Make a hole at the bottom using a skewer, this is where a wooden skewer or thick wire will slide through so you can push it into the soil.
Let the markers dry completely. Seal them with a waterproof outdoor varnish, this step is important if they will live outside through rain and sun.
Paint the stamped letters with a contrasting color so they are easy to read at a glance.
Alternative: If you do not have letter stamps, use a toothpick to carve the plant names freehand. Slightly uneven handwritten lettering actually looks charming and personal.
These cost almost nothing to make. A block of clay and a can of outdoor spray varnish together come to around $7–$8.
They also make very thoughtful gifts for gardening friends. Drop a few in a small terracotta pot with a seed packet and it becomes a complete present.
7. Marbled Clay Coasters
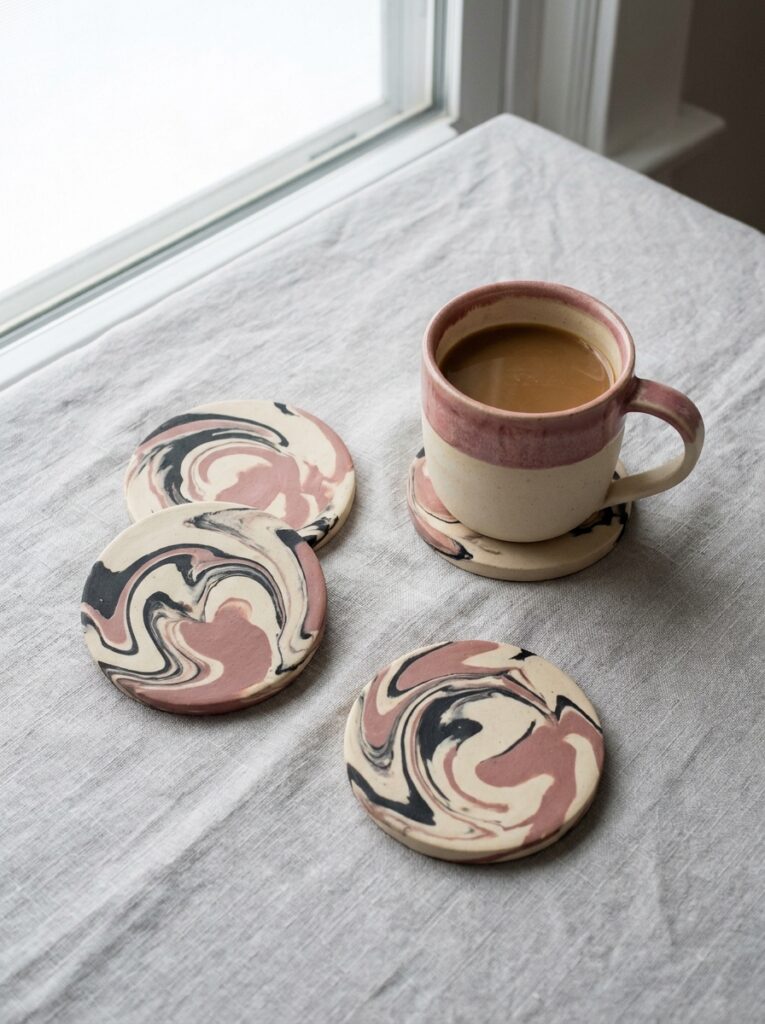
Marbled clay coasters look expensive and complicated but are actually very beginner-friendly.
Take two or three colors of polymer clay. Twist them together loosely, do not over-mix or you will lose the marble effect. Roll the twisted clay into a ball, then flatten it with a rolling pin.
The marble pattern appears as you roll. Cut into circles using a round cookie cutter or a glass turned upside down.
Bake according to your clay’s instructions. Once cooled, sand lightly with 400-grit sandpaper for a smooth surface.
Apply a thin coat of resin or a water-resistant varnish on the top surface to protect them from cup rings and moisture.
Stick small felt pads on the bottom so they do not scratch your table.
Color tip: A black and white marble effect looks very sleek and modern. Earthy tones, cream, brown, and rust, look warm and organic. Pick a palette that matches your kitchen or living room.
Each coaster costs pennies to make. A set of four is a beautiful housewarming gift.
Budget tip: One $5 block of polymer clay in each of two colors makes approximately eight coasters — enough for two sets.
8. Mini Clay Cactus Sculptures
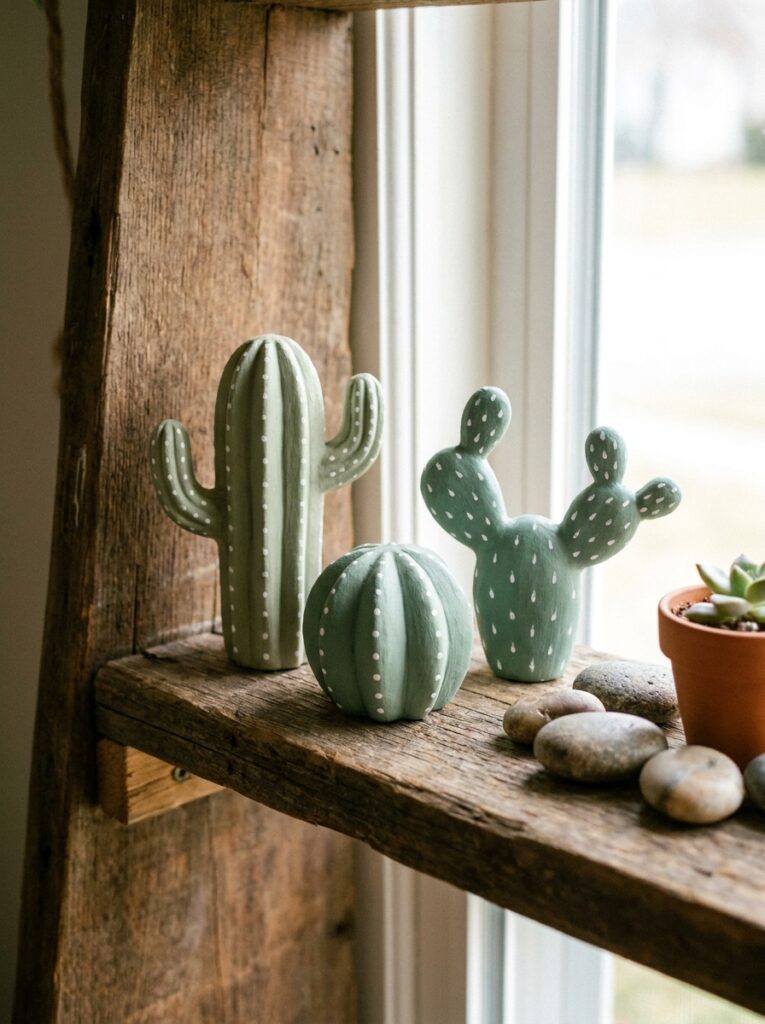
Mini clay cactus sculptures are cute, zero-maintenance, and look great on any shelf or desk.
Use air-dry clay to sculpt simple cactus shapes by hand. The basic shapes are a tall cylinder for a saguaro cactus, a round ball for a barrel cactus, and a branching form for an opuntia.
You do not need sculpting tools. Your fingers, a toothpick, and a flat knife are enough to create texture and definition.
Use a toothpick to press small dots across the surface, these become the spine impressions and add great visual detail.
Once dry, paint in shades of green. Use a darker green for the base and dry-brush a lighter sage green over the raised areas to create depth.
For the “pot,” pinch a tiny bowl shape from leftover clay and let it dry separately before placing the cactus inside.
You can fill the gap with tiny pebbles or sand for a realistic desert effect.
Display idea: Group three different-sized cacti together on a small wooden tray. It becomes a tiny desert diorama that looks like something from a boutique shop.
Total cost: under $5 for a full set of three.
9. Clay Moon Phase Wall Hanging
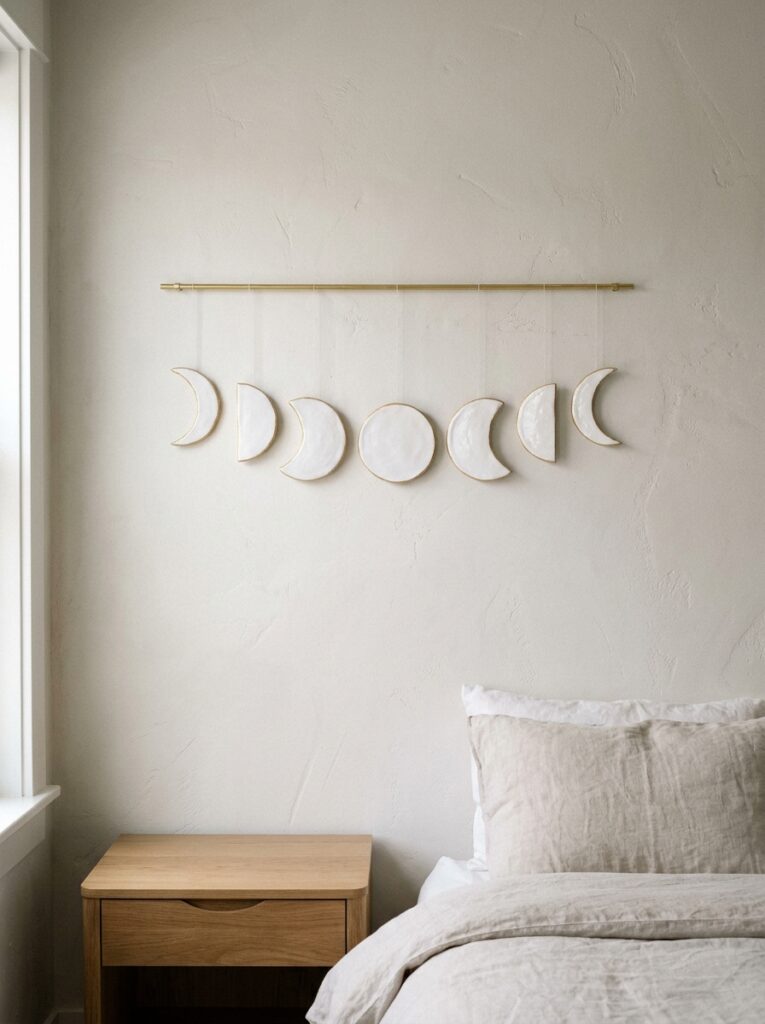
Moon phase wall décor is consistently popular, and making your own clay version is a genuinely satisfying weekend project.
You need seven moon shapes: a full circle, two gibbous shapes, two half-moons, and two slim crescents.
Roll your clay flat and cut each shape freehand or use a round cookie cutter as your starting point. Trim away sections to create each phase of the moon.
Make a small hole at the top of each piece with a toothpick.
Once dry, paint them all the same color, matte white, ivory, or a pale gold all work beautifully.
Thread them onto a thin brass rod or wooden dowel using twine or thin wire through the holes. Space them evenly and hang the rod from the wall with two small nails.
Variation: Paint each moon a slightly different shade, cream, blush, and pale gold, for a warmer, layered look.
This project costs around $8–$12 total for clay, paint, and a wooden dowel. It fills a wall beautifully and feels very handmade in the best way.
It is also a popular piece to make and sell at craft markets, where similar pieces often sell for $25–$40.
10. Stamped Clay Gift Tags

Clay gift tags are a beautiful upgrade from paper tags, and they become a keepsake the recipient can keep long after the gift is opened.
Roll air-dry clay flat to about 3–4mm thickness. Cut tag shapes, rectangles, ovals, teardrops, or classic tag shapes with a notch at one end.
Punch a hole near the top with a straw or skewer. This is important to do before the clay dries.
Press small stamps, lace fabric, or carved designs into the surface while still soft for texture and pattern.
Let dry fully. Paint with a base coat of cream or white.
Use a fine brush to add details, a thin gold border, a small painted flower, or a simple line pattern.
Thread with baker’s twine or narrow ribbon once dry.
Make a batch: One block of air-dry clay can produce 20–30 gift tags. Make them in advance and store them for holidays, birthdays, and gifts throughout the year.
These also sell well at craft fairs and markets. They are small, take very little clay, and shoppers love buying unique tags in packs of five or six.
At under $10 for everything including clay, paint, and twine, this is one of the most affordable projects here.
11. Clay Incense Holder
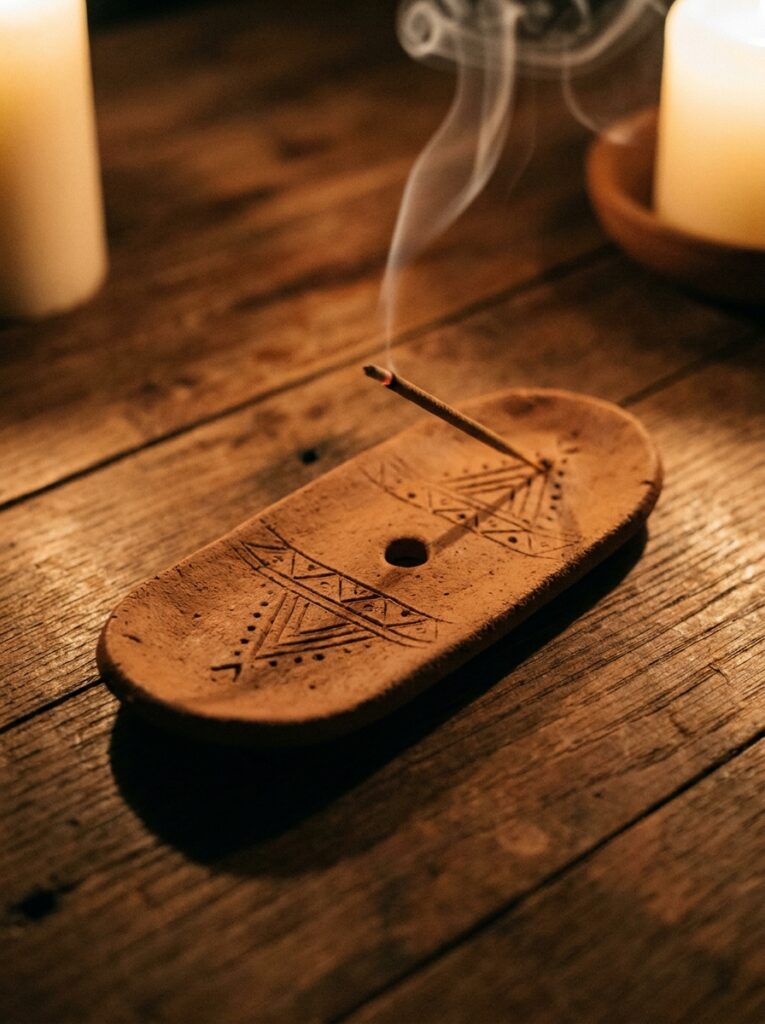
An incense holder is one of the simplest, most practical clay projects you can make in under an hour.
Roll a small log of clay and flatten it into an oval or rectangular slab, about 10cm long and 1cm thick.
Before the clay dries, press an incense stick gently into the center of the slab to create the hole. Remove it, let the hole dry in shape, and then insert the incense stick again once fully cured.
Make a small tray-like raised edge around the hole area to catch falling ash, just pinch up the clay slightly in a small oval around the central hole.
Carve decorative lines, dots, or leaf patterns into the surface with a toothpick while the clay is still soft.
Once dry, paint in matte black, terracotta, or sage green. A coat of varnish protects the surface.
Grouping idea: Make three in different shapes, one round, one rectangular, one free-form, and group them on a small wooden tray as a meditation station.
Total cost: under $3 per holder. This is one of the most affordable items on this list and one of the most genuinely useful.
12. Clay Bookmarks
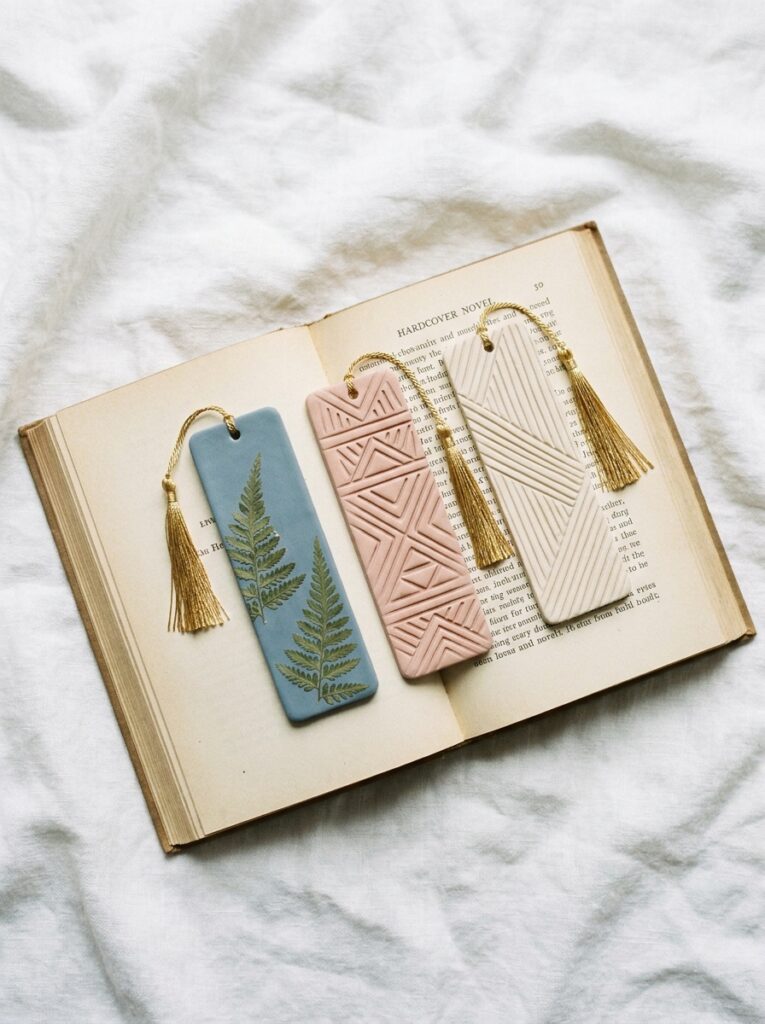
Clay bookmarks are a slightly unexpected project, and they turn out beautifully.
Roll clay into a long, narrow strip, about 2cm wide and 12cm long. Keep it thin, around 3–4mm, so it sits flat inside a book without bulging.
Add texture while the clay is still soft press lace over it, carve a thin line pattern, or stamp a small image near the bottom end.
Make a hole at the top with a skewer. This is where a small tassel or chain will hang.
Dry flat on a smooth surface. If the bookmark curls as it dries, lay something flat and heavy on top during the first few hours of drying.
Sand smooth when dry. Paint in one flat matte color, a single color looks more refined than multiple shades on such a small piece.
Attach a short piece of chain, ribbon, or a small tassel through the hole at the top.
Gift idea: A handmade clay bookmark tucked inside a new book is one of the most thoughtful and affordable gifts you can give to a reader.
Total cost per bookmark: under $1 if you already have paint. A batch of six makes a wonderful small gift set.
13. Sculpted Clay Mushroom Figurines
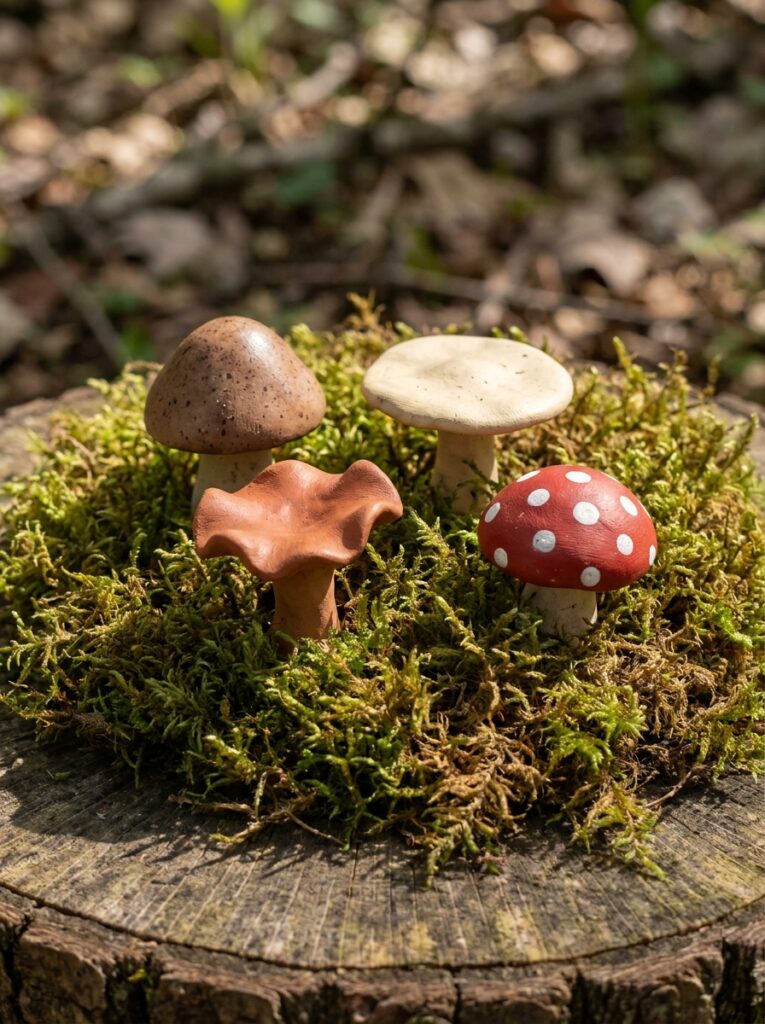
Mushroom figurines are wildly popular right now, and clay is the perfect material for sculpting them.
Shape the stem from a small cylinder of clay. Flatten one end slightly for the base so it can stand on its own.
For the cap, roll a ball of clay and flatten it slightly, then curve the edges downward like an umbrella. Score the top of the stem and the underside of the cap, add a tiny amount of water, then press them together firmly.
Let the pieces dry together in position. If the cap sags, prop it with a small wad of scrunched paper towel underneath while drying.
Once dry, paint the stem cream or white and the cap in any color you love. Classic red with white dots is always charming. Earthy brown and tan looks more realistic.
Add depth: Paint the cap one color, let it dry, then lightly dry-brush a slightly lighter shade over the top to create dimension.
A group of three mushrooms in different sizes on a small wooden slice looks like a tiny forest scene.
These are beloved as shelf decorations, terrarium accents, and holiday ornaments. They also sell quickly at craft markets.
14. Clay Zodiac Pendants
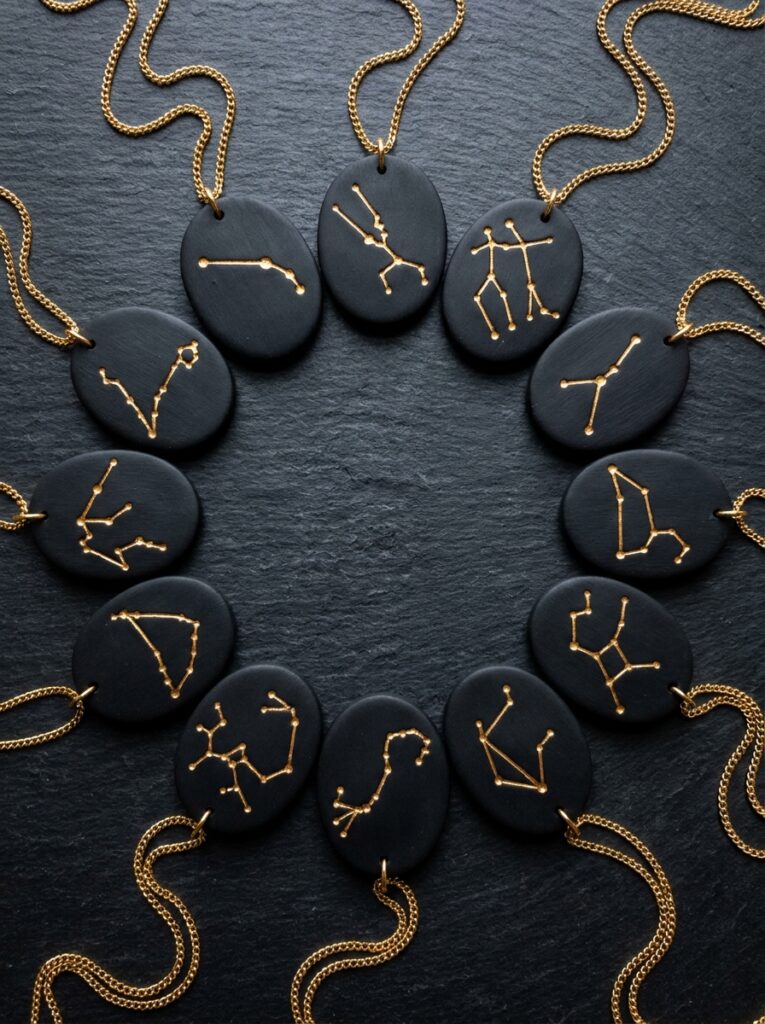
Zodiac pendants are personal, meaningful, and surprisingly easy to make from polymer clay.
Roll polymer clay thin, about 2–3mm. Cut oval or circle shapes for each pendant.
Use a toothpick to carve the constellation pattern of each zodiac sign into the surface, small dots for stars connected by thin carved lines.
Make a small hole at the top with a skewer before baking.
Bake according to your clay brand’s instructions. Once cooled and sanded smooth, paint the pendant a flat dark color, black or navy works well.
Use a fine detail brush to paint the constellation dots and connecting lines in gold paint. Allow to dry.
Seal with a clear varnish to protect the painted details.
Thread a thin chain through the hole at the top.
Personalization tip: Make pendants for every person in your family or friend group and gift them according to each person’s star sign. It is a very personal and low-cost gift that feels genuinely thoughtful.
A single block of black polymer clay and a small bottle of gold acrylic paint are all you need. Total cost: around $8–$10 for materials to make twelve pendants.
15. Clay Herb Planter with Drainage Tray
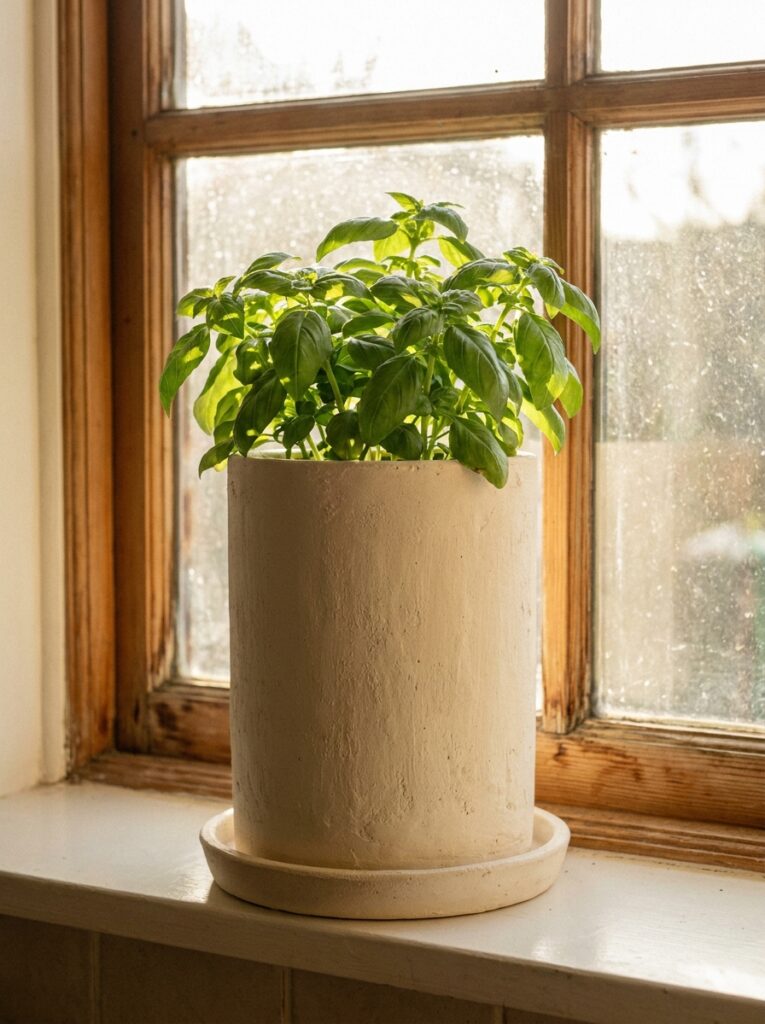
A clay herb planter is one of those projects that is useful every single day after you make it.
Build a cylinder using a slab of clay. Roll the clay flat, cut a rectangle, and wrap it into a tube shape. Score and smooth the seam.
Cut a flat circle for the base. Attach it firmly by scoring both surfaces, adding a small amount of water, and pressing together.
Use a skewer to punch 2–3 small drainage holes in the base before the clay dries. This is important for plant health.
Roll an extra flat slab and cut a wider circle for the drainage tray, make it about 2cm larger in diameter than the base of your planter.
Dry both pieces flat and separately.
Paint both the planter and tray in matching colors. A rough, imperfect texture on the surface adds character, do not over-smooth it.
Seal with a food-safe, waterproof varnish rated for outdoor or plant use.
Planting tip: Line the inside of the planter with a thin plastic bag before adding soil. This extends the life of the clay significantly.
Total cost: under $10 for a planter and matching tray. It looks beautiful on any kitchen windowsill.
16. Woven-Texture Clay Bowls
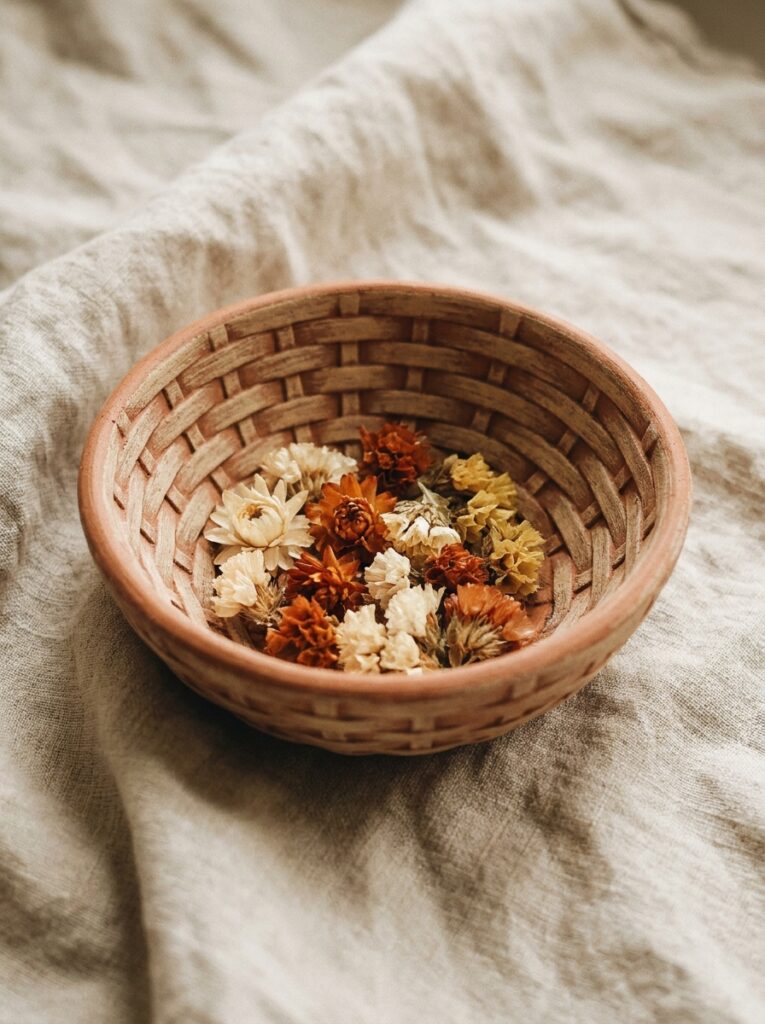
Pressing a woven texture into clay creates something that looks far more complex than it actually is.
Roll your air-dry clay into a flat slab. Press a piece of burlap, canvas, or basket-weave fabric firmly into the surface. Lift it off slowly, the weave pattern transfers into the clay perfectly.
Shape your bowl by draping the textured slab over a small existing bowl lined with plastic wrap. This gives it a perfect curved form while drying.
Let it dry in place, usually 24–48 hours.
Once removed and fully dry, paint in one matte color. Terracotta and cream both show off the woven texture beautifully.
Dry-brush a lighter shade over the surface with a nearly-dry brush so the raised woven pattern catches the lighter color and stands out clearly.
Seal with a matte varnish.
Styling tip: These bowls look beautiful filled with dried lavender, cotton stems, or small smooth pebbles. They work as catch-all dishes near an entryway or on a coffee table.
Making four matching bowls in slightly different sizes costs under $10 total. They stack beautifully for storage and look intentional as a set.
17. Clay Fridge Magnets
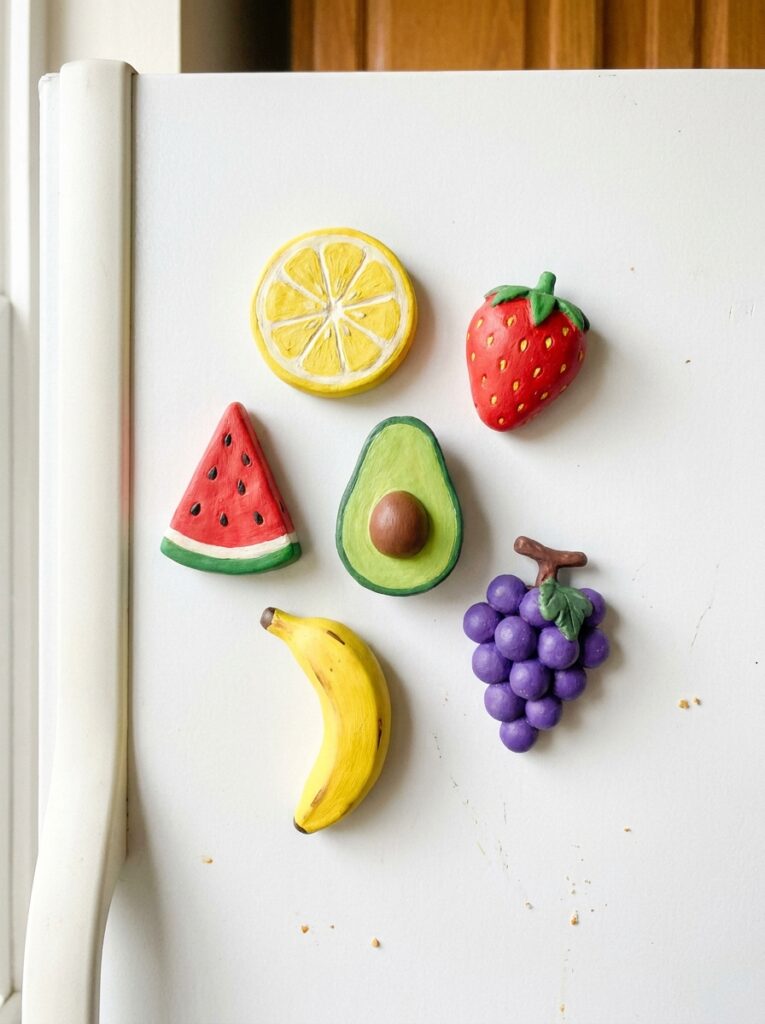
Clay fridge magnets are quick, fun, and one of the most kid-friendly clay projects on this list.
Sculpt small flat shapes from polymer clay, fruits, animals, food items, geometric shapes, or whatever you love. Keep them flat on the back side so the magnet sits flush against the fridge.
Paint them with acrylic paint before baking if you want color baked in, or bake first and paint afterward for sharper detail.
Once baked and cooled, attach a small round magnet to the flat back using strong glue (E6000 works well). Let the glue cure for 24 hours before putting on the fridge.
These are an excellent project to make with children, they can sculpt their own designs and paint them any way they want.
Batch tip: Make a matching themed set, all food items, all animals, all geometric shapes. A complete set in a small bag makes a cute gift.
Total cost: A small block of polymer clay, a pack of round magnets, and a tube of glue come to around $8–$10 and produce dozens of magnets.
These are popular sellers at school fundraisers, craft markets, and Etsy shops.
18. Pressed Flower Clay Ornaments
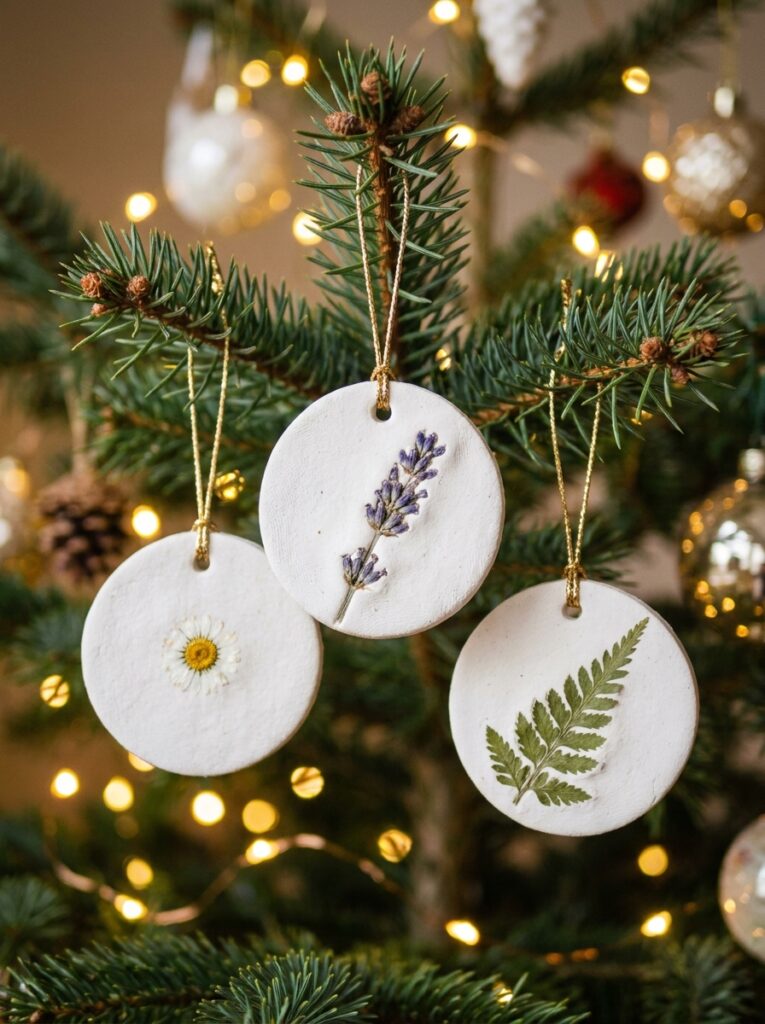
Pressed flower ornaments are one of the most delicate and beautiful projects on this list, and they are very straightforward to make.
Flatten a slab of white air-dry clay. Cut into circles, ovals, or any shape you like using a cookie cutter.
While the clay is still soft, press a dried pressed flower or leaf gently into the surface. The flower will leave a perfect impression, or you can leave it embedded in the clay for a three-dimensional effect.
Make a small hole at the top with a skewer for hanging.
Let dry completely, keeping the flower embedded in the surface if desired.
Paint around the flower impression with white or cream paint to make the botanical detail stand out. If the flower is embedded, leave it natural or seal over the top with a thin layer of clear varnish.
Tie a loop of gold twine through the hole at the top.
Seasonal tip: These work as Christmas ornaments, gift tags on wrapped presents, or year-round wall decorations. They also make very meaningful favors for weddings or baby showers.
A pack of pressed flowers, a block of clay, and twine cost under $10 together.
19. Clay Pebble Paperweights
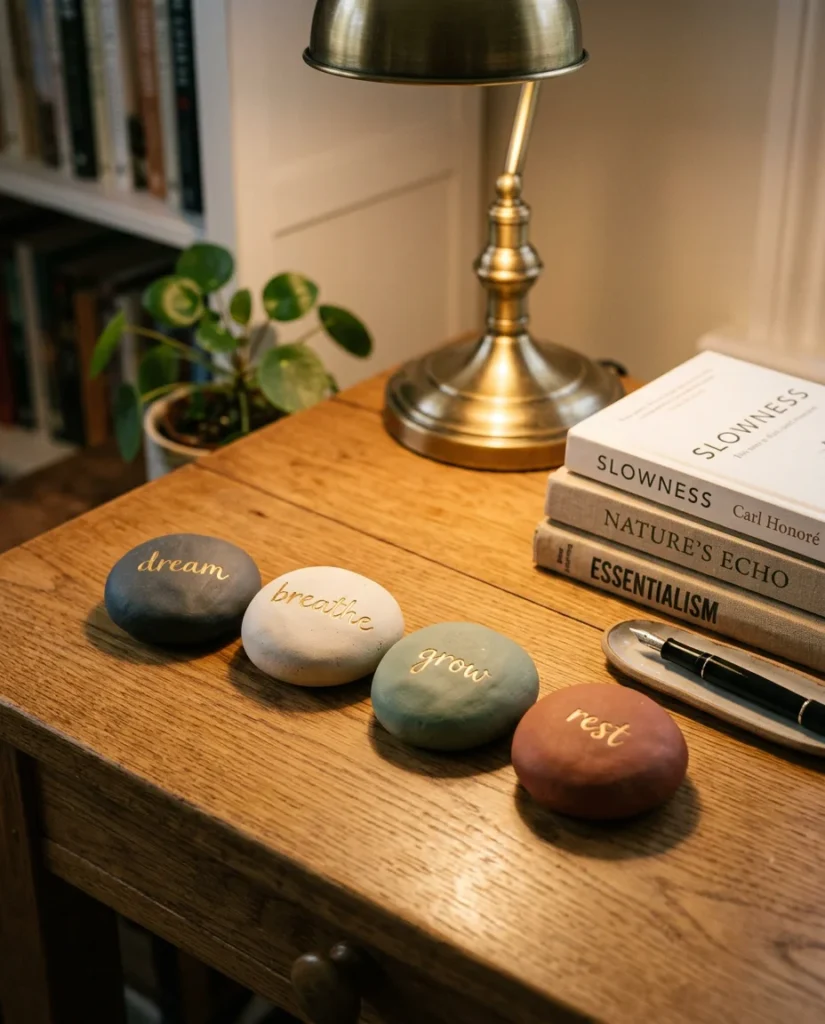
Clay pebble paperweights are easy to make, satisfying to hold, and look great on any desk or bookshelf.
Roll a ball of air-dry clay and then flatten one side slightly so it sits stable on a surface. Smooth the surface as much as possible for a polished pebble look.
The goal is a simple, organic stone-like shape, no perfect geometry required. Slight irregularities make them look more natural.
Once dry, sand with progressively finer sandpaper: start at 220 grit and finish at 400 grit. This gives the surface a smooth, almost stone-like quality.
Paint in matte earthy colors. Charcoal, sage green, rust, and cream all look beautiful together as a set.
Use a fine brush to hand-letter a single word on one side, a word that feels meaningful to you.
Practical tip: For added weight (so they actually work as paperweights), press a few small flat pebbles or metal washers into the base of the clay before it dries.
A set of four pebbles in matching earthy tones costs around $6–$8 to make and looks like something from a mindfulness boutique.
20. Clay Animal Keychains
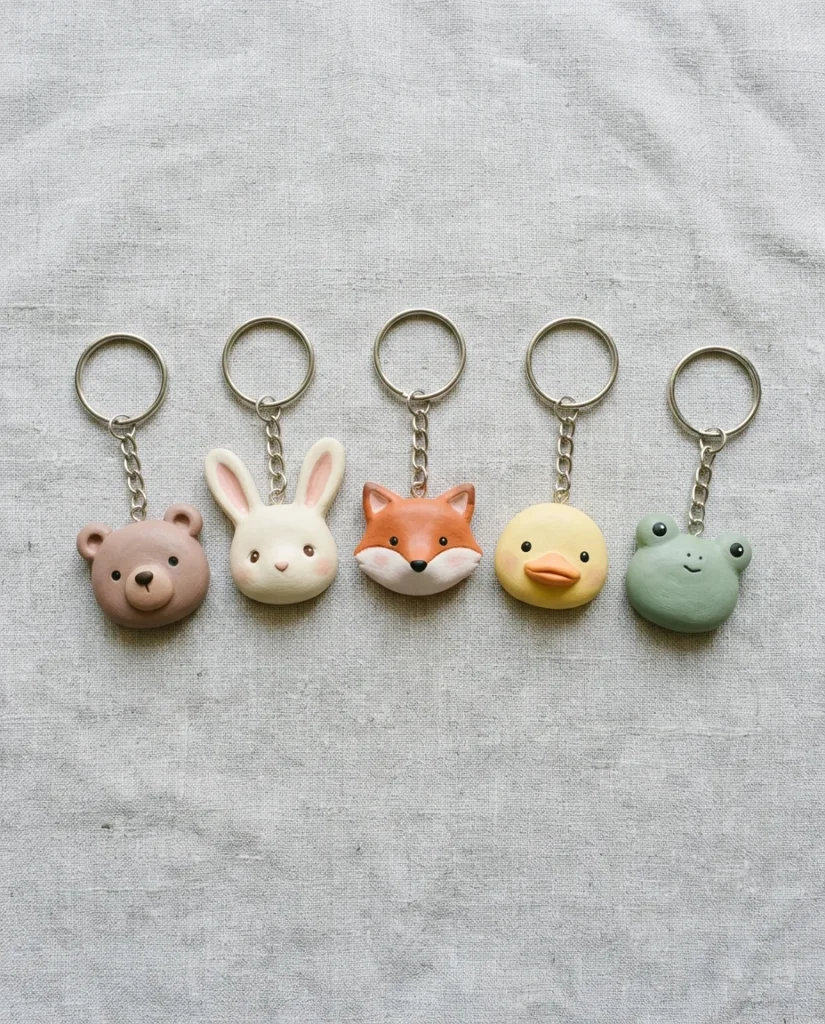
Clay animal keychains are one of the most popular DIY clay projects and for good reason. They are small, fun to make, and people genuinely love carrying them around.
Use polymer clay to sculpt simple animal faces, you do not need to make full bodies, just the face and ears work perfectly.
Start with a flat oval as the base of the face. Add small ear shapes, a tiny nose, and dot eyes using a toothpick or ball tool.
Keep the features simple. Clean, minimal faces look cuter than overly detailed ones for this scale.
Bake according to your clay brand’s instructions. Once cooled, add painted details rosy cheeks, whisker dots, colored ears, using a fine brush and acrylic paint.
Seal with a matte or glossy varnish.
Attach a small keychain ring through a hole made before baking, or glue a bail to the back after baking.
Gift idea: A personalized keychain featuring someone’s favorite animal is a charming, inexpensive, and personal gift.
Total material cost per keychain: well under $1 if you buy polymer clay in bulk. They also sell quickly online and at markets for $5–$12 each.
21. Geometric Clay Vase
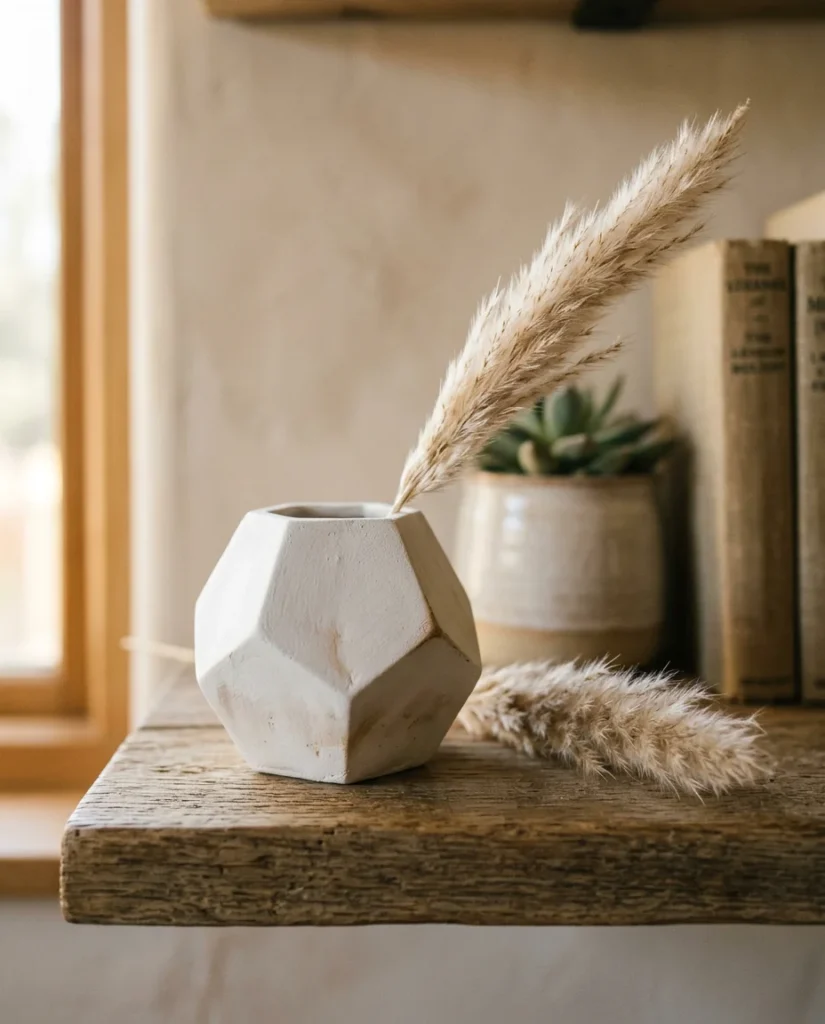
A geometric vase made from clay slabs is one of the more architectural projects on this list, and the result looks genuinely impressive.
Build this using the slab method. Roll flat sheets of clay and cut geometric shapes, rectangles, triangles, or trapezoids, that will become the sides of your vase.
Score and slip each edge (score means scratch with a fork; slip means apply a thin paste of clay and water) before pressing the pieces together to form a 3D shape.
A simple six-sided hexagonal form works well for beginners. A triangular prism is even simpler.
Make a flat base and attach it the same way.
Let the assembled form dry slowly, place it on a flat surface and avoid moving it for the first 24 hours to prevent warping.
Once dry, sand the edges smooth and seal any gaps with a thin line of spackle or air-dry clay paste.
Paint in a single matte color. White is stunning. Matte black looks architectural and modern.
Styling tip: These vases look beautiful with a single dried flower stem or a sprig of eucalyptus. Keep the arrangement minimal to let the vase itself stand out.
22. Clay Soap Dish
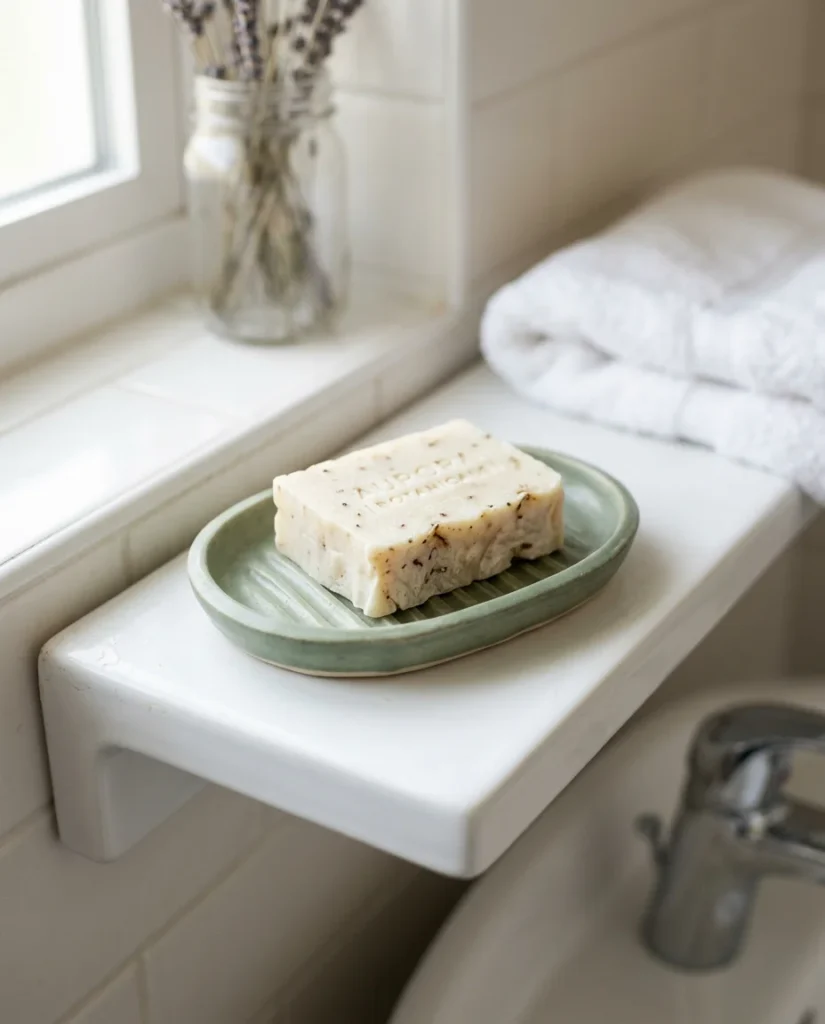
A clay soap dish is one of the most practical things you can make, and it takes under an hour of active work.
Roll a slab of air-dry clay and shape it into an oval or rectangle. Raise the edges slightly by pinching them upward to create a shallow dish that will hold a bar of soap.
Press raised ridges across the bottom of the dish using a fork or a comb. This lifts the soap off the dish surface so water can drain and the soap dries properly between uses.
Make 3–4 small drainage holes through the bottom of the dish with a skewer if you want water to drain completely.
Let dry flat. Sand smooth.
Paint with a waterproof outdoor acrylic or seal with multiple coats of waterproof varnish, soap dishes get wet every day, so sealing is important.
Matte sage green, terracotta, and navy all look beautiful in bathrooms.
Durability tip: Apply at least two to three coats of waterproof varnish, letting each coat dry fully between applications.
One block of air-dry clay makes two to three soap dishes. Total project cost is around $5–$8. It also makes a lovely addition to any handmade gift basket.
23. Clay Name or Word Signs
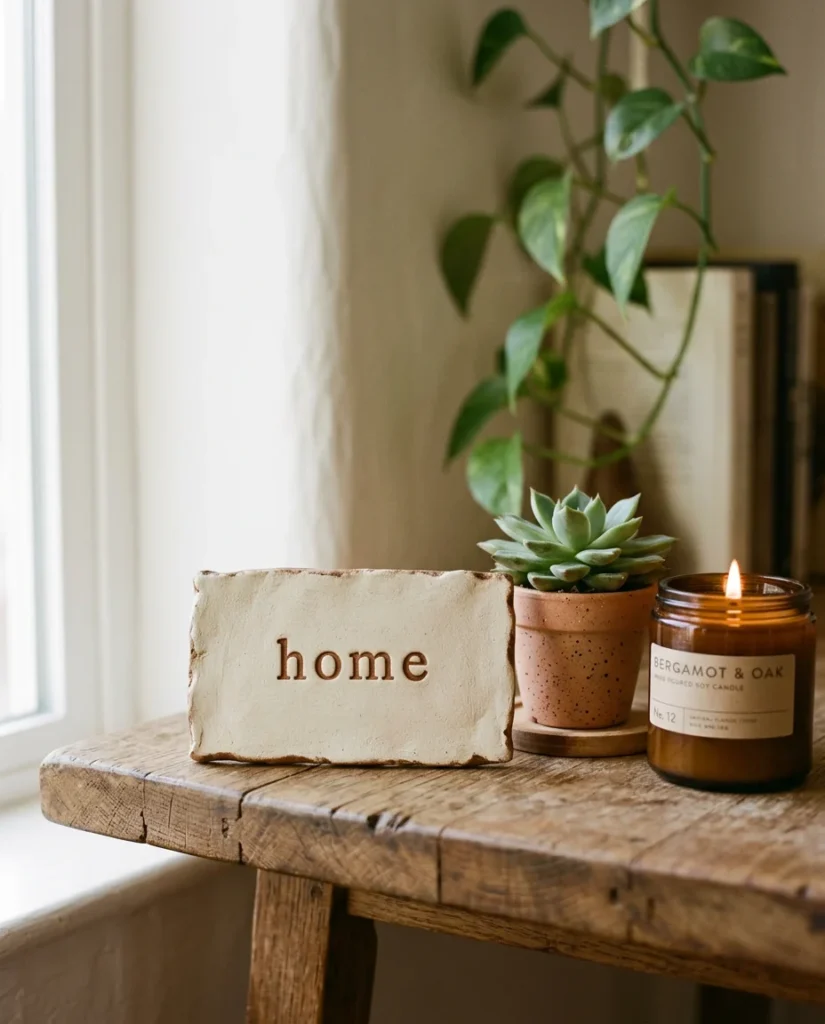
Clay name signs are popular as nursery decorations, desk accents, and personalized gifts.
Roll air-dry clay flat and cut a wide rectangle, the width depends on how long the word or name is.
Press letter stamps firmly into the clay while still soft to spell out a name or a single meaningful word. Press deeply enough for the letters to be clearly readable.
Smooth the edges by pinching them slightly upward for a finished look.
Make two small holes near the top if you want to hang it from the wall, or leave it flat-bottomed to stand on a shelf.
Once dry, paint the whole piece one color. Let it dry. Then rub a slightly darker shade of the same color into the stamped letter recesses using your finger, wipe away the excess from the surface so only the letters hold the darker color.
This creates a very refined, subtle contrast effect that looks professional.
Letter stamp tip: Sets of small letter stamps are available online for $5–$8. They are one of the most useful tools for clay projects generally.
These signs make excellent nursery gifts, desk decorations, and personalized Christmas ornaments.
24. Clay Herb Wreath Wall Hanging
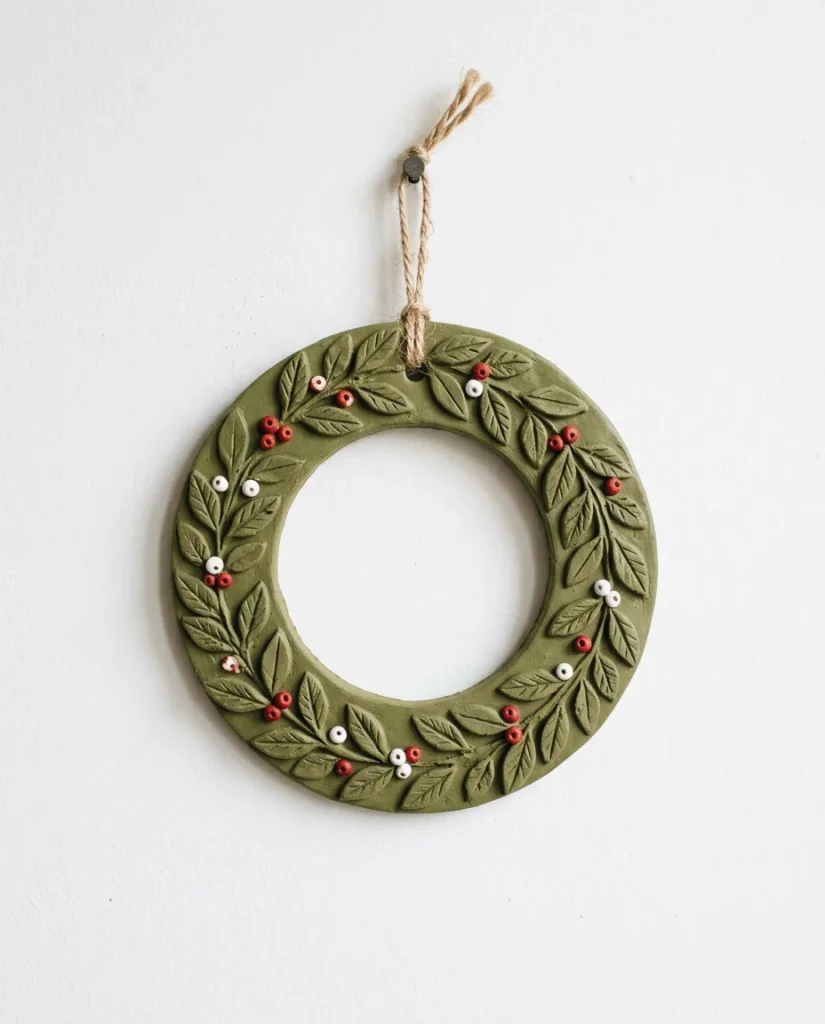
A clay herb wreath wall hanging is a beautiful, nature-inspired project that works in any room of the house.
Build a ring shape by rolling a long rope of clay and connecting the ends. Smooth the seam where they join.
While the clay ring is still soft, press small sculpted leaves, berries, and flower shapes around the surface. Attach each one by scoring both surfaces and pressing firmly.
Keep the proportions simple, too many elements makes the wreath look cluttered. Leave some negative space between the botanical elements.
Let dry flat on a smooth surface. The ring may develop small cracks at the seam as it dries, fill these with a little fresh clay and smooth over.
Once fully dry, paint the whole wreath in a base color. Olive green or forest green works well for a botanical look. Add tiny details, berry colors, lighter leaf veins, with a fine brush.
Attach a loop of jute twine at the top for hanging.
Variation: Make a winter version with small sculpted pine cone and berry shapes. Paint in dark green with gold berry accents for a festive look.
Total cost: under $8. Display time: indefinite, clay wreaths last for years.
25. Clay Tea Light Holder Village
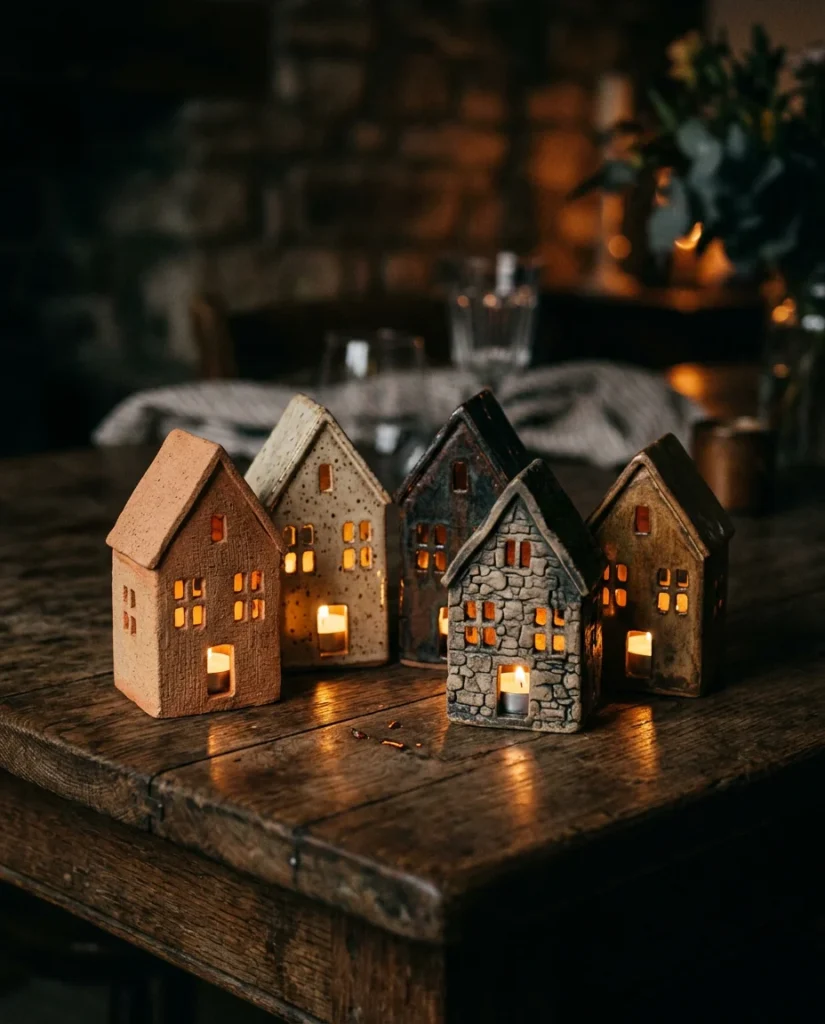
A clay village of tiny house-shaped tea light holders is one of the most magical projects on this list, and it is simpler than it looks.
Build each house using flat slabs of clay. Cut a rectangle for the body and a triangle for the roof. Score and slip the edges before pressing them together.
Cut small window and door shapes from the front slab before assembling, these are where the candlelight will glow through.
Leave the bottom open so a tea light can slide inside.
Make each house slightly different, vary the roof angle, the window shape, the door style. This gives the village an organic, handmade charm.
Dry the houses standing upright, propped if needed, for 24–48 hours.
Paint in varying shades of cream, grey, and dusty blue. A light dry-brush of white over the surface creates a snowy winter cottage effect.
Place tea lights inside each house and group them together on a wooden tray.
Safety note: Use only battery-operated tea lights if you plan to leave the village unattended. The effect is identical and much safer.
Total cost: under $12 for a village of five houses. The glowing effect when lit is genuinely beautiful and makes this the most impressive piece on this list to display.
Conclusion
Clay crafting is one of those hobbies that costs very little to start, scales as far as your interest takes you, and delivers immediate, tangible results. Every project on this list is doable on a free Saturday or Sunday no kiln, no wheel, no art degree required. Start with the simplest project that appeals to you. Make something small. See how it feels when it comes out of the drying phase and you hold something you made entirely with your hands. That feeling is genuinely addictive. From there, the materials stay cheap, the skills build naturally, and the things you make become more confident and more personal over time. Whether you are making something for your home, crafting a gift, or quietly exploring a new creative outlet — clay gives you something real to show for your time. Pick one project from this list and start this weekend.