

Planning a party doesn’t have to mean expensive decorations or last-minute store runs. Paper crafts are one of the most affordable, rewarding ways to make any celebration feel personal and thoughtful.
Whether you’re hosting a birthday, baby shower, graduation, or casual get-together, the right paper projects can completely change the look of a room, without draining your wallet.
Most of these crafts use supplies you already own: printer paper, cardstock, scissors, and glue. This guide walks you through 25 paper crafts that are genuinely fun to make, easy enough for beginners, and impressive enough to wow your guests.
1. Paper Cone Party Hats
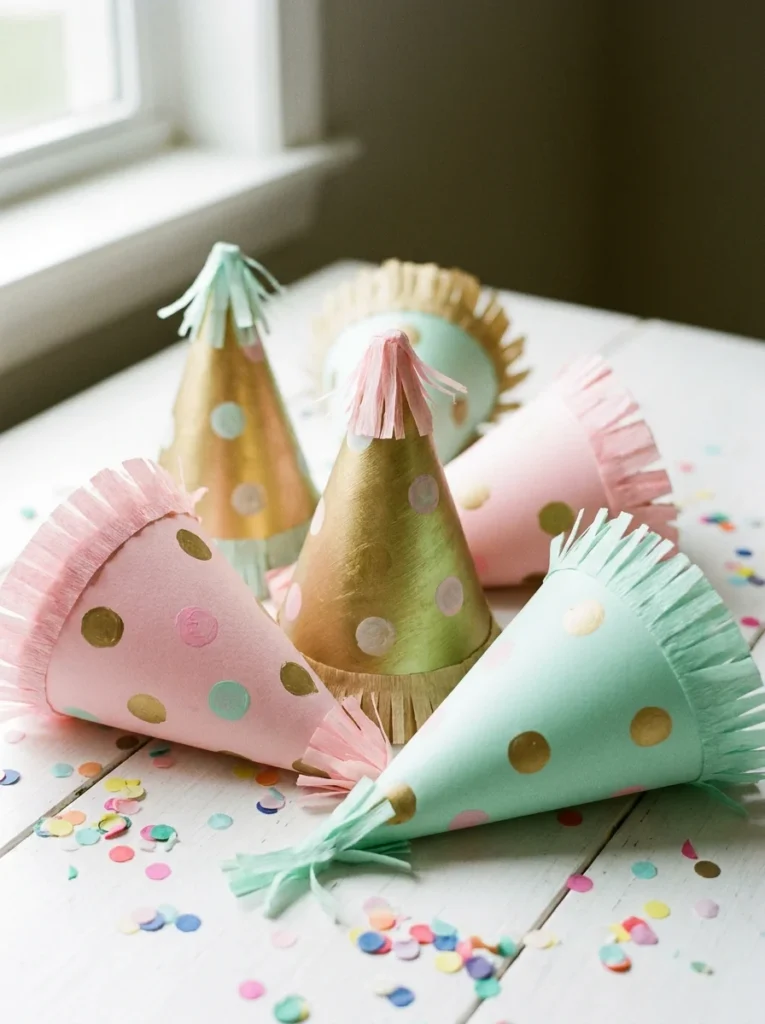
Party hats are a party classic, and making your own is surprisingly simple.
All you need is a sheet of cardstock, scissors, a stapler, and some elastic cord. Roll the cardstock into a cone shape, secure the edge with tape or a stapler, and trim the base so it sits flat. That’s the whole structure done.
From there, the decorating is where it gets fun. Try these ideas:
- Glitter trim along the top edge
- Tissue paper fringe hot-glued around the base
- Washi tape stripes for a quick pattern
- Sticker sheet accents for kids’ parties
A pack of cardstock costs around $5 at any dollar store or craft shop. You can make a full set of 12 hats for under $3. That’s a fraction of what pre-made party hats cost at retail.
Make them the night before and stack them in a basket near the entrance. Guests love grabbing one on the way in, it sets a playful tone from the moment they arrive.
Customize the colors to match your party theme. Pastels for baby showers. Bold primaries for kids’ birthdays. Black and gold for adult celebrations.
2. Tissue Paper Pom-Poms
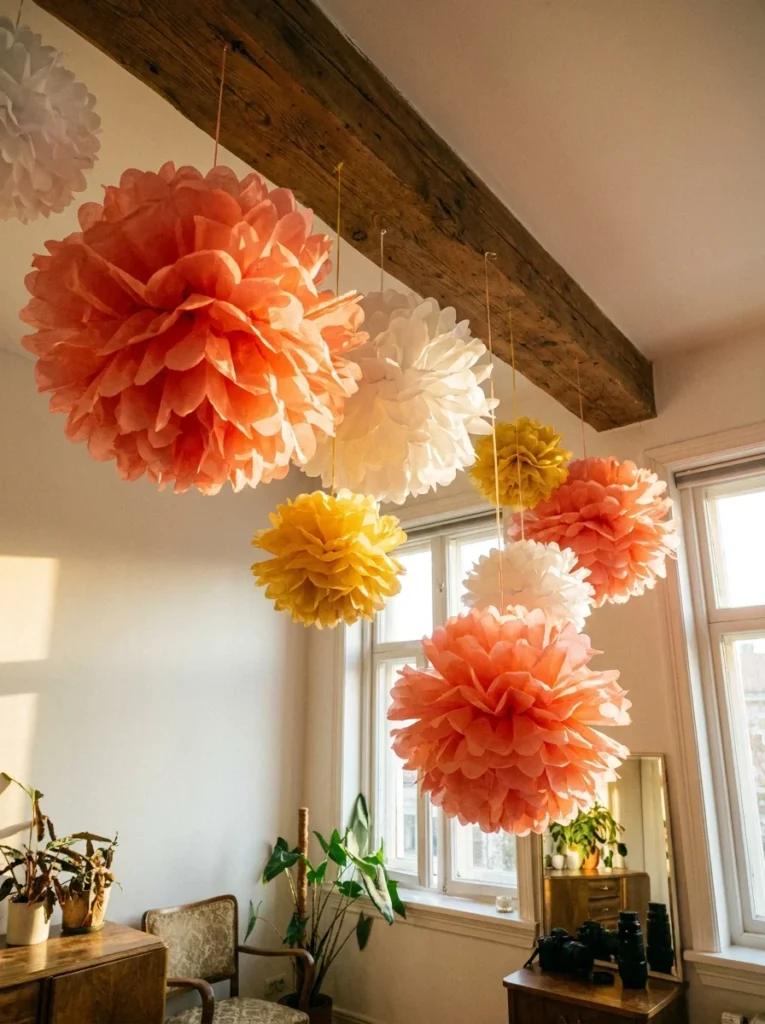
Tissue paper pom-poms might be the most popular DIY party decoration for a reason, they look amazing and cost almost nothing.
To make one, stack 8 to 10 sheets of tissue paper on top of each other. Fold the stack accordion-style, back and forth, in roughly 1.5-inch folds. Tie the center with floral wire or a pipe cleaner. Then trim the ends, either straight across or in a rounded shape for a fuller look. Gently pull each layer apart, fluffing from the center outward.
Budget tip: A pack of tissue paper (around 20 sheets) costs $1 to $2. One pack can make 2 full pom-poms.
Size options:
- Small (8-inch pom), perfect for table centerpieces
- Medium (12-inch pom), great for wall clusters
- Large (18-inch pom), showstopper ceiling decoration
Hang them at different heights using fishing wire or string to create a floating cloud effect. Mix three coordinating colors for the most visually satisfying result.
These also double as photo booth backdrops when you cluster 6 to 8 together on a wall. Takes less than 10 minutes per pom-pom once you get the hang of it.
3. DIY Paper Garland
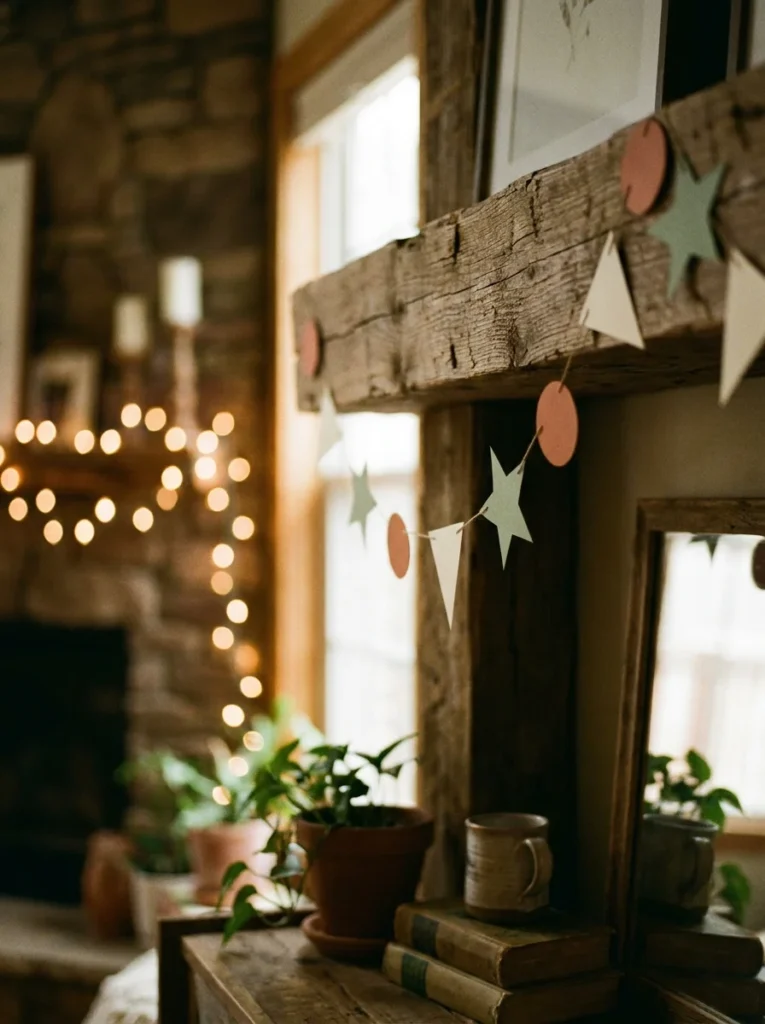
A paper garland is one of the easiest decorations you can make, and it works for almost any party.
The basic version: cut shapes from cardstock, punch a hole in the top, and string them onto twine or ribbon. Done.
But you can get more creative with the shape options:
- Circles, use a cup or jar lid to trace them
- Stars, print a free template and trace
- Flags, fold paper in half, cut a triangle from the fold
- Letters, spell out a name or phrase
Mix two or three cardstock colors for a layered, intentional look. Alternating patterns feel more polished than random.
Quick tip: Use a hole punch instead of scissors for cleaner holes. Reinforce with a small sticky label on the back if the paper is thin.
A single garland that stretches 6 feet long costs less than $1 in materials. You can make multiples in an evening while watching TV.
Drape garlands across tables, windows, doorways, or behind a dessert spread. They’re light enough to hang with just a few pieces of tape.
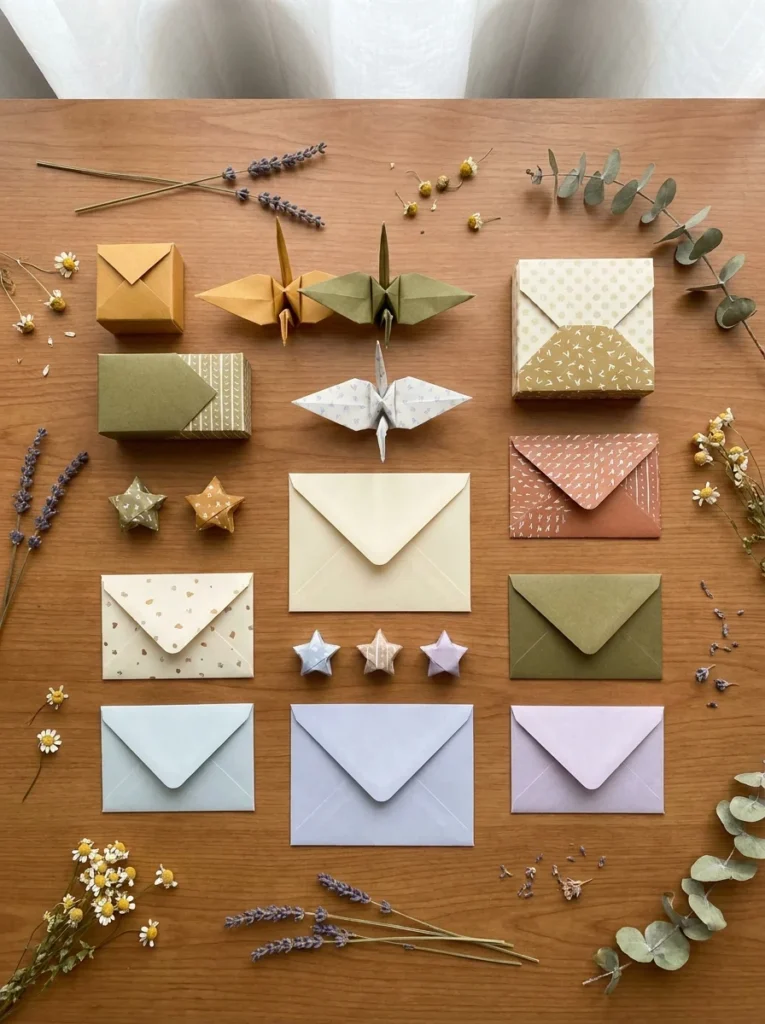
4. Origami Star Place Cards
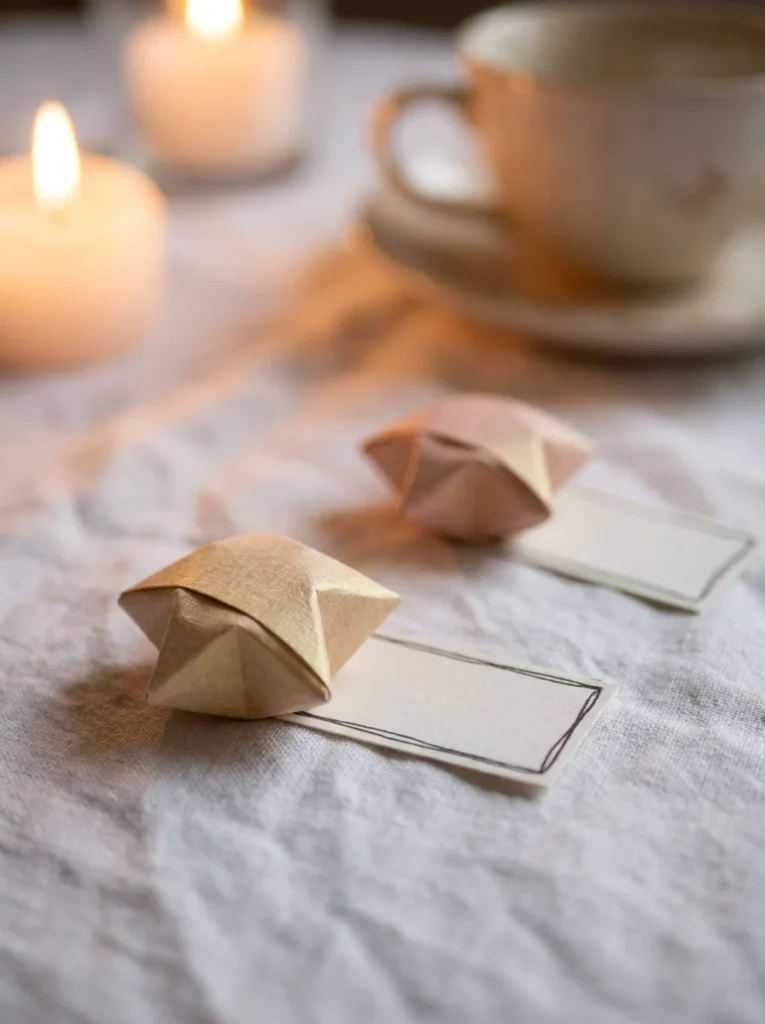
Origami lucky stars are tiny, satisfying to make, and look stunning as place card holders or scattered table decorations.
To fold one, you need a single strip of paper, about 1 centimeter wide and 25 centimeters long. Start by tying a loose overhand knot at one end, flatten it gently into a pentagon, then wrap the remaining strip around and around the shape. Tuck the end in and pinch the five sides inward with your fingernails. A star pops out.
It sounds complicated but takes about 3 minutes per star once you’ve made two or three.
Material options:
- Origami paper strips cut with a paper trimmer
- Strips of old magazine pages for a colorful effect
- Metallic wrapping paper strips for a festive look
Make 50 of these in an afternoon and scatter them across the table like confetti. They also work beautifully inside clear glass jars as centerpiece fillers.
For place cards, write each guest’s name on a small folded card and tuck a star next to it. It’s a tiny detail that feels genuinely thoughtful and takes the table from ordinary to memorable.
5. Paper Fan Backdrop
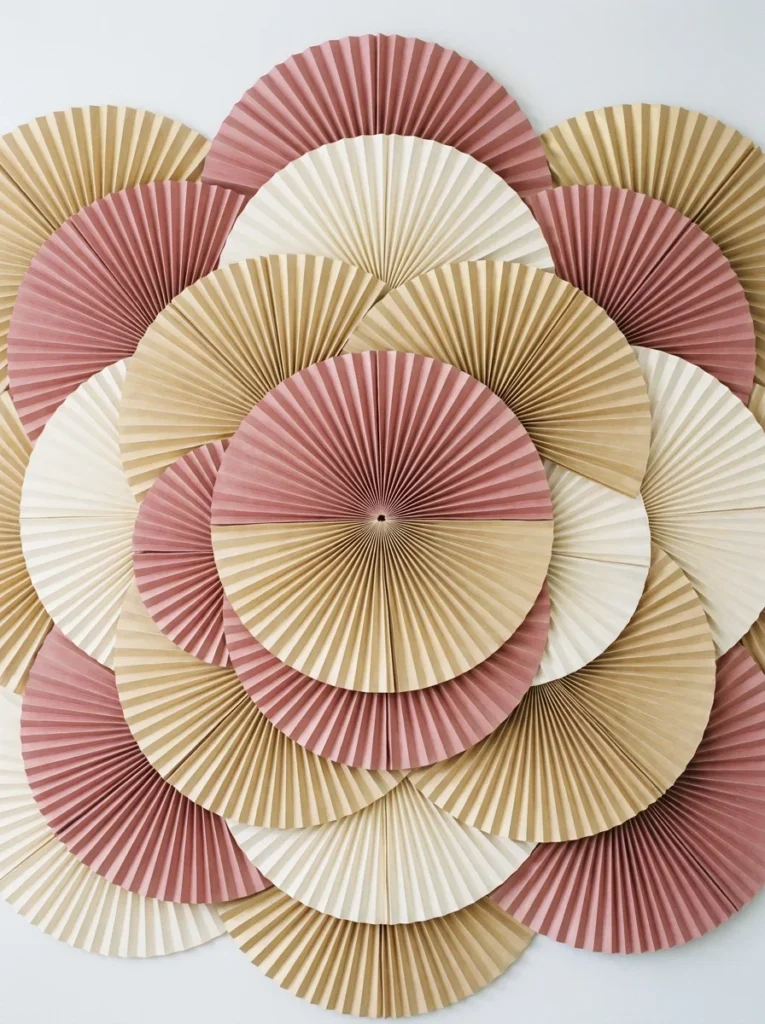
A paper fan wall is one of those decorations that looks like it cost hundreds of dollars, but you can make one for under $10.
Each fan is made from a few sheets of tissue paper or lightweight cardstock folded accordion-style. Fold back and forth in even 1-inch sections, then pinch the bottom and fan out the top. Secure the pinched base with tape or a rubber band. Open both sides to form a full circle, or leave one side closed for a half-fan shape.
Fan sizes:
- Small fans (5 inches), great for filling gaps in the arrangement
- Medium fans (12 inches), the workhorse of the display
- Large fans (18+ inches), anchor pieces at the center
Arrange them in a cluster on the wall before the party. Start from the center and work outward, overlapping edges slightly for depth.
Budget tip: Two packs of tissue paper at $1 each give you enough material for 6 to 8 medium fans. That’s a full backdrop for $2.
This backdrop works perfectly behind a dessert table, as a photo wall, or above a gift table. Takes about an hour to assemble.
6. Paper Pinwheels
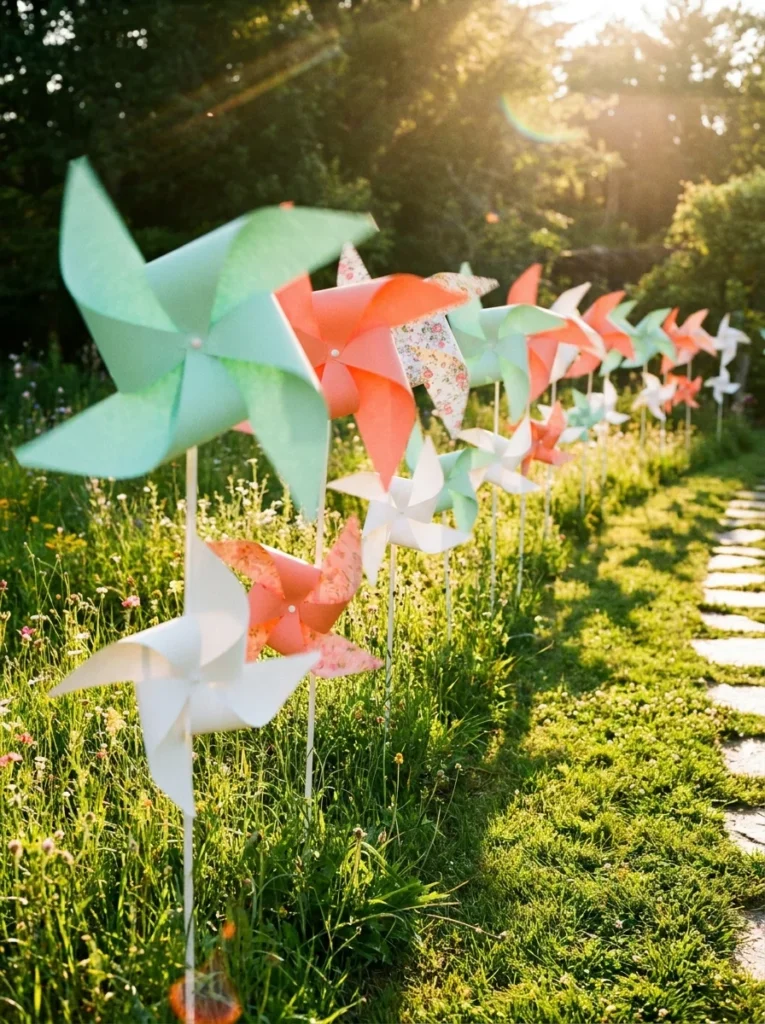
Paper pinwheels add movement and color to any party space, both indoors and out.
To make one, start with a square sheet of paper. Cut from each corner diagonally toward the center, stopping about an inch from the middle. Fold every other point into the center (don’t crease, just bring the tip in) and secure with a brad or push pin. Attach to a wooden dowel or pencil and you have a fully functional pinwheel.
The whole process takes about 5 minutes per pinwheel.
Decorating ideas:
- Double-sided paper, shows two colors as it spins
- Patterned scrapbook paper, adds personality instantly
- Metallic paper, catches light beautifully indoors
Use these as cake toppers, table centerpieces (stuck into a foam base), or stuck in the ground outside along a pathway. They’re also wonderful attached to a favor bag or wrapped gift.
For outdoor parties, they work as natural directional markers. Line them up leading guests from the driveway to the party area.
A pack of scrapbook paper (12×12 sheets, 20 sheets) runs about $5 and gives you 20 pinwheels. Cost per decoration: about 25 cents.
7. Paper Gift Boxes
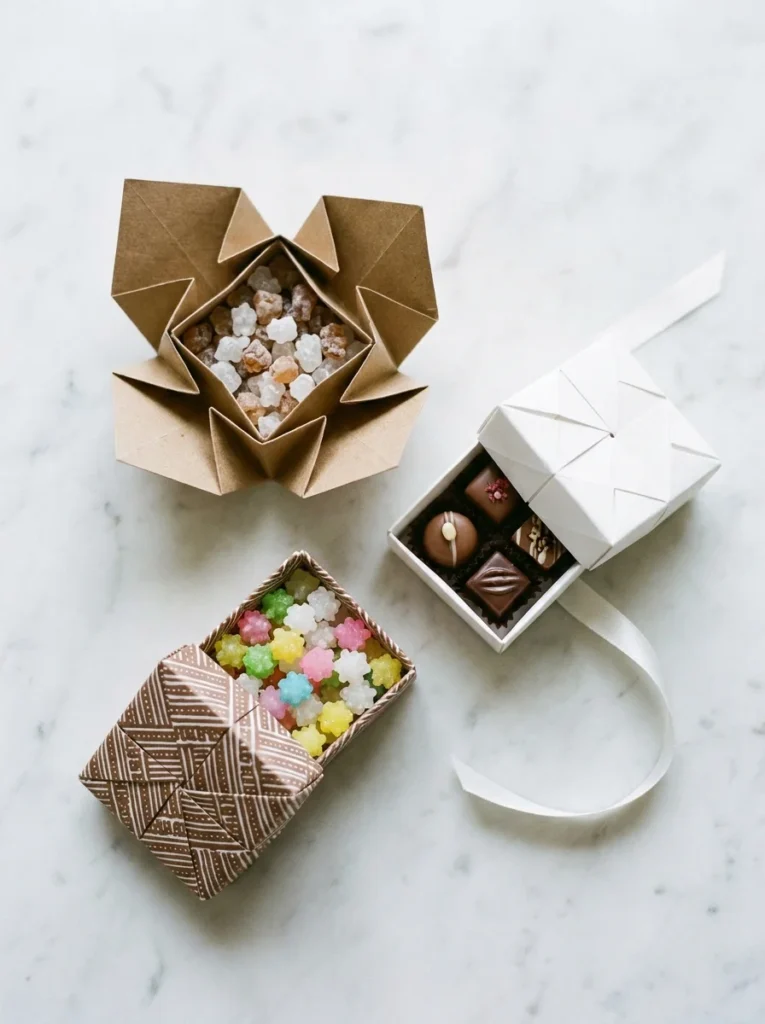
A handmade paper box doubles as both a party favor and a decoration. Guests can take them home filled with candy, small trinkets, or a thank-you note.
The basic box fold uses a single sheet of square paper. Score and fold the edges inward, then fold up the sides and lock the corners together. No glue needed, just clean folds.
If you want a lidded box, make two boxes from slightly different-sized squares. One fits snugly over the other as the lid.
Paper options:
- Cardstock, sturdy and holds shape well
- Patterned scrapbook paper, looks gift-ready without any wrapping
- Kraft paper, rustic and natural, pairs with twine
Fill ideas for party favors:
- Mini chocolates or wrapped candies
- Small folded notes with a kind message
- Pressed flowers or dried petals
- A folded origami figure
Tie a piece of twine or satin ribbon around the finished box for a polished look.
You can pre-fold 20 of these in one sitting. Stack them in a basket and let guests pick their own favor as they leave. It’s a warm, personal touch that costs almost nothing.
8. Paper Straw Toppers
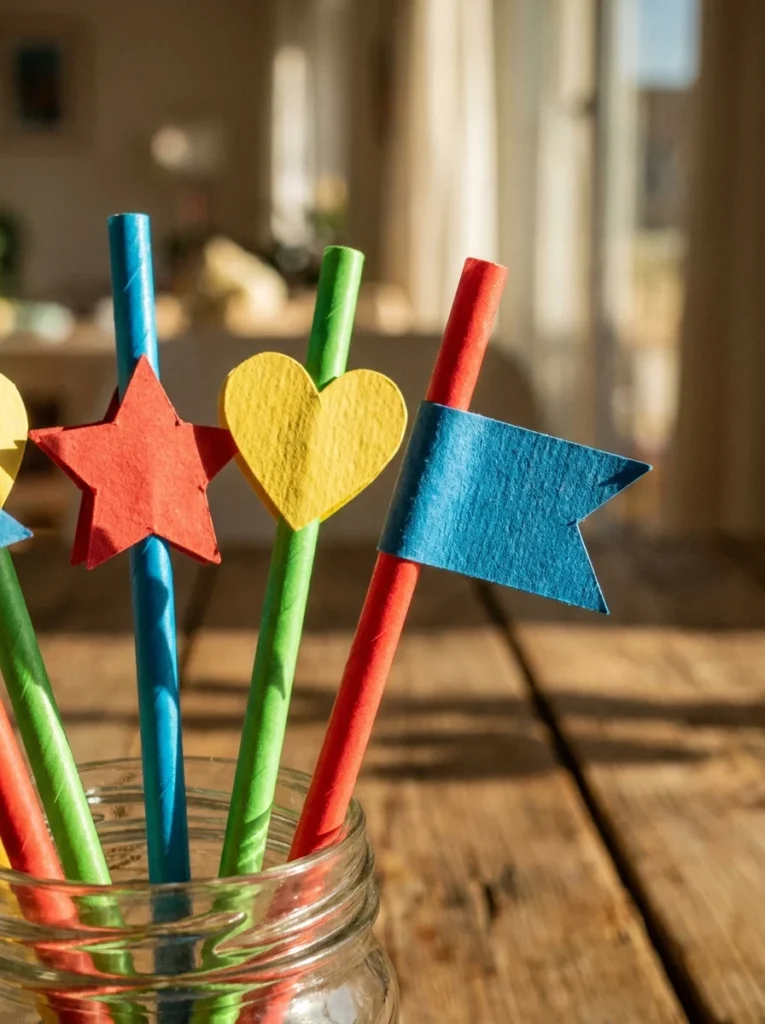
Straw toppers are one of the quickest paper crafts you can make — and they instantly upgrade a drinks table.
Cut small shapes from cardstock: stars, hearts, circles, flags, or any shape that fits your theme. Make two identical shapes for each topper. Place the straw between them and glue the two shapes together, sandwiching the straw. Let dry for 10 minutes.
That’s it.
Shapes by theme:
- Stars and moons, celestial or nighttime party
- Hearts, Valentine’s Day or wedding shower
- Flags, Fourth of July or outdoor barbecue
- Flowers, garden party or spring celebration
- Numbers, milestone birthday celebrations
A pack of 100 cardstock straws costs around $3. Making toppers for all of them takes about 20 minutes if you batch-cut the shapes first.
Set up a drinks station with straws displayed in a tall glass jar. It looks like something out of a party planning magazine, and guests almost always comment on it.
Pro tip: Use a small hole punch to add detail to the shapes before gluing. A few punched holes along the edge of a star topper catches the light beautifully.
9. Paper Bunting Flags
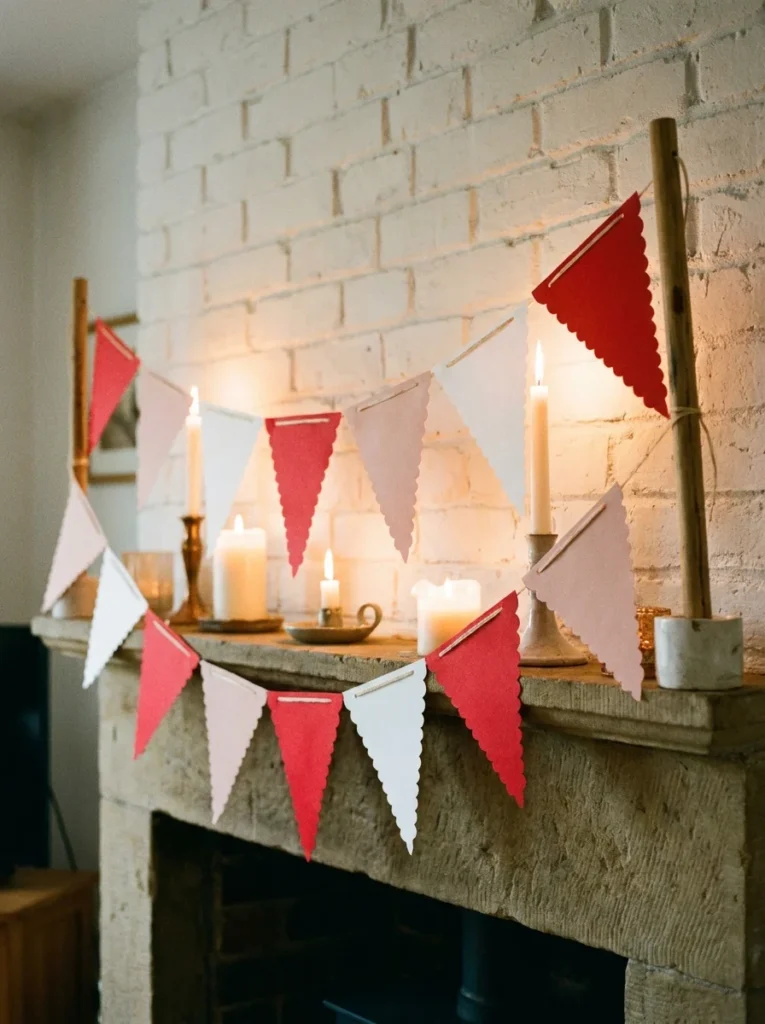
Bunting flags are a party staple across every culture and celebration style, and making your own costs almost nothing.
Cut triangles from cardstock using a simple paper trimmer or scissors. Aim for triangles roughly 5 inches tall and 4 inches wide at the base. Fold the flat top edge over a length of twine or ribbon and glue or staple it in place.
Repeat until you have enough flags to span your space.
Pattern variations:
- Solid color alternating, two colors, back and forth
- Patterned paper, use scrapbook paper with existing prints
- Kraft and white, minimal and rustic
- Fabric-look paper, linen-texture cardstock for a premium feel
Punch the flags with a decorative edge punch for a professional touch. A scalloped or zigzag edge turns a plain triangle into something that looks store-bought.
Length guide:
- 6-foot span → about 15 flags
- 10-foot span → about 24 flags
One pack of 50 cardstock sheets ($3 to $5) can produce multiple 6-foot banners. Make them in advance and roll them loosely around cardboard tubes for crease-free storage.
Hang across table edges, windows, and doorways for a cohesive party look.
10. Paper Lanterns

Paper lanterns glow beautifully and create an atmosphere that few other decorations can match.
To make a simple cylinder lantern, take a rectangular sheet of cardstock and cut vertical slits from one long edge toward the center, stopping an inch from the opposite edge. Roll the sheet into a cylinder and tape the open ends closed. Slide a battery-operated tea light inside.
The slits let the light glow through in stripes, it looks stunning in a dim room.
Variations:
- Cut-out patterns, punch or cut shapes (stars, circles, diamonds) for a lantern-light effect
- Colored tissue paper liner, glue tissue paper on the inside of a plain cardstock lantern for tinted light
- Accordion fold lantern, more complex but creates a beautiful pleated texture
Always use battery-operated LED lights inside paper lanterns. Never use real candles.
String lanterns at different heights using clear fishing wire for a magical floating effect. Use removable adhesive hooks rated for the weight.
A battery-operated tea light pack (12 lights) costs around $3 to $5. Combined with cardstock you already have, the full set of lanterns can be made for under $5.
11. Confetti Poppers

Confetti poppers are pure joy, and guests of all ages absolutely love them.
The basic version uses an empty toilet paper tube. Cover one end with a small square of tissue paper, secured with a rubber band. Fill the tube with tissue paper confetti, cut into small circles or squares, then seal the open end loosely with another piece of tissue.
To pop: hold the open end toward the sky and squeeze the middle of the tube sharply. The tissue paper cap on the sealed end pops off and confetti sprays out.
Filling ideas:
- Tissue paper circles (use a hole punch, fast and uniform)
- Small paper stars cut from metallic paper
- Paper flower petals made from thin tissue paper
- Strips of metallic paper ribbon, curled with scissors
Decorate the outside of the tube with washi tape, wrapping paper scraps, or paint before assembly.
Budget note: Toilet paper tubes are free. Tissue paper and washi tape bring the cost to about 25 cents per popper.
Make a batch of 10 to 15 poppers and set them in a jar or bucket. At the right moment in the party, a toast, a reveal, a song, have everyone pop theirs at once. The effect is electric.
12. Paper Crown Favors
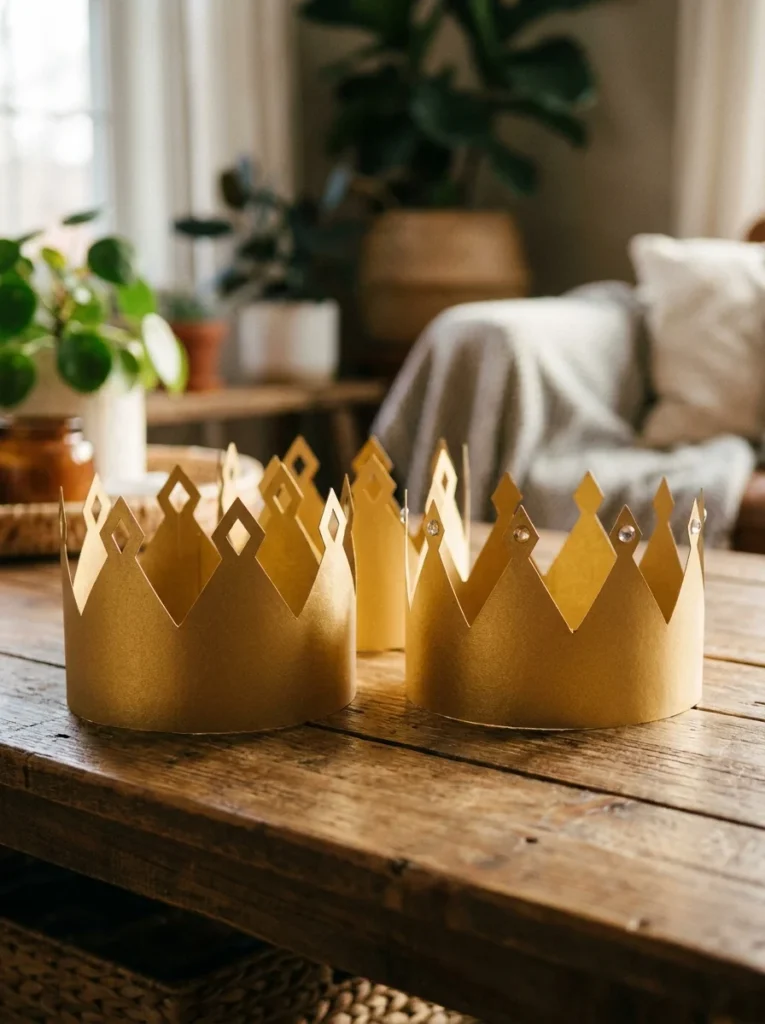
Paper crowns make excellent party favors because they’re both a decoration and an activity. Kids love them. Adults secretly love them too.
Cut a strip of cardstock about 3 inches tall and long enough to wrap around a head (roughly 22 inches for adults, 20 inches for children). Draw zigzag or castle battlement shapes along the top edge and cut them out. Overlap the ends and staple or tape them together.
The basic crown takes about 3 minutes per piece.
Upgrade options:
- Jewel stickers, self-adhesive gems from the dollar store
- Glitter glue along the points
- Stamp patterns onto the base with an ink pad before cutting
- Washi tape running along the base for a color stripe
Make them ahead and stack them in a basket near the entrance or by the dessert table. Add a small sign that says “Take one” (or let the setup speak for itself).
For a birthday party, make the guest of honor’s crown slightly taller or in a different color so it stands out.
Gold and silver metallic cardstock elevates the final look significantly. A single sheet makes 2 adult crowns. A pack of 10 metallic sheets runs about $3.
13. Accordion Paper Fan Centerpieces
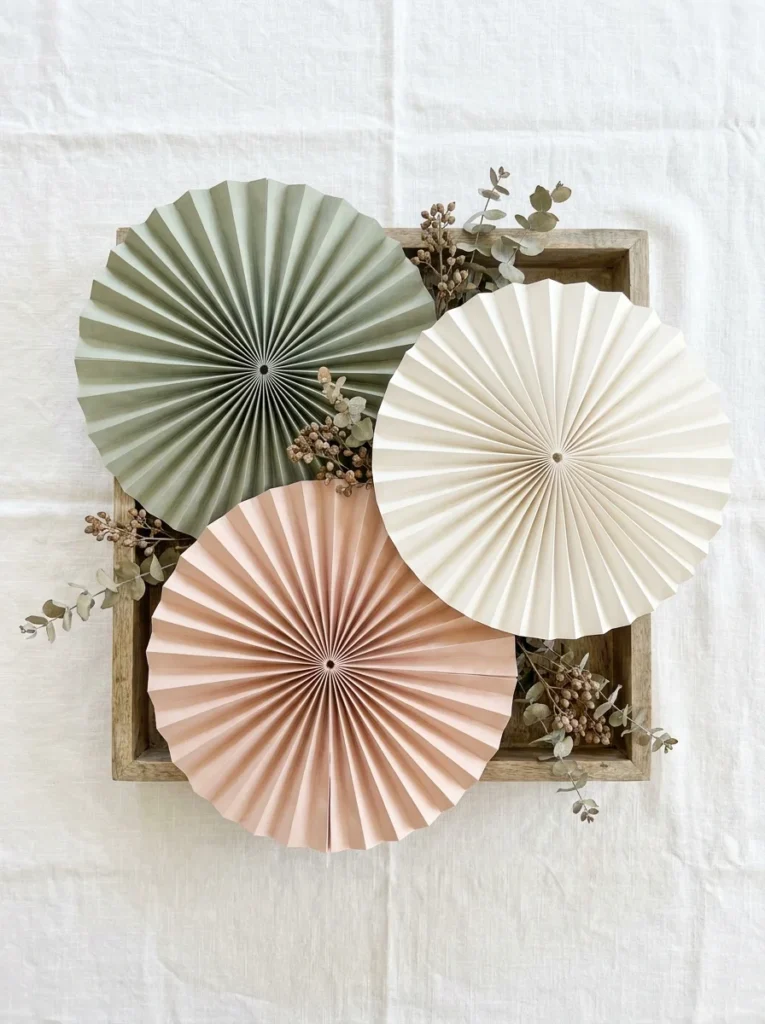
A paper fan centerpiece is a gorgeous alternative to flowers, and it lasts forever.
Use cardstock or thick patterned paper. Cut rectangles, fold accordion-style in half-inch pleats, and pinch the bottom. Secure the base with a rubber band or floral wire, then open the fan into a semicircle.
For a full circle centerpiece, make two identical fans and tape or glue the flat ends together back-to-back.
Centerpiece display options:
- Stand fans upright in a low wooden tray or box
- Prop them against a glass vase or lantern
- Hot-glue them to a foam base wrapped in burlap
- Stack fans at different heights for dimension
Add natural elements around the base: dried flowers, ribbon, small stones, or greenery clippings. The contrast between structured paper folds and organic textures looks genuinely sophisticated.
Color tip: Stick to a maximum of three coordinating colors per table. More than that gets visually busy.
These centerpieces can be made days in advance and stored flat. They open back up easily before the party. Each table centerpiece costs about 50 cents in materials, a fraction of what fresh flowers would cost.
14. Paper Butterfly Garland
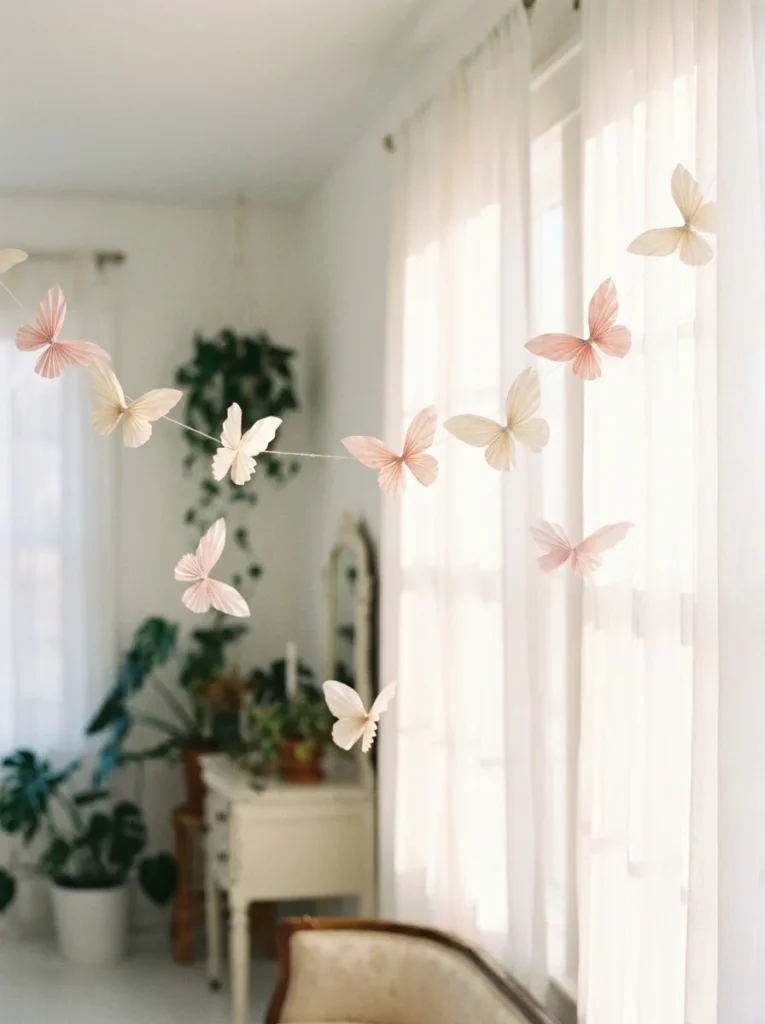
A butterfly garland brings a whimsical, airy quality to any party space.
Start with a square piece of paper, any size works, but 4×4 inches is a good starting point. Fold it in half, then fold each half back toward the center fold, creating a tight W shape when viewed from the side. Pinch the center and tie with thin wire or thread. Let the wings spread naturally.
The result is an instantly recognizable butterfly shape.
Paper choices:
- Patterned scrapbook paper, shows beautiful prints on the wings
- Watercolor paper with hand-painted washes of color
- Tracing paper, translucent and ethereal when backlit
- Magazine pages, unexpected but striking
String finished butterflies onto a length of clear thread at varying intervals. Some can hang lower, some higher, to mimic butterflies in flight.
Attach to a curtain rod, string lights, or along a staircase banister.
This garland works especially well for spring parties, garden themes, baby showers, or birthday celebrations with a floral or nature concept.
Make about 20 butterflies for a 6-foot garland. The whole project takes about 45 minutes.
15. Paper Doily Backdrop
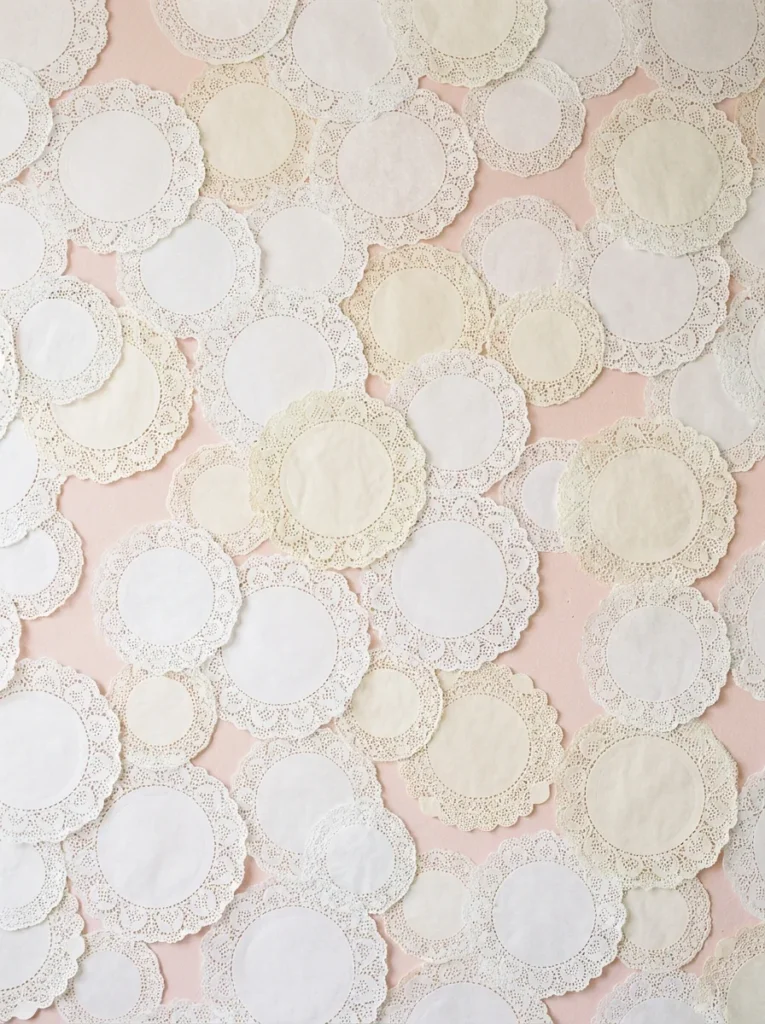
Paper doilies are cheap, widely available, and wildly underestimated as a party decoration.
Buy packs in different sizes, usually 6-inch and 10-inch rounds, from a dollar store or grocery store. A pack of 20 costs about $1.
For a backdrop, cover a foam board or section of wall with overlapping doilies. Start from the top and work down, securing with a small dot of removable adhesive or tape. Overlap each row so the base wall color doesn’t show through.
The finished result looks like intricate lacework and is genuinely beautiful in photos.
Color options:
- All white, classic and elegant
- White on blush, romantic and soft
- Gold doilies on white, glamorous
- Mix sizes, small in gaps, large as anchors
Other uses for doilies:
- Underneath cake plates as decorative liners
- Wrapped around mason jar vases
- As paper lace inserts inside clear favor boxes
- Folded in half and hung as individual wall ornaments
This backdrop takes about 45 minutes to make and photographs beautifully for a party photobooth wall. Take it apart and store doilies flat afterward, they can be reused.
16. Paper Roll Table Numbers
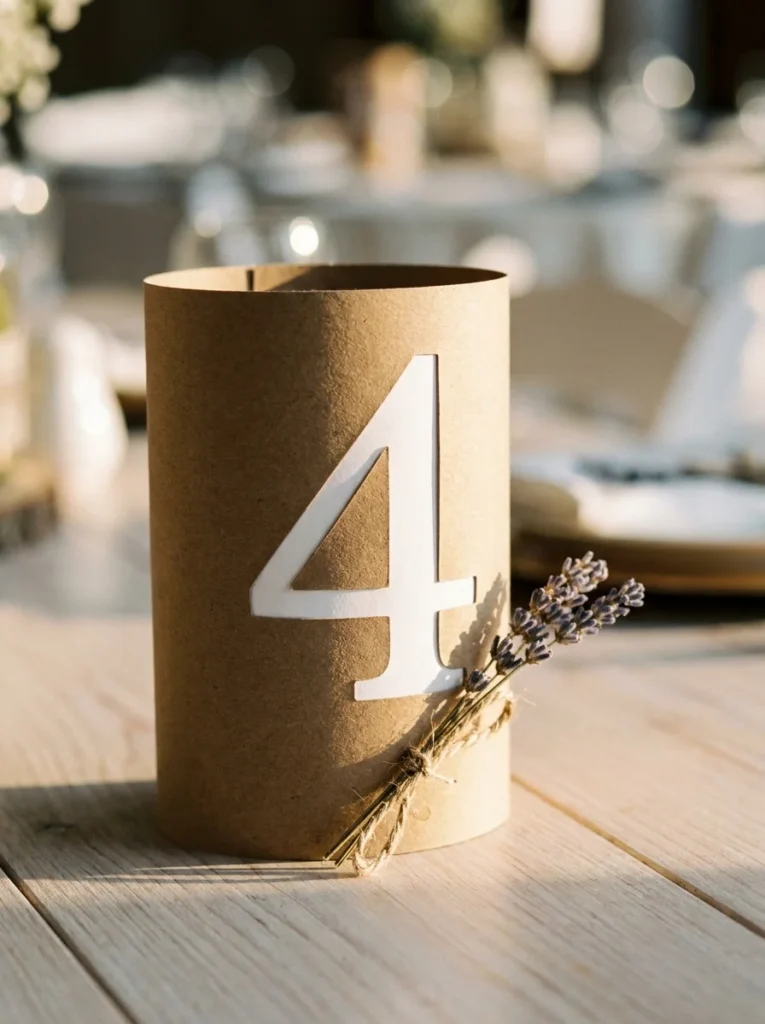
Table numbers are one of those small details that make a party feel organized and intentional, especially for dinners and receptions.
To make a standing paper table number, roll a sheet of cardstock into a tight cylinder and tape it closed. This becomes the stand. Cut the number separately from a contrasting sheet of cardstock. Attach the number to the front of the cylinder with a small piece of foam adhesive squares so it pops forward slightly.
The result: a three-dimensional, freestanding table number.
Style variations:
- Bold block numbers, clean and modern
- Handwritten and scanned numbers, personal and imperfect in a good way
- Geometric cutout numbers, cut with a craft knife for precision
Match the paper colors to your table linens and other decorations. White numbers on black cardstock. Gold on navy. Blush on ivory.
Add a small decorative element to the base, a pinched piece of tissue paper, a dried flower, a small folded star, to make each number feel complete.
Cost per table number: about 10 cents in materials.
For 20 tables, the whole set of numbers costs about $2. Compare that to $3 to $5 per number at party supply stores.
17. Paper Photo Booth Props
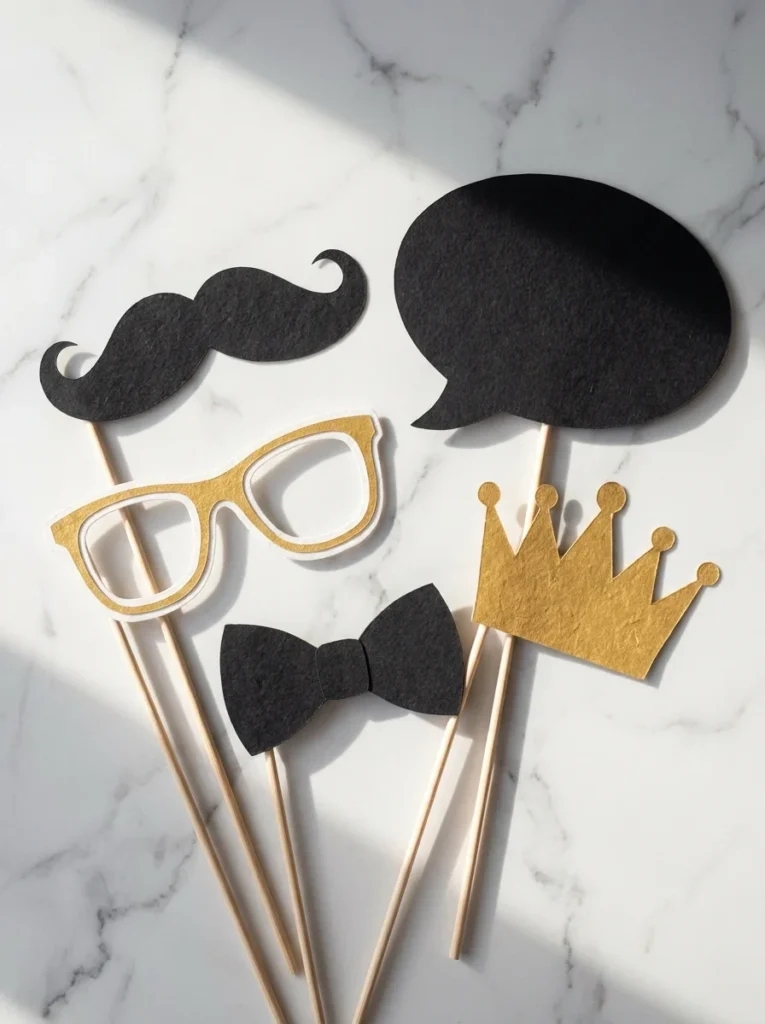
A photo booth is one of the most beloved party features, and the props don’t need to cost anything.
Print or draw prop shapes on cardstock: oversized glasses, mustaches, speech bubbles, bow ties, tiaras, and lips are classics. Cut them out carefully and attach each one to a wooden craft stick or dowel with hot glue or strong tape.
Store them upright in a jar near the photo backdrop.
Prop ideas by theme:
- Birthday: “I’m the birthday star,” number props, party hat cutouts
- Baby shower: “It’s a boy/girl,” tiny onesies, pacifier shapes
- Wedding/bridal: “Bride tribe,” rings, bouquet outlines
- General fun: Sunglasses, mustaches, word bubbles
Print speech bubble templates in large sizes and fill in text before the party. Or leave them blank and let guests write their own messages with a marker.
Material cost: A pack of craft sticks ($2), a pack of cardstock ($3), and a printer, total under $5 for a full prop set.
Set up a simple backdrop using a paper fan wall, bunting, or pom-poms. Place a tripod or ask a guest to take photos. The result is a genuine party highlight that guests remember.
18. Paper Spiral Hanging Decorations
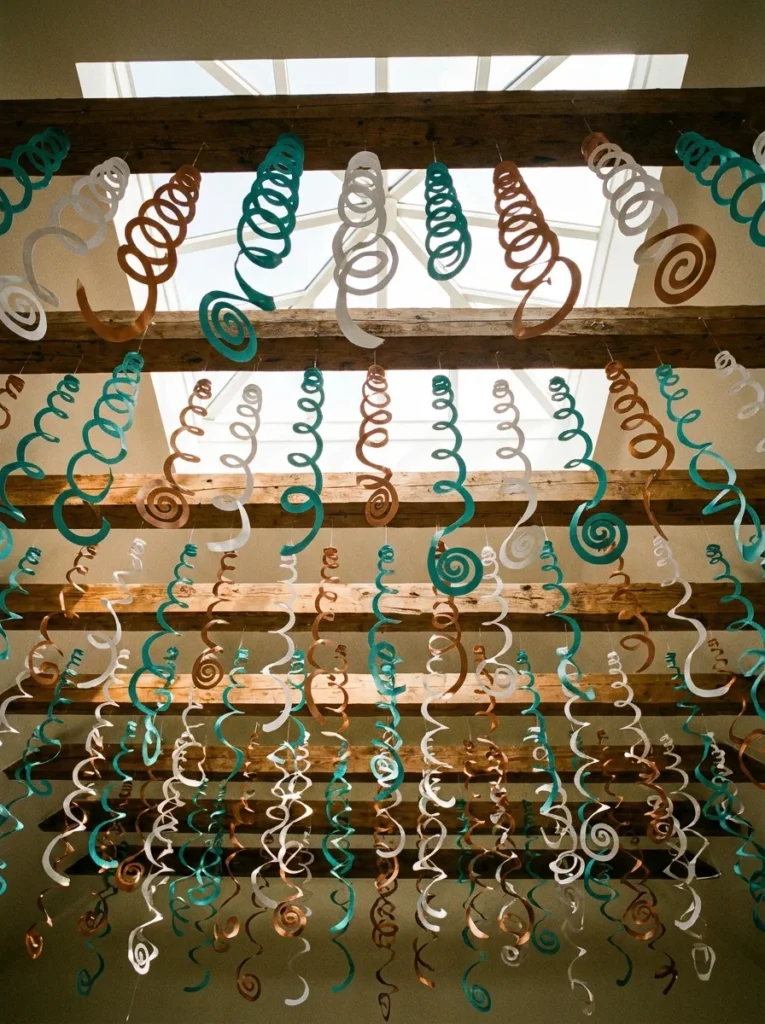
Paper spirals are one of the simplest hanging decorations you can make, and from below, they look absolutely stunning.
Draw a circle on a sheet of cardstock. Starting at the outer edge, cut in a continuous spiral toward the center. When you reach the center, make a small tab, this is where you’ll attach the hanging string.
Let the spiral dangle down and it naturally unfurls into a beautiful coiled shape.
Size guide:
- Small circle (6 inches) → about 12-inch hanging spiral
- Medium circle (10 inches) → about 20-inch hanging spiral
- Large circle (14 inches) → about 30-inch hanging spiral
Mix sizes for the most dynamic effect. Hang clusters of 3 to 5 spirals together at varying lengths from a single anchor point.
Paper options:
- Metallic cardstock, looks stunning under lights
- Two-tone paper, shows different colors as it spins
- Patterned scrapbook paper, adds visual complexity
Cut 20 spirals in an evening while watching TV. Hang them from ceiling hooks using clear fishing wire so they appear to float.
Total material cost for 20 spirals: around $2.
19. Paper Envelope Seed Favors
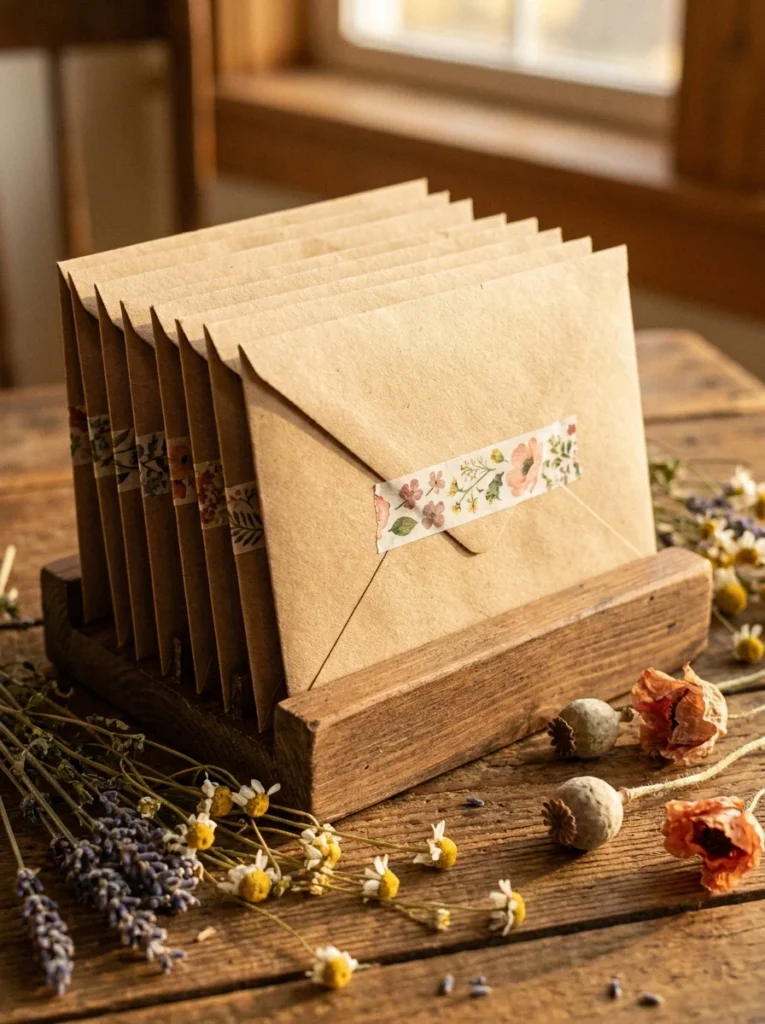
For outdoor parties, garden themes, or eco-conscious celebrations, paper envelope seed favors are a beautiful touch.
Fold a small square piece of kraft paper into an envelope shape, there are many simple origami envelope folds that work without glue. Tuck a small packet of flower or herb seeds inside, then seal with a piece of washi tape across the flap.
Write or stamp a simple message on the front: “Watch it grow,” “Thank you,” or “Plant with love.”
Seed ideas:
- Sunflower seeds, cheerful and easy to grow
- Lavender, fragrant and beautiful
- Wildflower mix, low effort, high reward
- Basil or mint, useful and practical
Buy seeds in bulk from a garden center. A $2 seed packet often contains enough seeds for 30 to 50 individual favors.
The envelope itself costs almost nothing, fold from paper you already own. A sheet of 8×8 kraft paper makes one generous-sized envelope.
Display them in a small wooden box or a basket near the exit with a handwritten tag inviting guests to take one home.
This favor strikes the right balance between thoughtful and practical. Guests actually keep and use them, which is more than can be said for most party favors.
20. Paper Napkin Rings
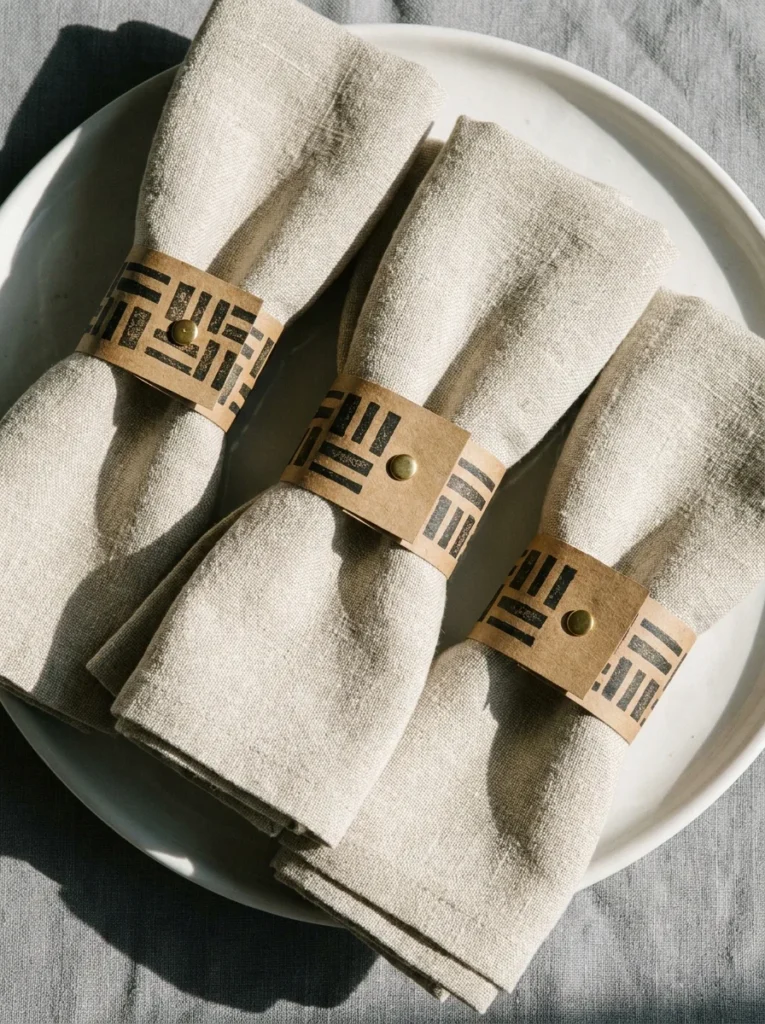
Napkin rings are a small detail that makes a table setting look deliberately styled rather than thrown together.
To make a simple paper napkin ring, cut a strip of cardstock about 1.5 inches wide and 6 inches long. Overlap the ends to form a ring and secure with a brad, tape, or a small sticker. Slide a rolled or folded napkin through the ring.
That’s the base version.
Ways to decorate the strip before forming the ring:
- Stamp a pattern with an ink pad
- Run a strip of washi tape along the center
- Write guest names for a place-card effect
- Punch a decorative border along both long edges
For a more polished look, cut the ends of the strip at a diagonal rather than straight across.
Theme ideas:
- Rustic: Kraft paper with twine wrapped once around the ring
- Elegant: White cardstock with gold ink stamping
- Playful: Bright patterns for kids’ parties
Make all napkin rings the evening before. Stack them flat and nestle them together, they take up almost no storage space.
Cost: essentially free if you have cardstock. Even buying a pack, the per-ring cost is under 5 cents.
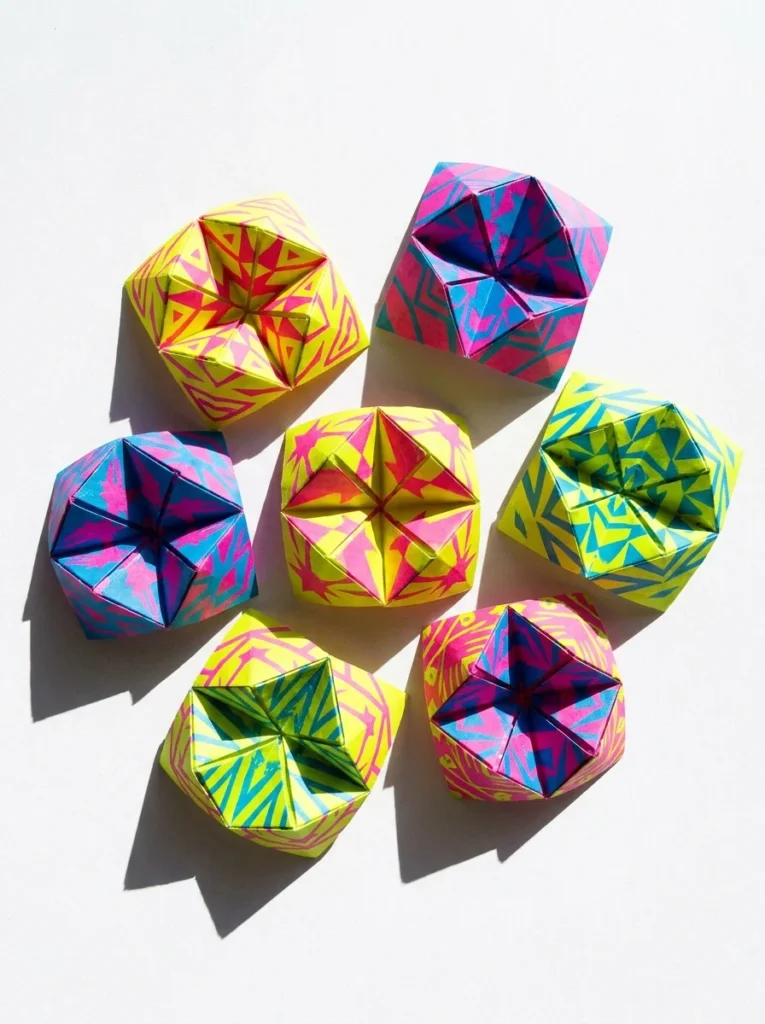
21. Origami Balloon Centerpiece
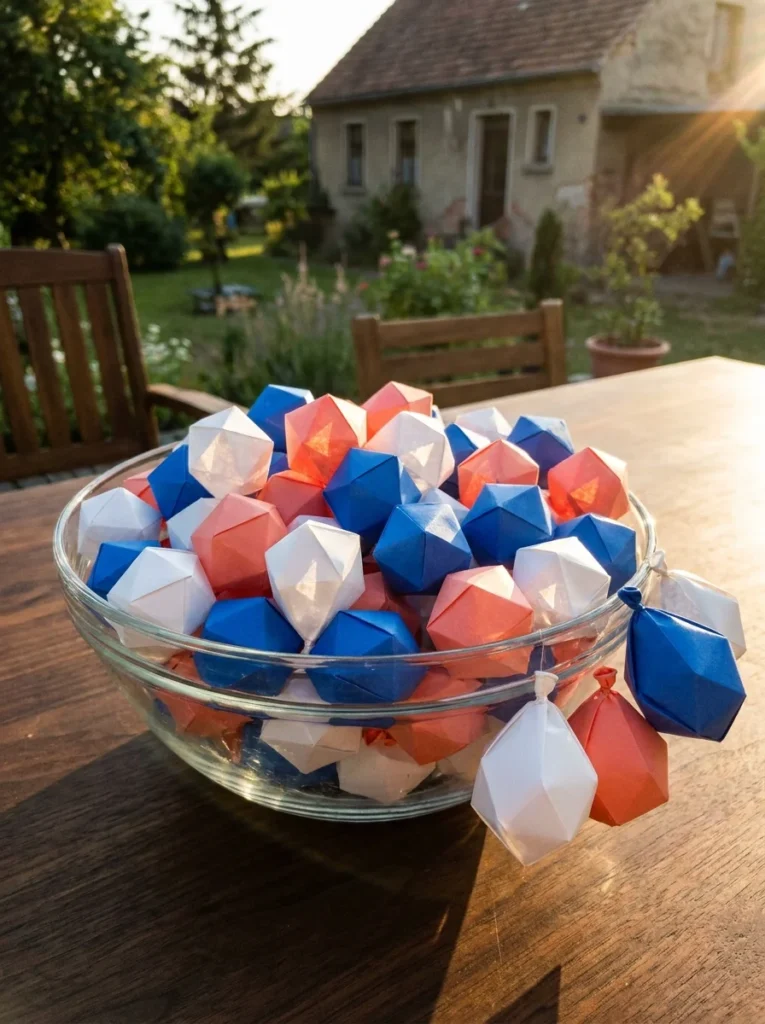
Origami water balloons, often called origami balloons or blow balls, are a satisfying craft that produces surprisingly beautiful results.
Start with a square sheet of paper. Fold it into a classic waterbomb base, working through a series of triangle folds until you have a shape with a small hole at the bottom. Gently blow into the hole while slowly expanding the paper outward with both hands. The balloon inflates into a three-dimensional cube or ball shape.
The first one takes about 10 minutes. After that, you can fold one in under 3 minutes.
Centerpiece display ideas:
- Fill a glass bowl with 20 to 30 small balloons
- Stack them in a pyramid on a flat plate
- Hang them individually on strings above the table
Use patterned origami paper for the most striking results. Metallic or two-toned paper creates beautiful faceted effects as light hits each face of the balloon.
Size note: Smaller squares (4×4 inches) produce smaller, denser balloons. Larger squares (8×8 inches) produce more impressive, airy ones.
A pack of 100 origami sheets in mixed patterns costs about $4 and provides more than enough material for a full table display.
22. Paper Tassel Garland
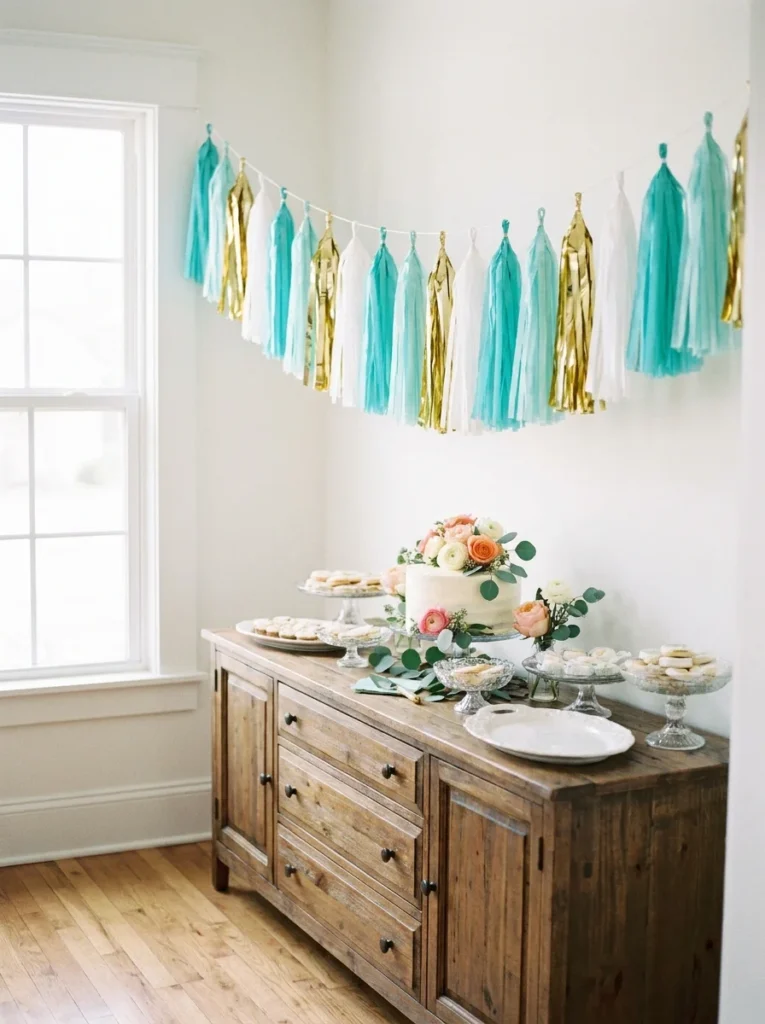
Paper tassels look expensive but cost almost nothing to make, and a full garland of them is genuinely striking.
To make a single tassel, take a rectangle of tissue paper (about 8×10 inches). Fold it in half lengthwise. Cut fringe from the folded edge up toward the top, leaving about an inch uncut at the top. Unfold, roll the paper from one short end to the other, then fold the roll in half. Twist the fold a few times and loop a piece of string through it. That twisted loop becomes the hanging point.
The fringe hangs below in a full, round tassel shape.
Key technique: Don’t pack the fringe cuts too close together. Leave about half-inch gaps between cuts for the fullest look.
String tassels together on a piece of twine, evenly spaced. Alternate colors in whatever pattern fits your theme.
A complete garland for a 6-foot span needs about 12 to 15 tassels. That’s roughly one pack of tissue paper, $1 to $2.
Pair this garland above a dessert table or a gift table. It draws the eye immediately and frames the space without competing with other decorations.
23. Paper Matchbox Mini Gifts

Matchbox mini favors are an adorable and genuinely creative party favor idea that almost nobody does.
Find empty matchboxes, buy a box of matches at any grocery store for $1 and empty the matches out. Cover the outside with washi tape, strips of decorative paper, or fabric tape.
Fill the drawers with:
- Small folded paper notes
- A few wrapped sweets
- A small origami figure
- A tiny pressed flower
- A folded fortune or party game
Slide the drawer closed and tie with a thin ribbon or thread.
The result looks like a professional miniature gift. Guests are surprised every time.
Presentation idea: Display them upright in a small wooden tray or arrange them in a grid pattern on a tray covered with kraft paper. Add a small handwritten label identifying what’s inside.
Cost breakdown:
- Box of 10 matchboxes: $1
- Washi tape (shared roll): $1
- Contents: varies, but under $1 per box for most fillings
Total per favor: about 30 to 50 cents. For 20 guests, the full favor set costs about $6 to $10.
24. Paper Pinhole Lantern Bags
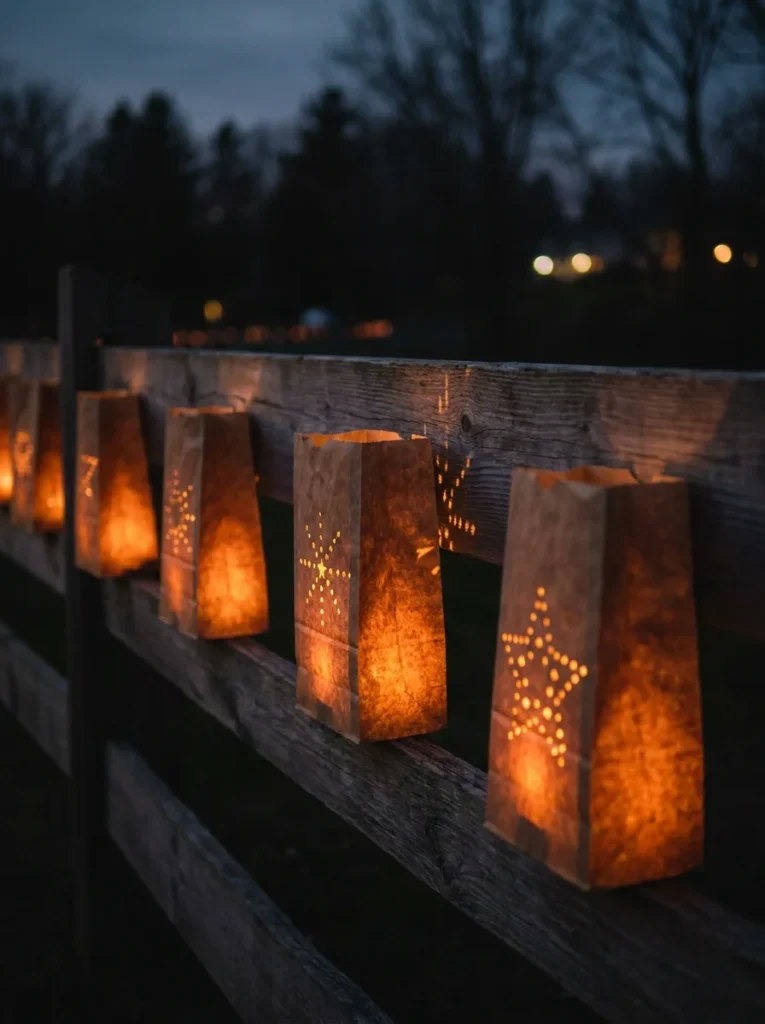
Pinhole lantern bags are magical, especially for outdoor evening parties.
Take a plain brown paper lunch bag. Use a pin, pushpin, or needle to poke a design through the side of the bag. The design can be a pattern of stars, dots, a heart outline, a flower, or anything you like.
Fold down the top edge of the bag a few times to give it structure. Place a battery-powered LED tea light inside. Turn off the lights.
The pinhole pattern glows on the bag’s surface and casts a gentle projection of light onto the surface behind it.
Design ideas:
- Random scattered dots → looks like a starfield
- A grid pattern → clean and geometric
- A simple flower shape → romantic and soft
- Concentric circles → abstract and modern
Line these along a fence, pathway, driveway, or along the edges of an outdoor table. They create an atmosphere that string lights alone can’t replicate.
Cost: Brown paper lunch bags cost about $2 for a pack of 50. LED tea lights run about $5 for a pack of 12. Total lighting budget for a whole pathway: under $10.
Make the bags in the afternoon. Place the lights inside right before guests arrive.
25. Paper Fortune Tellers
Paper fortune tellers, also called cootie catchers, are a guaranteed crowd-pleaser, especially when you customize the fortunes for your specific party.
Fold a square sheet of paper into a fortune teller using the classic method: fold the four corners to the center, flip and repeat, then fold in half and slide fingers in.
Write numbers on the outside triangles and colors on the inside flaps. Under each inner flap, write a custom fortune or party activity.
Custom fortune ideas:
- “You must eat a second piece of cake”
- “You win the next party game”
- “Tell your best joke”
- “Lead the next dance”
- “You get the last party favor”
For a bridal shower, write marriage advice. For a kids’ party, write silly dares. For a birthday, write compliments for the guest of honor.
Use patterned origami paper in party-matching colors for a polished look.
Place one at each table setting as an icebreaker activity, or pile them in a bowl at the entrance for guests to grab and play with.
Cost per fortune teller: about 3 cents if you use standard origami paper.
Paper Crafts are…
Genuinely one of the best investments you can make when planning a party. The materials are cheap, the process is satisfying, and the results feel far more personal than anything store-bought. Whether you spend one evening making a tissue paper pom-pom backdrop or a quiet afternoon folding origami stars, the time you put in shows, and guests notice.
You don’t have to make all 25 of these. Pick three or four that match your theme, your time, and your comfort level. Start simple. Master the basics. Build from there. A single paper garland strung above a dessert table can completely transform how a space feels without spending more than $2.
The most memorable parties aren’t the most expensive ones. They’re the ones where someone clearly cared — and that’s exactly what a handmade paper decoration communicates. So grab your cardstock, pull out your scissors, and start making something.